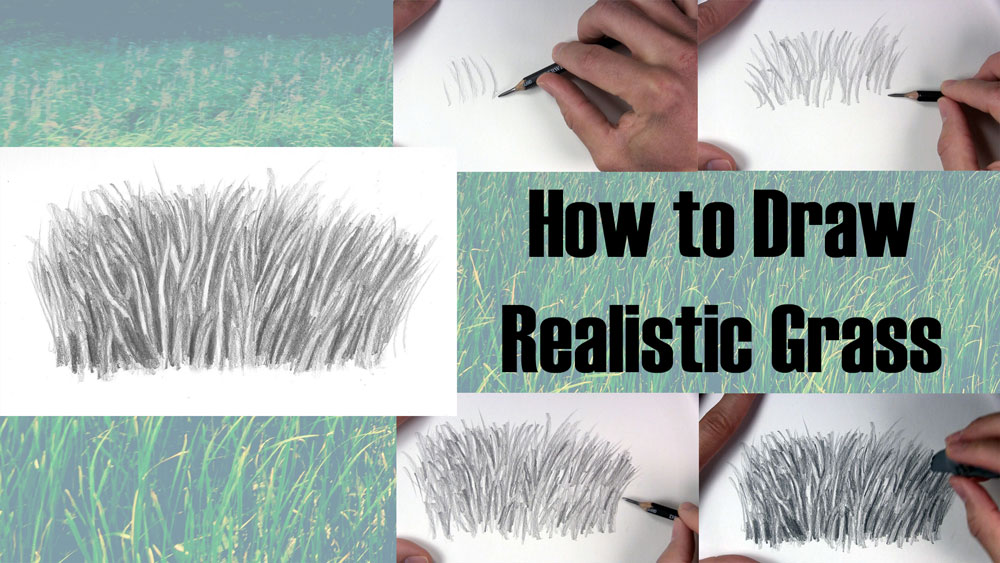
How to Draw Realistic Grass That’s Ready to Be Seen
Grass is a simple yet very plentiful type of plant. At first thought, the simplicity of grass might make one conclude that grass is easy enough to draw, even in a realistic way.
It might be one thing to draw one blade of grass. Drawing a patch or a field of grass, on the other hand, is a little bit different.
Sometimes, the things you choose to draw seem easy enough at first, but they don’t seem so easy when you are attempting them.
Such is the case for many beginners when it comes to drawing grass.
If this is the case for you, then this tutorial on how to draw realistic grass will restore some confidence in your abilities!
Table of Contents
Materials Used for This Drawing
Here is a list of the materials I am using for this drawing.
If you don’t have some of these materials, that’s okay. You can still make do with a regular pencil and eraser, as long as you just get started!
If you wish to purchase any of these materials, they can be found at your local art store, or you can buy them using the links below.
Affiliate Disclaimer: The links on this page are affiliate links. I will receive a small commission if a purchase is made through one of these links. Learn more here.
- 2H, HB, and 2B graphite pencil
- Drawing paper
- Kneaded eraser
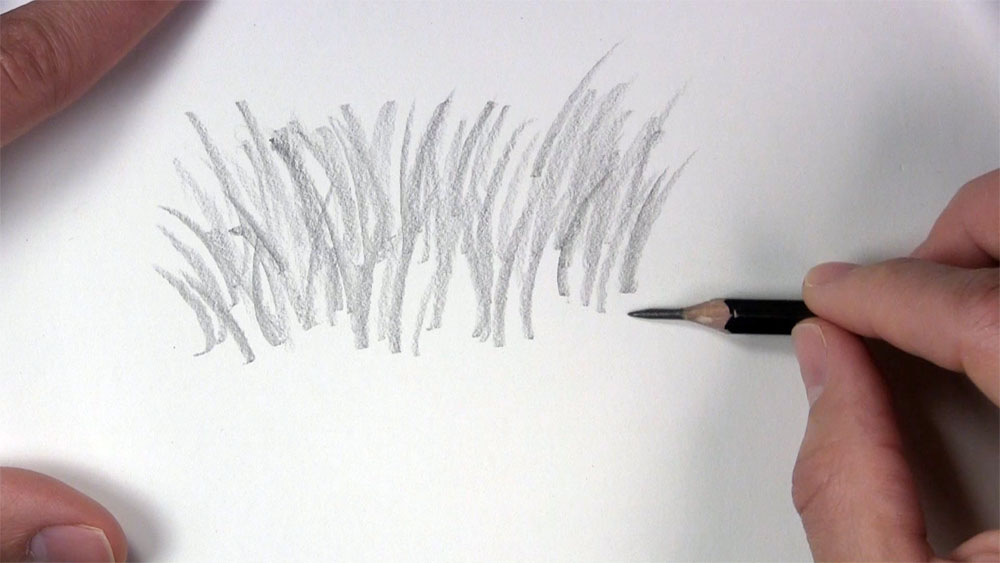
Draw the First Blades of Grass
In order to draw realistic grass, the first step is pretty straightforward. You can start by drawing lines that resemble a few blades of grass. In this example, I’m using an HB pencil. Similar to how you would draw hair, draw the blades in the direction they would naturally grow. Now, you can start from the bottom and make an upstroke for a tapered effect, with the base slightly wider than the tip. Alternatively, you can make upstrokes as well as downstrokes. I did a little bit of both here.
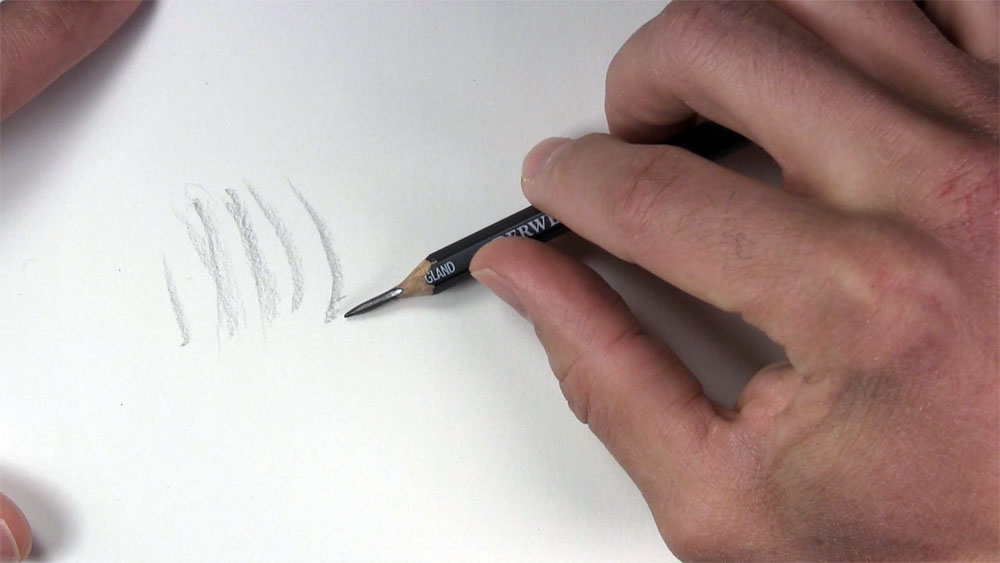
Next, draw a few more blades of grass going in the opposite direction. Give slight variations to the length of your grass blades. Additionally, draw some grass blades close together and draw others farther apart.

Go back over the row of grass blades just drawn and draw additional grass blades. Draw them similar in height and direction to what you drew previously. A big part of drawing realistic grass is building up the volume in layers.
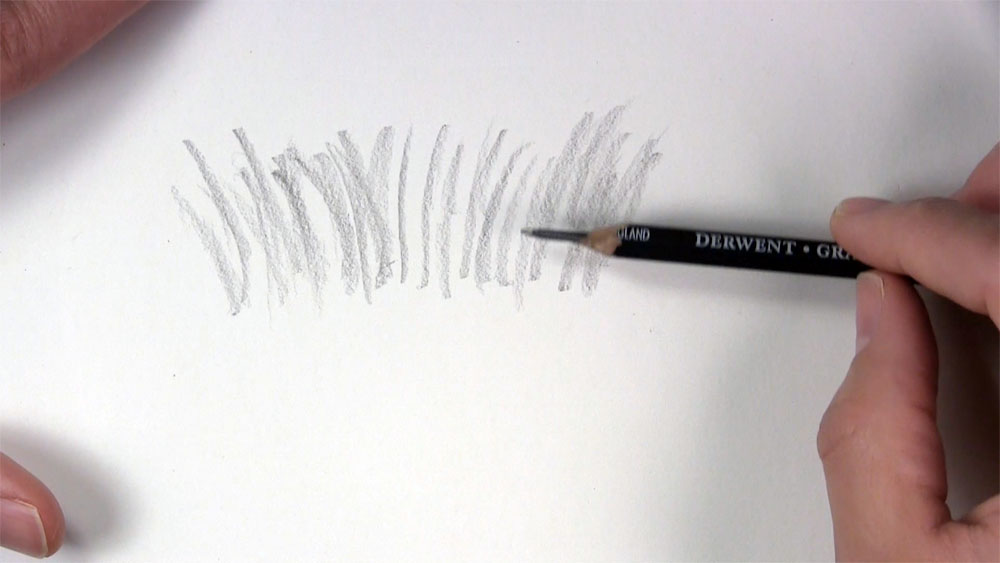
Build the Grass Up in Layers
Now, you can start to draw a second row of grass blades. As you can see, I drew a few sprigs here on the left side. As a side note, I’m using the term “row” loosely in this tutorial, because by the time we’re done, we won’t be able to distinguish one row from another!
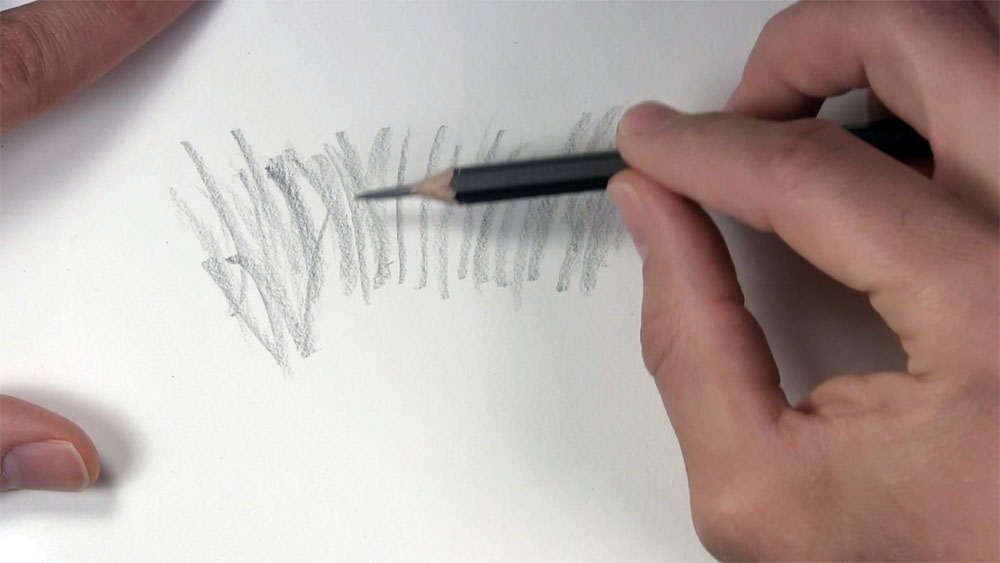
Continue to draw the second row of grass blades in a similar manner to the first. Keep your pencil strokes loose and light. You can do this by choosing your pencil grip wisely. I’m using an overhand grip in these beginning stages of drawing the grass.
Afterwards, repeat the process with a third row of grass in the foreground. Don’t worry about your marks overlapping one another. They should! That will add to the realism!
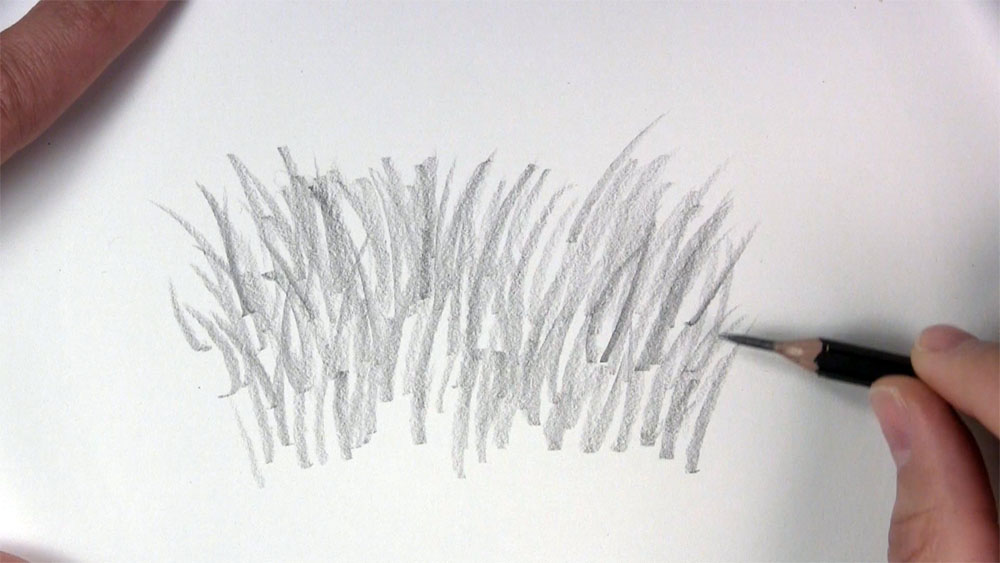
Go over all of the grass you have drawn so far with additional layers. As mentioned before, much of the success you will have with drawing realistic grass comes from the layers you build up.
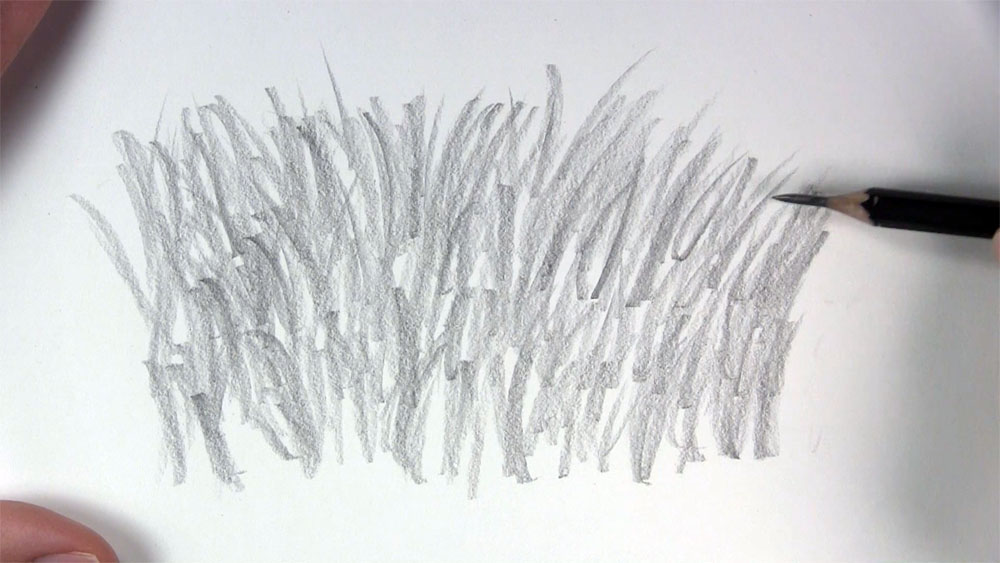
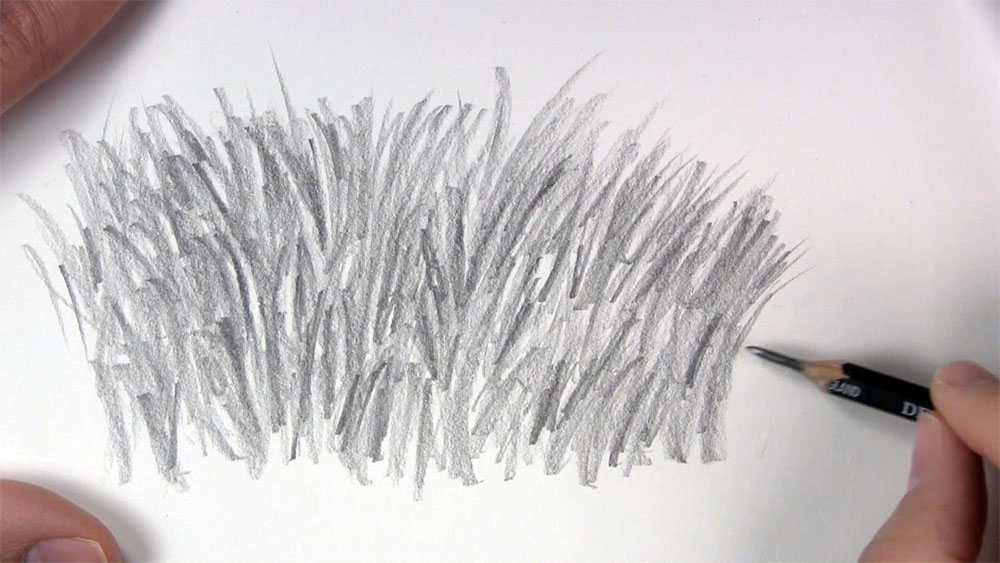
Shade Between and Around the Grass Blades
Now, let’s begin to distinguish some of these pockets by using light and dark values. A good way to do this is to look for areas between blades of grass where some darker tones exist and shade over them to make them darker. You can see in the image below how I am starting this process.
Continue to shade in between some of the grass to make some areas darker. This is a preliminary stage of shading. Try to look where certain blades of grass are traveling and shade along their path. Still, keep your sketching rather loose, and don’t get overly concerned about outlining each individual blade perfectly.
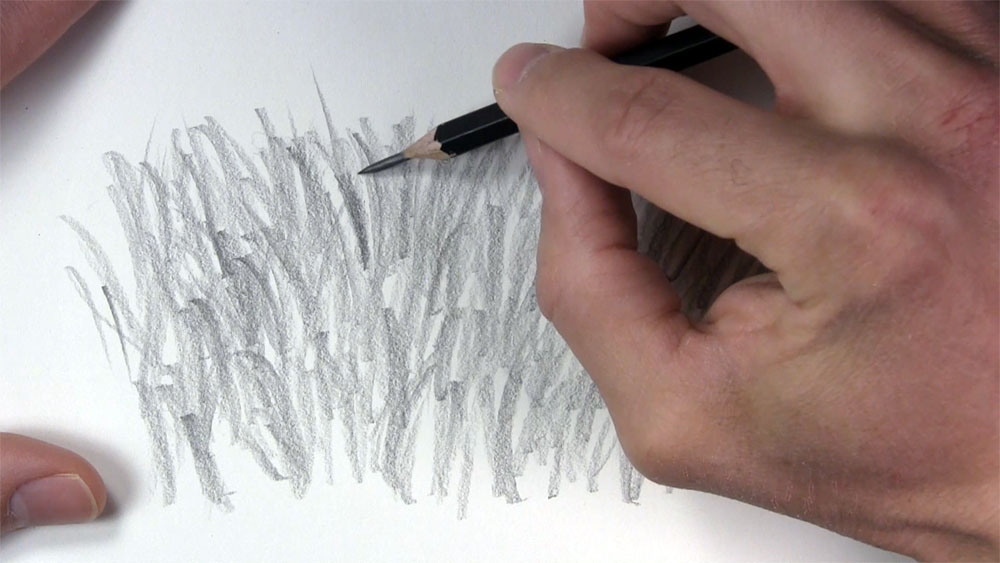
Now, let’s switch to a 2B pencil to better develop some of those shadows. Begin by shading the area closest to the ground.
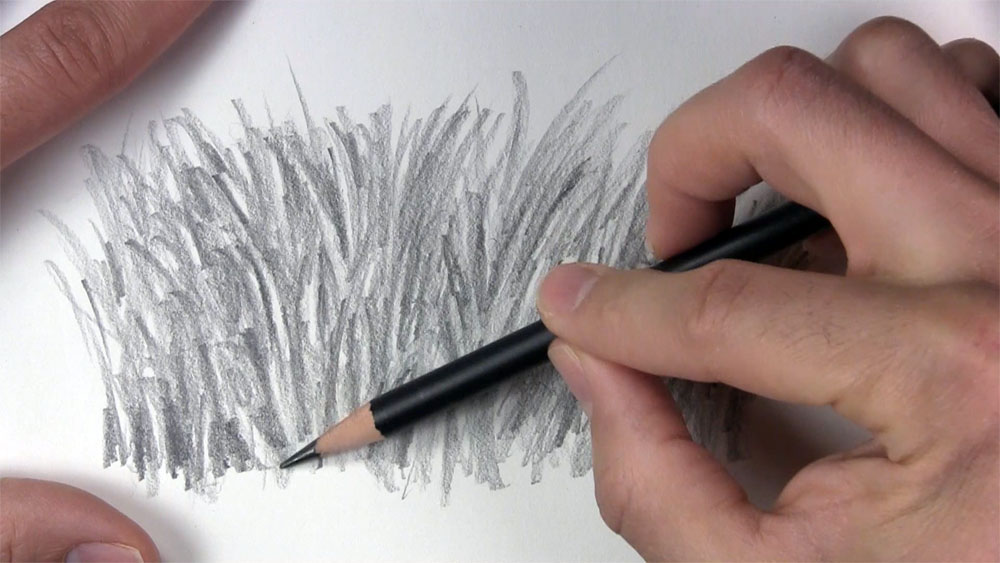
Keep shading the lower portion of the grass. Once again, focus on shading in between the lighter areas. We want lots of shadow between the grass blades close to the ground because the least amount of light reaches here.
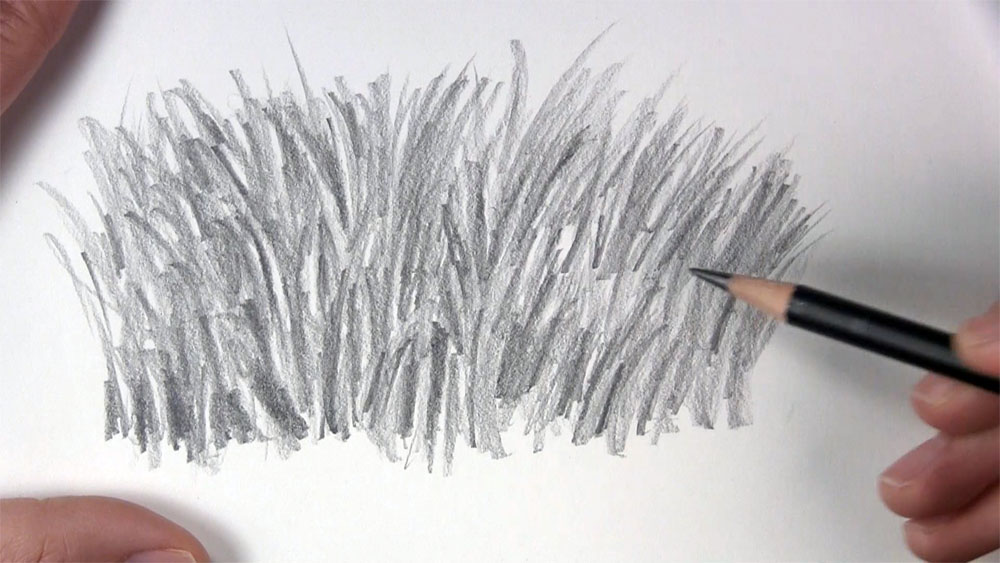
Work your way up to shading the grass above the ground floor. Keep shading primarily between lighter blades of grass that you might find. You don’t have to strive to make every blade of grass stand out individually, but do try to isolate a few blades here and there by shading directly next to them. This process of shading the negative space around the individual blades of grass is what gives us the resemblance of a collection of grass without having to draw each blade by itself.
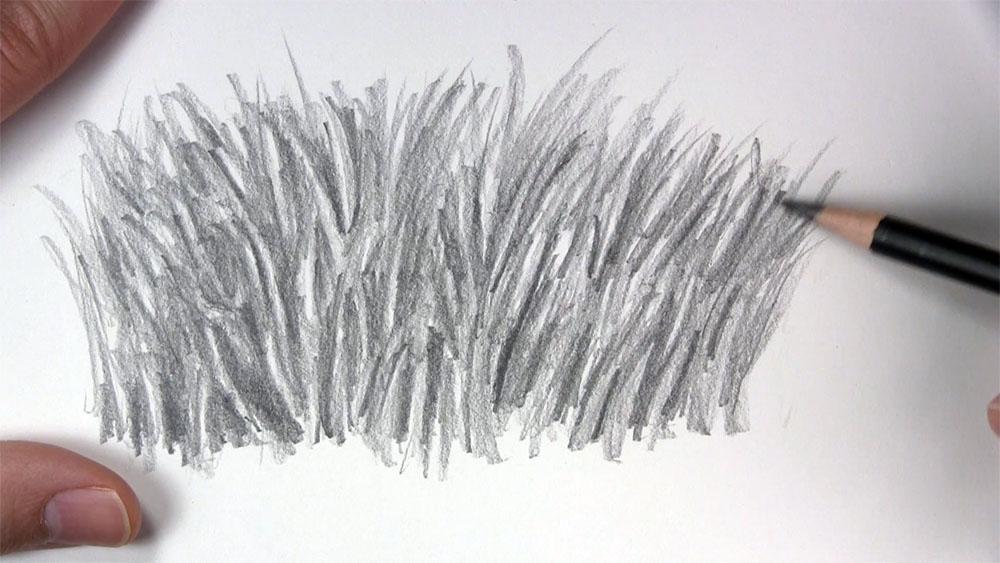
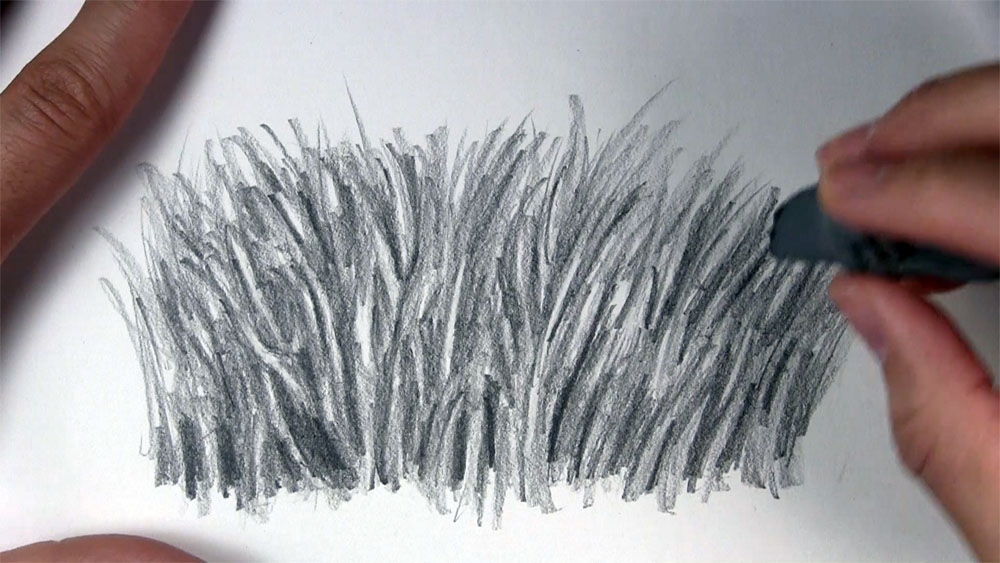
Lift Highlights in the Grass
It’s entirely possible that, with all of the layering you have done up to this point, you have marked over much of the highlighted areas of grass. To rectify this, use a kneaded eraser’s wedge edge to lift some highlights out of the grass. Look for any faint areas of highlights and use an upward swoop of the eraser to make them brighter. In between your swoops, keep reshaping your eraser to make a new edge with less graphite accumulation. This will make it easier to lift new grass highlights.
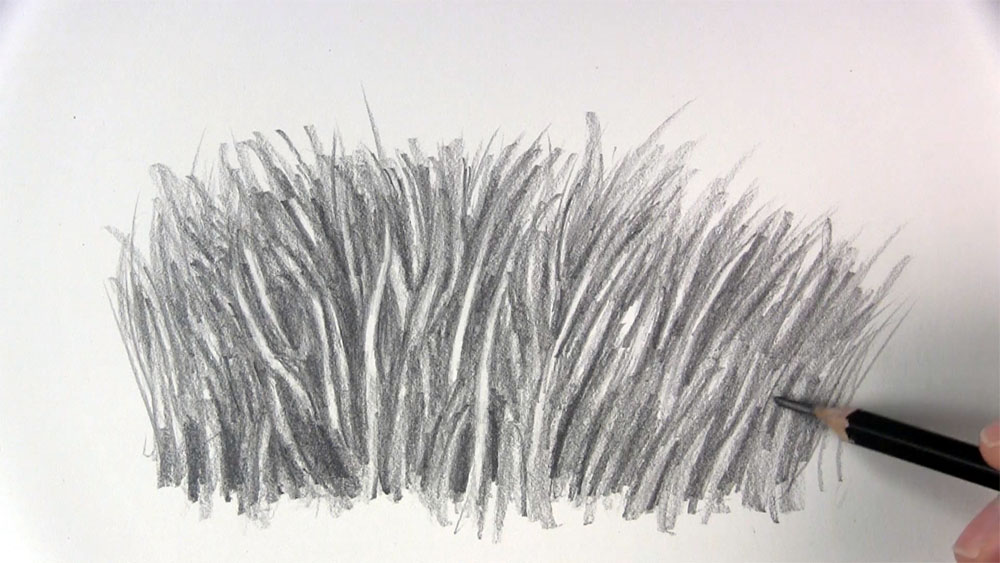
Draw More Layers of Tone for a Realistic Effect on the Grass
Use a 2H or HB pencil to further develop the areas where highlights were lifted. This just means you will reshape and touch up those areas so there’s more of a defined edge to some of the highlighted blades. You can also draw a few thin blades here and there with swift upstrokes of your pencil.
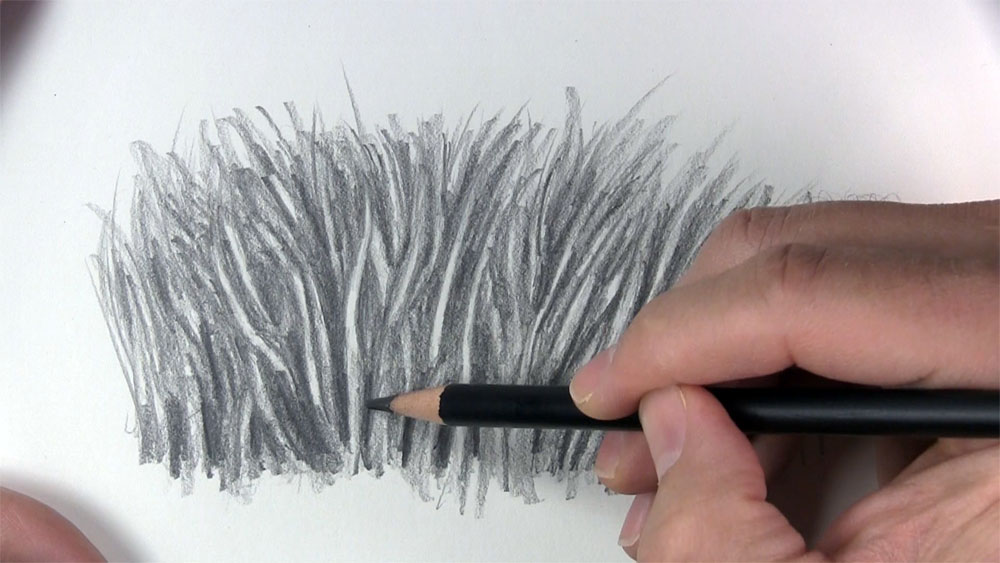
Alternate between an HB and a 2B pencil to shade and shape the negative space around the grass blades, developing the thickness and volume you desire. Use the 2B pencil to apply the final layers of shadow in between the grass and especially near the base of the grass where it meets the ground.
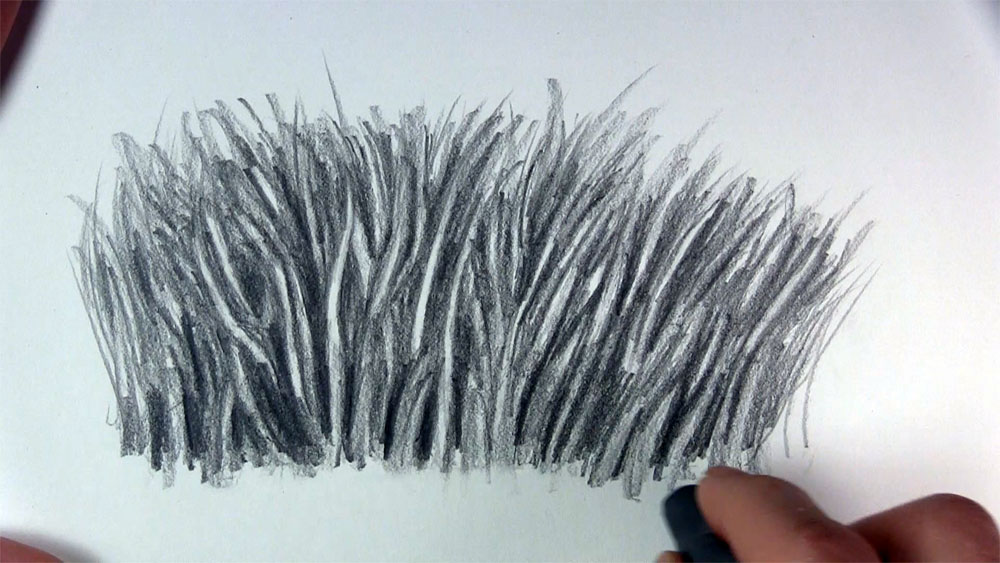
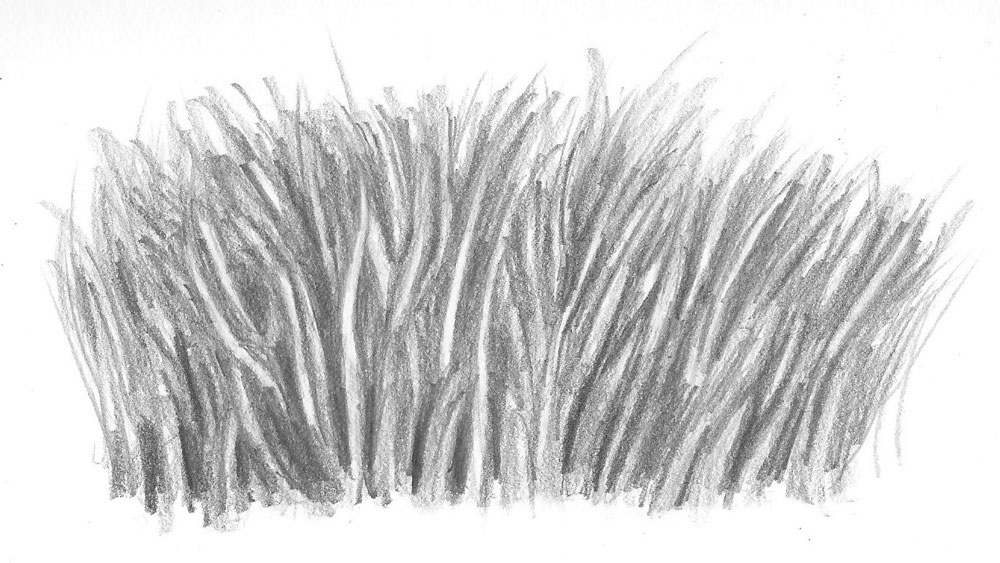
Use a kneaded or regular eraser to clean up any smudges on the paper at the bottom of the grass or anywhere else around it. Of course, if we were drawing an entire field of grass, we would keep going, as the grass would not abruptly end. However, for the purposes of our practice tutorial, we can stop here. Feel free to keep going if you wish!
And that is how to draw realistic grass!
Tutorial Recap
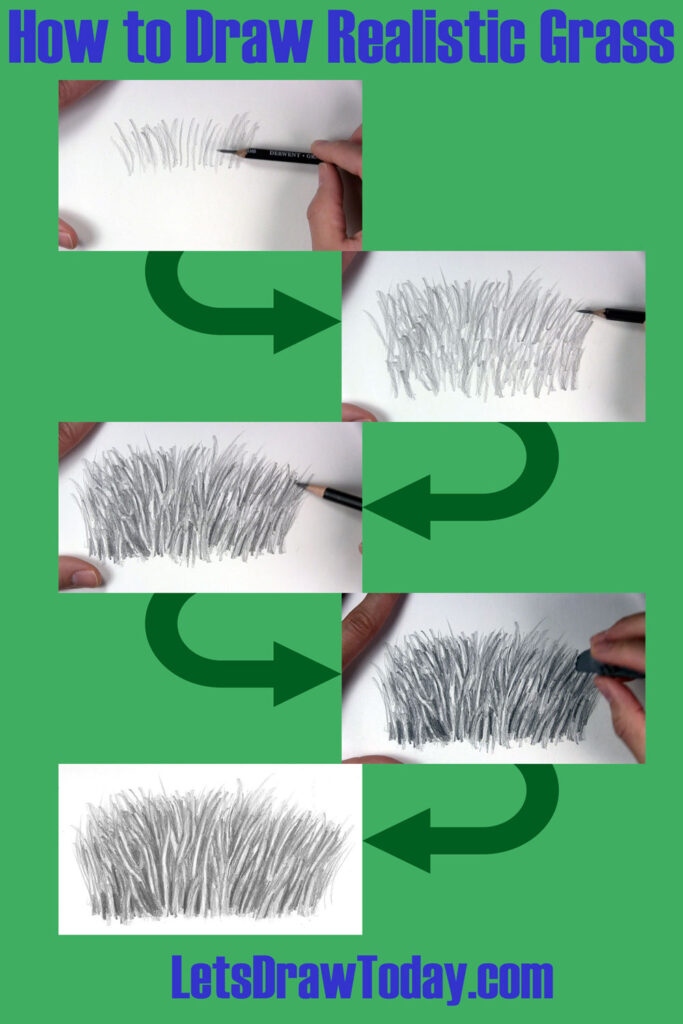
For a quick visual recap of this tutorial, take a look at the image below. It shows you a step-by-step summary progression for how to draw realistic grass.
Tips for Your Next Realistic Grass Drawing
Here are a few takeaways from this tutorial:
- Remember to keep your pencil strokes nice and loose. Keep them light as well, at least at the beginning.
- Draw markings that resemble the growth of realistic grass blades. You can draw up from the base or use an up-and-down motion.
- Build up your grassy area in layers of overlapping marks.
- Focus on shading the negative space between the grass blades rather than drawing each individual blade of grass. You can see me doing examples of this in other tutorials. For instance, I use negative space as I draw the grass in the foreground of this waterfall drawing.
- Apply these tips to draw other subjects with grass. You might draw plants surrounded by grass, animals in a grassy habitat, or the grass in various landscapes.
Conclusion
I hope this tutorial makes it a little easier for you to draw realistic grass and even feel good enough about sharing it!
Keep practicing, and you will find the task of drawing grass to be a breeze!


LOVED THIS ONE!!!
Thanks Margaret!
that is so cool now this is my favorite thank you you so much.
So glad you enjoyed it!
Thanks
You’re very welcome, Yisa!