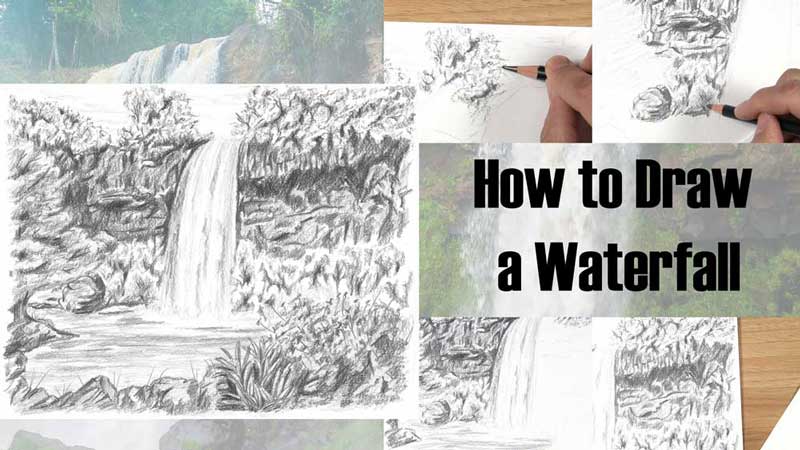
How to Draw a Waterfall in a Beautiful Landscape
Looking at a waterfall brings feelings of bliss and delight. You might be wondering; how do you draw a waterfall landscape in a way that captures its beauty?
A waterfall can often be described as a river flowing from the upper reaches of a mountain, cliff, or other steep land formation. This river then flows over the edge, sometimes descending breathtaking distances toward the bottom. The rocky surroundings that frame a waterfall are often accompanied by a variety of trees, shrubbery, and other plants.
There are many separate things contributing to the overall beauty of a waterfall landscape. Even so, it does not have to be difficult to draw these things to create our own beautiful waterfall drawing.
Even if you are a beginner when it comes to drawing, I encourage you to try this waterfall tutorial. You might be surprised by what you can create with a basic outline and an easy, step-by-step shading process.
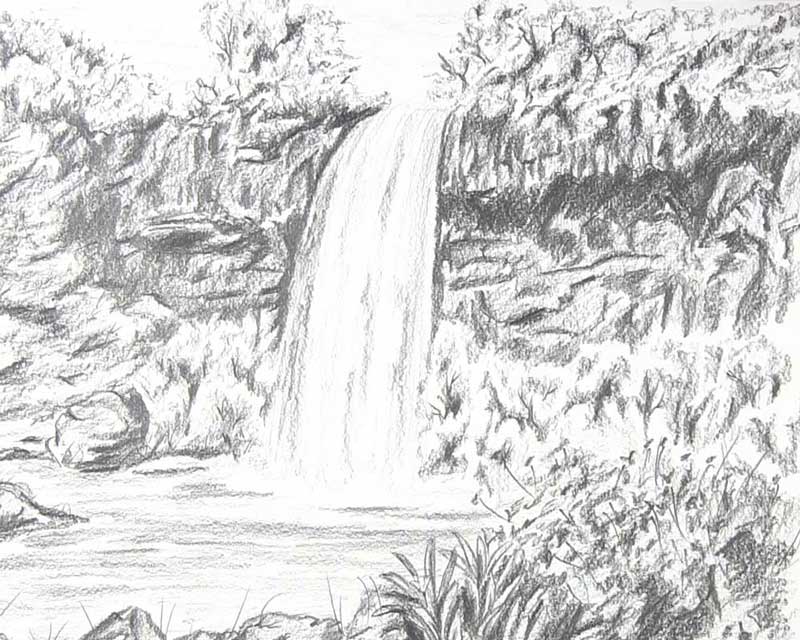
Using pencil, I will show you how to draw a waterfall, foliage, and rock texture.
Keep reading to draw a realistic and beautiful waterfall landscape!
Table of Contents
Use a Reference Photo of a Waterfall Landscape
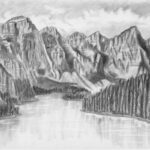
In this tutorial, I will show you how to draw waterfall scenery by using the following photo as a reference:
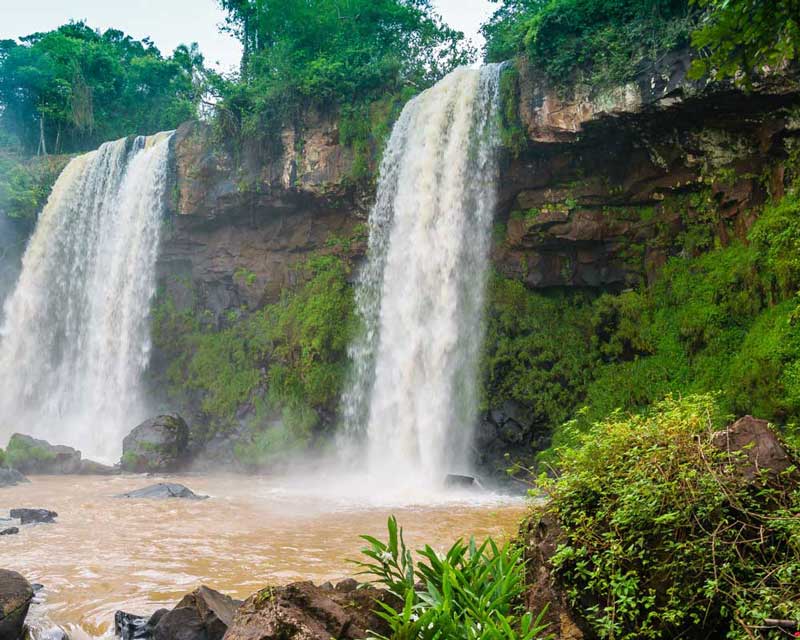
Image by Heiko Behn from Pixabay
When creating this tutorial, I decided to replace the waterfall on the left with a tree. That allows focus to remain on one waterfall in the center.
This photo was taken at the Iguazu Falls in South America, on the border of Argentina and Brazil. You can’t tell by this photo alone, but if you were to pan out, you would see just how massive and impressive these falls really are!
Materials Used for This Drawing
Here is a list of the materials I am using for this drawing.
If you don’t have some of these materials, that’s okay. You can still make do with a regular pencil and eraser, as long as you just get started!
If you wish to purchase any of these materials, they can be found at your local art store, or you can buy them using the links below.
Affiliate Disclaimer: The links below are affiliate links. I will receive a small commission if a purchase is made through one of these links. Learn more here.
- HB, 2B, and 4B graphite pencils
- 8” by 10” drawing paper (90 lb., medium rough surface)
- Kneaded eraser
Draw the Landscape Outline, Sky, and Top Trees
In order to draw a waterfall landscape, the first step is to sketch a basic outline. Then we can work on the sky and trees at the top of the drawing.
Sketch an Outline of the Waterfall Landscape
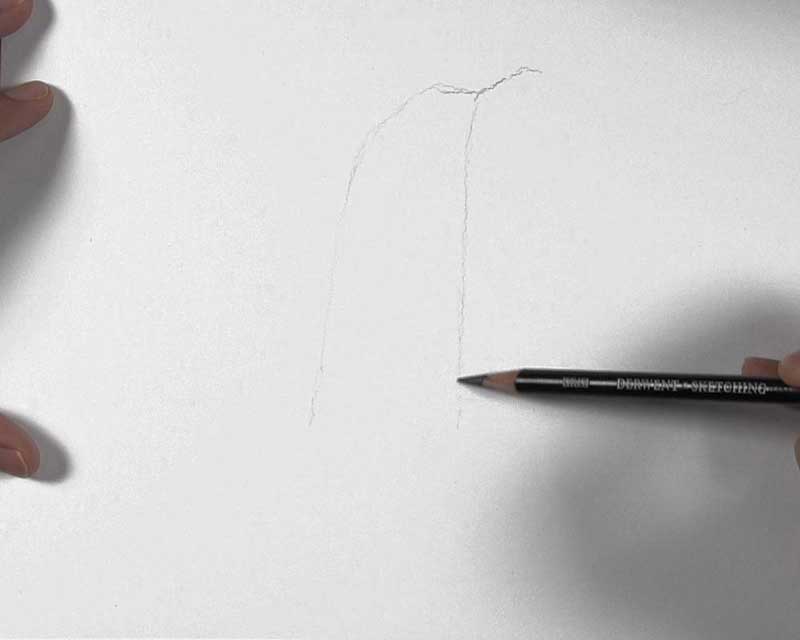
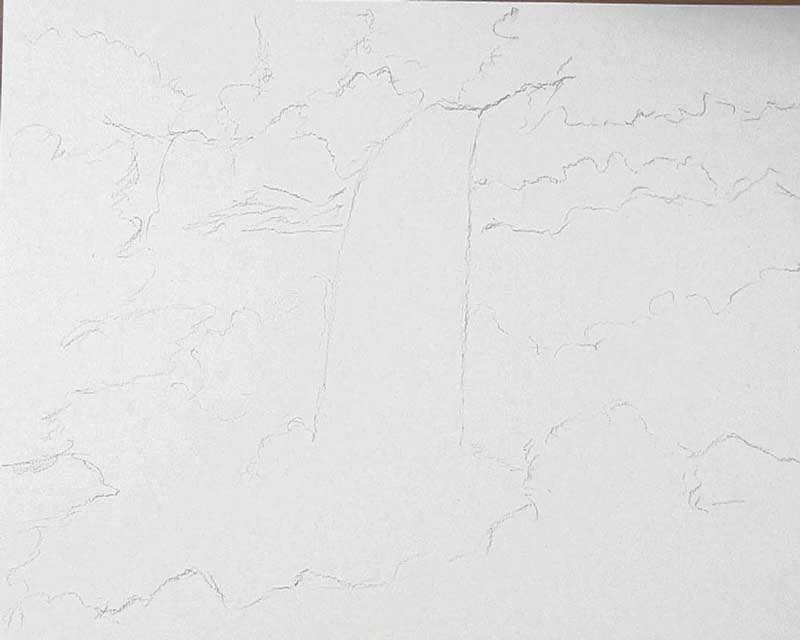
Use the reference photo as a rough guide as you sketch the contours of the main parts of the landscape. Start with an HB pencil and a sloping zigzag line near the top of the paper, followed by two almost parallel and mostly vertical lines coming down to represent the sides of the waterfall.
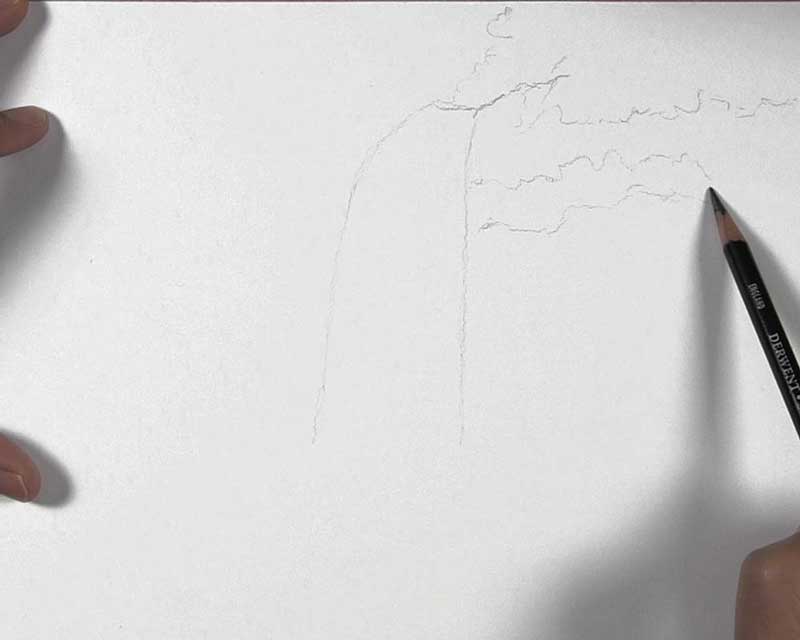
Next, draw two squiggly lines under the top of the right cliff. During the shading process, these two lines will help us to create the appearance that the cliff is jutting out near the top. Above the waterfall and along the top edge of the cliff, draw the bushy outline of the upper trees and bushes.
Sketch a rough outline of the cliff to the left of the waterfall. Along with it, sketch the outline of some additional foliage. Keep your lines very loose and don’t stress about creating an exact match to the reference photo.

As mentioned before, I’m replacing the waterfall on the left side of the reference with a tree. If you are doing the same, you can sketch the outline of a tree now. Feel free to shape your tree slightly different from mine. In addition, let’s draw the outline of the foliage at the bottom of the cliff. You can do so by outlining the top of the bushes, just about halfway between the top and bottom of the waterfall.

Finish the outline by drawing the contour lines of the plants and rocks in the foreground, as well as a little piece of land for our tree on the left side to live on.
Begin Drawing the Sky and Top Trees
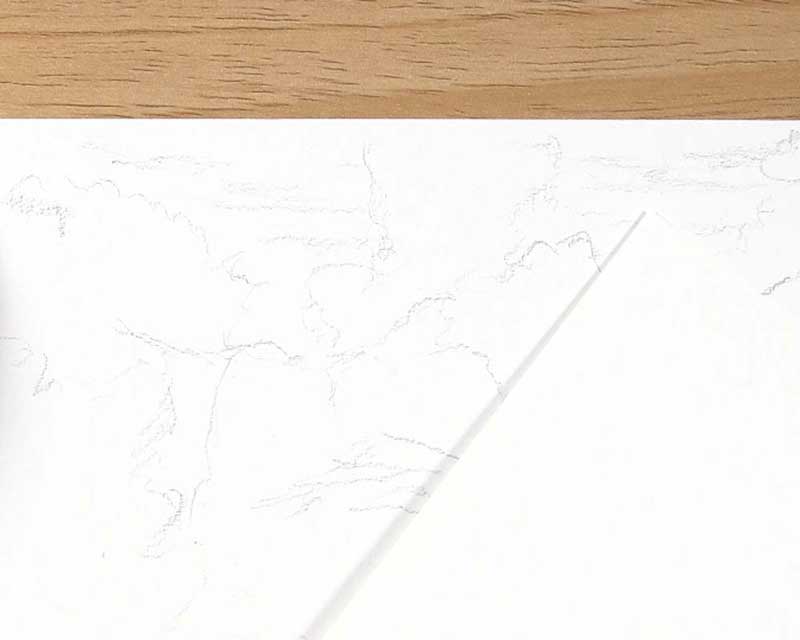
The reference photo shows a clear sky. I wanted to do the same for my drawing. So, with the exception of a few lightly-sketched clouds that you can barely see, I left the sky pretty much untouched. There are other methods for drawing clouds. If you want to make the sky in your waterfall landscape much cloudier, you might wish to refer to how I drew clouds in this previous tutorial.
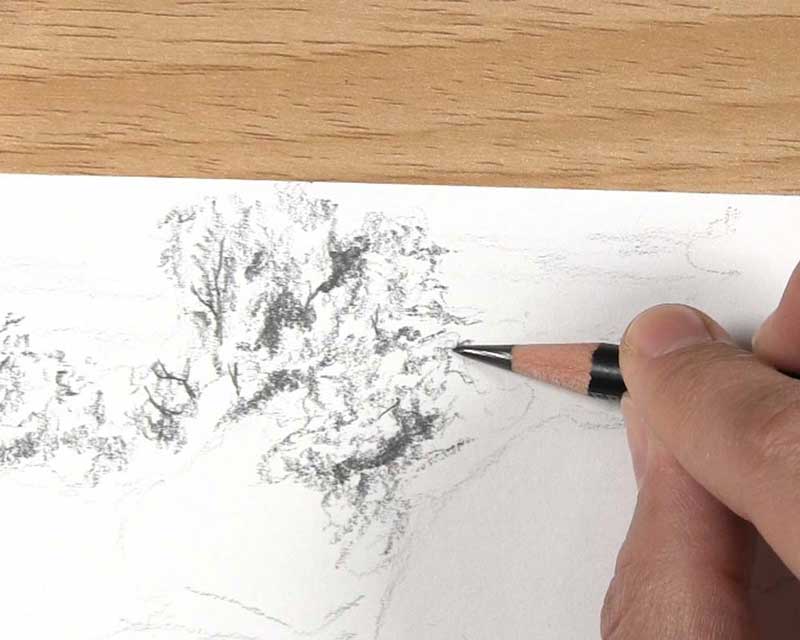
Okay, now let’s see how to draw foliage for our waterfall landscape. Trees and bushes are made up of numerous clusters of leaves and branches that are grouped together. Starting with the left side of the drawing, use the side of a 2B pencil to create patches of shading within the mass of foliage. These patches of shading represent where less sunlight is reaching the various clusters within the foliage.
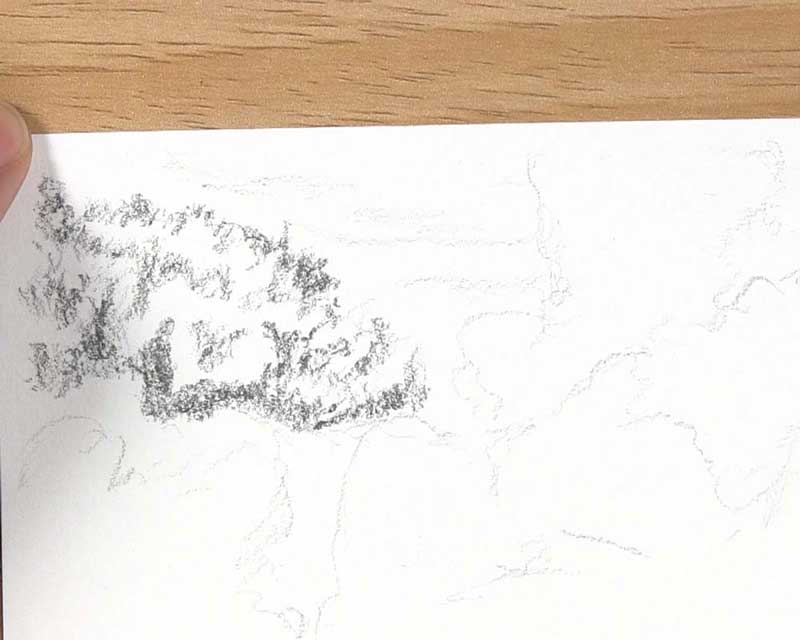
Rather than drawing every leaf and other little detail we see, we can make the suggestion of these small details, which is still often enough to create a realistic representation. Suggest the leaves by making tiny marks within the highlighted areas of the trees and bushes. Make a few marks along the outer edges as well. Draw a few branches poking out of the open areas between the leafy clusters.
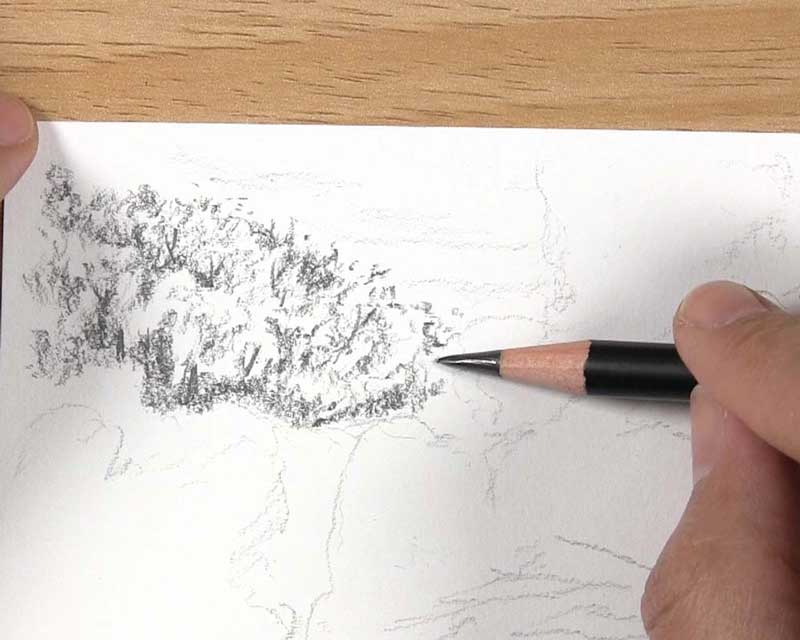
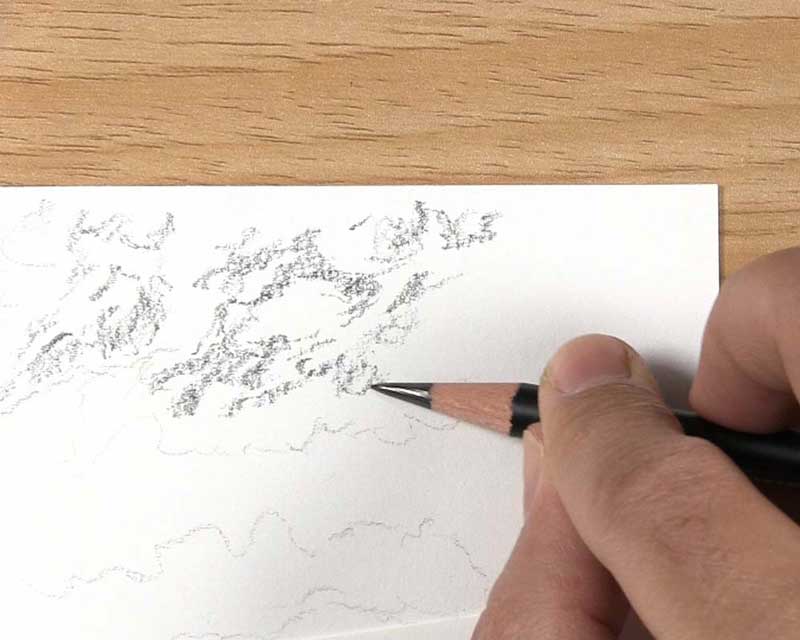
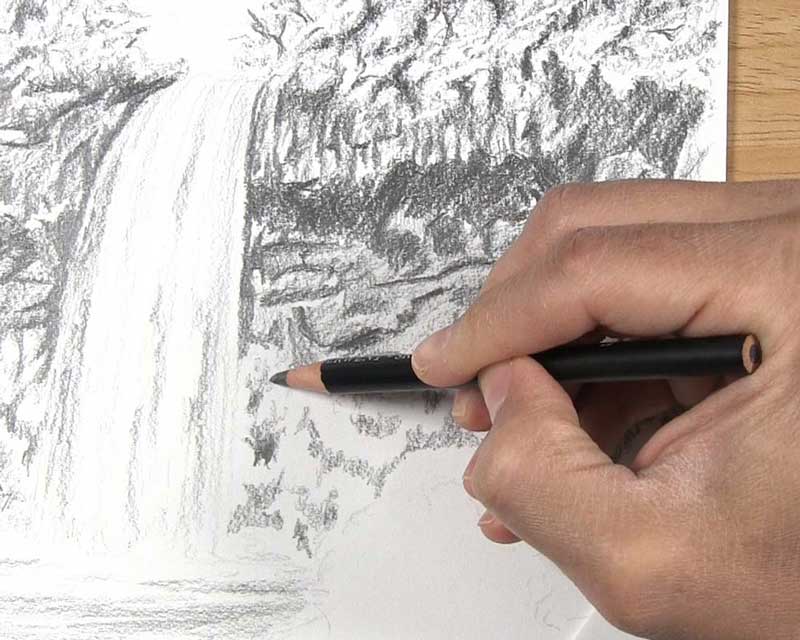
Let’s do the same thing with the next bunch of foliage near the top of the waterfall. Draw random patches of shading within the foliage shape. Make some of the shading darker in some spots than others. As you get into the lighter areas, make a gradual transition from the darker patches. Draw a few branches within the leafy mass as well as some branches sticking beyond the outer edge.
Finish Drawing the Top Trees
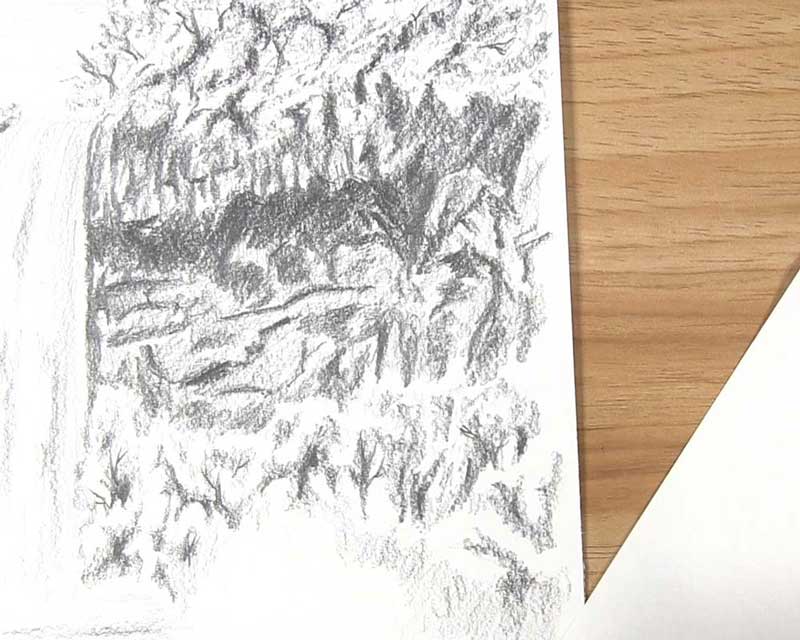
Continue the same process to finish drawing the trees and bushes along the top of the cliff. Start by establishing the shadow areas of the foliage. Keep in mind that some of the leaves overlap the top edge of the right cliff.
Then apply a darker layer of graphite over a few spots of the shadow areas you just made. Gradually make short markings for leaves as you work your way into the lighter areas. Make a few leaves sticking beyond the edges of the foliage. Draw several visible branches to complete the top trees and bushes.

Draw the Landscape to the Waterfall’s Left
Now let’s focus on the landscape to the left of the waterfall. During this part of the tutorial, we will draw the left cliff and the trees, bushes, and a boulder below it. Then, we will draw a tree in the place of the waterfall on the far left in the reference photo.
Draw the Rocky Texture of the Left Cliff
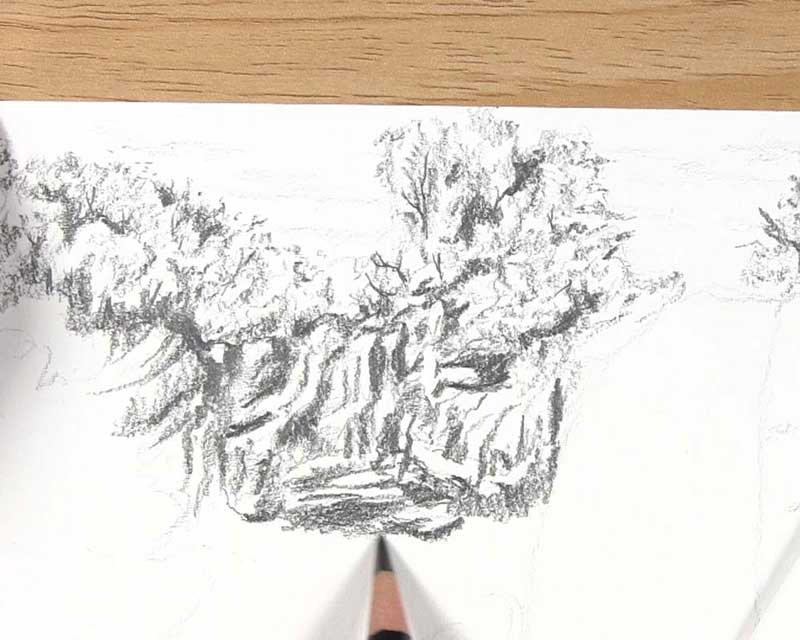
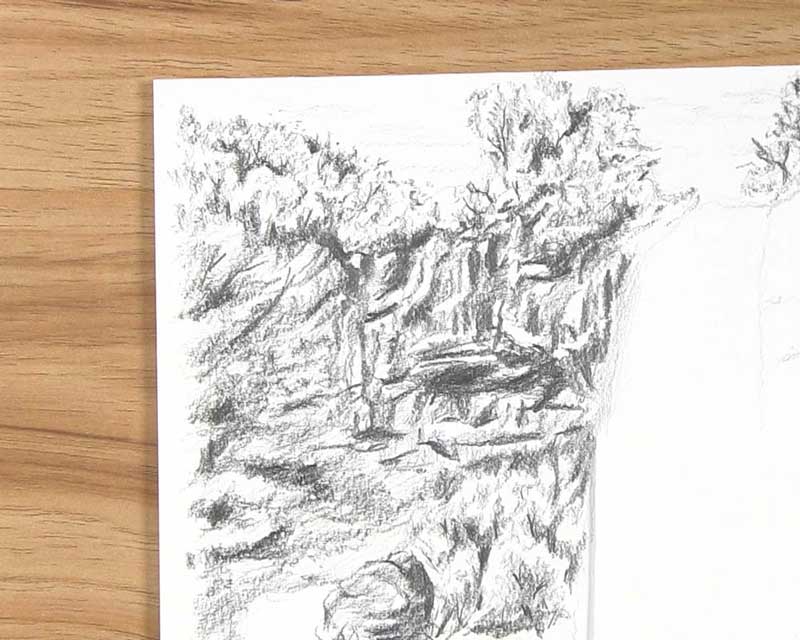
First, let’s see how to draw a cliff. We’ll start by creating some rocky texture on the cliff just to the left of the waterfall. Use the reference photo as a rough guide as you draw a series of lines and shapes that resemble the outline of a rugged cliff. You might include a narrow shape along the base of the portion that juts out. Additionally, draw cracks, grooves, and lines to help form the texture.

We can further create the appearance of a rocky texture by using a combination of light and dark values. Apply dark tones within some of the shapes and along some of the cracks and grooves you created in the last step. Apply lighter tones in between these darker areas.
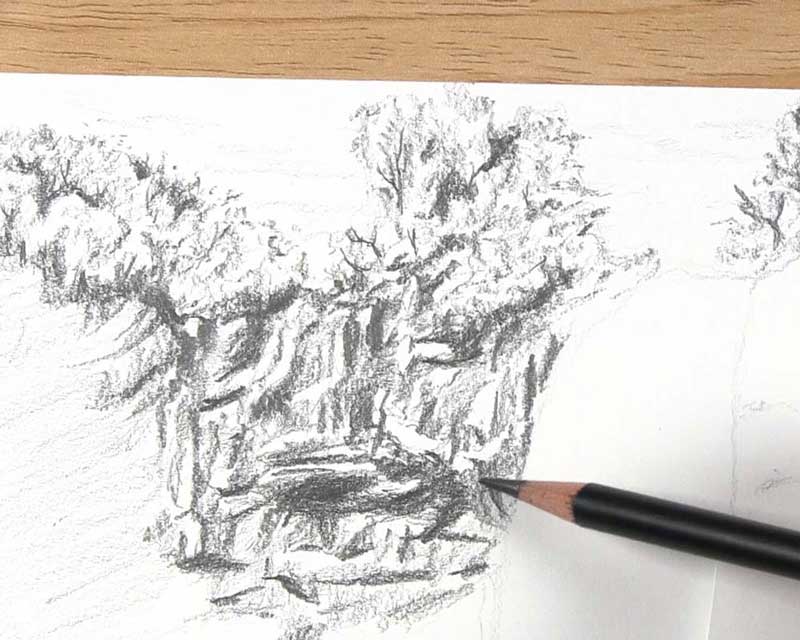
Use the same process for the middle part of the left cliff. Vary the direction of the lines you draw on the surface of the rock. Whenever you draw rocky cliffs, embracing randomness and avoiding symmetry is key. Put extra shading near the top of the cliff to help separate the cliff from the trees and bushes above it. On the far left side of the drawing, apply a very light base layer of shading. Refrain from drawing details here since we will draw the tree in this spot later.
Draw the Bottom Foliage of the Left Cliff and a Boulder
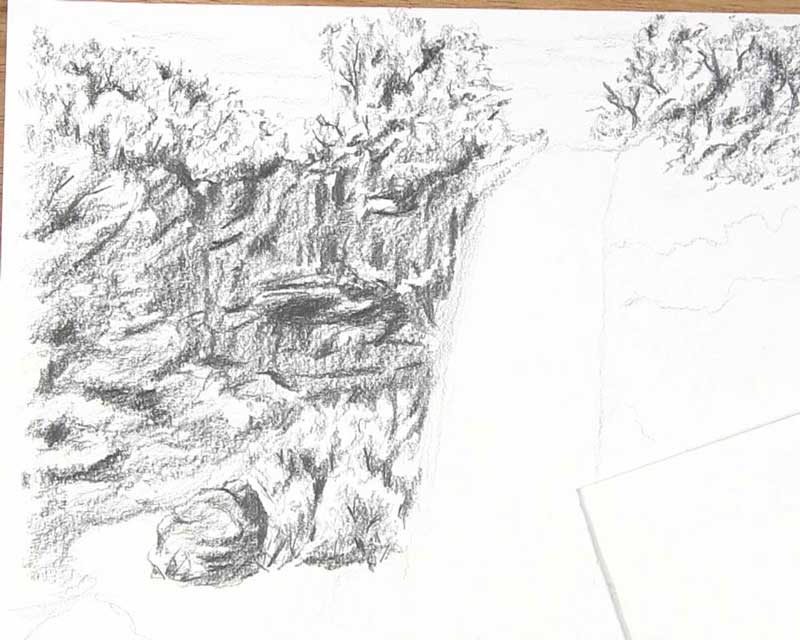
For the trees and bushes along the bottom of the left cliff, we can use the same methods as we did for the trees at the top. Begin by placing some shadow tones to separate the different clusters of leaves.
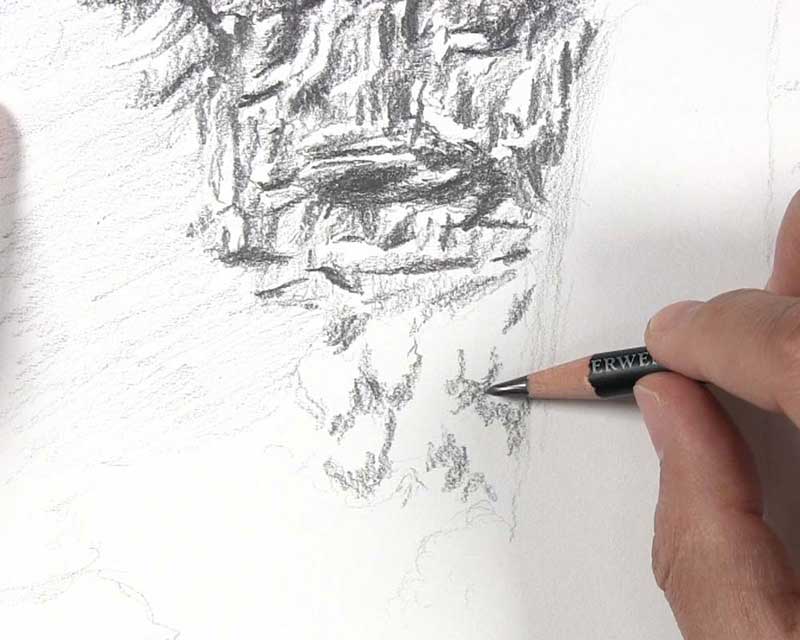
Then sketch some short markings in the lighter areas of the foliage. It’s important to remember that, when you draw foliage, it is not necessary to draw every leaf.
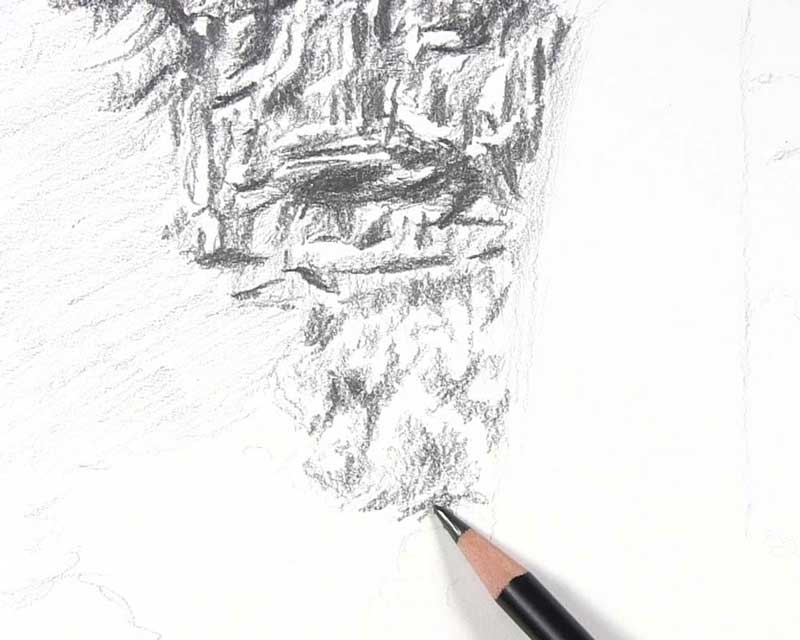
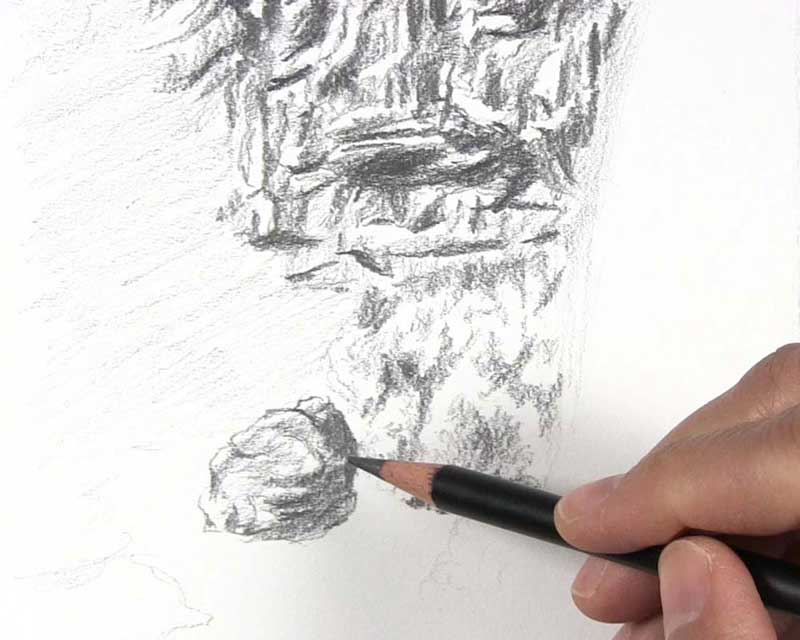
Here at the base of the foliage is a good spot for a boulder. Draw an outline for the big rock, which can be seen in the reference photo. Include curved lines to distinguish the major faces and planes of the boulder.
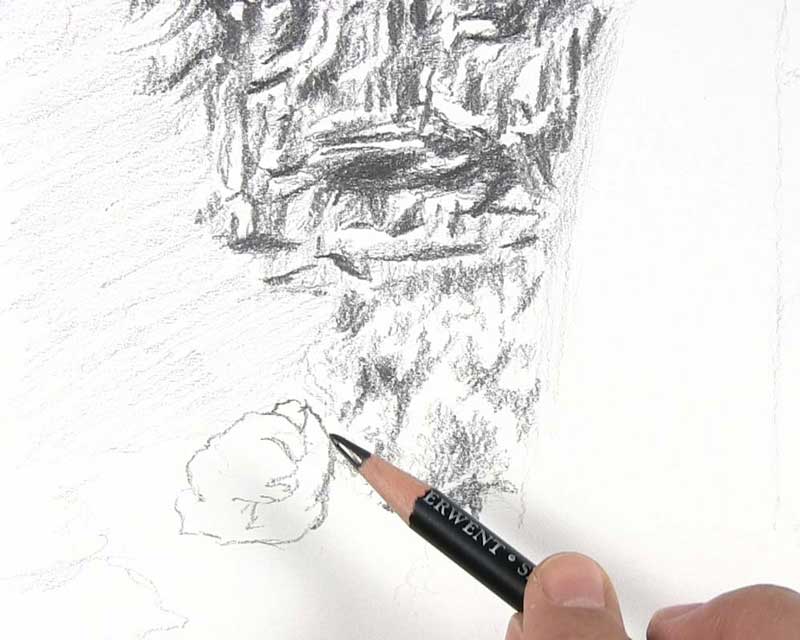
Apply some dark tones on the right face of the boulder. Place some lighter tones on the left face. Leave a thin strip of white along some of the edges and cracks of the rock. This will help to create a range of values on the rock’s surface.
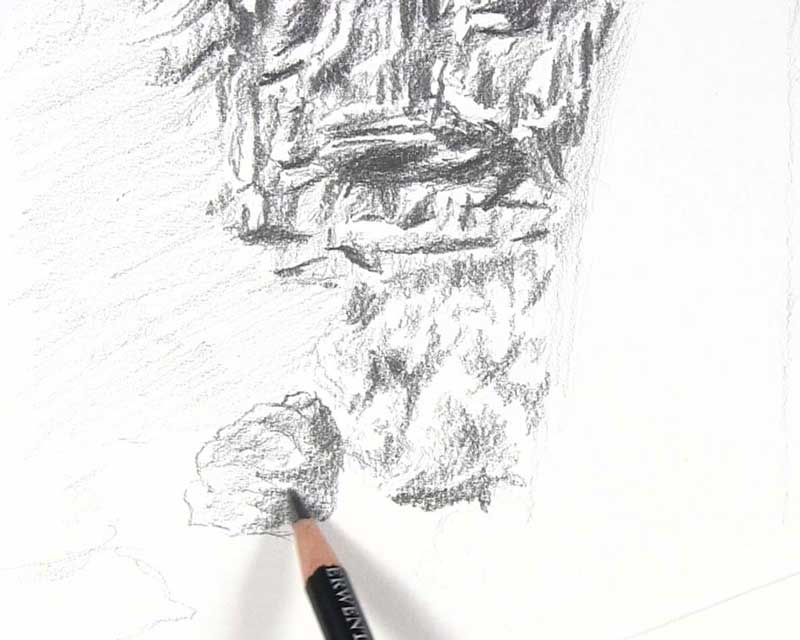
Go over some of the darker spots of the boulder with a 4B pencil. This will help to create an overall greater value range. Add a few extra details on the highlighted side of the rock, such as bumps and cracks, to finish up the rough texture of the rock.
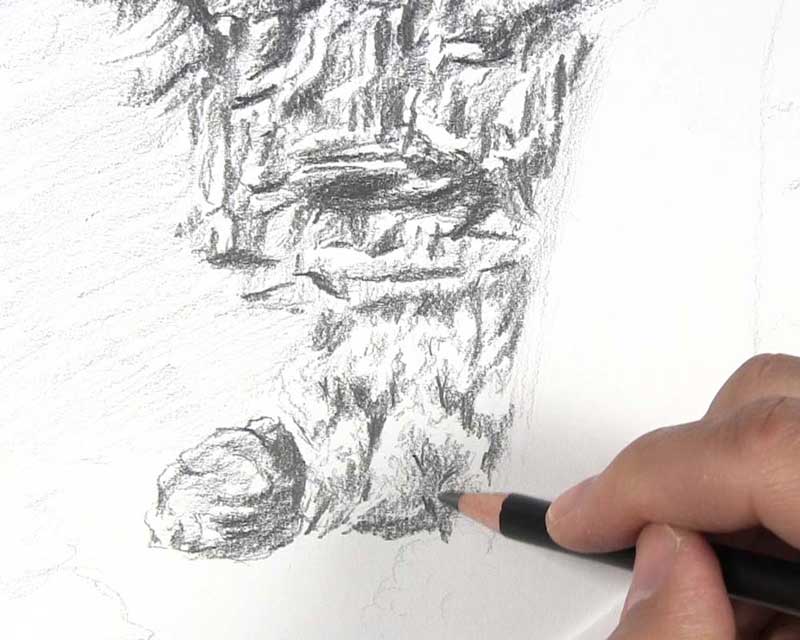
Switch back to a 2B pencil to finish up the shrubbery at the base of the cliff. Place emphasis in the darker areas to create greater contrast with the lighter areas. This will help to separate the leafy clusters. Also, you might want to put additional shading on the lower surface of the cliff just above the foliage. Again, this will create more contrast and help to distinguish the cliff from the bushes.
Draw the Left Tree
Here is the point in the drawing where I replaced the waterfall at the left edge of the reference photo with a tree. In my tutorial on how to draw a tree with leaves, I mentioned that you could sketch oval shapes to identify the different leafy clusters. In this drawing, I’m taking a similar approach. However, rather than drawing the oval shapes, I’m shading the dark patches, or negative space, between the clusters to identify them. This is the same approach that we have been using for other foliage in this drawing.
Next, start sketching the indications of some leaves. Begin in the darker areas and use a mixture of short markings and small circular strokes to gradually move into the lighter areas. Leave the lightest values along the outer edge of the tree.
Sketch some of the tree’s branches in between the leaf clusters. You might also see some of the trunk running vertically behind some of the clusters.
If the values used in the tree are very similar to the values on the surface of the cliff, it might be necessary to do some touching up. You can use a kneaded eraser to brighten the clusters along the edge of the tree. Then, you can apply another layer of shading over the cliff, especially along the edge of the tree.
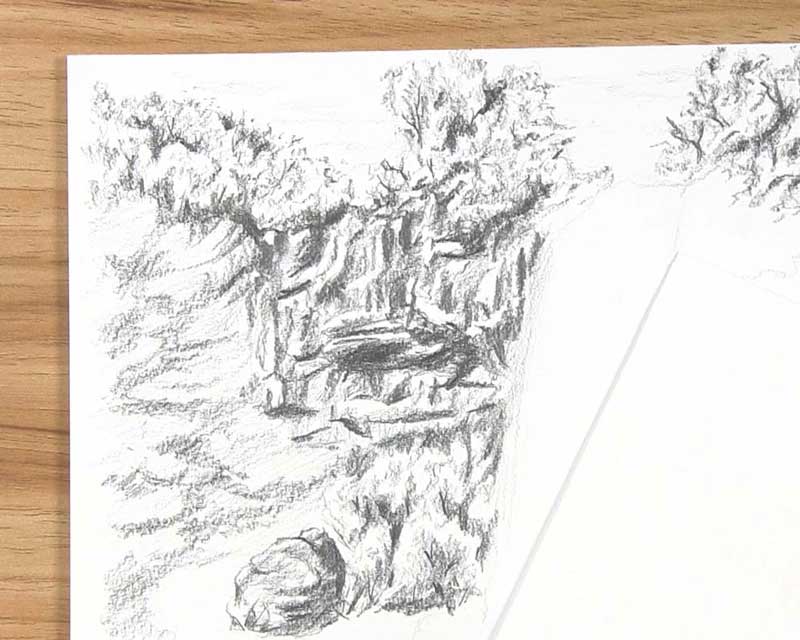
Draw a small piece of land for the base of the tree. Continue to build layers of contrast between the tree and the cliff as needed.
Draw the Waterfall and the Water Below
Now we have come to the focal point of our drawing – the waterfall! Let’s see how to draw a realistic waterfall step by step, as well as the water beneath it.
Draw the Waterfall
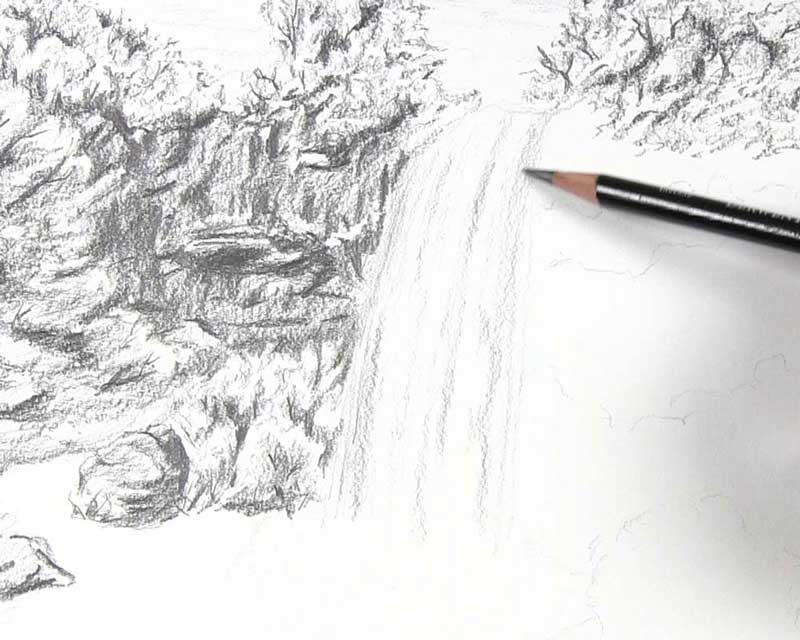
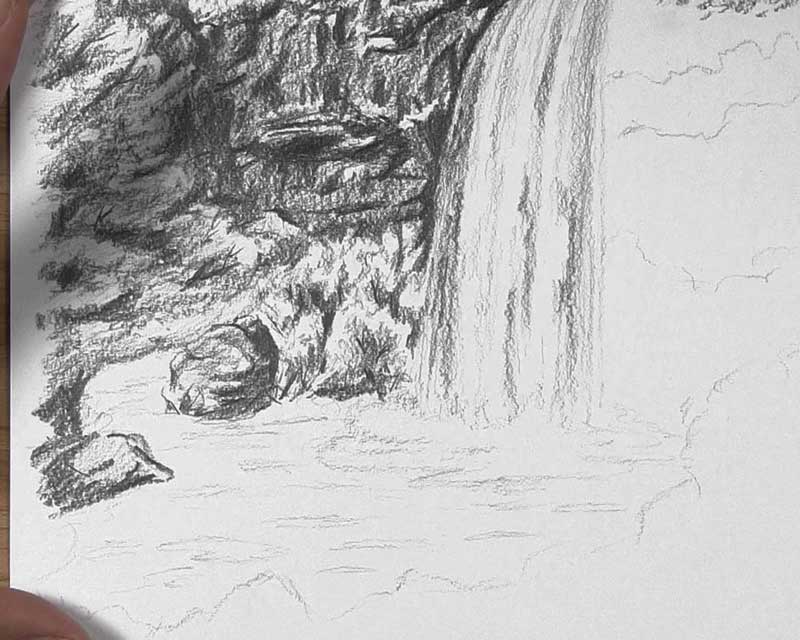
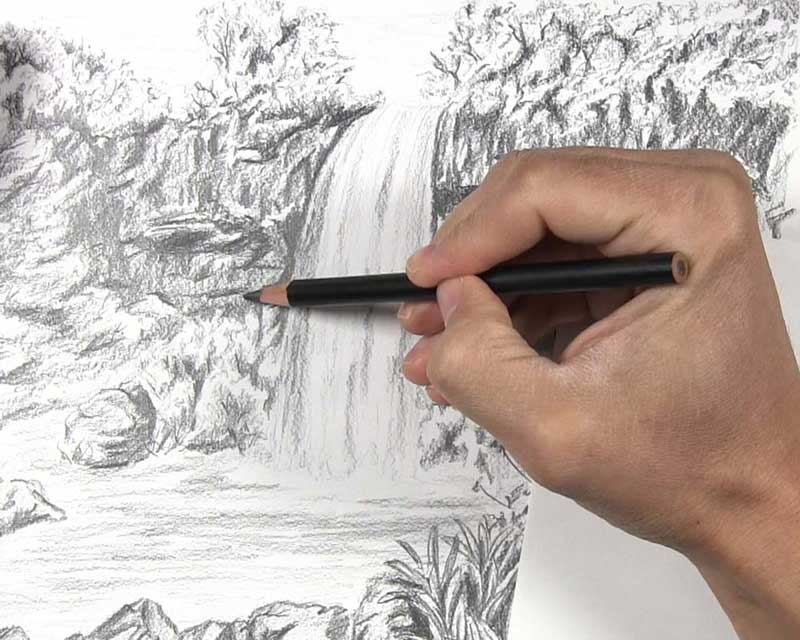
Start by using an HB pencil to gently draw lines going from the top of the waterfall to the bottom. The lines should curve over the edge of the cliff. Then they should come down at the same angle as the edges of the waterfall.
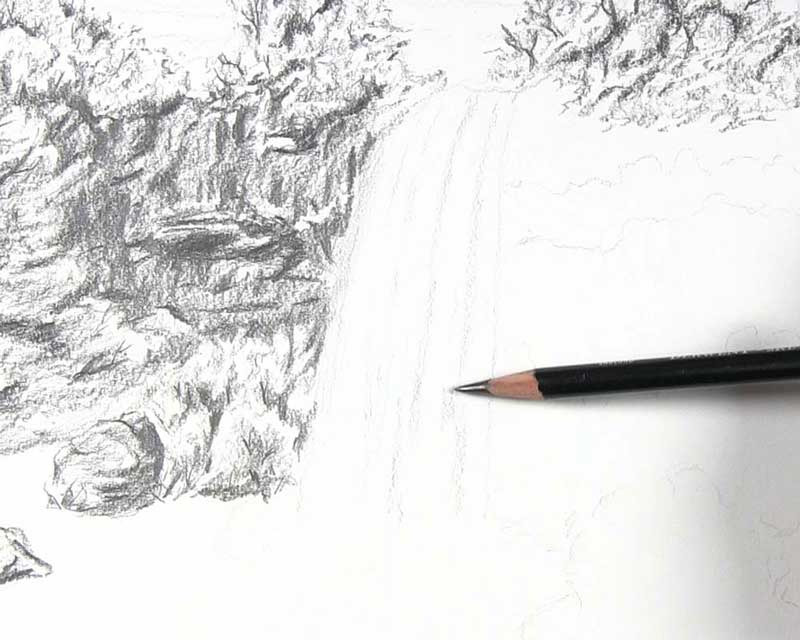
Continue to sketch more lines within the waterfall. Add some wiggle to some of the lines, especially near the bottom. Draw more lines along the edges to show where the waterfall gets thinner. Make fewer lines down the center portion where there is more water.
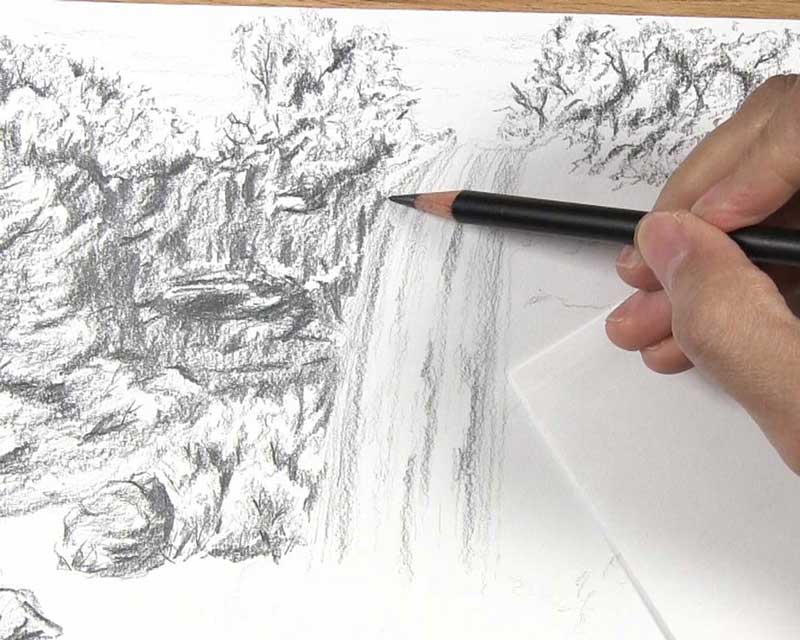
Add volume and thickness to the waterfall by sketching more lines. Sketch over some of the thicker, wavy lines with the side of your pencil’s graphite. Draw more thin lines with the tip of your pencil, especially near the top and along the sides.
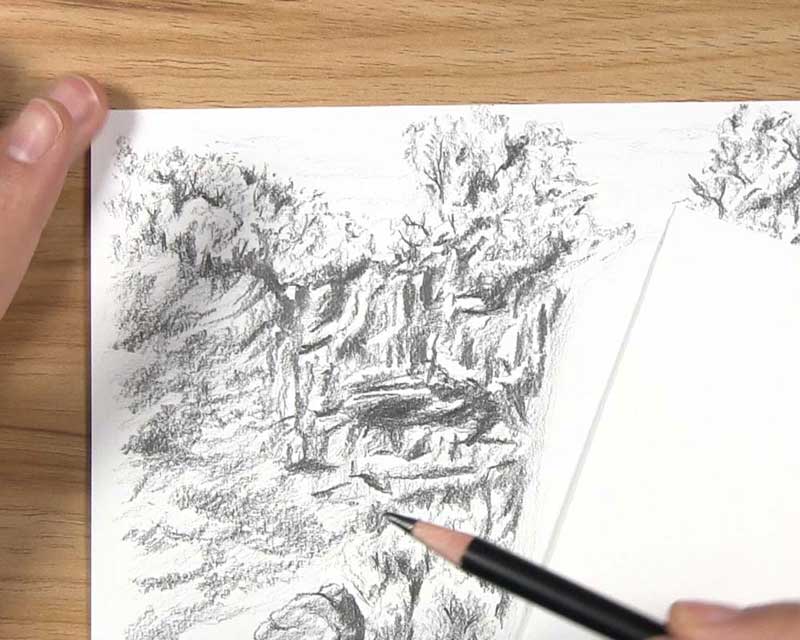
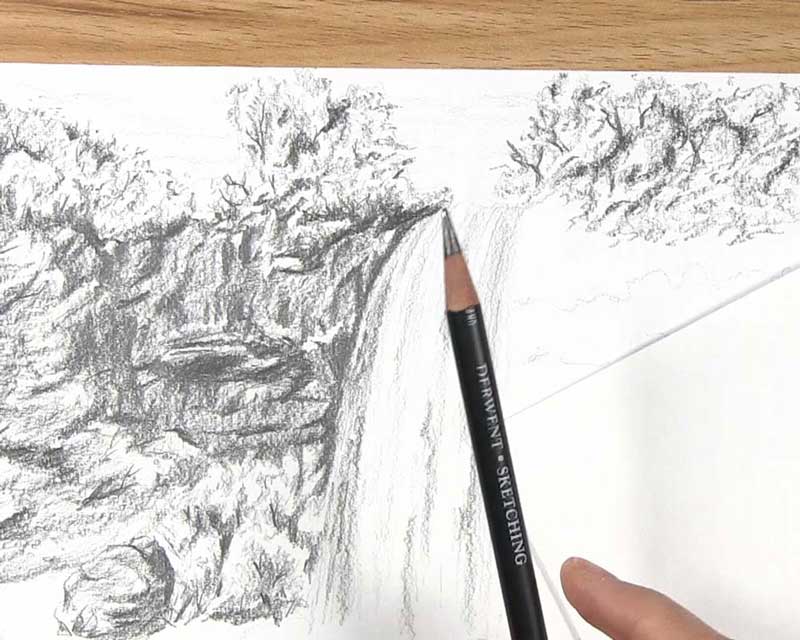
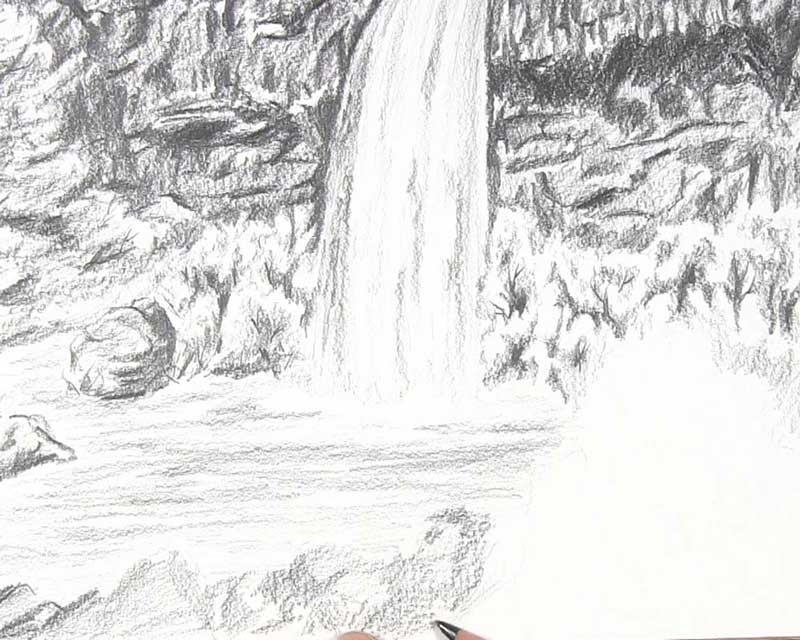
Use a 4B pencil to shade the cliff along the left edge of the waterfall to create some contrast. Also, draw some tiny spots in the water along the edge to show how the water separates as it falls, revealing the cliff behind it.
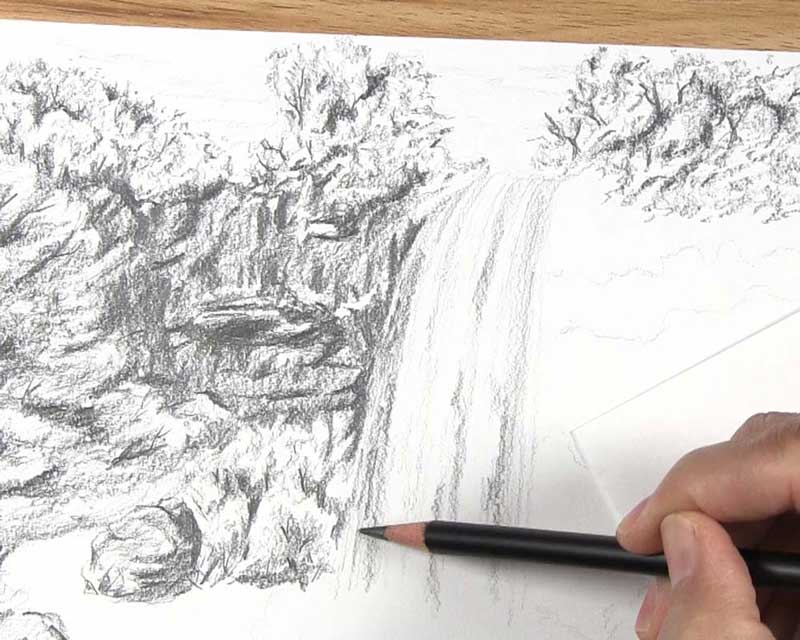
Continue to build any necessary contrast along the edge of the waterfall, as well as the top where the water pours over the cliff. When you draw with contrasting values, like the dark cliff next to the light water, it helps us to frame and create a beautiful waterfall.
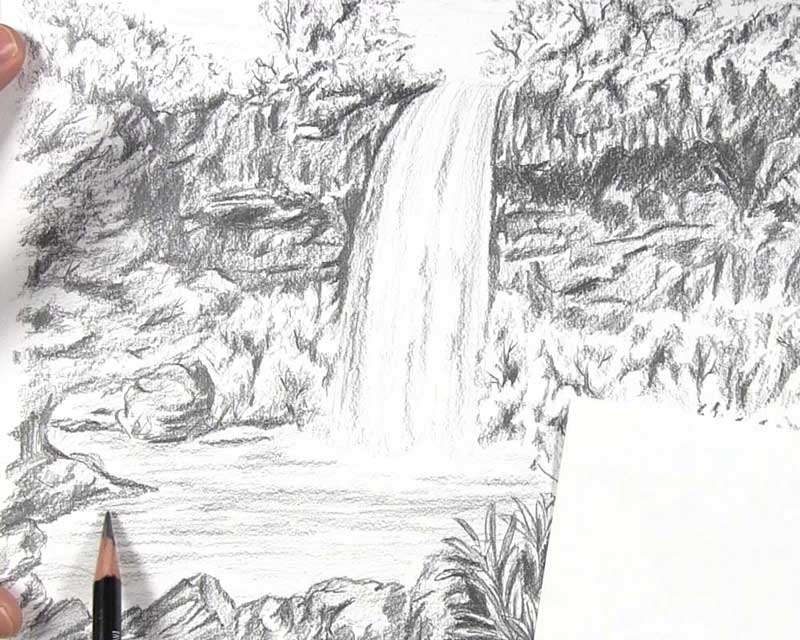
Draw the Water Beneath the Waterfall
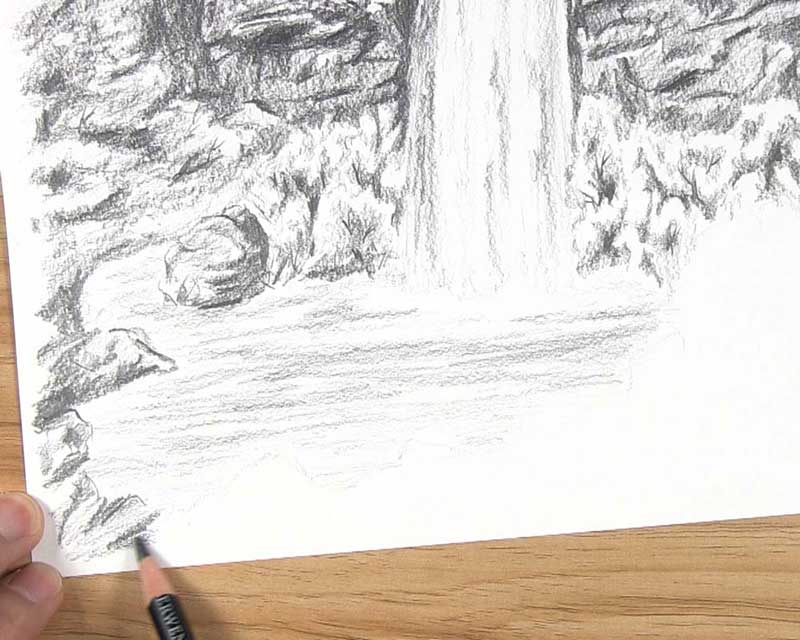
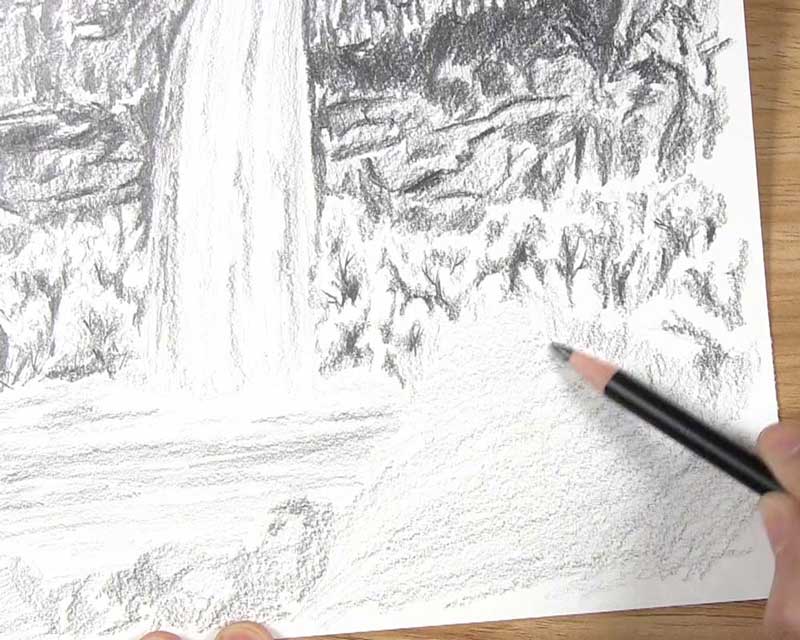
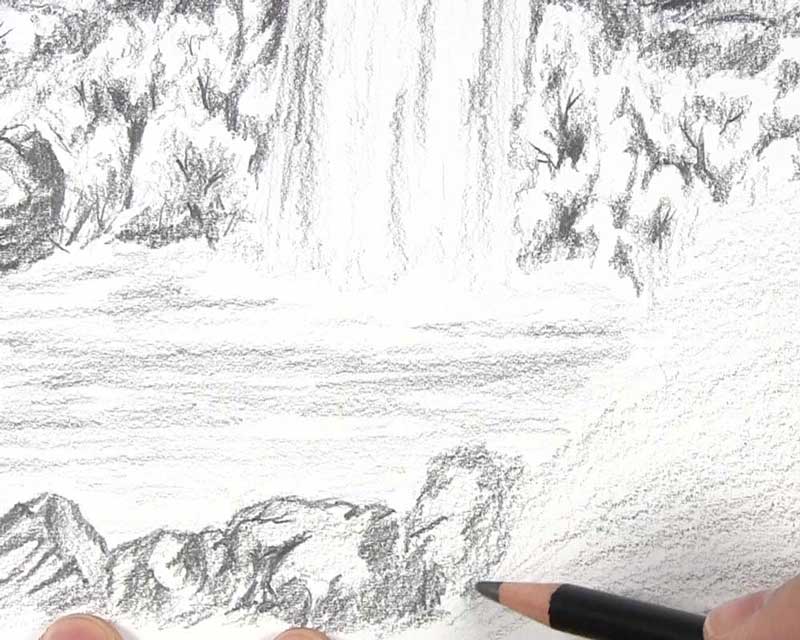
What would a waterfall be without the water beneath it? Our waterfall has some mist at the base surrounded by rippling water. There are many ways to draw water ripples. A simplified version begins with drawing very thin sideways shapes with an HB pencil to indicate some of the ripples.
Afterward, shade the space between the shapes. Use a sideways motion to easily move between the thin ripple shapes. Shade along the mist area at the base of the waterfall, too. If some of the ripples get harder to see, use a kneaded eraser to lighten them while applying more shading along the ripple edges with your pencil.

Draw the Landscape to the Waterfall’s Right
Now that we have drawn the waterfall and the cliff to the left of it, let’s finish framing the waterfall by drawing the cliff on the right side and some foliage at the bottom.
Identify the Darker Areas of the Right Cliff
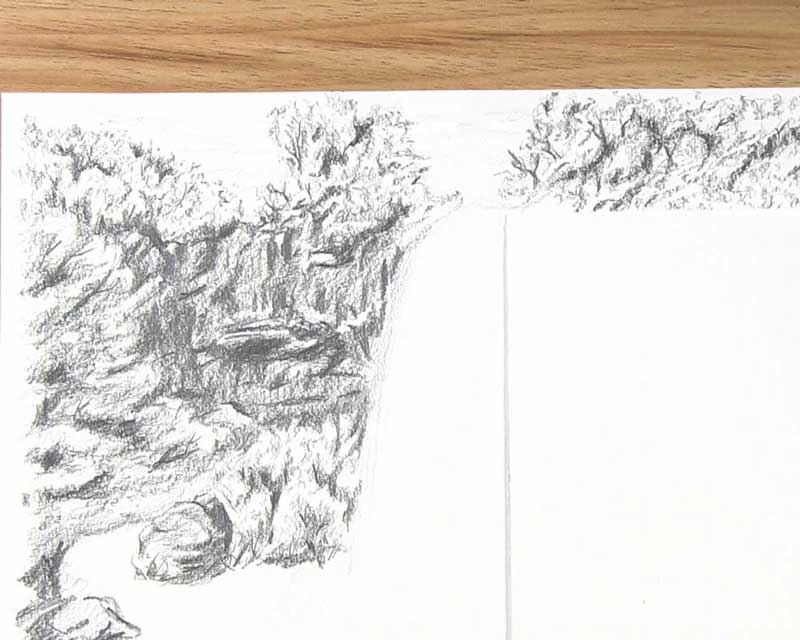
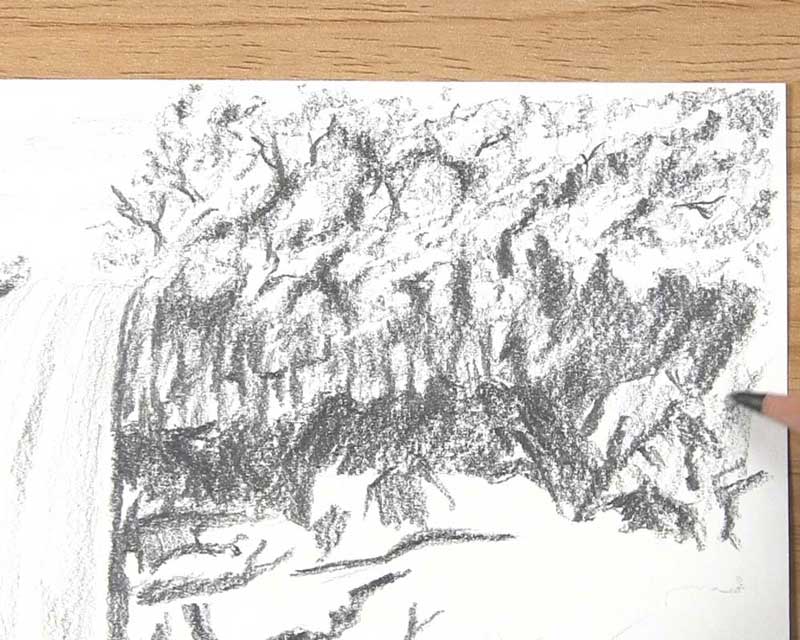
We can draw the cliff face by first identifying the darker areas. With a 2B pencil, draw some mostly vertical lines and a few tall triangle shapes to carve out the rugged surface of the top of the cliff.
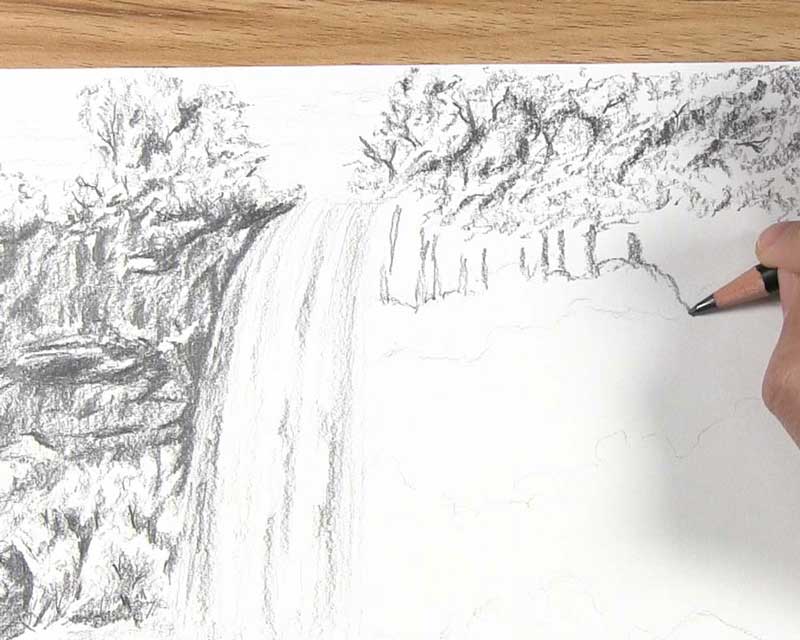
Draw several thin, irregular shapes under the top part of the cliff. Unlike the lines and shapes at the top, these shapes can be more horizontal, since they form the rock under the upper part of the cliff that juts out.
Use a 4B pencil to shade along and inside the thin shapes on the face of the cliff. This shading will represent shadows on the various bumpy faces of the cliff as well as shadows within some of the cracks and grooves. Apply a heavy layer of shadow just under the top portion of the cliff (under the vertical markings). This heavy shading will help to create the illusion of the rock protruding.
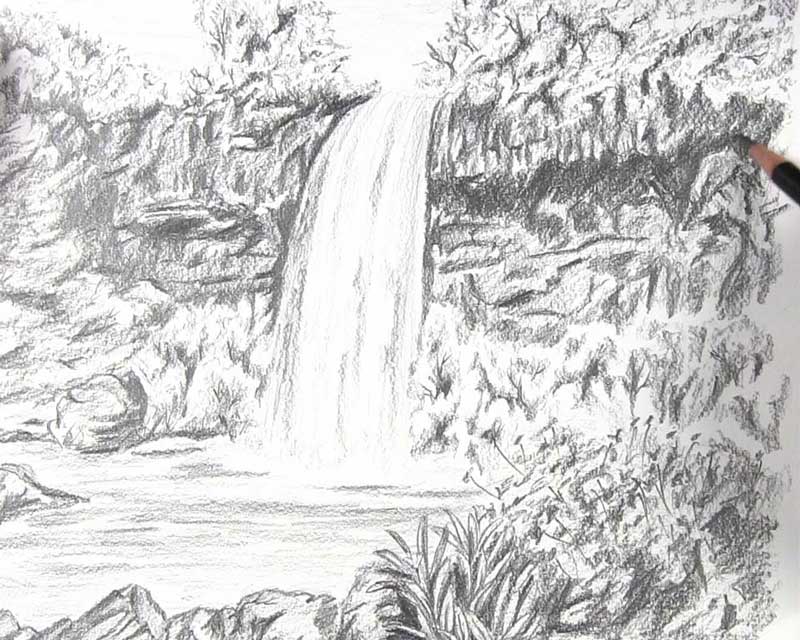
Finish the Rocky Texture of the Right Cliff
With your 2B pencil, shade the open areas of the upper cliff area. Apply a midtone value that is darker than the big shadow area created by the 4B but lighter than the trees and bushes overhead. As you shade next to the darker grooves in the cliff, gradually transition to lighter tones nearby. This creates a three-dimensional effect on the rocky surface.
Now, let’s work on the middle part of the right cliff. Put some light base shading on the rocky surface just above the lower trees and bushes. Use darker patches of pencil markings in various directions to further mold the rough texture on the cliff.
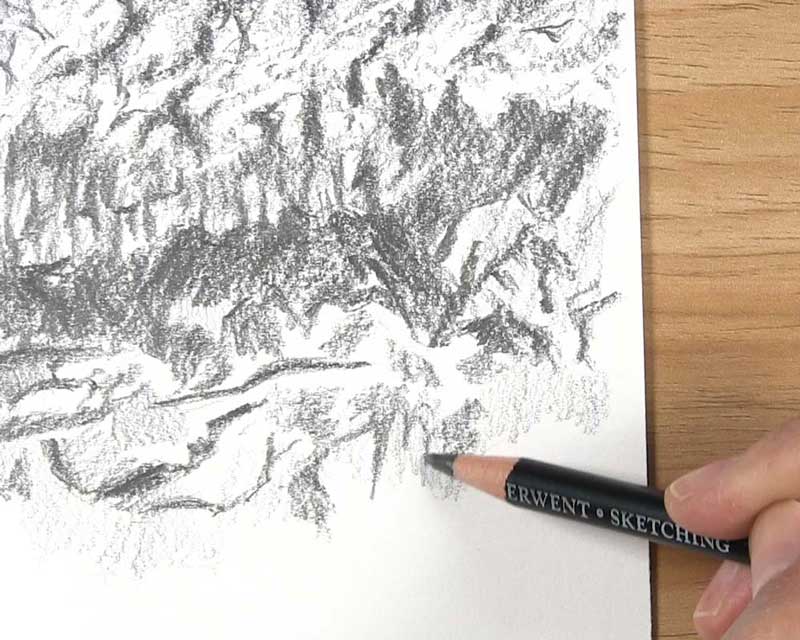
Continue to build up the rugged surface by using midtones and highlights between the darker crevices. Draw additional grooves and cracks in the rocks. Whenever you draw rocks and cliffs, a range of values combined with a few extra details can help to bring out the texture you would expect.
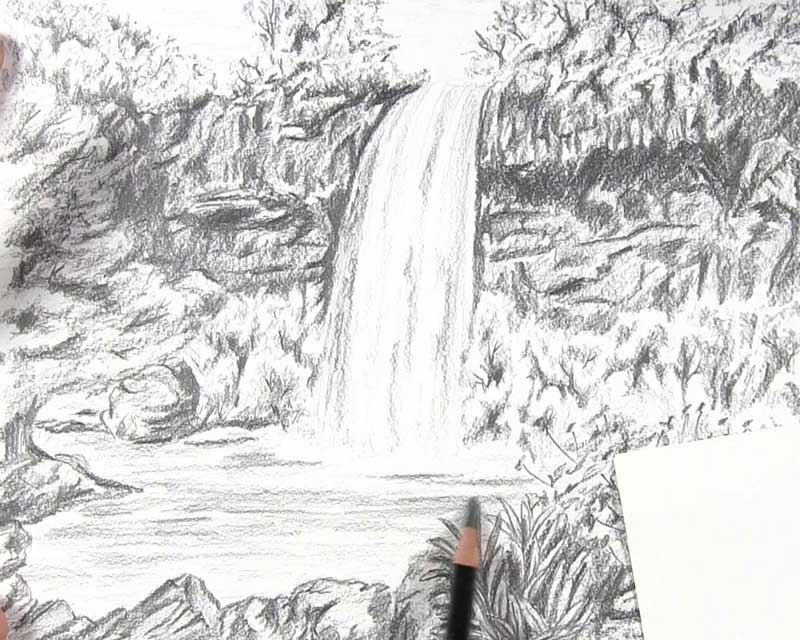
Draw the Bottom Foliage of the Right Cliff
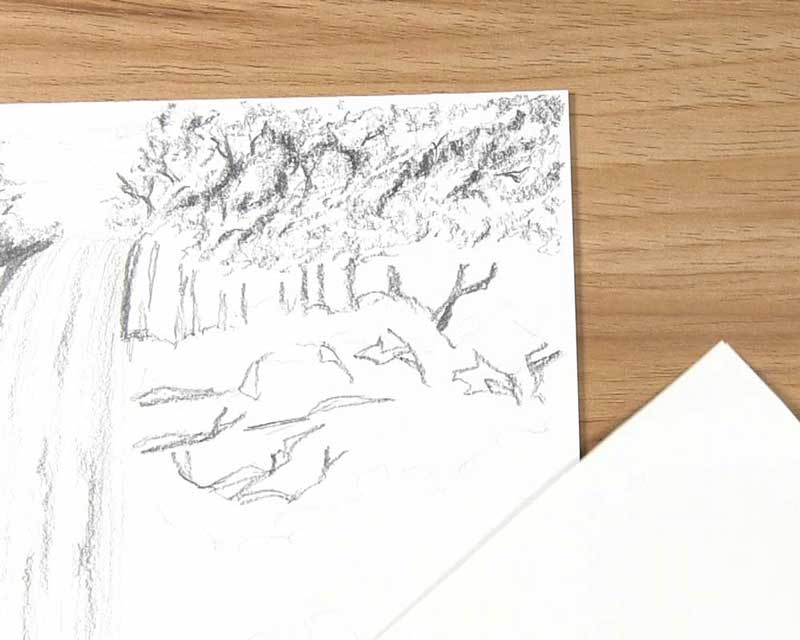
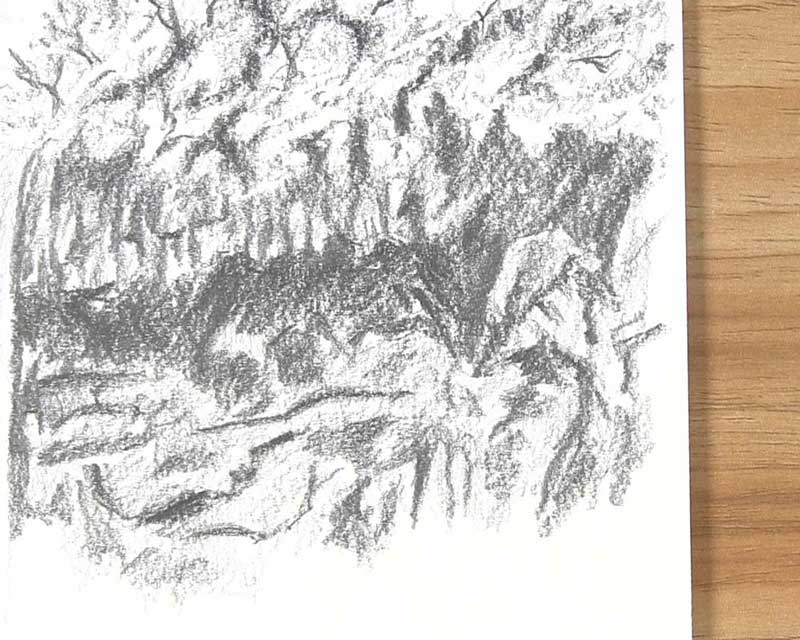
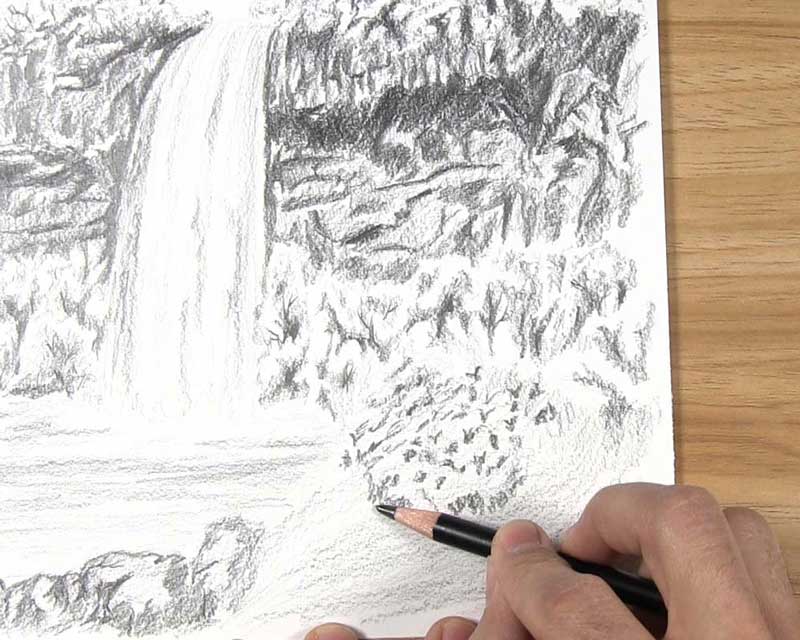
Start shaping the shadow areas of the trees and bushes along the bottom edge of the right cliff. Sketch abstract shapes that will allow the various leaf clusters of the foliage to form.
Now, we can develop the foliage here just as we did in the other parts of the drawing. Pick one area of shading. Make a small portion of that shading darker. Then, as you get closer to the lighter areas, gradually lighten your touch. Use a mixture of short circular and choppy markings to suggest the leaves in the highlighted parts.
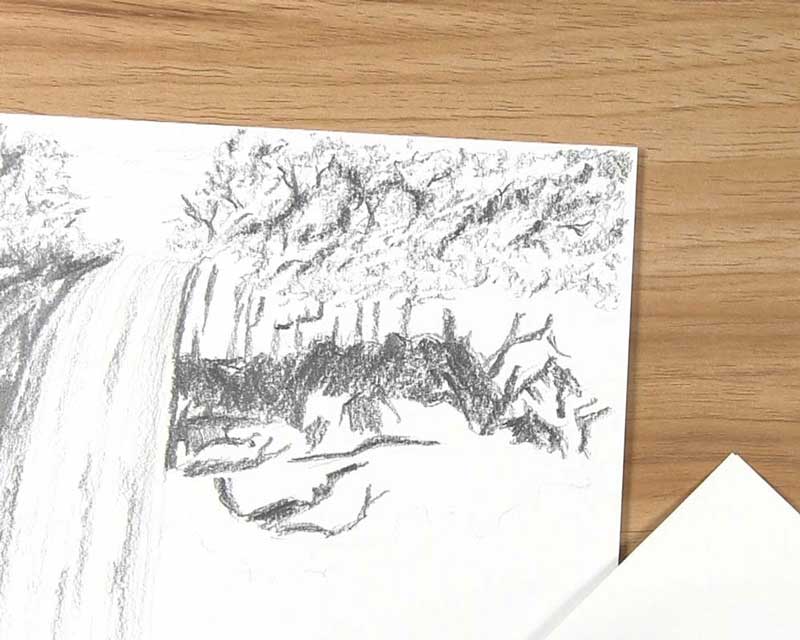
Repeat this process to suggest the leaves in the rest of the trees and bushes. You can use the short and choppy markings in the tighter areas. If you wish, you can also use longer hatch marks in some of the more open areas. Also, add some darker tones to the cliff area if more contrast is necessary between the cliff and the top of the foliage.

Draw a few tiny branches coming from the darker areas into the lighter areas of the leaves. When you draw branches, it’s a good idea to move your pencil from the bottom of the trunk or branch upward, and taper the lines as you approach the end of each branch. Even though we are drawing tiny, far-away branches, the process is very similar to drawing larger branches.
Draw the Foreground and Finishing Touches
Our waterfall drawing is coming along! Let’s finish up by drawing rocks and plants in the foreground. Then we can add some final details.
Draw Rocks in the Foreground
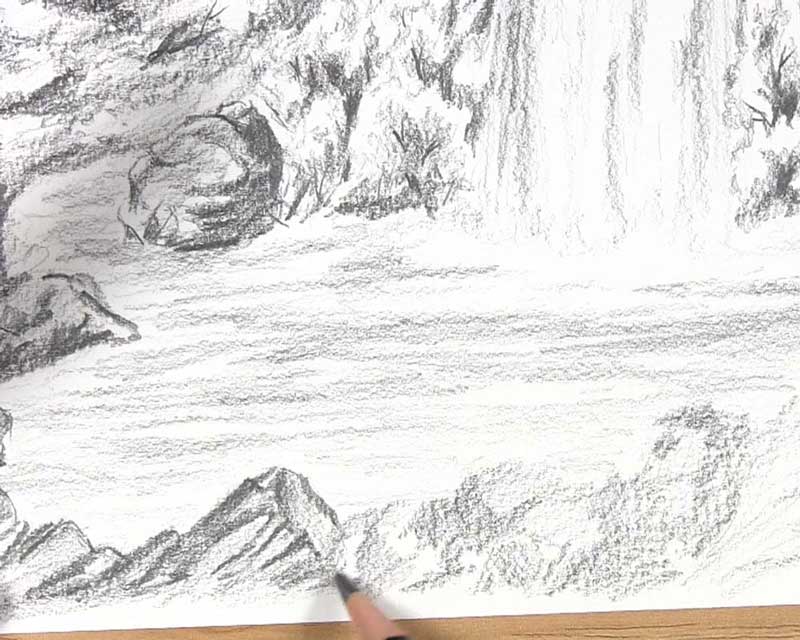
Let’s first draw some rocks in the foreground of the waterfall. Start by drawing a few rocks in the lower left corner.
Sketch a light, rough base layer of tones along the bottom edge of the drawing. Vary the direction of your pencil strokes so they mimic the collective shape of additional rocks. Also, create a combination of darker and lighter surfaces while keeping the overall layer light in value.
Create a base layer of light shading over the remainder of the foreground. We will draw some plants here pretty soon.
Next, return to the lower left corner. Add details to the rocks by applying shadow tones over the areas where the base layer is already slightly darker. Make sure to draw some additional bumps and cracks in the rocks.
Continue in this manner to draw details and shading on the rocks. As you shade the rocks, be aware of the various faces on each rock, and apply different values to each face.
Draw Plants in the Foreground
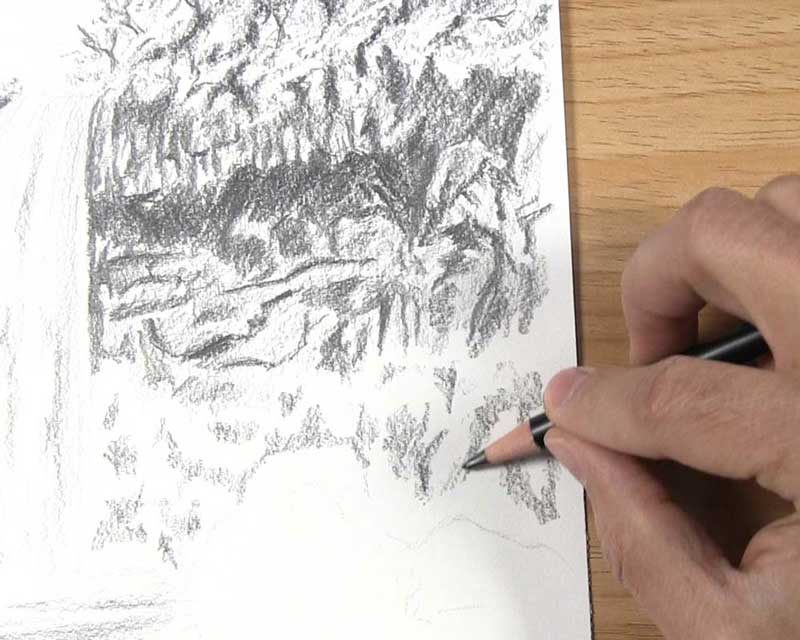
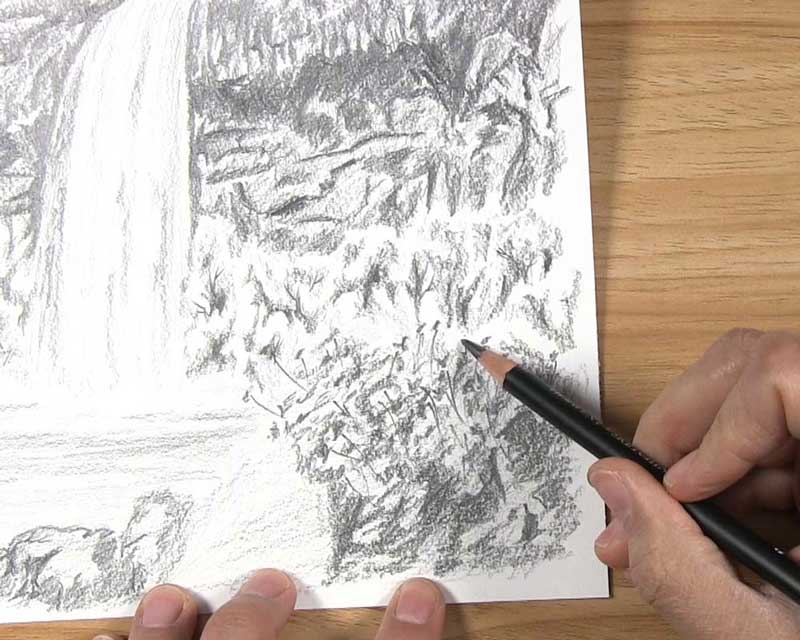
I decided to take a different approach to drawing the plants in the foreground. This is mostly because these plants are much different from the foliage we have drawn up to this point. Begin by drawing a series of short markings near the top of where the plants will be.
Create a series of irregular patches of shading near the bottom right corner of the drawing. Just like when drawing a patch of grass, much of this shading will serve as the negative space of shadows that will shape the highlighted areas of the plants.

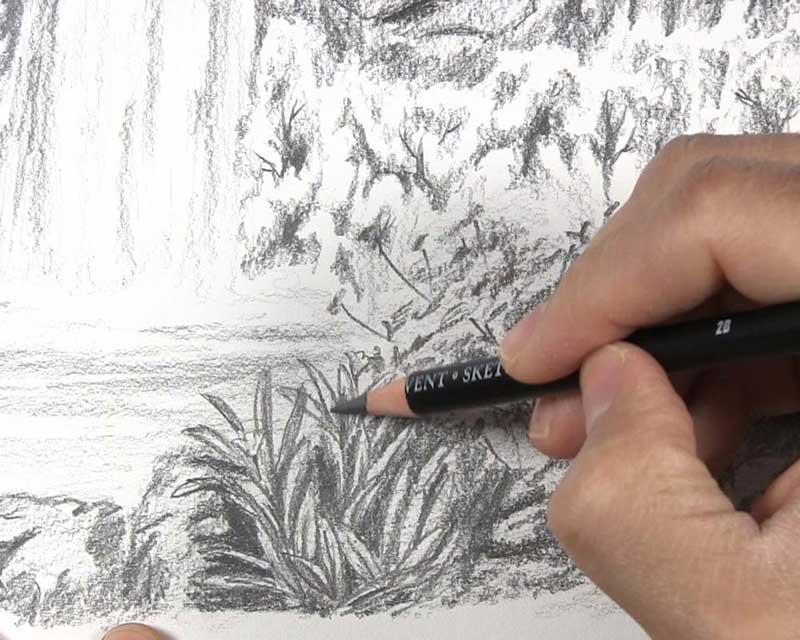
Draw thin lines that connect the short markings at the top to the shaded areas near the bottom. Use a 4B pencil to work in another layer of shadow atop some of the negative space to build the density of the mass of plants.
In between the rocks in the foreground and the plants we just drew, there is another species of plant consisting mostly of tall leaves and a few flowers. Draw the outline of these tall leaves. Make a few of them curve in opposing directions and even overlap one another. Draw a few visible flower petals too.
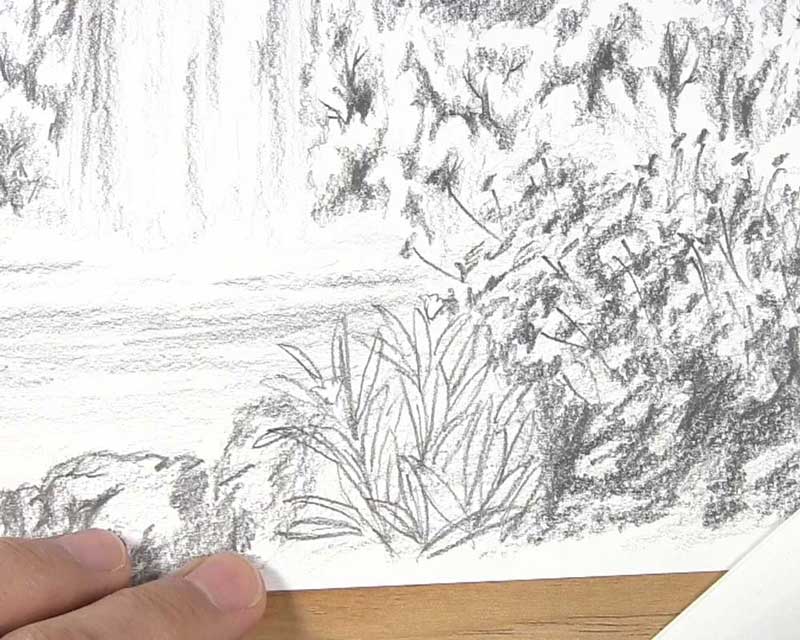
Use a 4B pencil to shade the space around the leaves. This helps to create shadow behind the plants while also adding some volume to the subjects in our foreground.
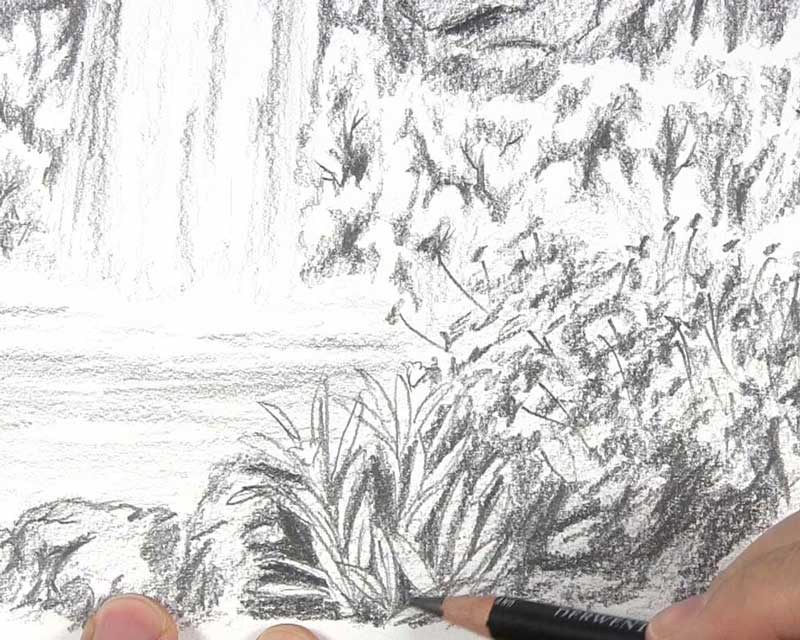
With your 2B pencil, carefully shade the individual leaves. The tones you apply should be a lighter value than the background tones created with the 4B. Don’t forget to leave some areas of highlight on the leaves. You can do this by occasionally shading on one side of a leaf while leaving the other side untouched.
Add the Finishing Touches to the Waterfall Drawing
As always, the last steps involve looking over our waterfall picture and deciding which finishing touches to draw, if any. The finishing touches you add to your drawing may differ from mine. Nonetheless, I will go over mine to give you some ideas. First, I decided to use a 4B pencil to build additional contrast into the shadows of the cliffs. A good way to build contrast is to shade alongside areas of much lighter value, such as where the waterfall touches the cliff on its left edge.
Next, I added some much smaller rocks in the water beside the big boulder. Also, I drew a few more ripples in the water next to the tree. In the tree, I added a few more leaves and used my kneaded eraser to create some highlight in the trunk.
After that, I put a little more shading in the water. I used horizontal pencil strokes that glided along the ripples and the mist at the base of the waterfall.
That was followed by another layer of tones over the dark shadow areas of the right cliff.
The final step I recommend is to draw a few sprigs of thin grass between the rocks in the foreground.

And that’s it! That is how to make a waterfall drawing!
Tutorial Recap
For a quick visual recap of this tutorial, take a look at the image below. It shows you a progression of the main steps for how to draw a waterfall.

Keep Drawing Waterfalls
If you are lucky enough to live close to a waterfall, try to draw it from real life. If it’s easier, take a photo of it instead, or use other waterfall photos as references for practice. Just keep practicing! Use methods from this tutorial and apply them to other waterfall drawings.
The beauty in drawing landscapes is you don’t have to draw everything exactly as you see it in your reference photo (or real life). You can move things around, add things, take things away, or replace things. As long as you are drawing a decent suggestive representation of the individual pieces of your landscape, you are likely to end up with a pleasing and satisfying drawing. As you continue to practice, you will see just as much beauty in your waterfall drawings as you do in your sources of inspiration.


Thank you! A good learning experience!
You are welcome, Sandra!