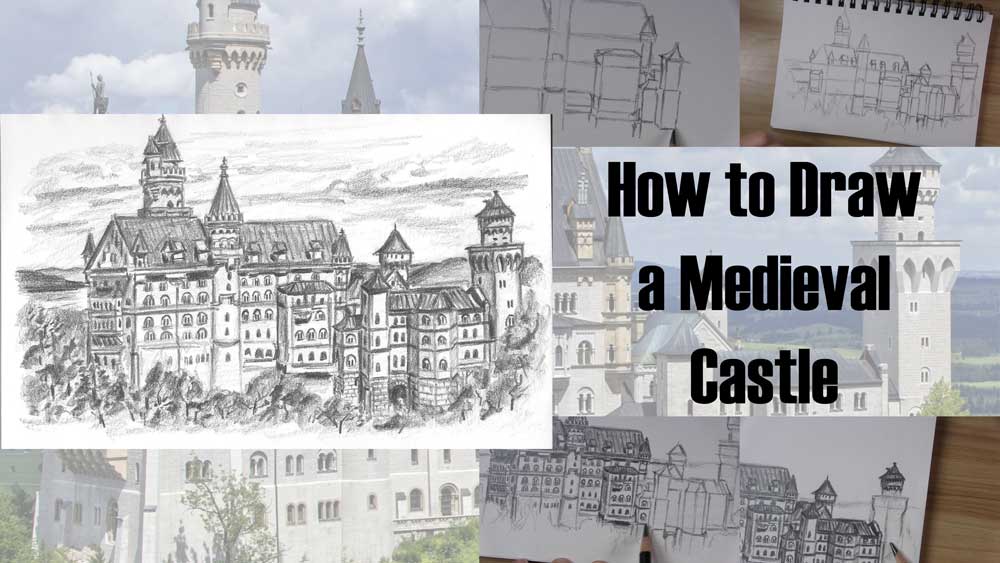
How to Draw a Medieval Castle
Castles served as both the grand homes and fortresses of rulers from centuries ago. Looking at the immense size and complexity of a big medieval castle might make you think it would be nearly impossible to draw.
However, that is far from the truth.
While it may be true that a realistic castle is not necessarily the easiest thing to draw, it is very possible and maybe even a little easier than you might first think.
Stick around to learn how to draw a medieval castle step by step!
Table of Contents
Use a Reference Photo of a Medieval Castle
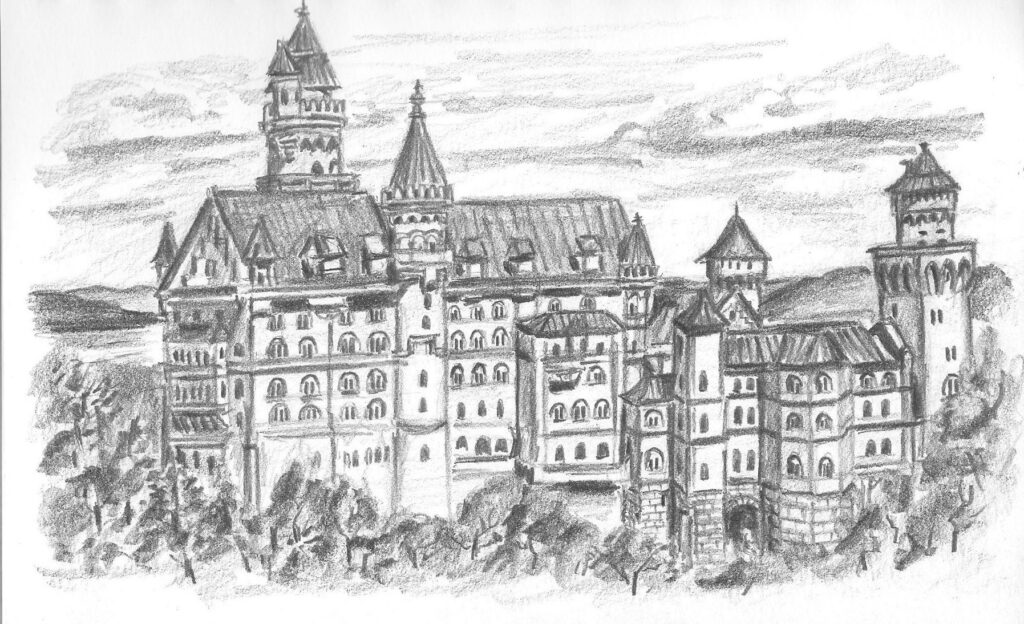
Here is the reference photo I used for this tutorial. This is a real castle in Bavaria, Germany. It is called the Neuschwanstein Castle.
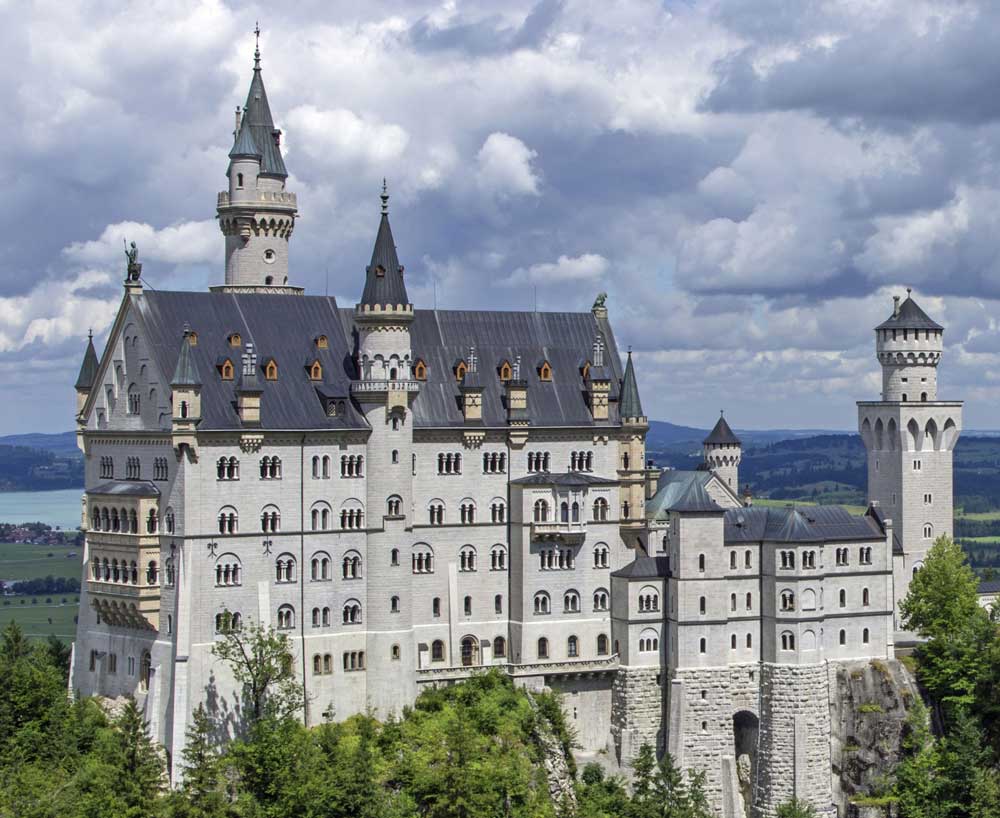
Since it was built in the 19th century, it may not be a true medieval castle, but it was built in a style that replicates castles of the 13th century. Therefore, I decided it would still be a nice subject for this tutorial and beneficial for anyone wishing to draw a beautiful, fairy tale castle.
Materials Used for This Drawing
Here is a list of the materials I am using for this drawing.
If you don’t have some of these materials, that’s okay. You can still make do with a regular pencil and eraser, as long as you just get started!
If you wish to purchase any of these materials, they can be found at your local art store, or you can buy them using the links below.
Affiliate Disclaimer: The links on this page are affiliate links. I will receive a small commission if a purchase is made through one of these links. Learn more here.
- 2B graphite pencil
- Drawing paper (I sketched this in a sketch pad)
- Sheet of folded paper to prevent smudging
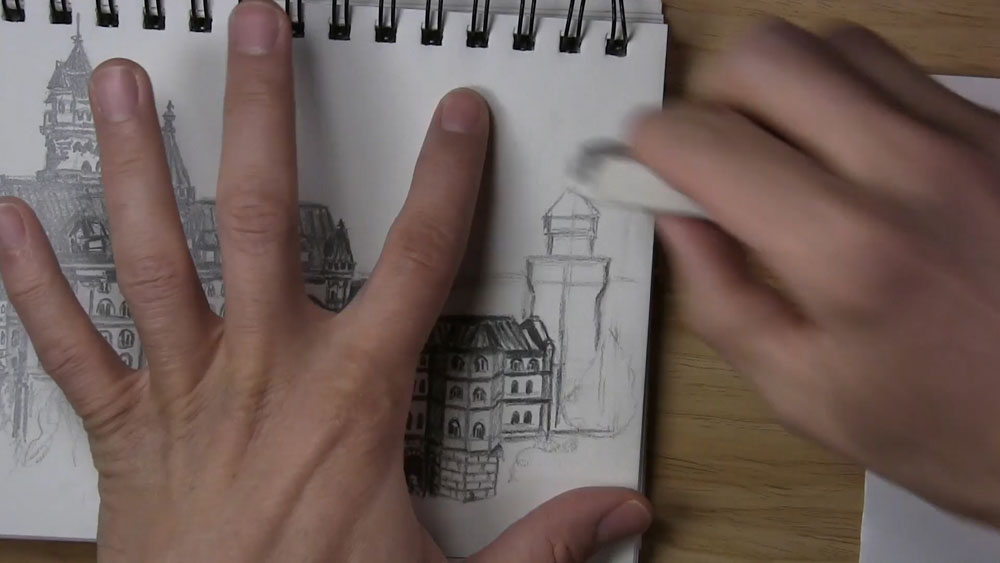
- Kneaded eraser
- Plastic eraser
How to Draw a Medieval Castle Video Tutorial
You can watch the time-lapse video version of this tutorial below. Watch it once all the way through to get a sense of the overall process. Then watch a second time and draw along with me, pausing as needed.
Draw the Left Side of the Castle
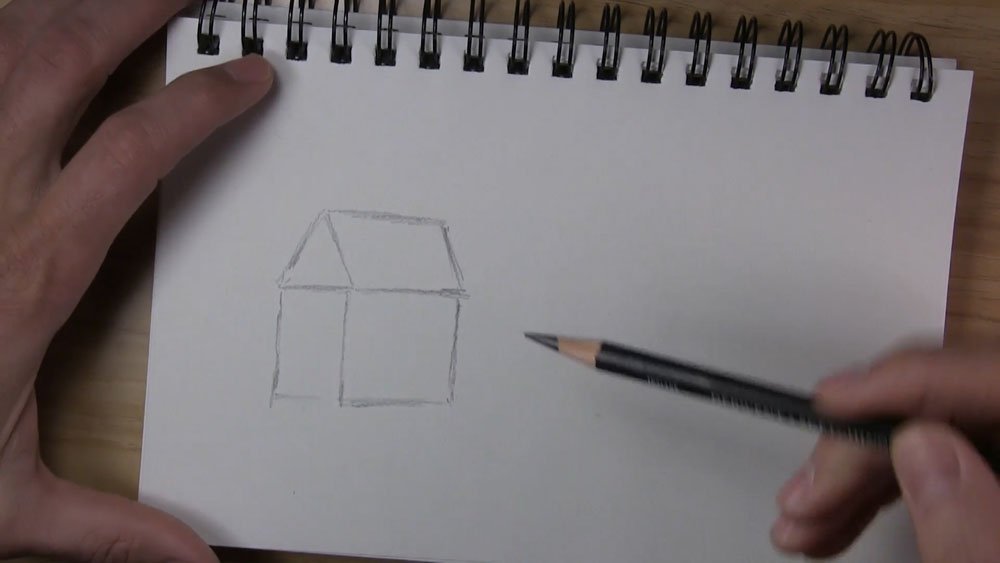
We will begin by using some very basic shapes to sketch the left side of the castle. Start by sketching a triangle. Then sketch a parallelogram shape to the right of and touching the edge of the triangle. Keep the angle of the right edge parallel to the triangle’s right edge. Next, draw three vertical lines extending from each corner and connect them with a horizontal line at the base. So far, we have a very basic house shape.
Extend the three vertical lines below the house shape. Then to the right of the house shape, sketch two rectangles, one short and one taller. These two rectangles actually represent a tall cylindrical structure or tower attached to the castle. Sketch a skinny rectangle on top and a cone on top of that. Then sketch a similar but larger tower on the other side.
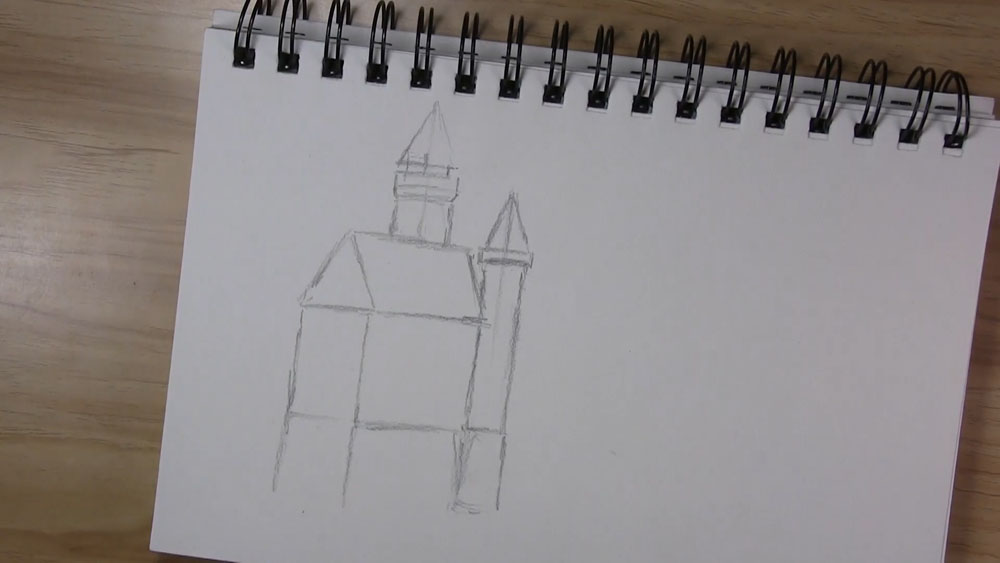
Sketch some details on the back tower in the form of vertical and horizontal lines and another tiny cone shape. Extend the roof beyond the right side of the tower in the foreground. Maintain the same angle as previously drawn with the other slanted edges of the roof. Then draw a horizontal line midway across the face, bending the line on the tower.
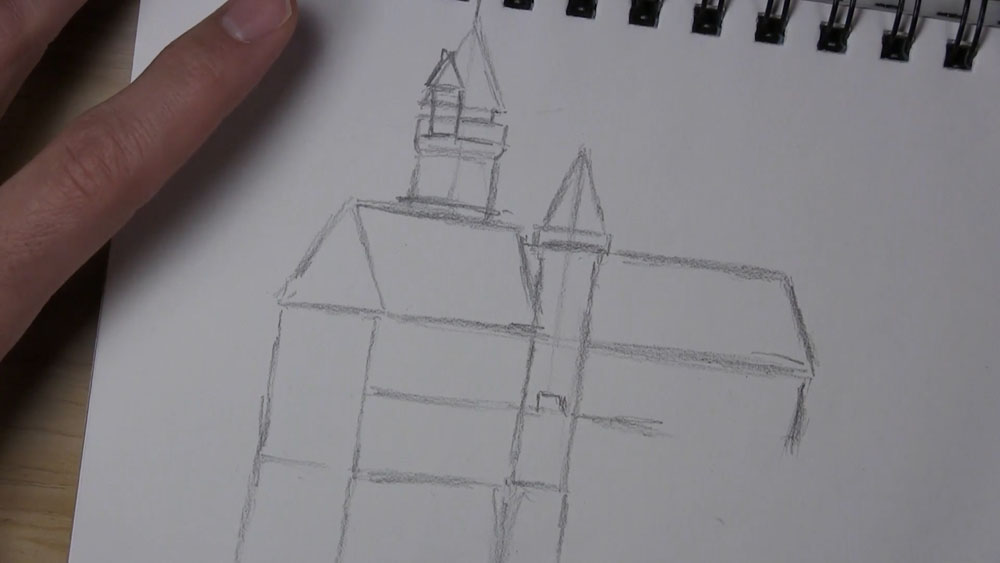
Continue using a series of basic shapes as you draw this part of the medieval castle. Sketch a rectangular prism protruding a short distance from the side facing us. Don’t connect the top of the prism just yet. A section of roof will go here in a minute. Then draw some horizontal and vertical lines on the lower portion of the castle. Curve the line on the tower to give it a cylindrical look. Draw another shorter cylinder and cone at the upper right corner.
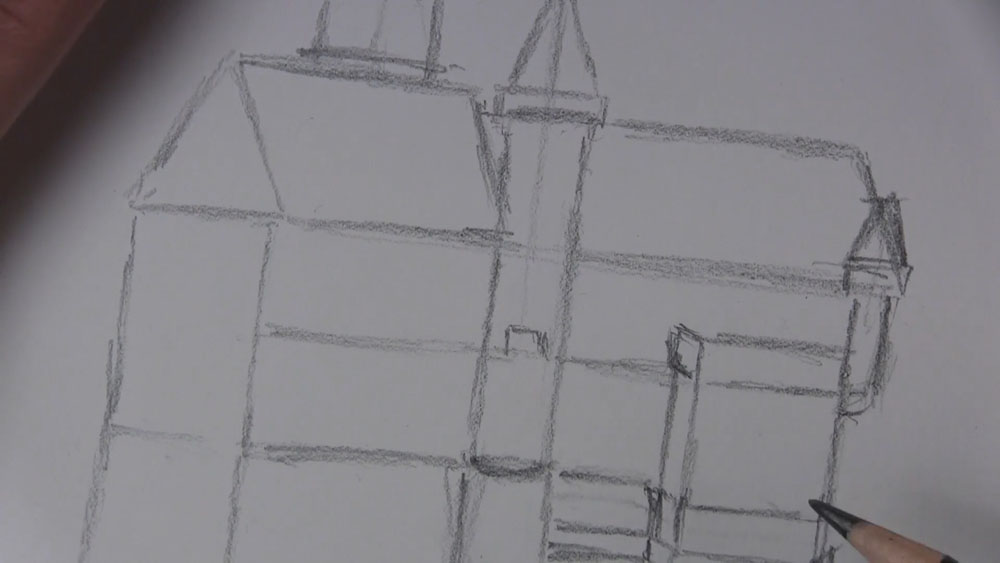
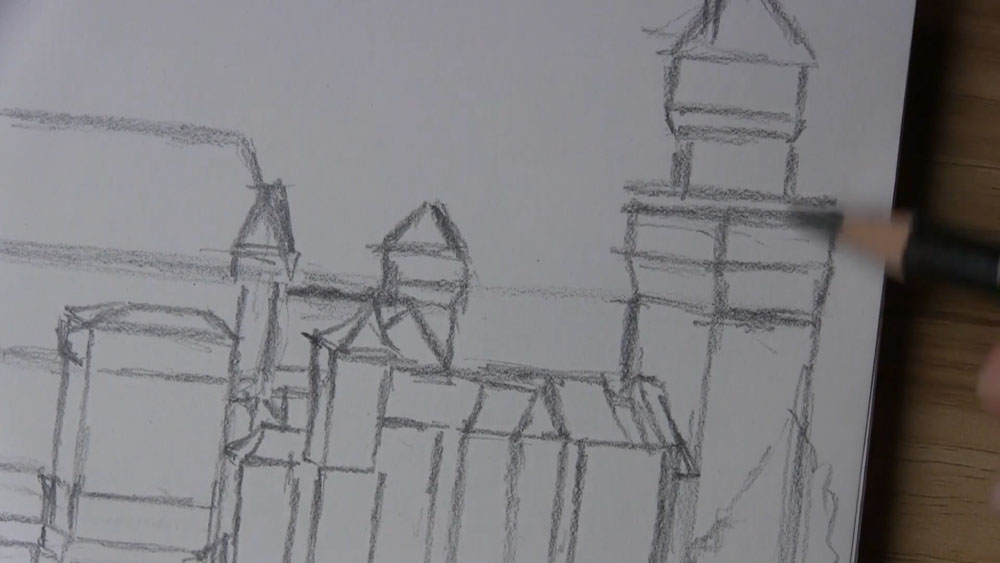
Draw the Middle and Right Side of the Castle
Now we are getting to another section of the castle. Keep sketching a series of rectangular prisms and curved triangle shapes for the roof sections.
Draw more tall rectangle shapes. Some of the rectangle shapes seen here represent an angular tower section of the castle with corners greater than the typical 90 degrees. Sketch a horizontal line for the base of the roof. Sketch guidelines for a tall tower on the right and a tree outline in front of it. Use rectangle and triangle shapes to complete the roof.
Okay, the tall tower outline on the right that I sketched here is much taller than the reference photo. This is an example of me making the mistake of using improper reference points to guide my proportions. I will redraw this later on at a proper size, so you can skip this step for now!
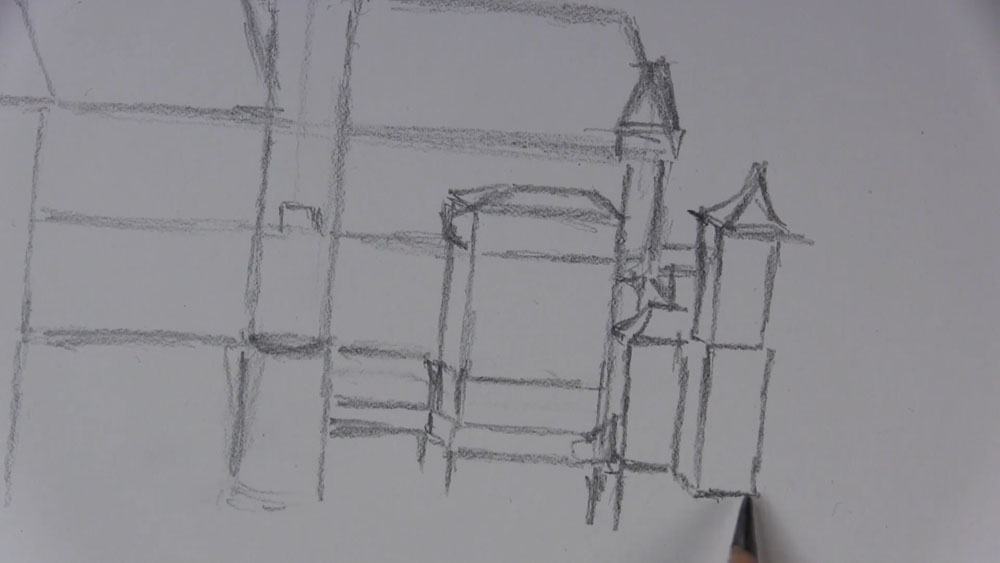
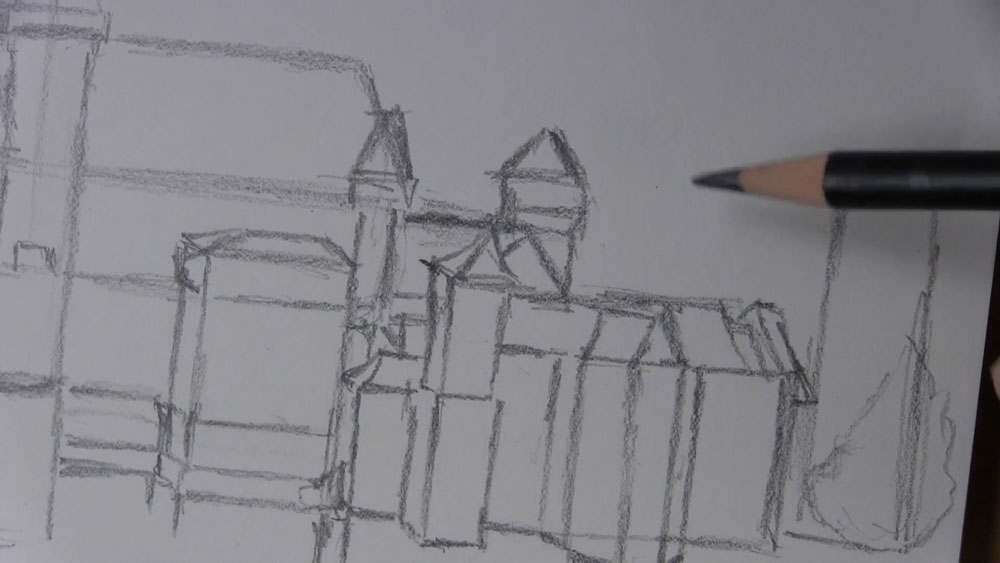
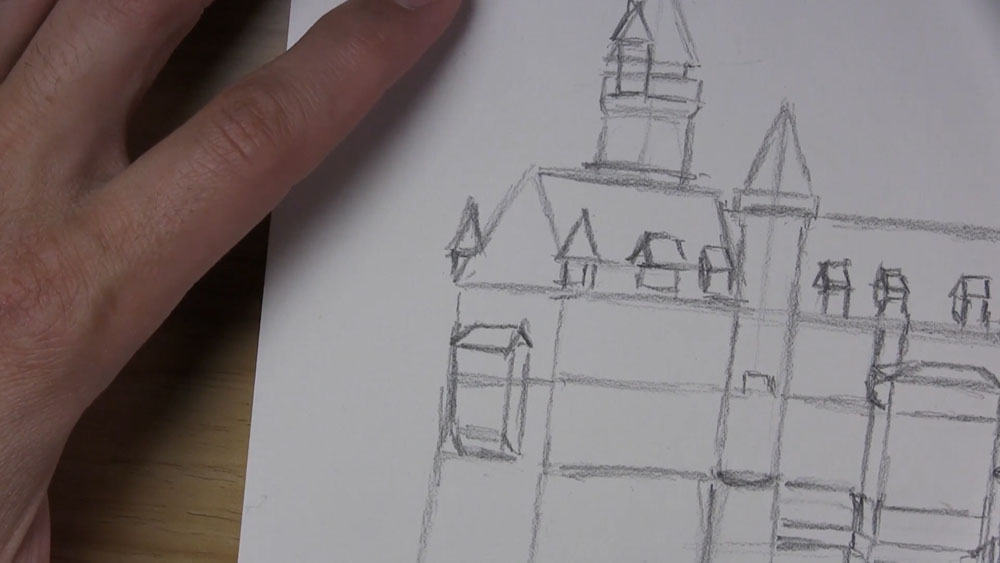
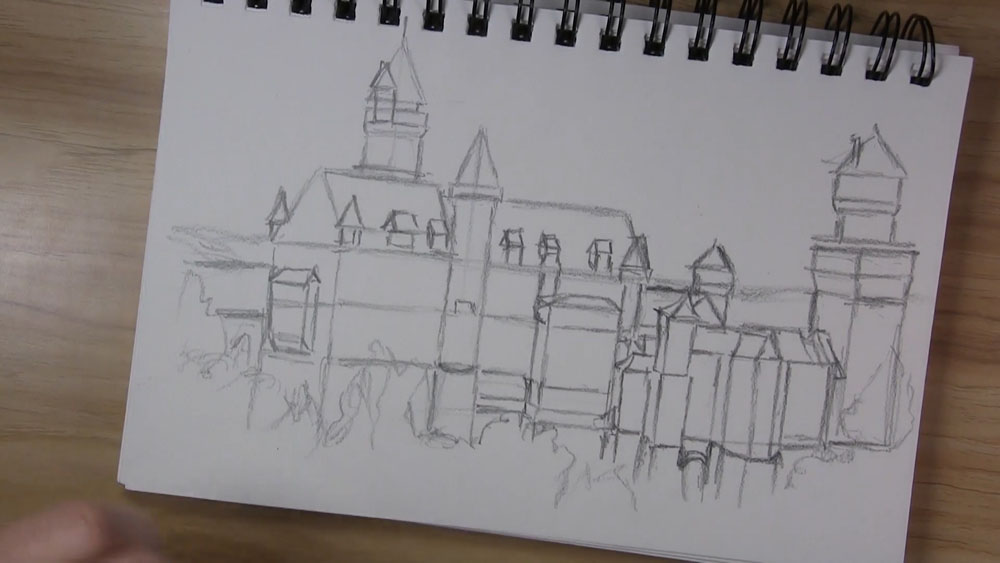
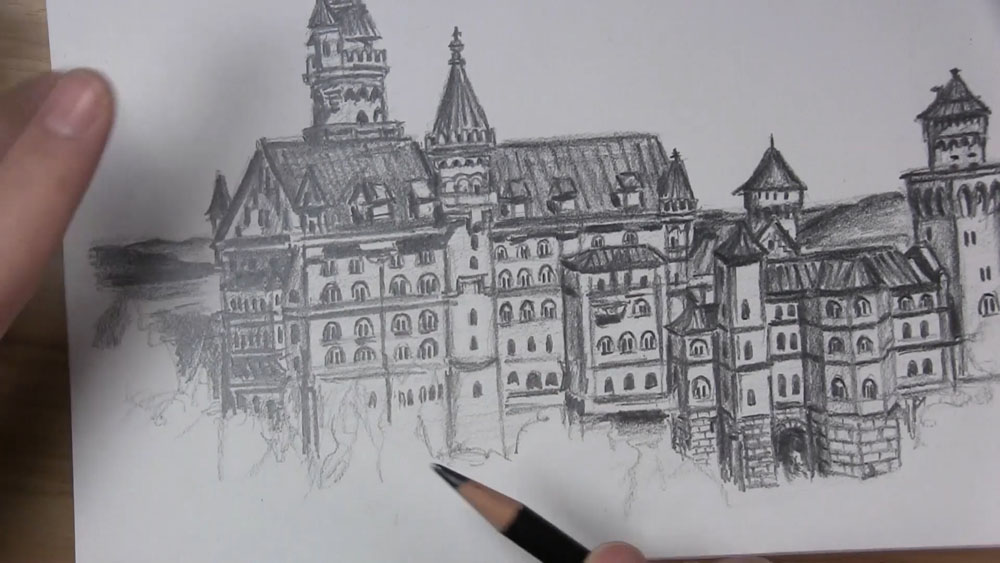
Draw the Finished Outline of the Medieval Castle
Next, we’re going to sketch a series of short, vertical, rectangular-prism-like structures that jet out from the lower edge of the main roof. Each of these structures has a little roof structure of its own.
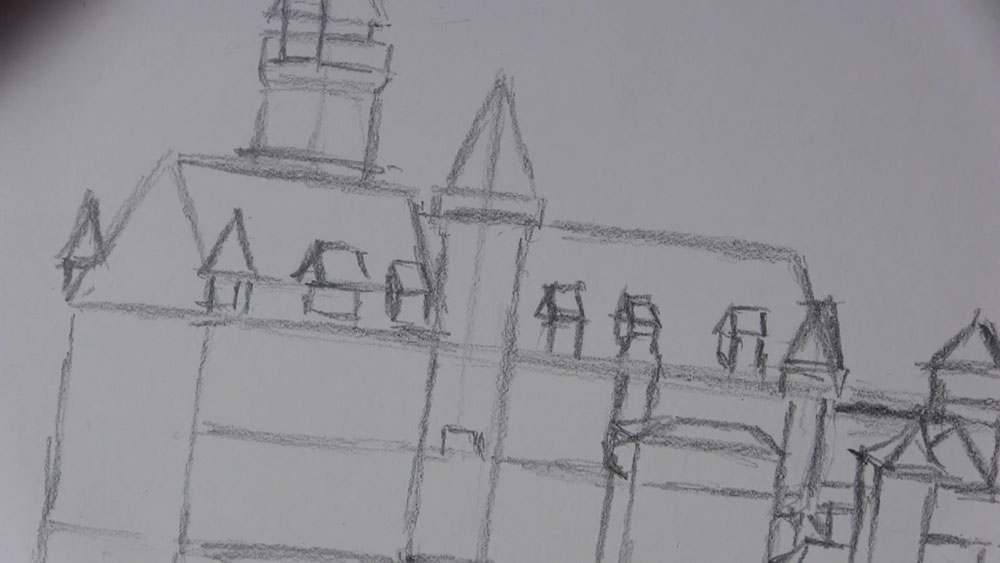
On the left side of the castle, there is a rectangular protrusion from the main building. Draw a skinny side and an angular bottom. Then draw a line coming toward the top. On the top, draw an angled roof.
Lightly sketch a rough outline of trees on the left side of the castle and in the foreground. Under the section between the main part of the castle and the right tower, draw lines extending downward to outline the stone structures at the castle’s base. Sketch a narrow arch too. Finish the base and tree outlines on the right. Sketch some rolling hills and a lake in the background. That completes the outline of the castle!
Shade the Left Side of the Castle
Next, we’ll shade the left side of the castle and begin to shade the roof. We’ll also add additional details like pillars, windows, and other various structural elements. Draw several short, black, vertical marks for the spaces between the pillars on the left side. In this drawing, the sunlight is coming from the right, so most of the left side should be in shadow. Also, sketch a deep cast shadow just under the roof, shade the roof, and sketch lines from the top of the roof going downward.
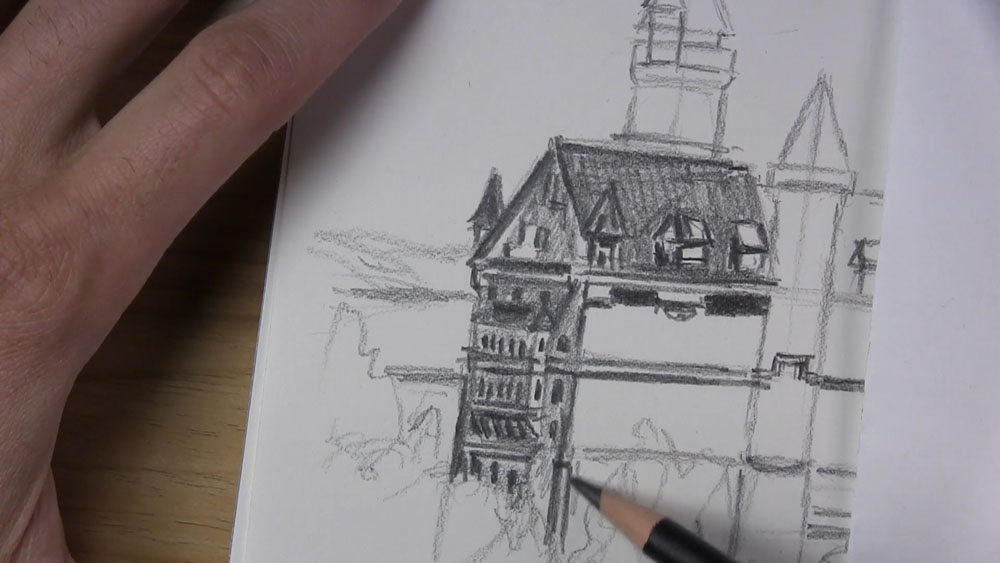
Put a very light base layer of shading on the white part of the castle facing us. Shade the cone roof of the tall rear tower and sketch vertical lines from the top of the cone. Sketch the battlements near the top and the arch-like design underneath them. Put shadow between these spaces and a dark slanted shadow on the left.
For the multiple windows and pillars on the face of the castle, here’s how to draw them. Sketch a row of four upside down “u” shapes or arch shapes. Then draw another row. Repeat this with two more rows underneath. It may be helpful to sketch a horizontal guideline for each row to keep everything aligned. Then draw the same narrow black marks that we did on the left side of the castle. Outline the top of each arch shape to create a shadow effect.
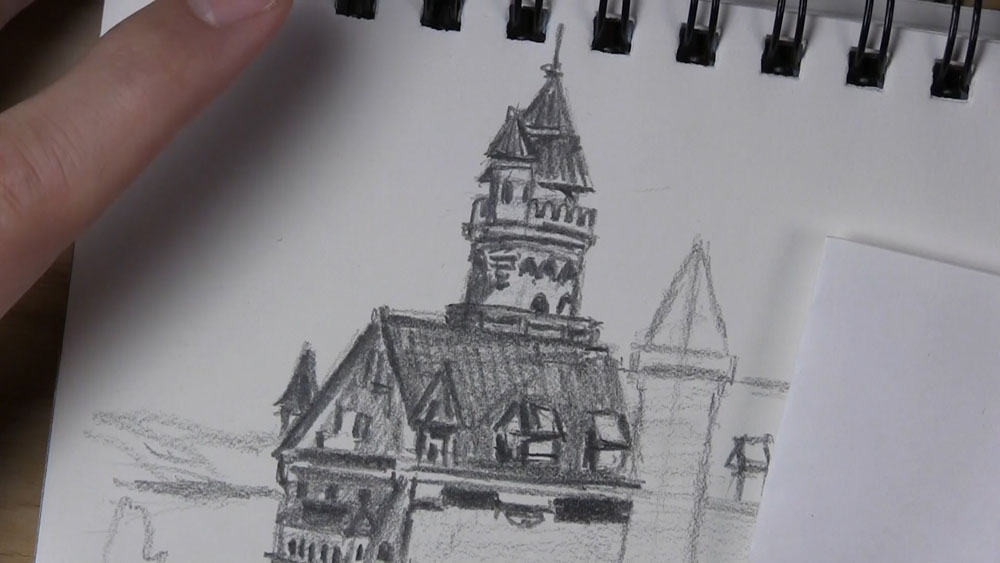
Shade the Middle of the Castle
Shade the cone roof of the cylinder structure in the same manner as with the taller tower. Put more shading on the left side where there is less sunlight. Sketch some arch designs just underneath. Put some windows down the center and a thin shadow along the left edge to help form the cylinder shape of the tower.
Continue adding details and shading to the middle part of the castle. Repeat the process with similar steps as before. Put shading on the roof and a cast shadow underneath. Keep in mind that the face of the tower on the left side is away from the sunlight and should have more shading. Draw the rows of windows and pillars aligned with the floors already drawn.
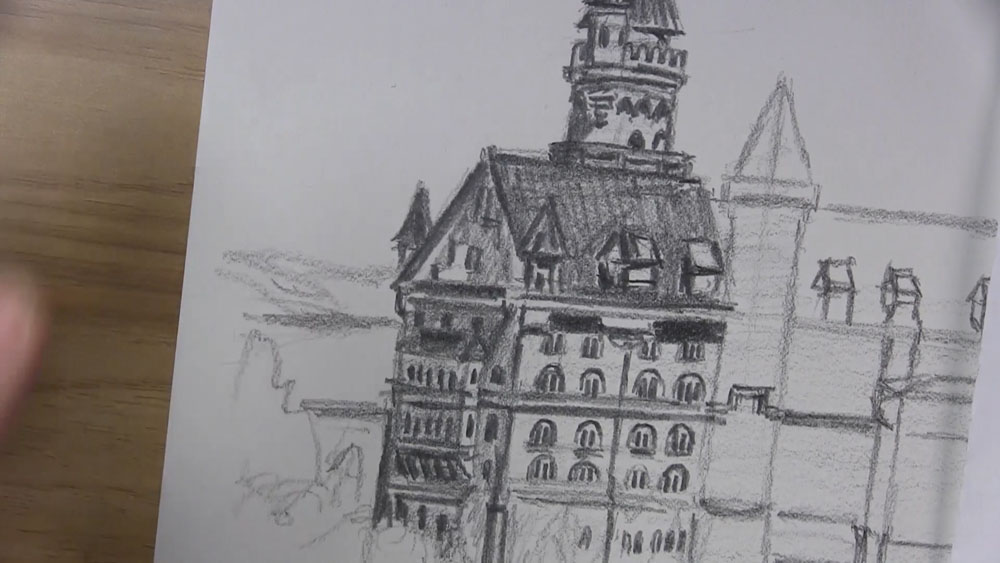
At the base of the castle, draw the stone by making parallel horizontal lines on each face of the building. Then use short vertical marks that stagger with each subsequent row. This is very much like drawing the pattern of a brick wall. Put more shading on the roof and the left side. Place windows and shading on the next tower and the other parts of the castle behind it. Put dark shading under the arch and the brick pattern around it.
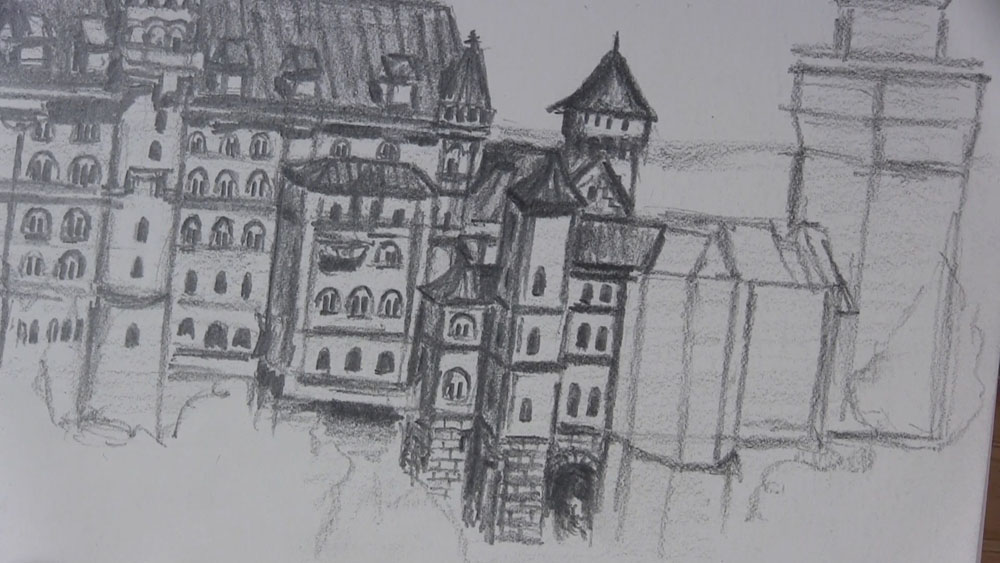
Now this next section is the part with the angular corners. Looks like it might have half an octagon as the floor. Place the darkest shadow on the left wall. Shade a slightly lighter shadow on the wall to its right. Leave the next wall the lightest. Draw the windows and other structural details on the remaining part of the castle, up to the tower on the right.
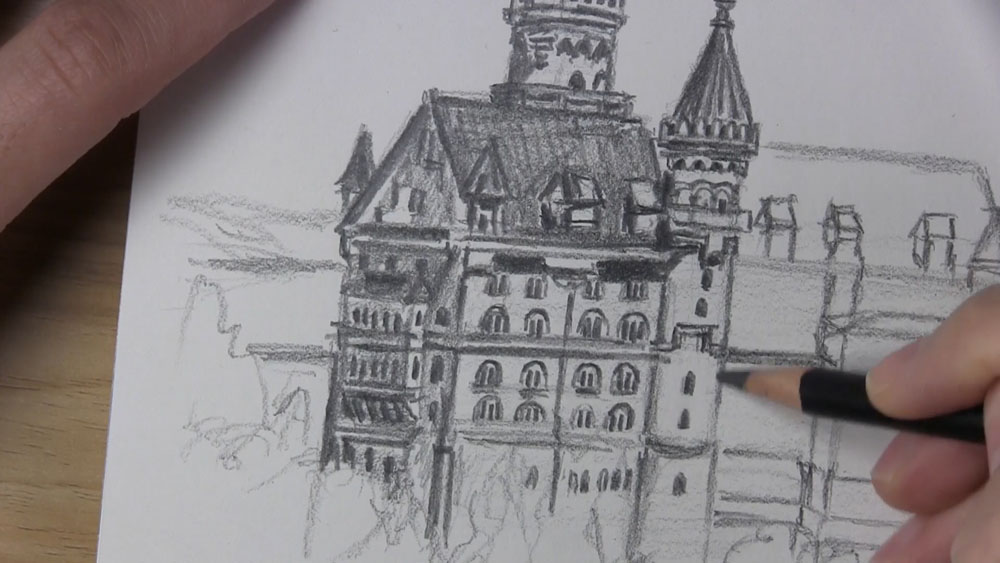
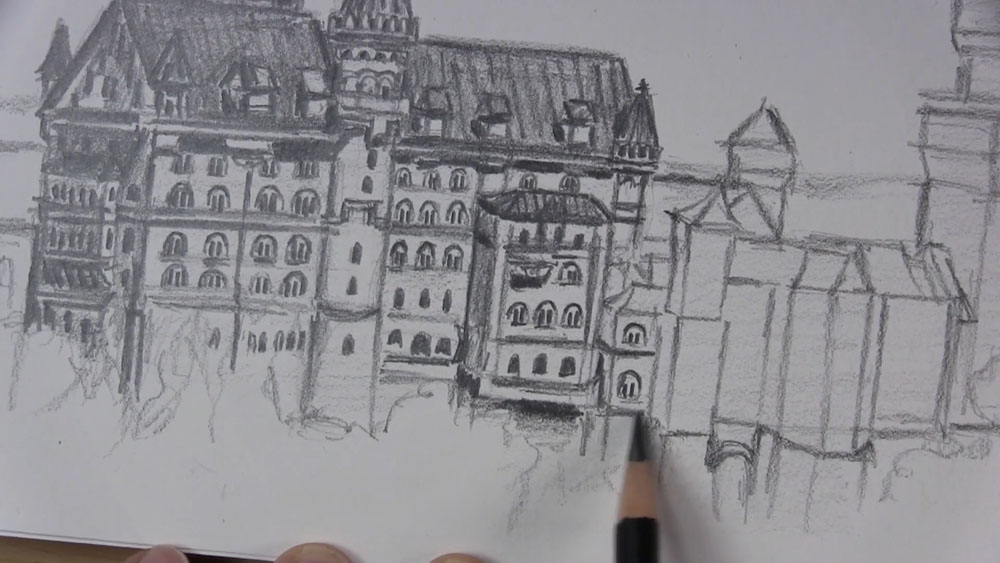
Draw and Shade the Tower on the Right to Complete the Castle
Okay, here’s where I correct my gigantic tower and replace it with something more proportionally accurate to the real castle. I’m sketching a horizontal guideline slightly above the main roof because I want the tower’s top to align along here. Then, I want the part of the tower with the flat walls to top out along just above the lower edge of the main roof.
Next, sketch the top of the tower with the curved walls and the cone roof. Mine still looks a little shorter than the reference, but I think it’s close enough for the purposes of this sketch.
Shade the roof, putting more shadow on the left side. Draw lines from the vertex to the base. As you develop the upper area of the tower, draw a dark shadow under the roof and swooping toward the left.
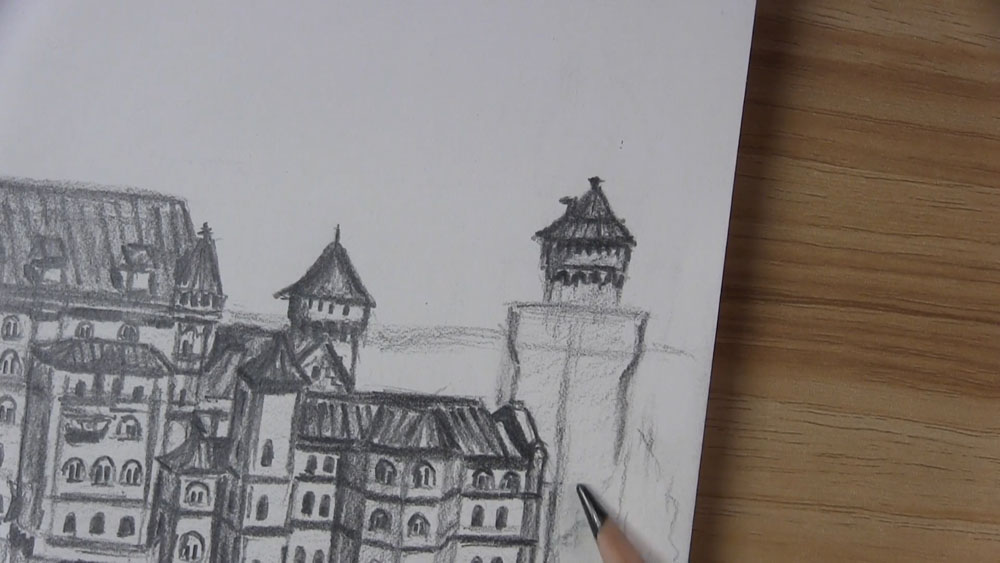
Place some windows, or maybe these are actually arrow slits, near the tower’s top. Working your way down, draw a skinny sideways rectangle. Draw two horizontal lines below that. On the top row, draw three arches on each side. Then draw lines from the arches down to the second horizontal line. Keep the angle the same as the sides. Place dark shadow along each arch structure.
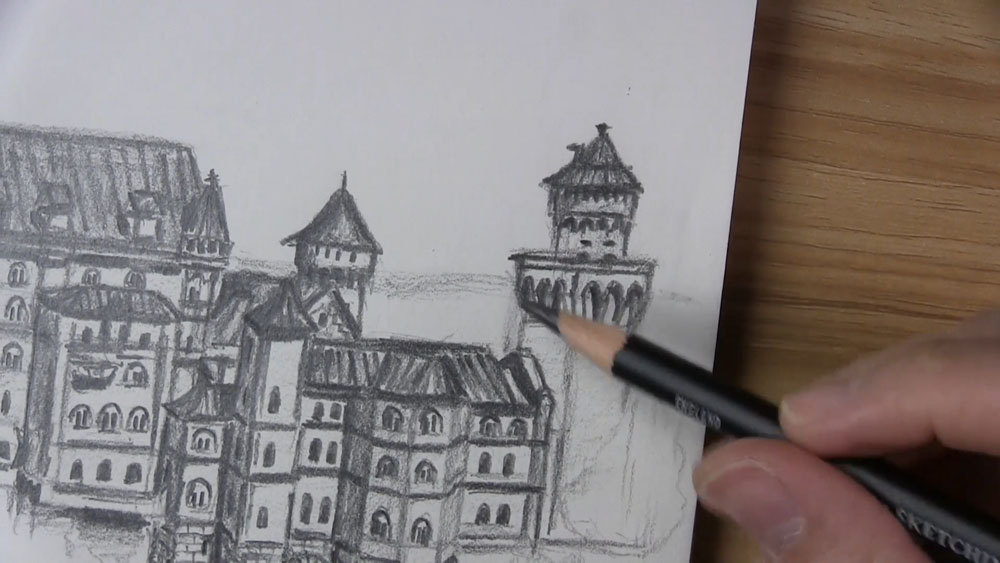
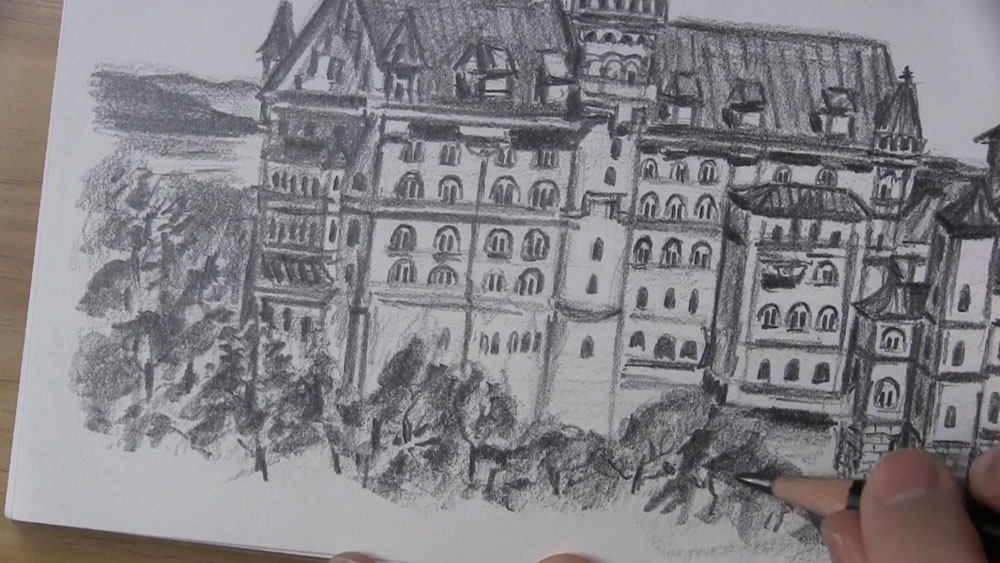
Sketch more windows or arrow slits down the sides of the castle’s right tower. Shade the tower’s left side. That pretty much does it for the castle itself. Next, we’ll work on the surrounding landscape.

Add Shading to the Surrounding Landscape
Put some shading on the hills in the background. Use a lighter touch for the more distant hills. Additionally, making the tops of the hills darker and the lower parts lighter can help to create a hazy effect. Sketch a few horizontal water lines in the lake.
Now, I’m just going to sketch a loose representation of the trees by first creating a base layer. Then, a few shadow areas and some indications of trunks and branches here and there will give us plenty of vegetation surrounding our castle.
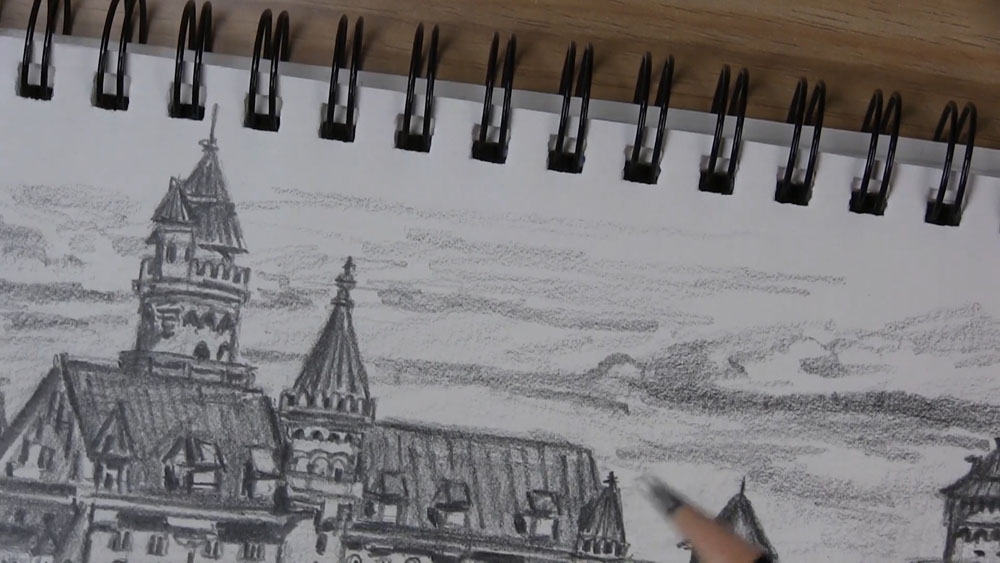
For the sky, I decided to go with a less-cloudy look than what is in our reference. In order to do this, just lightly shade the lower part of the sky. Then sketch the shape of some clouds with heavier graphite application along the lower parts while keeping the upper parts lighter.
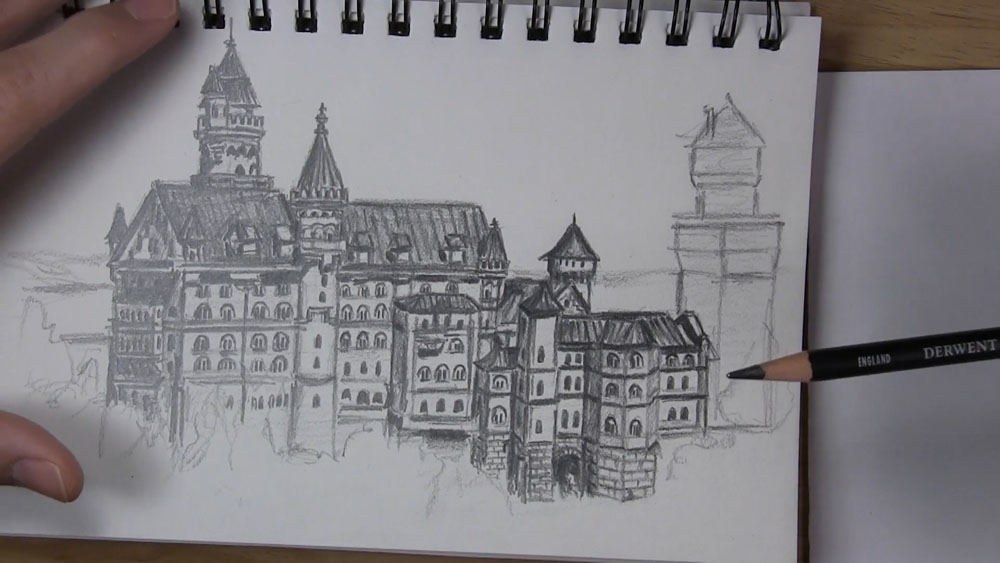
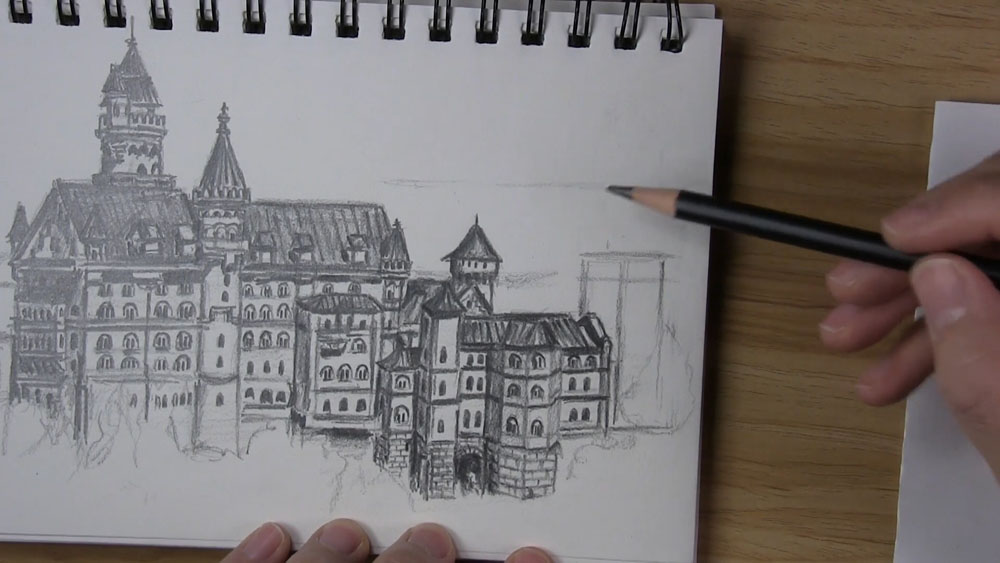
And that is how to draw a medieval castle!
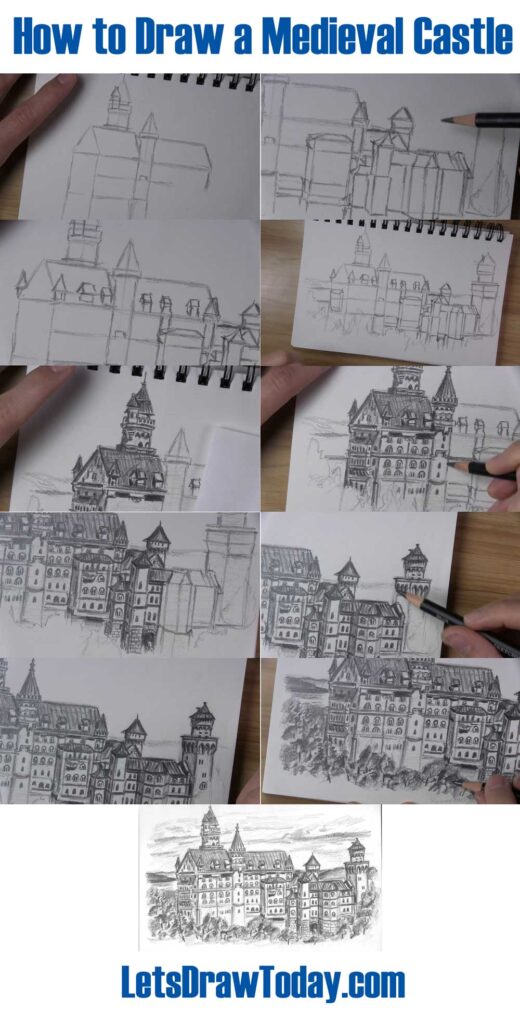
Tutorial Recap
For a quick visual recap of this tutorial, take a look at the image below. It shows you a progression of the main steps for how to draw the medieval castle.
Tips for Your Next Medieval Castle Drawing
The next time you wish to draw a fantasy castle, here are a few pointers you can remember from this tutorial:
- Try using a reference photo while you draw the castle so you gain a more realistic representation.
- Start off by sketching basic shapes to establish the overall frame of your castle. Then build on additional details.
- If you are using a reference photo, don’t feel an overwhelming need to include every little detail in your drawing. You can still create a loose sketch that will result in a realistic representation of a castle. The amount of detail you add is up to you. When I started sketching the castle in this tutorial, I didn’t know what to expect because I never drew a castle before. I was a little intimidated by all of the detail in the photograph and thought my final sketch would be much looser. However, as I got a rhythm going during the drawing process, I got enough flow that motivated me to keep going!
- Consider using both a color and a black-and-white version of your reference. You can use both photos together to give you information about light and dark values as well as subtle changes in color, such as the slight variations between the lighter and darker shades on the various faces of the castle’s outer walls.
- Try drawing a variety of castles. You can sketch simpler castles or attempt even more detailed drawings of more complex castles.
- Consider drawing the landscape surrounding your castle. Include the trees, any nearby water, and clouds in the sky to accurately depict your castle’s overall setting.
Thank you for visiting my tutorial on how to draw a medieval castle!


I fully enjoyed working this castle. You made it so easy and fun. I like both the video and the step by step.
Thank you so much, Mary! That means a lot. I’m so happy you enjoyed it!
Thank you I did this for a castle project at school and got good marks! It looks very impressive
my only advice would be is maybe not to have as many windows/arches because it took me like 3 days to draw all of them
very good though 🙂
Thanks for the tip! I’m glad this helped you with your project!