How to Draw Ear Piercings with Realistic Results
Many artists have a tendency to oversimplify the ear or cover it up with elaborate hairstyles in an effort to avoid drawing it. But the ear itself is nowhere near as complex as it seems. Covering the ear up or oversimplifying also means that the artist is missing out on an opportunity for growth. That’s why in this tutorial, we’re going to take things one step further. We’re going to draw an ear with piercings!
Please work alongside me throughout this tutorial. Take your time and work at your own pace, but try and do each step as you read through it. As with my other drawing tutorials, don’t be afraid to stop and take your time with any section. Work through each step as best as you can and then move on to the next. I will guide you with tips, advice, and a detailed explanation of the process.
Note: I would like to thank artist Noble McCredy for contributing his drawings and tips for this tutorial!
Table of Contents
Use a Reference Photo of Ear Piercings
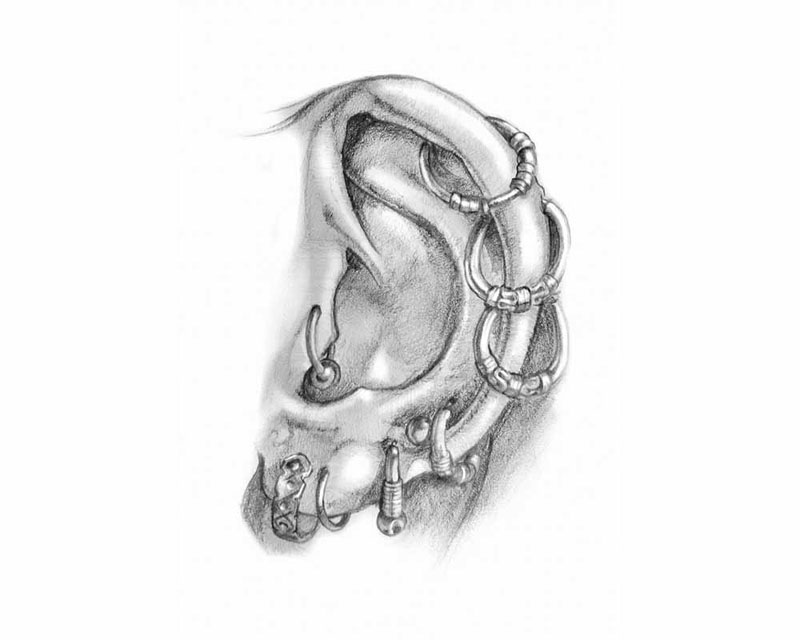
In this tutorial, I will show you how to draw ear piercings by using the following photo as a reference:
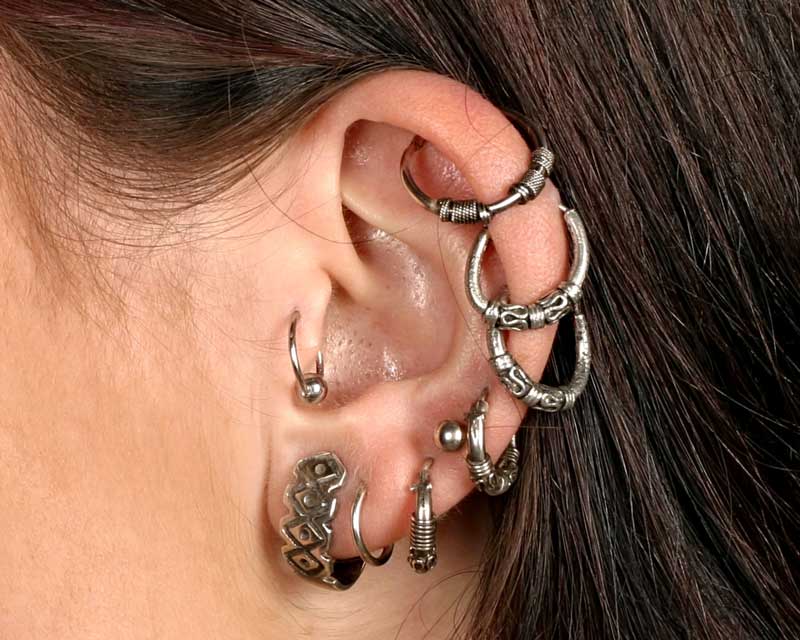
The shiny metal next to the smooth skin gives us an interesting range of textures. Keep reading to learn how to recreate these textures in a realistic manner.
Materials Used for This Drawing
Here is a list of the materials used for this drawing.
If you don’t have some of these materials, that’s okay. You can still make do with a regular pencil and eraser, as long as you just get started!
If you wish to purchase any of these materials, they can be found at your local art store, or you can buy them using the links below.
Affiliate Disclaimer: The links below are affiliate links. I will receive a small commission if a purchase is made through one of these links. Learn more here.
- Sketchbook
- 5mm graphite stick
- HB and 2B graphite pencils
- Mechanical pencil
- 0.5mm 2B lead refills
- Kneaded eraser
Block-In the Ear and the Piercings
The block-in is probably the most important stage in any drawing. It doesn’t matter if it’s just a quick sketch or a master work, the block-in will ultimately determine the final result of the drawing. Unfortunately, it’s also one of the more challenging and, some would argue, least exciting aspects of any drawing. In fact, you might be thinking it would be fine to skip this step altogether.
Don’t.
Take the time required to do the block-in and do it well. This is an essential step and any mistakes made here will carry on throughout the rest of the drawing. A good measure to use at this stage is this: do you like what you see? If you do, great. If not, try and figure out what it is that you don’t like. Don’t expect it to suddenly become better in a later stage of the drawing because everything else you do is only going to be built upon what you have done in this stage.
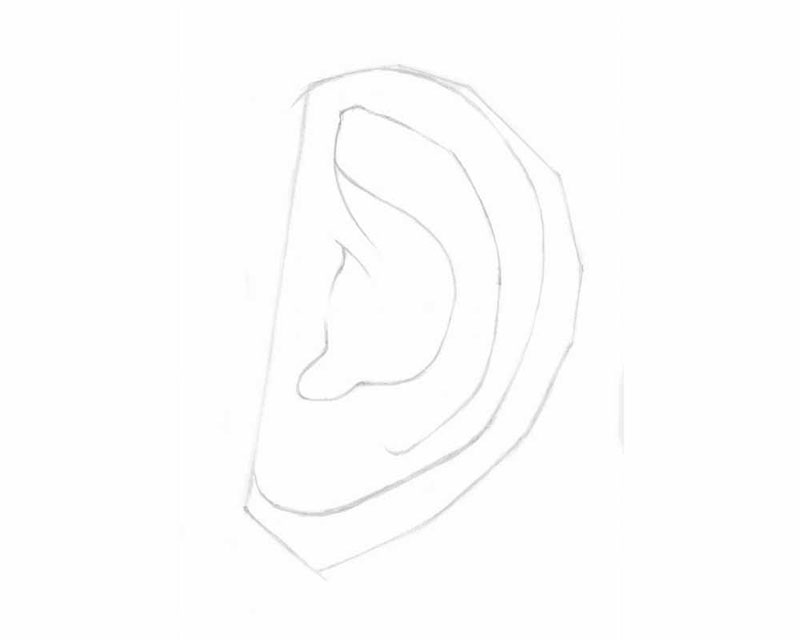
Sketch Out the Largest Overall Shape
A good practice to get into when drawing almost anything is to start with the largest shapes. Again, I know it’s tempting to just choose a point and start sketching, but in art it’s often best to work from large to small.
Looking at the reference image, think about what the largest shape is. The shape that encompasses everything you want to draw. I’m not just talking about the shape of the ear. I’m talking about the simplest shape that both the ear and the earrings create. Once you think you’ve got a good idea as to what that largest shape is, start sketching.
Begin by using a 5mm graphite stick to lightly sketch out the largest form. If you do not have something similar, just use your softest pencil — HB, H, 2H, etc. are all good choices — or simply work as lightly as you can with what you have available. Hold the tool between your thumb and forefinger and, drawing from your elbow, sketch out the largest shape using a series of straight lines.
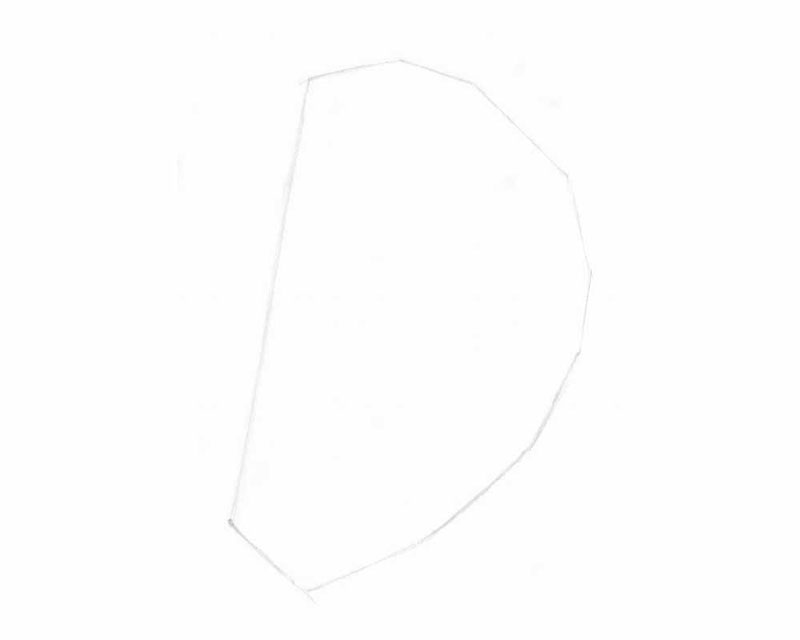
TIP: Using straight lines will make it easier to simplify this large shape. Draw from point to point, almost like connect the dots, along the outermost edges of the shape. We can always come back later and make it nice and curvy.
This shape encompasses everything that will be contained within the drawing. This means the earrings as well as the ear itself. The shape represents the outermost boundaries of the image, and from here on out, everything you draw should be contained within.
If, in future steps, you find yourself drawing outside this initial shape, take a moment to reevaluate your proportions. Everything should fit within this shape. Take your time. Compare angles and proportions regularly.
Draw an Ear
Now that we’ve established our largest shape, we can begin sketching the ear itself. Still use a soft graphite or light touch and still draw from the elbow. Take your time here. Try to make broad sweeping lines, not little repeating hash marks. Even if it isn’t completely accurate, a single line will always appear more confident than a series of hesitant strokes.
At this point, we can feel free to erase anything that we feel isn’t working in order to retry it and get it just right. Throughout this stage you can continue to make adjustments both to the ear itself and to the largest shape we’ve already drawn. Use the process of sketching the ear within the largest shape to make adjustments to your proportions.
TIP: At this stage, erasing is free. Don’t rush. Even step away from the drawing for a few minutes and come back with fresh eyes. Erase what needs to be fixed and make those changes while you still can.
Regularly compare your image to the reference. Find various specific points on the ear and compare them relative to each other. How far away are they? What internal shapes or patterns do they make? Do they line up with any other important features of the ear? These questions will help you refine your proportions and get a more accurate sketch.
Draw Piercings on the Ear by Blocking-In
Now that we have our ear nicely sketched out, we can start blocking-in the earrings themselves. Draw a simple ellipse to figure out the placement and proportions of each ear piercing. This will also help you to establish the perspective of the shape.
Once you’re satisfied, we can begin sketching out the larger shapes of the earrings themselves. Keep it as simple as possible at this stage. Lines and cylinders only.
Don’t worry about the fact that not all the earrings are perfect ellipses. At this point, simplifying the form is far more important, and it will help you find placement and proportions more accurately.
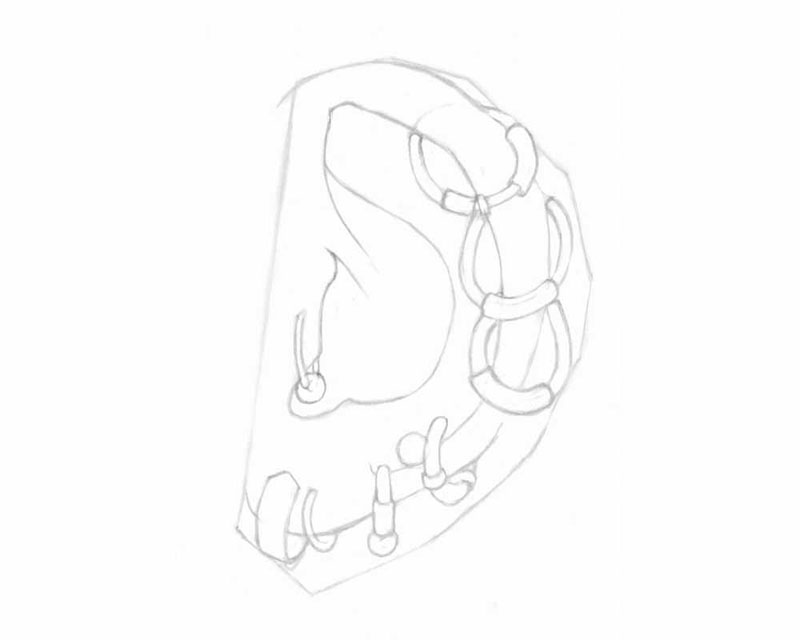
As you draw the final block-in for the ear piercings, notice how they are simplified to such a degree that some individual shapes are combined into one larger shape. At this stage the details don’t matter. Get the larger shapes right and the details will follow.
TIP: When working with any complex form, ignore the detail to start with. Try to find the biggest shapes and the simple geometric forms (cylinder, sphere, cube) that make up more complex objects.
Draw Basic Shadows Around the Ear Piercings
Now that our sketch is complete and we’re happy with it, we can begin to lay in some of the basic shadows.
TIP: This is the point of no return. If you’re not happy with the sketch, keep refining it until you are. From here on out, it’s going to become more and more difficult to fix any early mistakes.
Though we’ve blocked-in our earrings at this stage, we’re not going to worry too much about them for now, especially when it comes to laying in the shadow shapes. We’ll deal with the shadows on the earrings in more detail in a future step. First, we have one of the most important elements when it comes to defining the form of your subject.
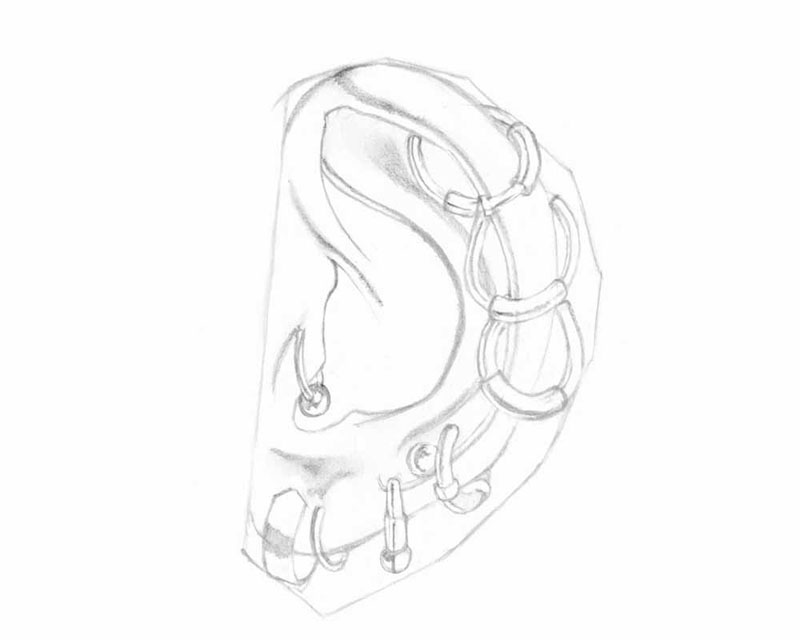
Apply Core Shadows
The core shadows will be some of the darkest shadows in the drawing. They occur at the point where the form begins to turn away from the light.
At this stage, we’re still using our 5mm graphite stick, though we’re allowing the values to build up a great deal more. This is only partially done by applying greater pressure. Be careful about pressing too hard. You may build up a much darker value far faster than you want. Instead, go over the shadow area multiple times, layering in darker values bit by bit.
For now, think about the form. Think about the direction of the light. Where the form begins to turn away from the light is where we will put our core shadows.
To draw my core shadows, I usually make sure that I have a flat side on whatever tool I’m using. To get a flat side, you can find a rough surface, concrete, wood, or sandpaper, and shave the graphite down on one side.
Once you have a flat edge to your graphite, take hold of the pencil gently between your thumb and forefinger and, using your whole arm, fill in the core shadows.
The core shadow itself can range from soft and wide where the form turns gently, to thin and sharp where the form turns more quickly away from the light. Keep in mind that the core shadow should never be completely sharp or hard edged. It can come close, but there should always be a little softness to it.
Create Shadow Shapes on the Ear
Having established our core shadows, we can begin filling in our shadow shapes. There are a couple of different ways to approach this. One method is to begin by softly outlining the larger shapes of the shadows themselves wherever you see them. However, if you feel confident enough, you can start by filling in the areas directly.
If you choose to outline the shadow shapes first, try to avoid making hard lines or sharp edges. The one exception to this rule is in the case of cast shadows.
Cast shadows are like core shadows in that they are among the darkest areas of value in the drawing. Cast shadows also helps to describe an object’s form as they will bend and curve along whatever surface they are cast upon. Generally speaking, cast shadows will have a much sharper edge.
To draw shadows shapes, switch from the 5mm graphite stick to the 2B pencil. Still holding the pencil between your thumb and forefinger, and drawing from your elbow as much as possible, begin carefully establishing the shadow shape using the method of your choice.
Do your best to use a uniform value at this stage. For now, ignore any variations in value that you see. It should be dark, but still lighter than the core shadows. This would also be a good time to darken your core shadows if you feel they are still too light. Feel free to lightly fill in the shadow shapes on the earrings if you choose, but we will be tackling the earrings in greater detail in the next step.
Draw Shadows and Details on the Ear Piercings
Now that we have our basic shadows in place, we can return to working on the earrings themselves. In this section, we will finish blocking in any details and establish the value range of the metal piercings. At the completion of this section, all important elements of the piercings will be in place.
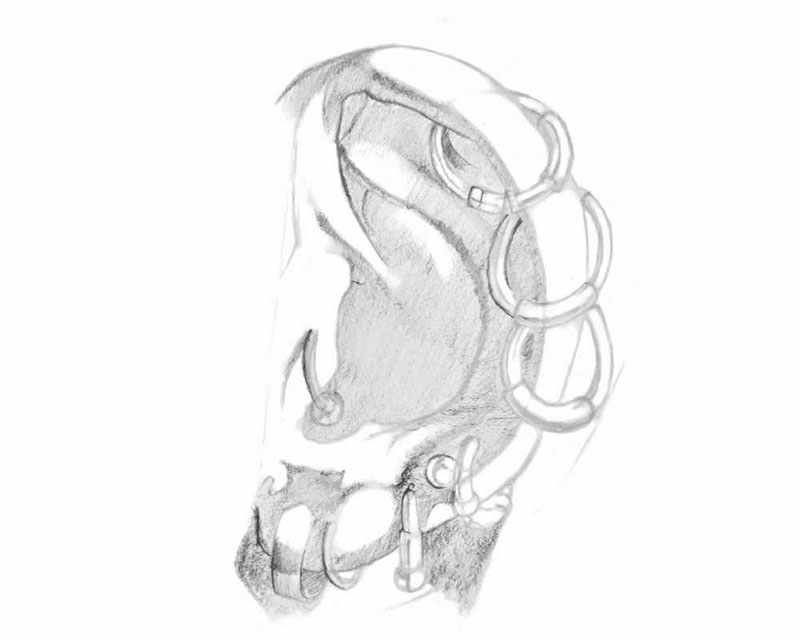
Refine the Earrings
In the early stages of this tutorial, we simply established the largest shapes of the earrings, their placement, and proportions. Now it is time to refine those larger shapes. During this time, switch back and forth between your 2B and mechanical pencil as needed.
Broadly speaking, use your mechanical pencil whenever you need to draw details and basic shadow on the ear piercings, and switch to a 2B when you need to emphasize the darker values a bit more.
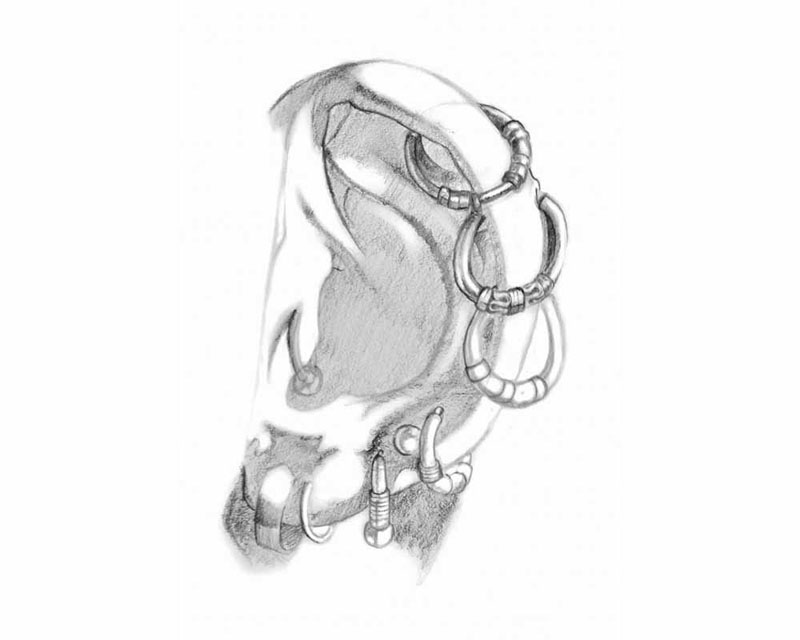
Just like with the ear, begin by finding the core shadows and darkening them to a greater degree. Fill in the shadow shapes as best as you can as well. Pay special attention to the nature of the material. Notice how the metal transitions much more quickly from dark to light and has a greater contrast between dark and light than the ear does.
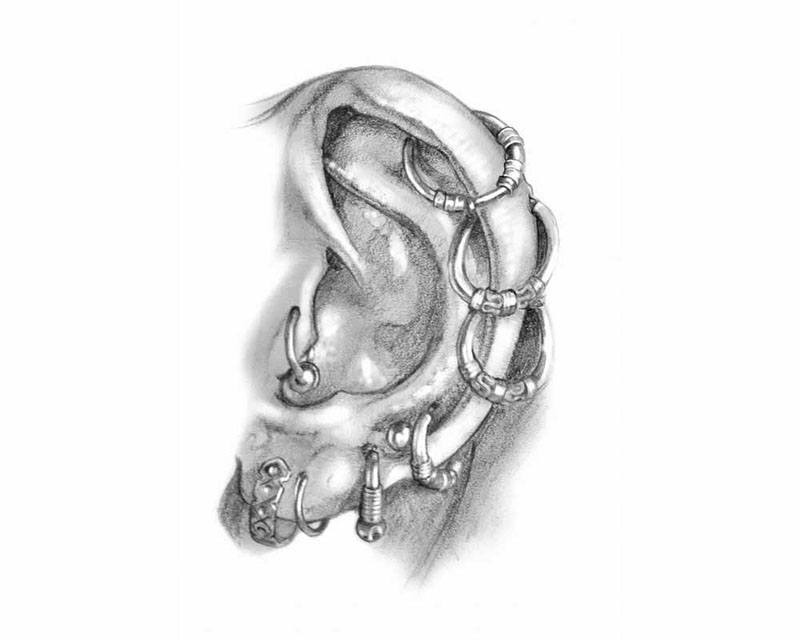
Once you established your basic shadow shapes, begin carefully filling in the details. Remember to work from large to small.
In the image above, you can clearly see the steps that are used. The earrings at the top of the ear are virtually complete. At the middle of the ear, you can see how the largest shapes are broken into smaller shapes, ready for details. Finally, at the bottom and left side of the ear, you can see the earrings virtually unchanged from the previous steps.
At this stage, we are only concerned with the secondary shapes and how the light affects them. Focus on how the larger shapes we’ve already established break down into smaller shapes. Then think about how the light and dark values apply to them.
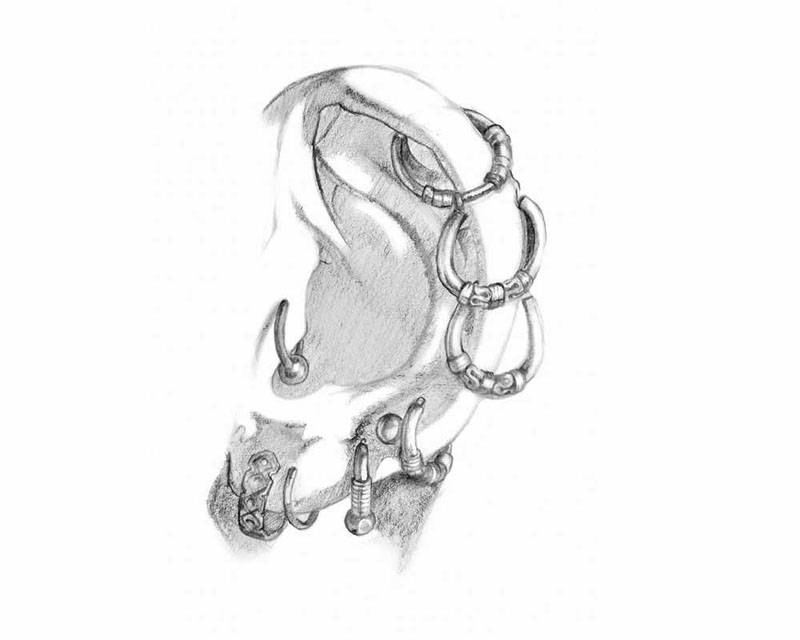
At this point we’re simply repeating steps already taken. There are quite a few piercings and a lot of detail to consider. Remember to take your time.
Refine the Values
At this point in the drawing, almost every important element and relationship is in place. From here on out, the changes that we make will be relatively minor. No more major changes, no more additions. You wanted to draw an ear? Well at this point you’ve essentially done so. From here on out, it’s all about refinement and the process of taking the drawing to completion.
At this point, frustration can set in. Especially if we didn’t spend as much time getting our proportions and relationships right in the beginning. This is where those things will really start to matter.
I know all too well the feeling of looking at a drawing that has reached this stage and feeling like a failure. There’s a little voice inside your head that says “Don’t bother finishing this. You can do better if you just start over.” While there are some circumstances where a drawing is beyond redemption, we are much more likely to think it’s true than for it to actually be true.
For now, ignore that voice. Especially if you’re just beginning to learn how to draw. Ignore it. Shut it out completely. Finishing a drawing is a skill in its own right and is every bit as important as anything we’ve done so far. So finish it, evaluate it honestly, and then draw some more.
Apply Occlusion Shadows
Occlusion shadows are easily overlooked or easily simplified. But they are among the most important shadows in any drawing, right up there with the core shadows when it comes to describing form.
Occlusion shadows occur where the form overlaps itself or where two planes come together creating a crease or crevice. If you want to see an example of occlusion shadows in real life, then simply hold your hand flat and straight under a harsh light.
You can still see all the little creases of your knuckles, right? Even though it’s under direct light. This is because as your skin folds together there are places where it’s so close together that even direct light can’t fully penetrate it and we see a shadow.
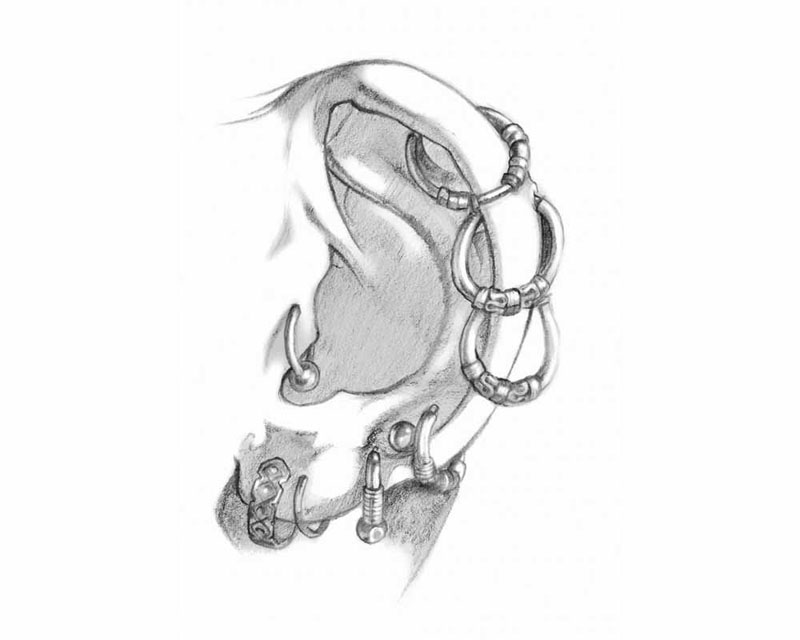
Occlusion shadows can be a bit tricky. Not that the technique is difficult, but simply because of the mindset required. It can be tempting to just outline everything, but you must resist that temptation.
Occlusion shadows occur where two planes in the form either overlap or come very close together creating a crease or crevice. Look for such locations.
At this point, we’re still using a 2B pencil. Drawing from your elbow and shoulder carefully, use your pencil to darken any areas where forms overlap. Draw in this manner for both the ear and the piercings wherever two forms overlap or come in close contact.
TIP: Use your best judgment when it comes to adding occlusion shadows. If you feel like the image would look better if there were a nice thick black line in a place where there wouldn’t naturally be one, give it a try. Exaggeration and stylization are all tools in the artist’s toolbox. The degree to which you use them is determined by what your ultimate goals for the drawing are.
Reinforce the Dark Values
We continue to refine our drawing by reinforcing our dark values. This is where we get to go crazy adding all kinds of variations to the dark values. Take time to layer in all the really dark darks, work to add texture to the ear by showing the different values and shades that play across it.
Still using a 2B pencil, begin to add variation to the darker values. Once again, I would say that you should draw values on the ear and the piercings in whichever way is most comfortable. Try to avoid shading with the point of the pencil directly, but other than that use whatever technique you find works the best for you.
Start by looking for the darkest areas and filling them in. If needed, reinforce some of the core shadows at this stage as well. Proceed slowing and don’t press too hard. It’s all about looking for the variations in values and gradually layering in those darks.
TIP: Be careful not to fill in areas of reflected light. The reflected light being the softer shadow on the inside of the core shadows. Most noticeable in this image at the top curve and inner curves of the ear. The combination of cast shadow and reflected light are some of the strongest contributors to the illusion of form.
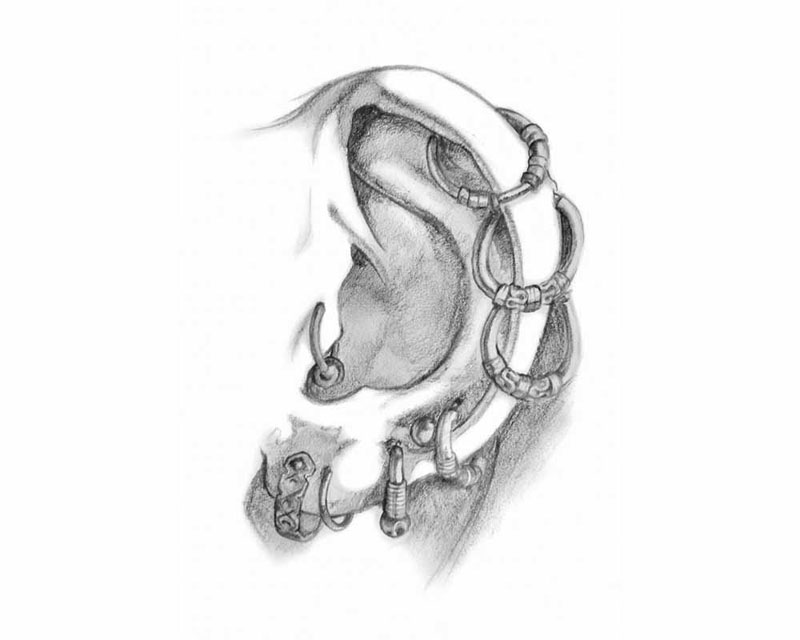
Fill in the Midtones
Now using your lightest pencil (such as an HB) or lightest touch, begin filling in the half-tones. Do this as lightly and carefully as possible. However, since almost all the remaining white space is midtone, feel free to fill it with a light uniform value in the same way you filled in your shadow shapes. Just remember that your lightest darks should still be darker than your darkest lights.
Once you’ve filled in your base midtones, you can begin working on some of the darker midtones. Give careful consideration to the forms. Ask yourself “Which way is the form turning?” and try to shade by making strokes parallel to the form. This will serve to reinforce its three-dimensionality as all your pencil strokes will be moving in the same direction as the form itself.
Beginning artists tend to think of the eraser only as a tool for getting rid of mistakes. This could not be further from the truth. The eraser is as much a tool of creation as the pencil is. You just have to know how to use it.
In this instance, we’re going to use our eraser to give our image highlights. Take your eraser and carefully knock back some of the midtones wherever you see highlights. Be careful not to erase too much. The highlights should be placed strategically, wherever you feel they will create the most contrast to bring out the form.
TIP: The highlights should be softer on the ear and harder on the earrings. Remember, different materials reflect light in different ways.
The Final Refinement
At this stage, we could call the image done. However, usually at this point, we as artists have been staring at the same piece of paper for so long that we almost don’t even see it anymore. Do yourself a favor at this stage and walk away for a few hours. This will allow you to come back and look at it again with fresh eyes, and fresh eyes will allow you to see things that you would not otherwise see.
Now is the time to double check everything. Make sure your darks are as dark as you want them and your highlights and midtones are as light as you want them. Reinforce shapes or shading that may have gotten smudged or has faded over time.
If some areas seem a bit harsh or hard edged and you want to add some soft edges or smooth transitions, use a blending tool such as a blending stump, tortillion, or tissue to carefully smudge those areas of the drawing. Do this with caution. Not everything needs to be smooth, and a nice balance of smooth and hard transitions will add contrast and create visual interest in the image.
Refine until you’re happy. Check the reference constantly. Just be aware that at some point you’ll have to take that last most difficult step and, for better or worse, call it done.
Conclusion
We’ve come a long way together and I hope you’ve learned as much from this experience as I have, but our journey is not over. As artists, we must continue to push ourselves forward at every opportunity and draw constantly.
To truly learn to draw ear piercings, you cannot simply do this tutorial once. Do it twice, three times, four times. Take what you’ve learned and try to apply it without the tutorial. Draw people from other reference photographs that may have piercings, or draw ears from your imagination.
Drawing is a skill that you must constantly develop. Never stop learning. Get better at drawing ear piercings by drawing them over and over again. To put it simply, never stop drawing.
Note: I would like to thank artist Noble McCredy for contributing his drawings and tips for this tutorial!