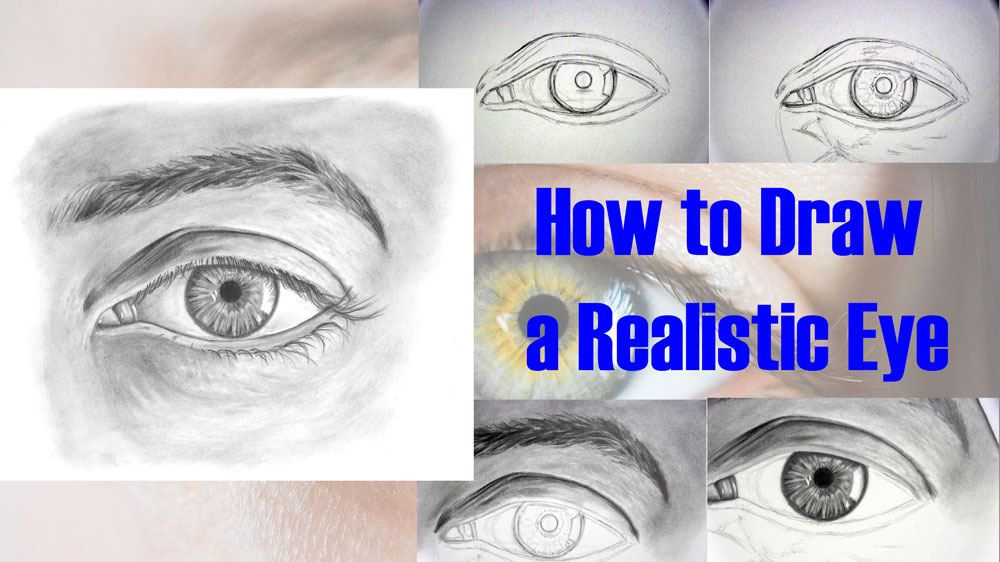
How to Draw a Realistic Eye
You may be wondering, “How do you draw a realistic eye with pencil?”
The eye definitely has a unique complexity to it that other facial features lack.
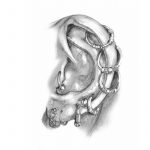
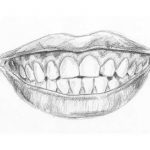
That’s not to say that drawing a nose, a mouth, or an ear is all that easy for a beginning artist.
Still you have to admit, the human eye is intriguing enough to make it both a challenging and fun drawing subject. In fact, the eye has always been my favorite facial feature to draw!
In this tutorial, I will show you how to draw an eye in a detailed and realistic manner. You will learn all about how to draw eyelids, an eyebrow, and eyelashes, in addition to how to draw the main parts of the visible eyeball like the iris and the pupil.
I will show you how to draw the initial outline and how to apply and blend shading in layers for a realistic look. You will see that it does not have to be difficult for beginners to draw a realistic eye.
Join me below so you can create your very own realistic eye drawing!
Table of Contents
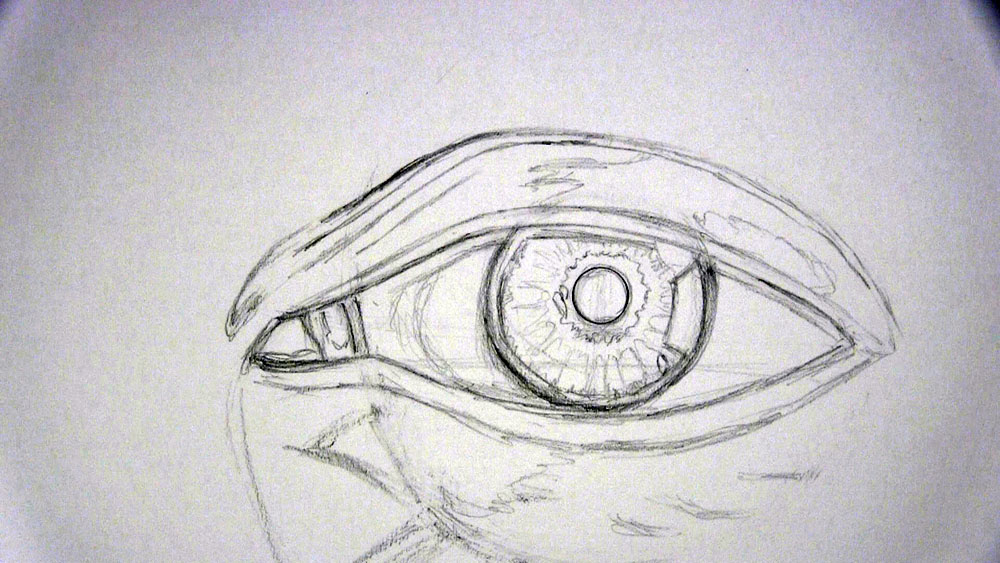
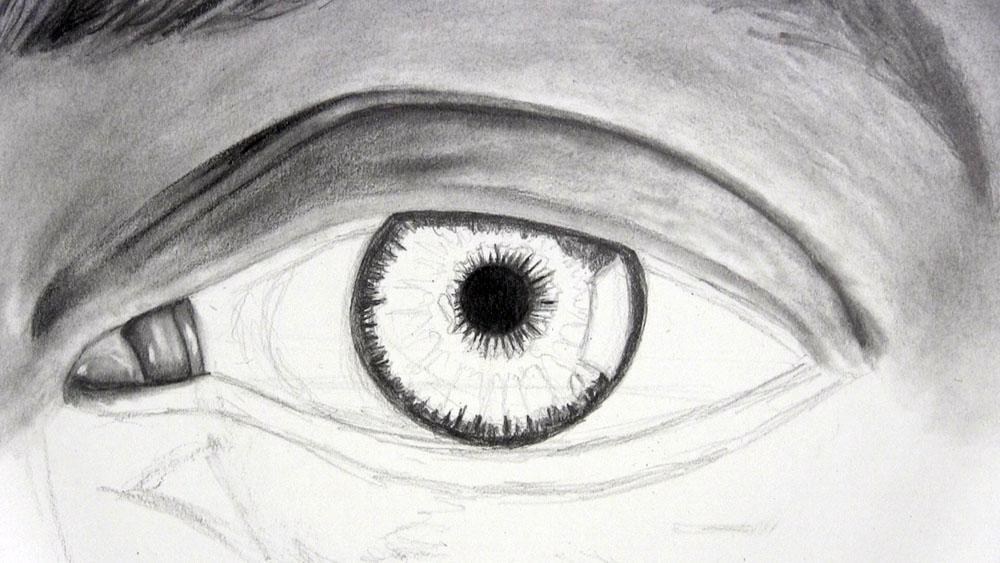
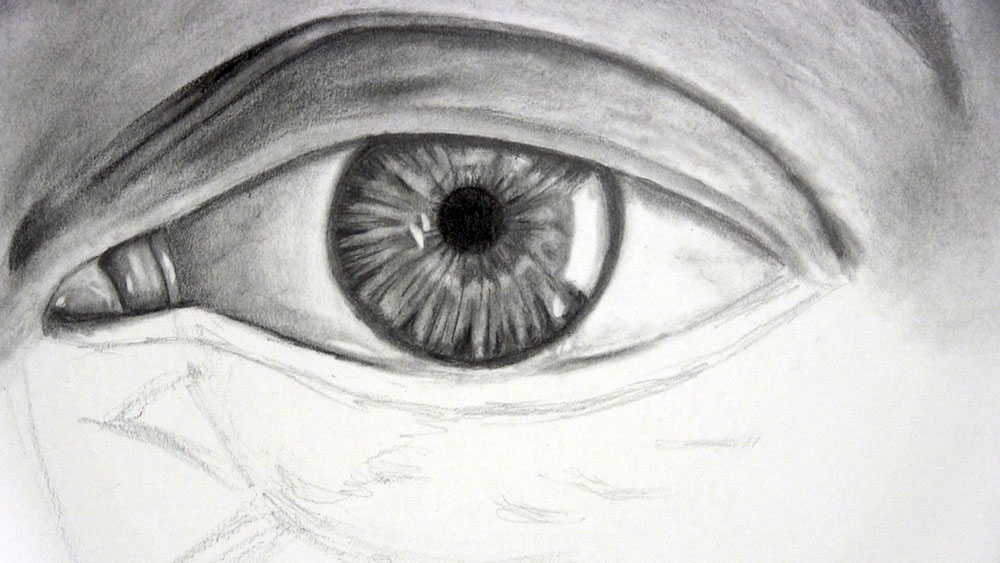
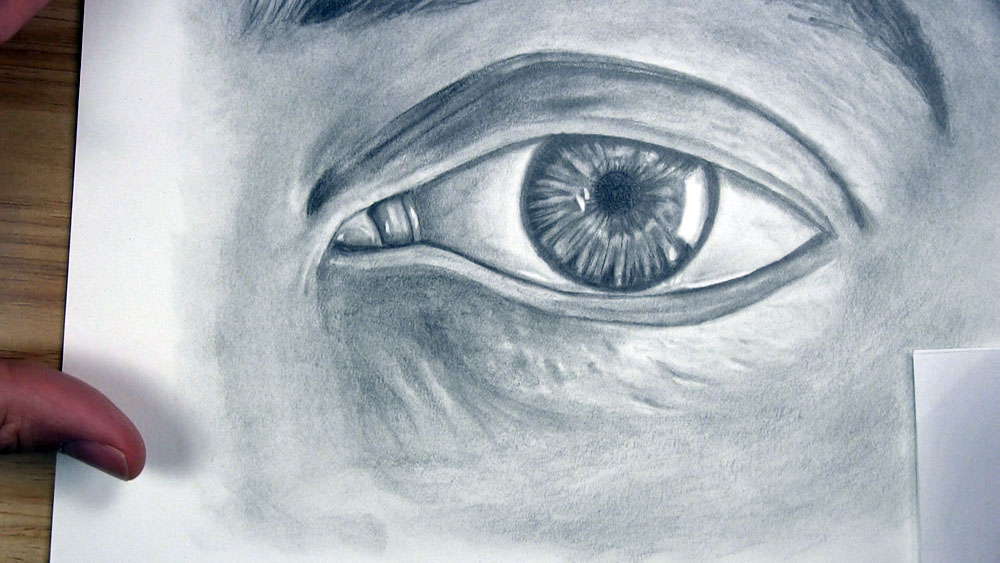
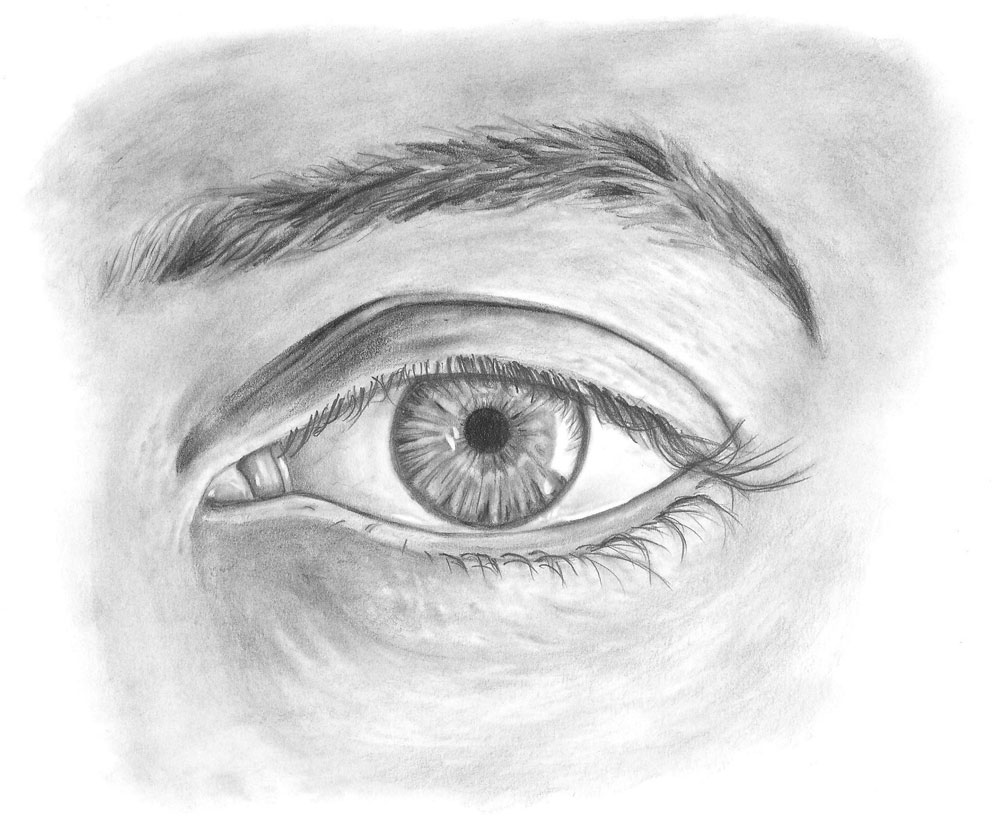
Use a Reference Photo for a Realistic Eye Drawing
Here is the reference photo for this tutorial. I chose to omit the hair on the right side and its large vertical shadow so I could make the eye the main focus of the lesson.
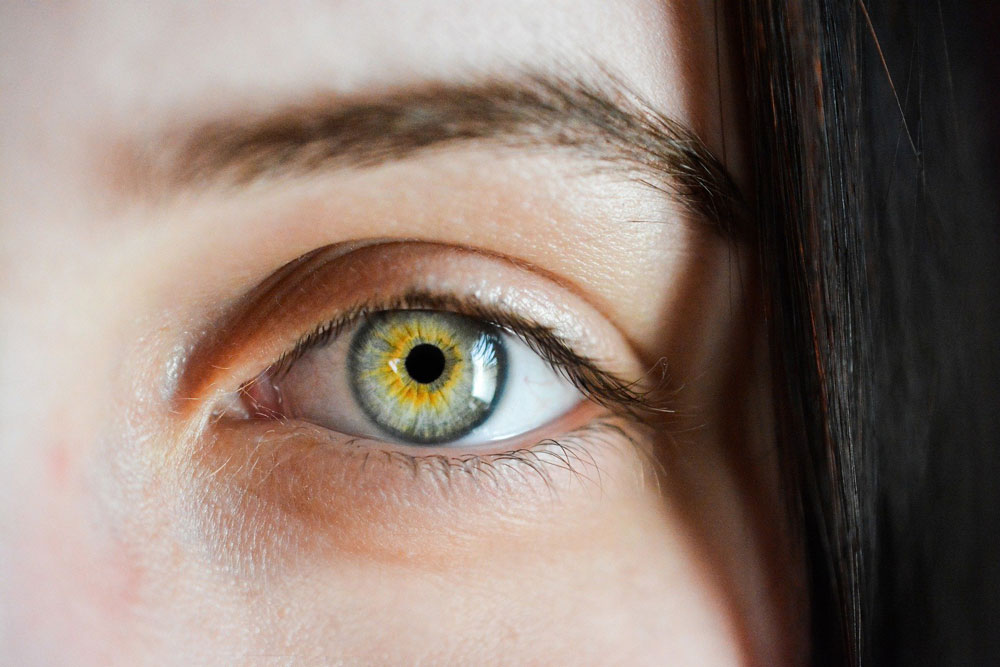
You can use the same concepts you learn from this tutorial and apply them to drawing other realistic eyes.
Materials Used to Draw a Realistic Eye
Here is a list of the materials I am using for this drawing.
If you don’t have some of these materials, that’s okay. You can still make do with a regular pencil and eraser, as long as you just get started!
If you wish to purchase any of these materials, they can be found at your local art store, or you can buy them using the links below.
Affiliate Disclaimer: The links below are affiliate links. I will receive a small commission if a purchase is made through one of these links. Learn more here.
- 2H, HB, 2B, 4B, 6B, and 8B graphite pencils
- Mechanical pencil
- 0.5mm 2B lead refills
- Bristol board drawing paper
- Sheet of folded paper to prevent smudging
- Blending stumps and tortillions
- Kneaded eraser
- Plastic eraser
- Dusting brush
- Electric eraser
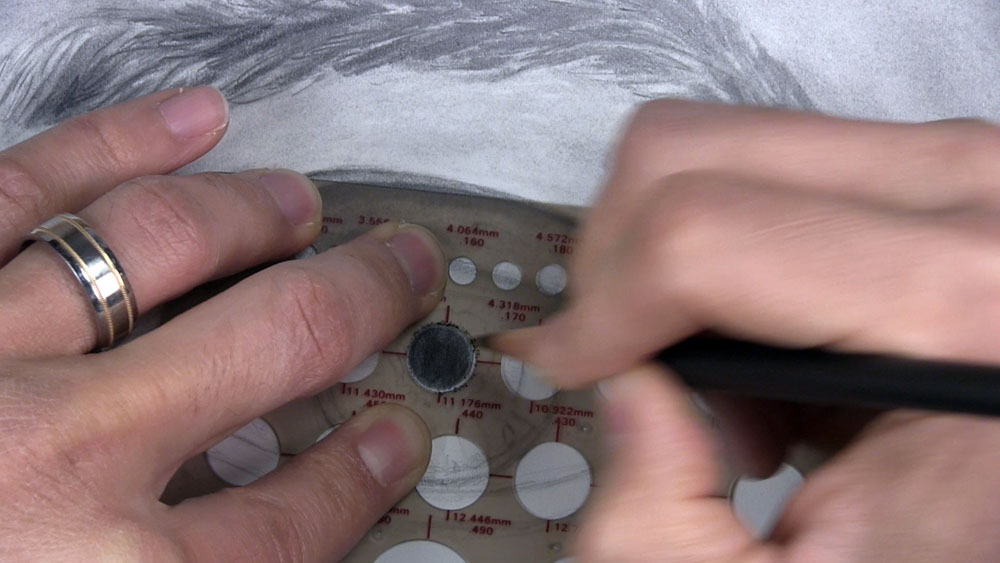
- Circle template
Draw the Initial Eye Shape
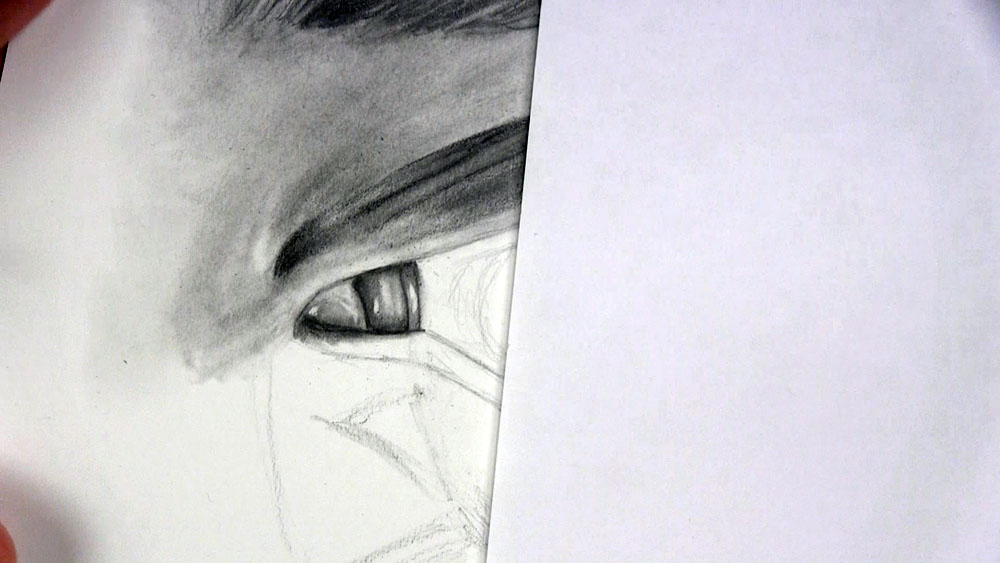
We’ll start by drawing the initial outline of the eye with a 2H pencil. Begin by drawing a slanted line near the left side of the paper for the corner of the eye. From here, extend another line that curves up and back down to form the top of the white part of the eye (and also the lower edge of the top eyelid). You may want to stop along the way to make tentative placement marks for each side of the iris.
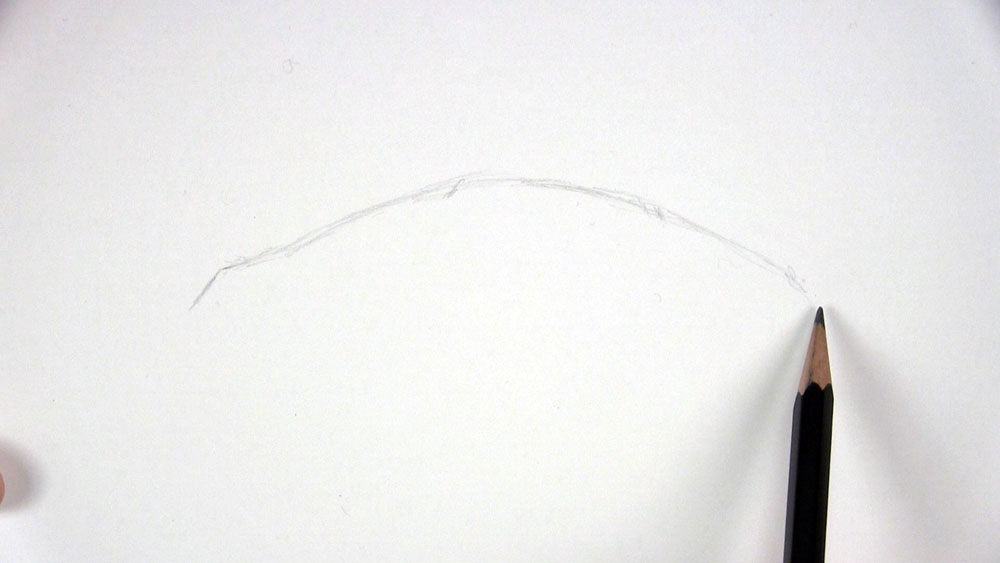
Use imaginary reference points and temporary guidelines to help you shape the outline of the eye so it will be a close match to the reference photo. For example, the outer corner of the eye on our right side aligns roughly with the upper part of the inner corner on our left. Then, by sketching a horizontal guideline from the lower part of the inner corner, we know to form the lower curve of the eye below this guideline but not too far below it.
Finish drawing the corner of the eye by forming the base of the corner along the horizontal guideline. Draw two slightly curved, slightly diagonal lines at the corner from the top to the bottom. These two lines represent the pink tissue found at the inner corner. You should end up with somewhat of an almond-shape for your eye.
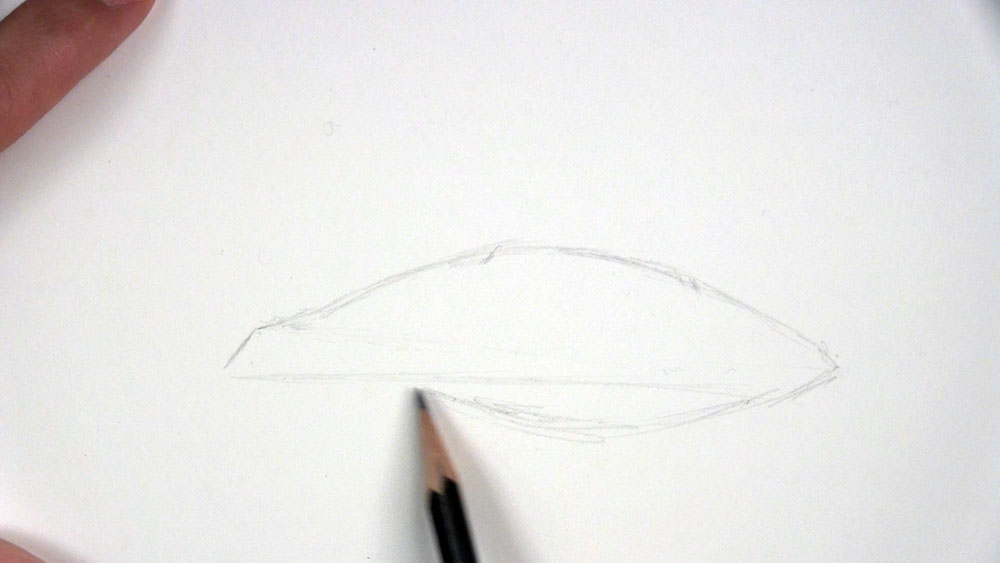
Draw the Eyelids
Sketch a line for the top of the top eyelid. This line should follow the same general curvature as the line already drawn for the lower part of the top eyelid. Directly underneath this line and very close to it, sketch two more lines running alongside it. These lines represent wrinkles in the upper portion of the eyelid. Sketch another shorter wrinkle. Finally, draw a line along the lower edge of the eyelid. This is where the eyelashes will go toward the end of our drawing.
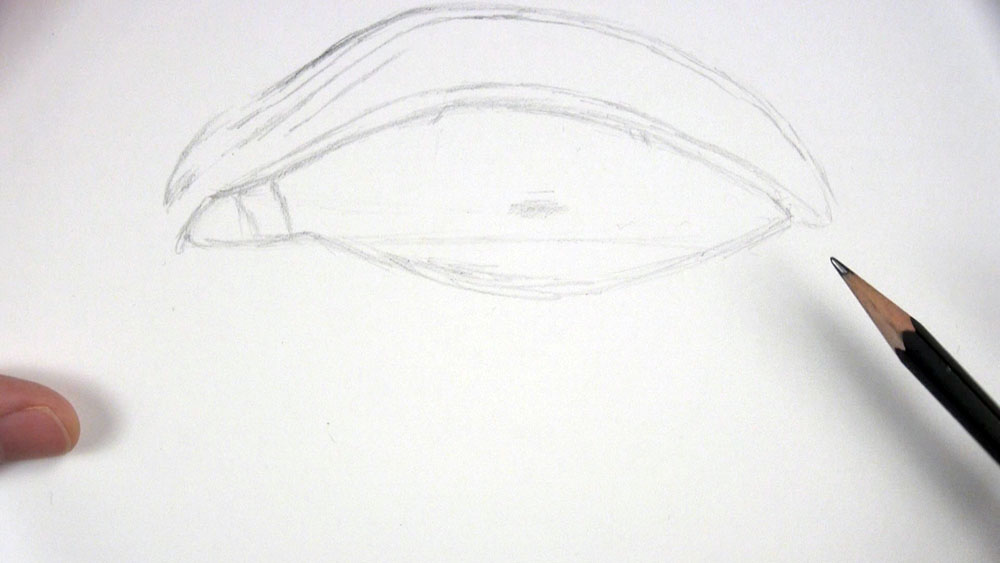
Sketch a line below the almond shape already drawn, again following the same curvature. This line will represent the upper edge of the lower eyelid. The lower eyelashes will be placed here later on.

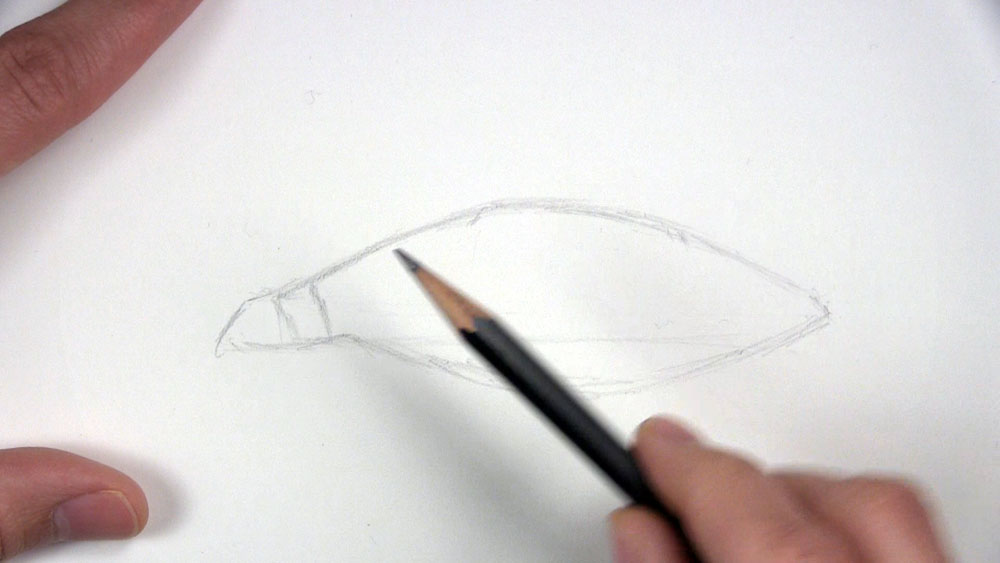
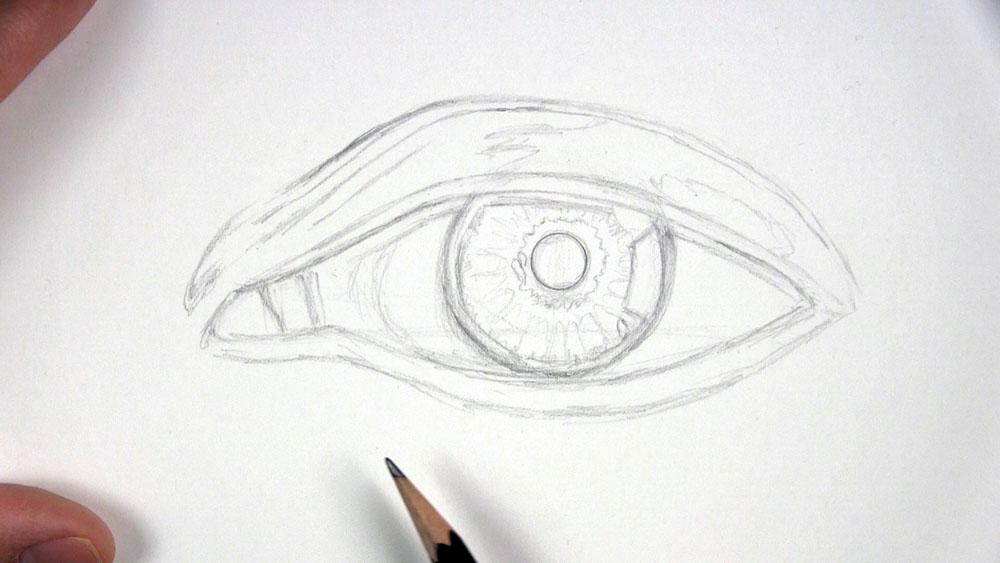
Draw the Iris Outline
Sketch a vertical guideline to establish the approximate center divider of the iris. Remember those tentative lines we marked along the top edge at the beginning? This vertical guideline should be centered between the two.
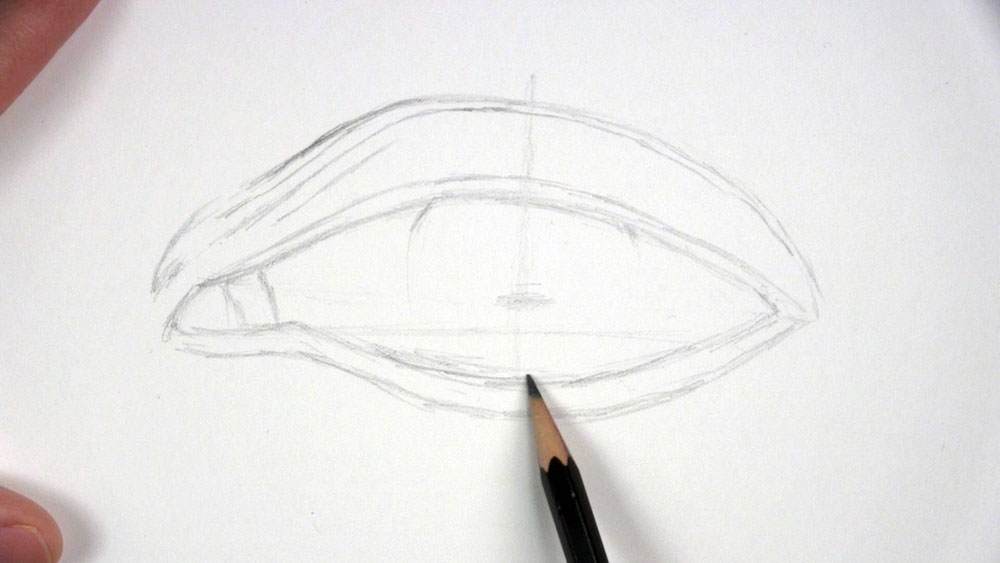
Sketch a circle for the iris. Use the guidelines to help you shape it as circular as possible. You may find it helpful to sketch the upper portion of the iris that is hidden behind the upper eyelid. If you have difficulty drawing a circle, you can trace a round object of a comparable size that you might have on hand, or you can use a compass.
Outline the Pupil
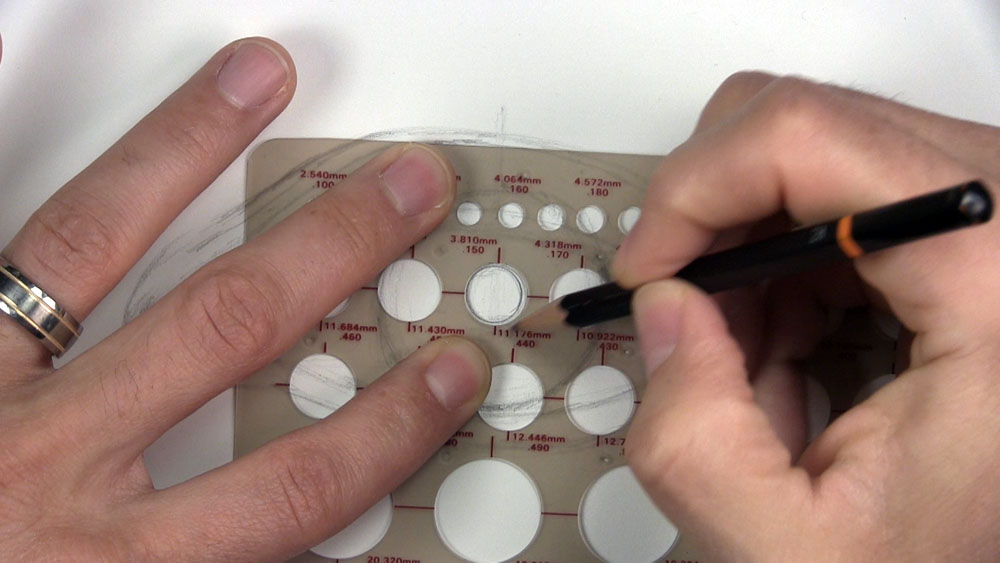
To draw the pupil, sketch a much smaller circle in the center of the iris. Just sketch the general shape as round as you can, just like the iris.
Check that the distance from the edge of the pupil to the edge of the iris is the same all the way around. You can do this by marking the distance along the edge of a scratch piece of paper and checking that distance with the other distances around the pupil. Once you are sure the pupil is centered, you can use a circle template to make the pupil perfectly round.
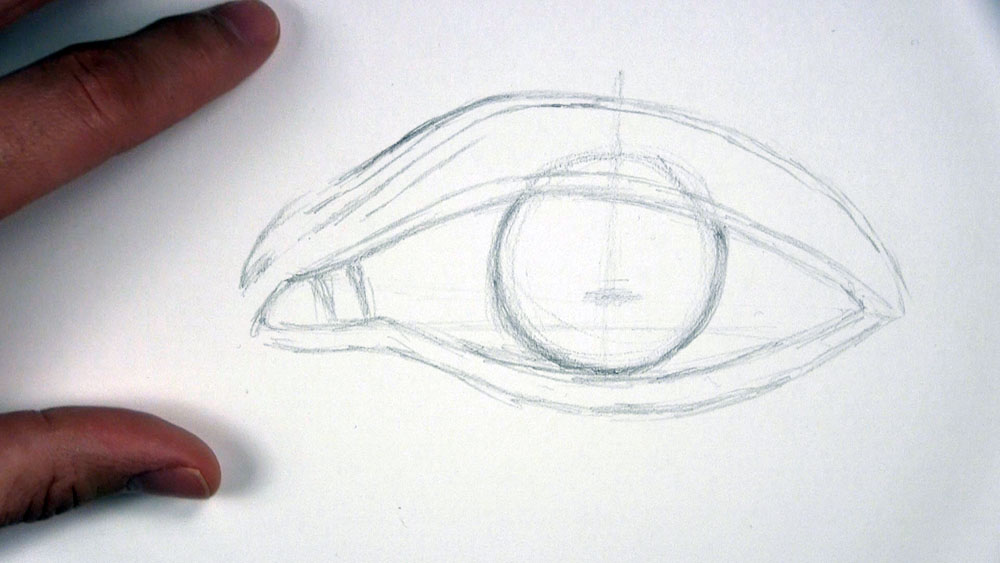
Draw Details on the Iris
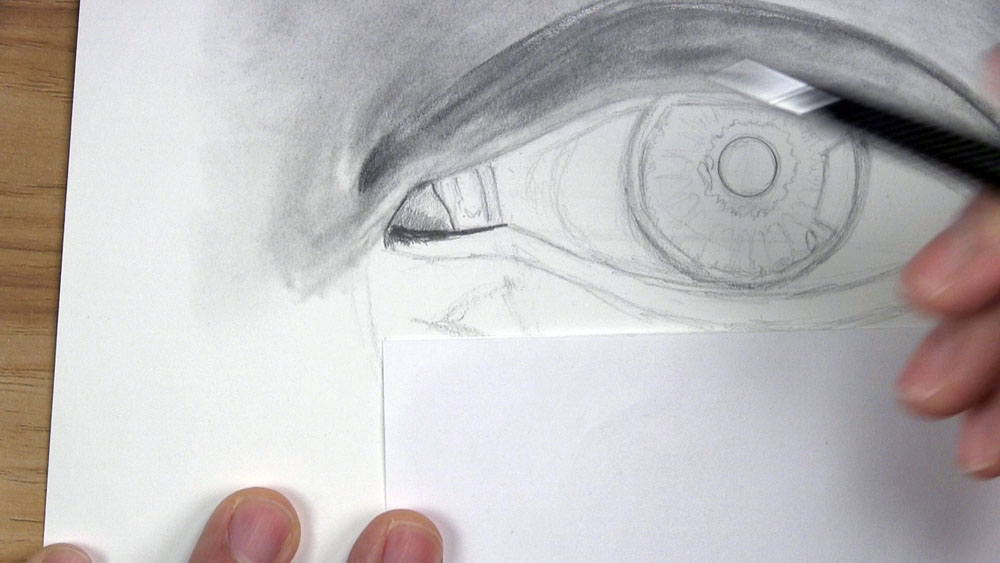
Make any adjustments as necessary. I decided I wanted to raise the upper eyelid a little bit so more of the upper iris would be visible in my drawing. You can also erase any guidelines, such as the upper hidden portion of the iris.
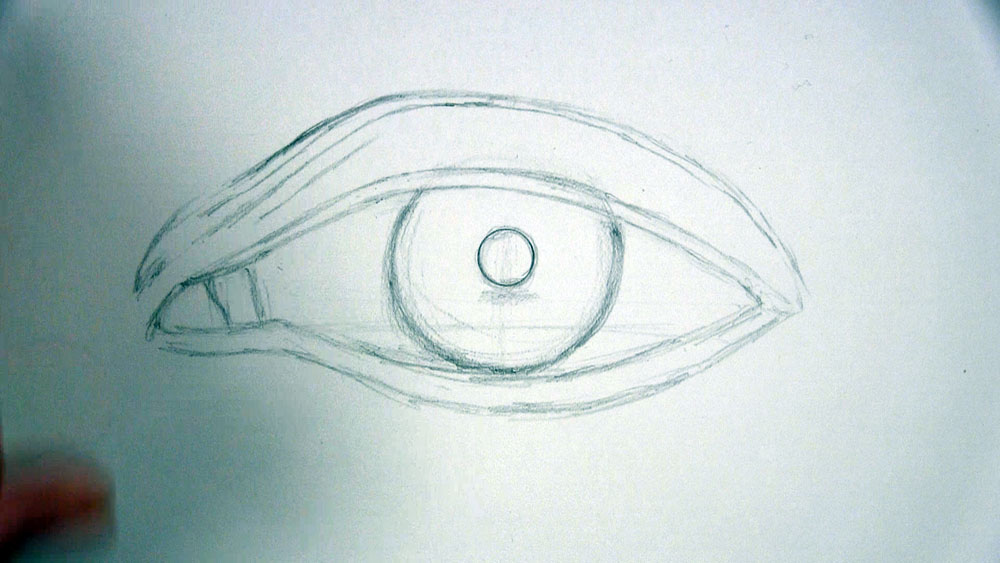
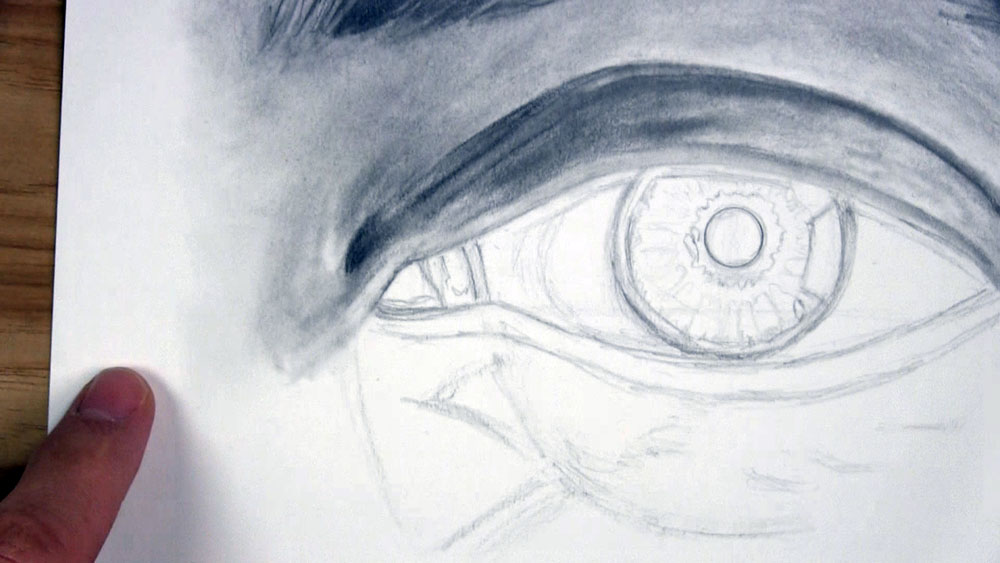
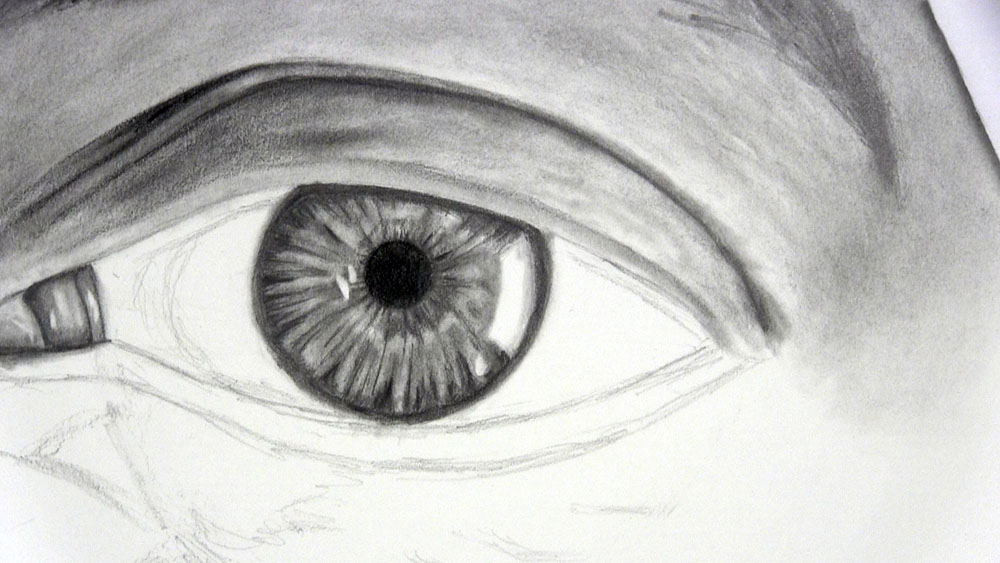
Now let’s add some lines to indicate highlights and shadows. On the right side of the iris, draw a large highlight. This highlight is almost rectangular in nature, but of course the edges should curve along with the curvature of the iris. Then draw a line curving closely along the inner border of the iris. This will be the limbal ring of the iris. Draw a line on the upper part of the iris just under the top eyelid for a cast shadow. Finally, sketch a few lines for light shadows on the white of the eye, namely under the eyelid and curving near the inner corner.
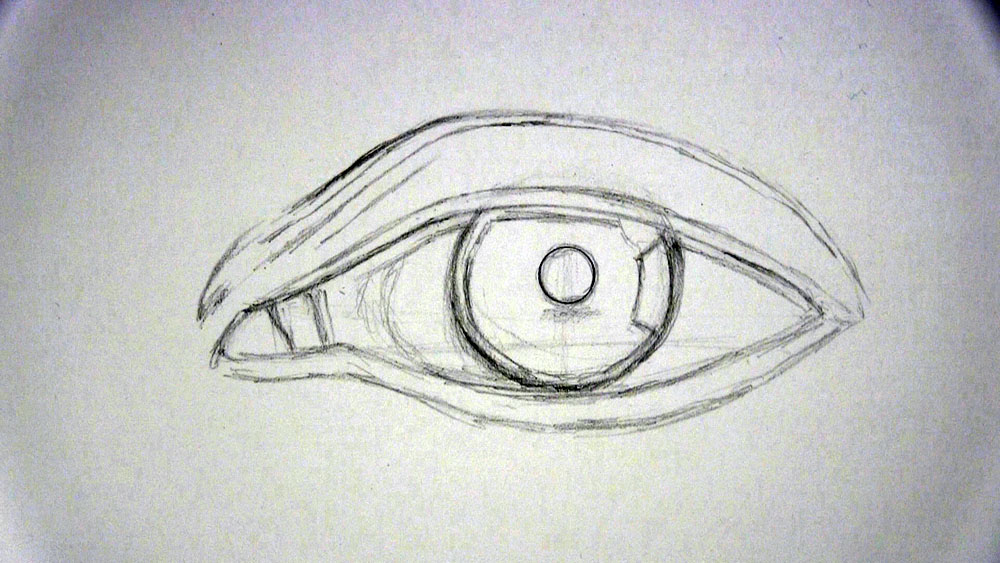
If you look closely at the reference photo, you’ll notice a bright squiggly ring on the iris that surrounds the pupil. Draw a squiggly line around the pupil. Then draw skinny bands on the outside of this squiggly line that radiate toward the outer edge of the iris. These bands should taper near the outer edges and look something like sun rays. Make sure to draw these little details, because they are an important step in creating a realistic eye.
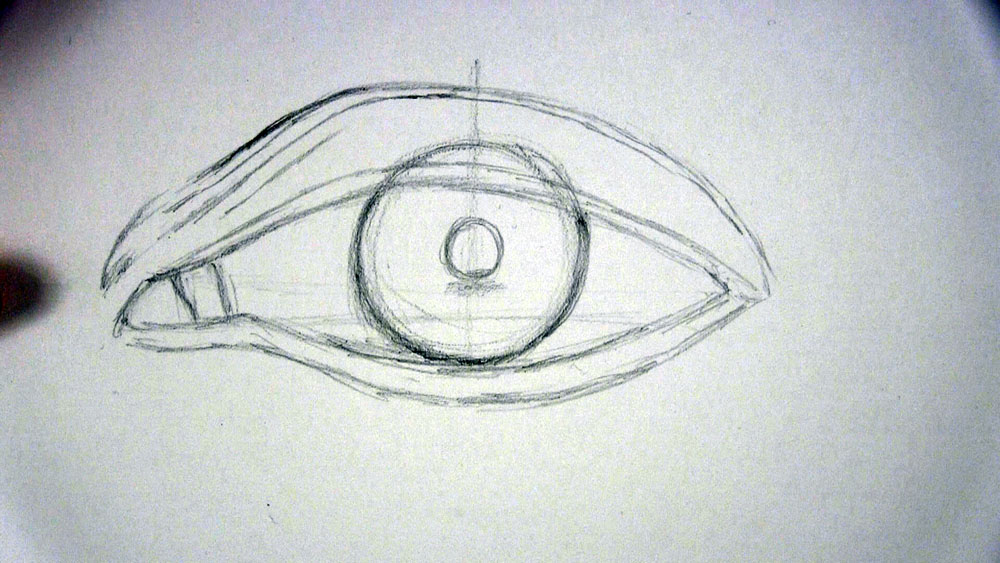
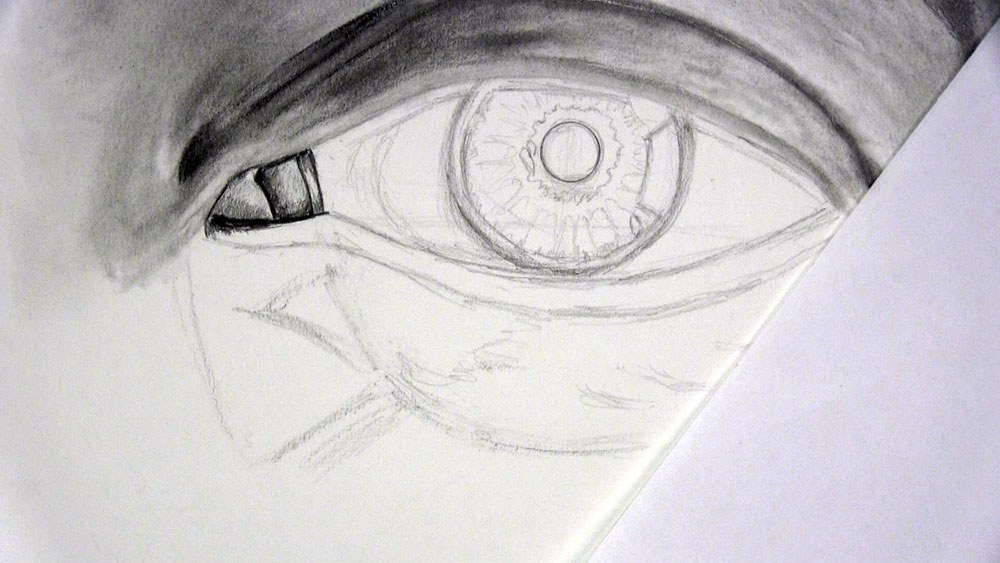
Draw Details on the Eyelids
On the upper eyelid, draw a couple of very light irregular lines. Draw one just over the left edge of the iris and the other just to the right of the iris. These lines will represent shadows and highlights on the upper eyelid.
To draw the lower eyelid, it’s important to remember that the lower eyelid rests on the lower portion of the eyeball, and the eyeball is a sphere. From the inner corner of the eye, sketch a very light and loose guideline to form the outer edge of the eyeball that is hidden behind the face.
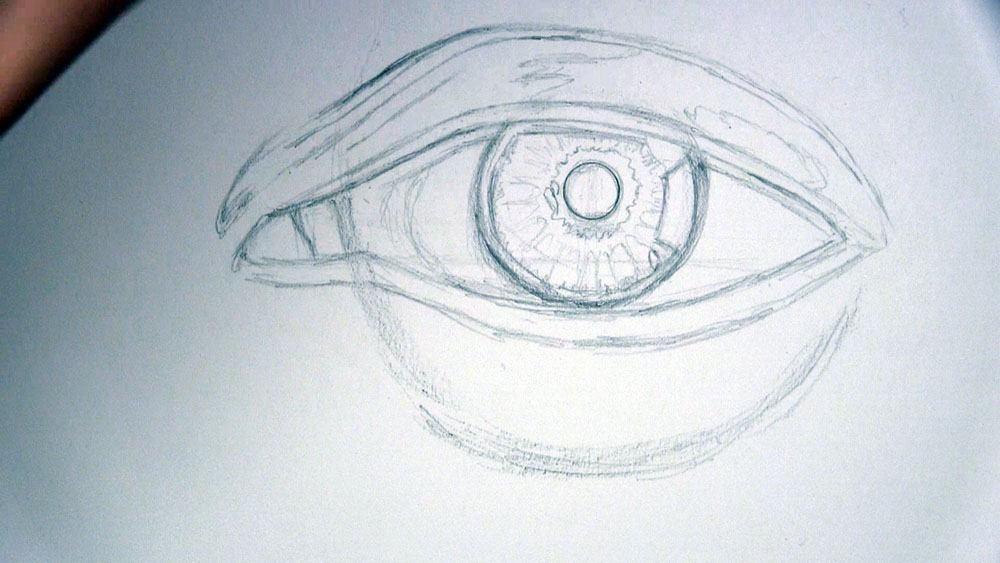
Similar to what we did for the top eyelid, sketch a light irregular line to place a shadow on the left side of the lower eyelid.
Sketch a few additional lines to the left of the eyeball. These markings will indicate shadows and other value variations in this area of the eye. Also, sketch a line drooping down from the inner corner and curving with the eyeball to give a rough approximation of where the nose can be found.

On the right side of the lower eyeball, sketch a few horizontal lines for wrinkles on the lower eyelid. Then we can erase the spherical guideline for our eyeball.
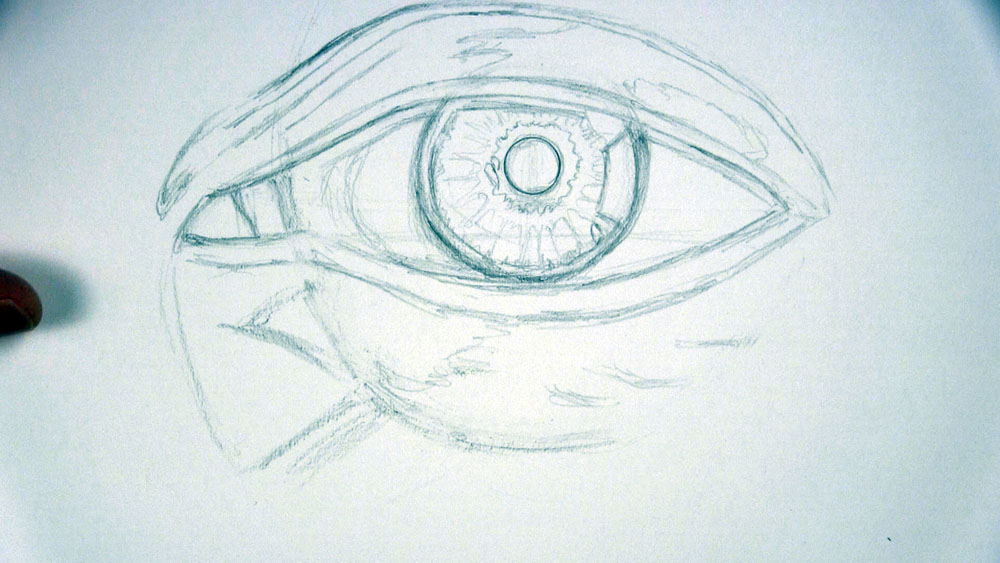
On the pink tissue at the eye’s inner corner, draw one or two squiggly lines to represent moisture and shadows.
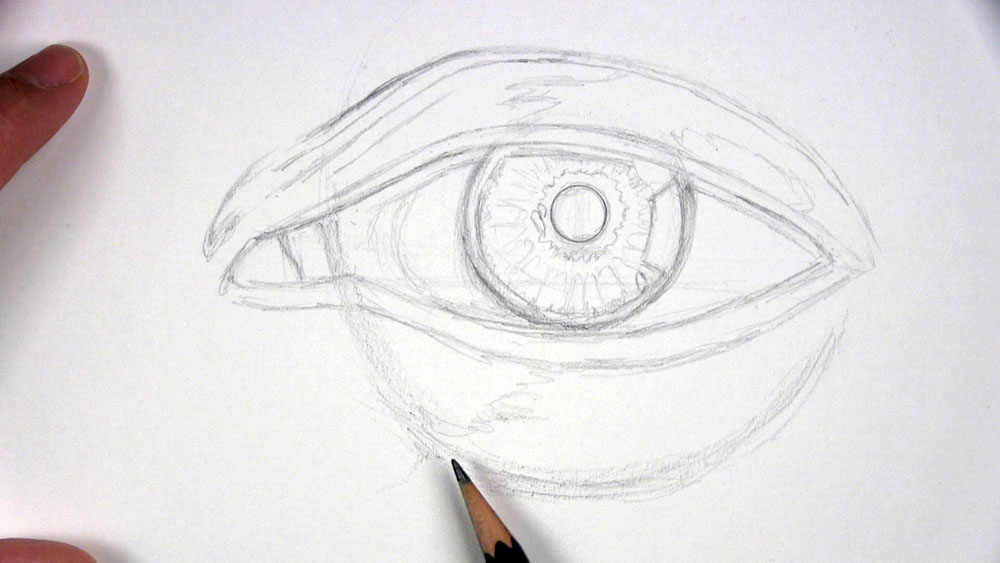
Draw the Eyebrow Outline
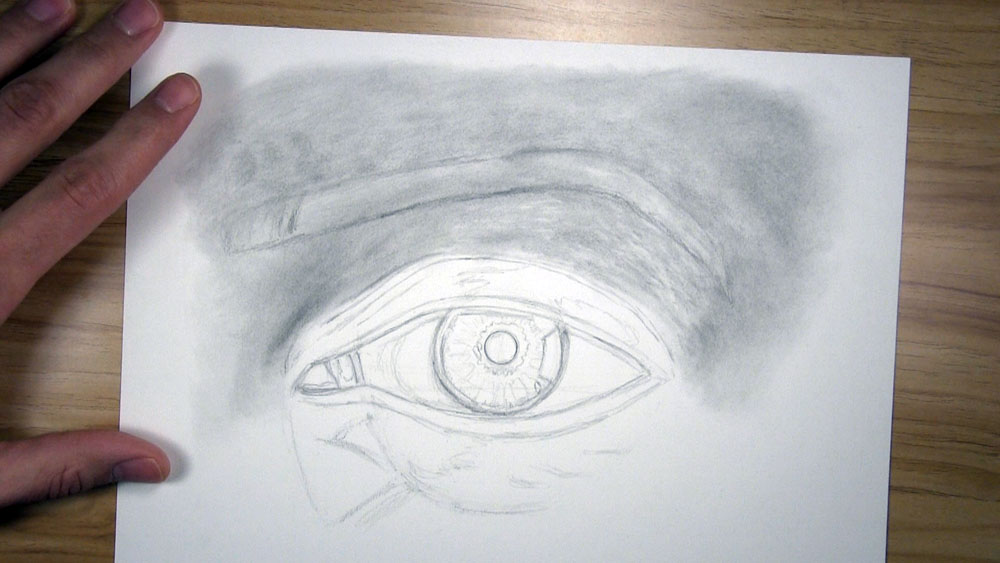
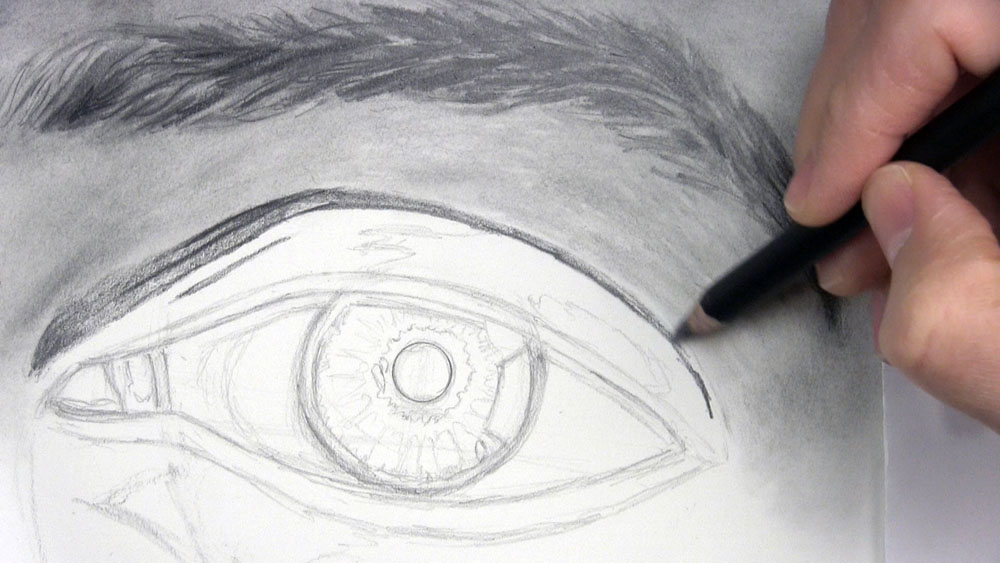
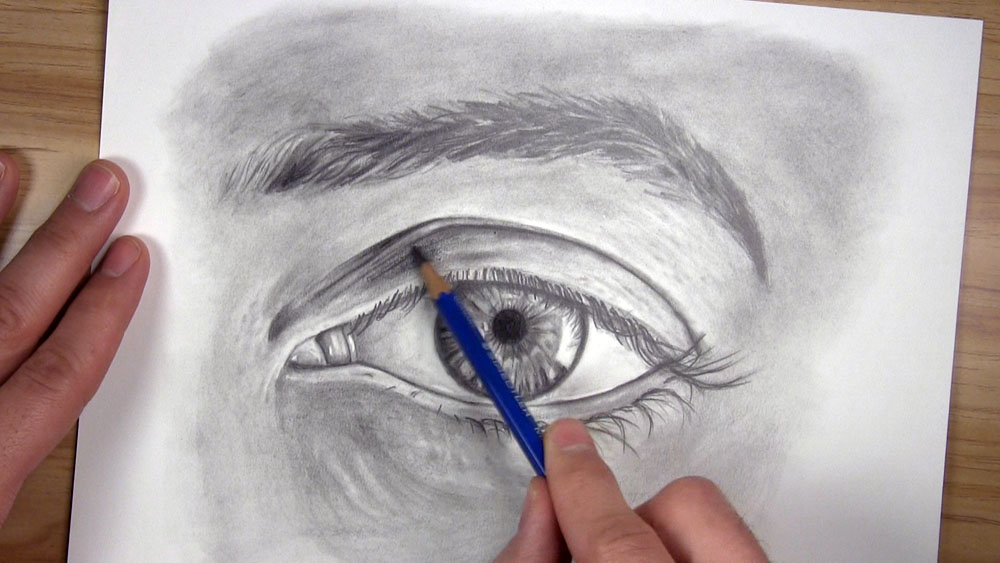
Next, let’s draw the lower edge of the eyebrow. I’m choosing to begin at the inner corner where the eyebrow is thicker. Draw your line going up from the corner and start to bring it back down when you are slightly to the right of the pupil. Plan on tapering the eyebrow at this outer corner. In the example you see here, the distance between the eyebrow and the upper edge of the eye is acceptable for a general eye drawing. However, I decided to make mine lower later in the drawing so it would more closely match the reference photo.
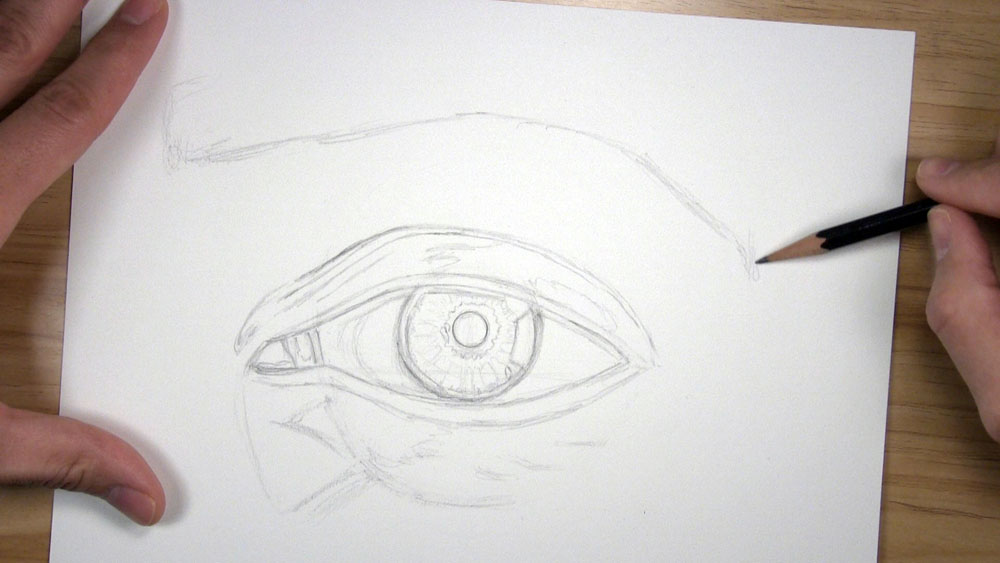
Finish the outline of the eyebrow by drawing the line to form the upper part. Be careful not to make the eyebrow too thick or too thin. Continue to make comparisons of width between other potions of your drawing and with the reference photo, too.

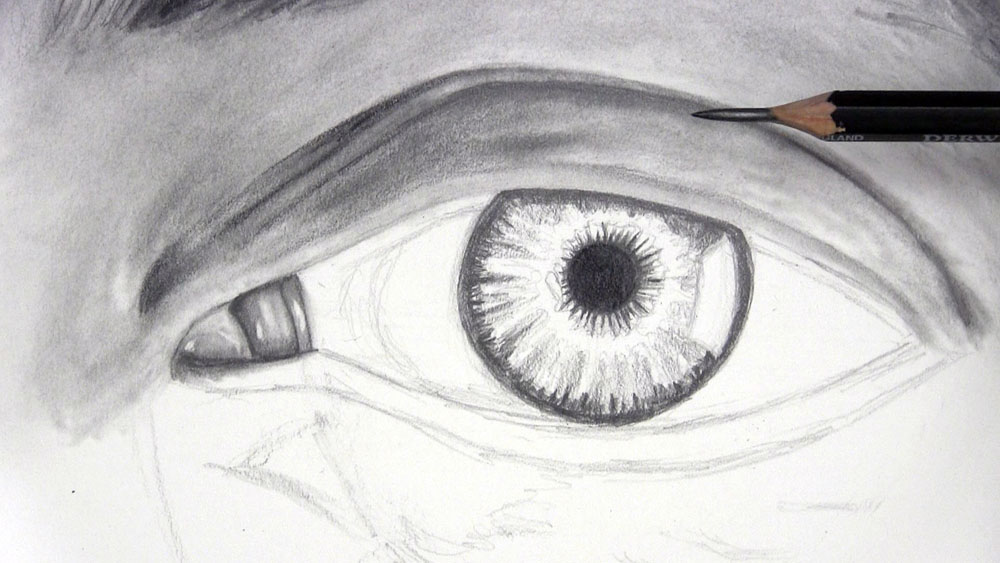
Pencils Used to Draw a Realistic Eye with Shading
As we move on to the shading portion of the drawing, here’s a quick note about the pencils. I suggest using an HB pencil for the lighter areas, a 2B for midtones, and a 4B for the shadow areas.
I switch pencils quite often during this entire process, so I won’t mention each time I switch in the steps below. If you really need to know every time I switch pencils during every step, I do walk you through that in the extended video version of this tutorial.
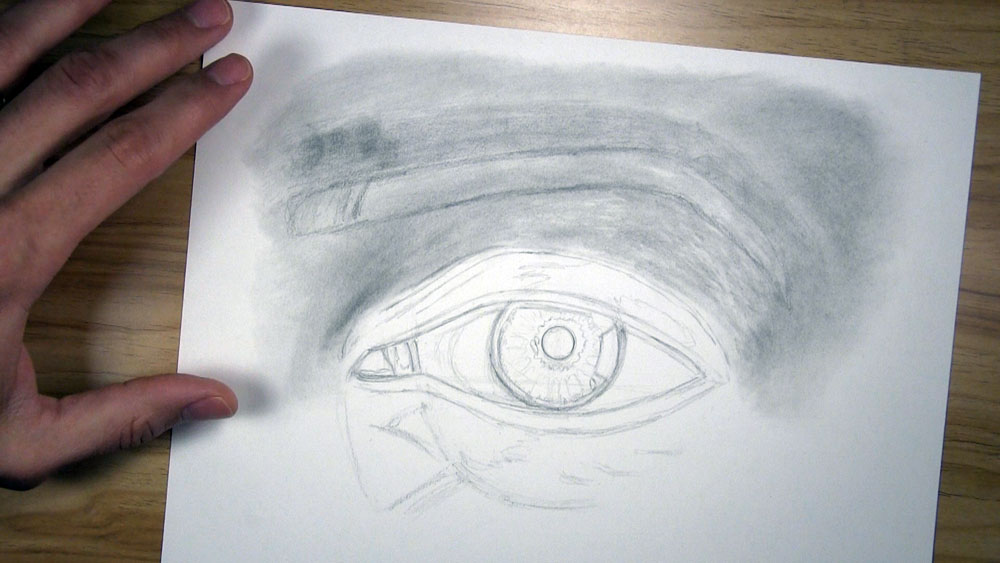
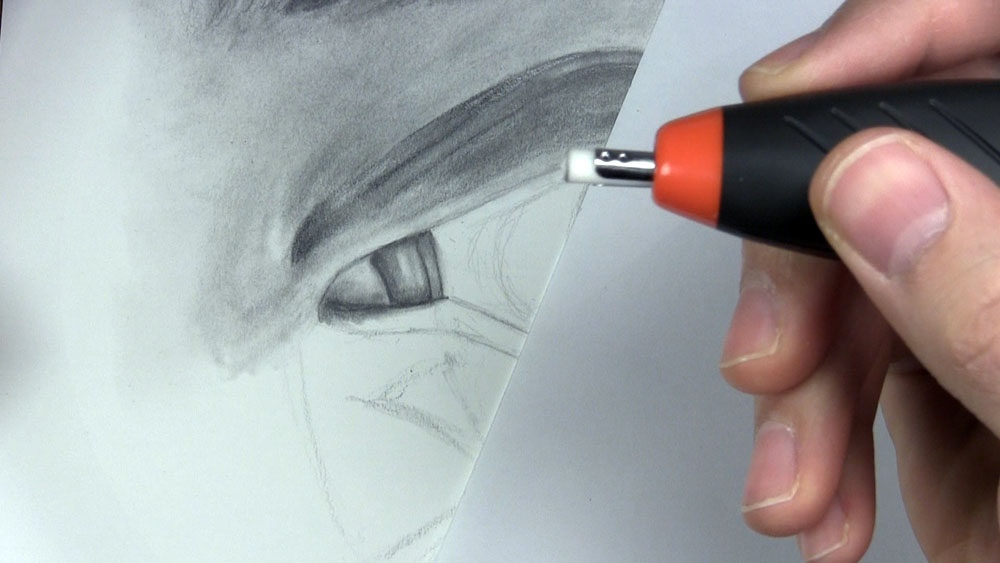
Shade the Area Above the Eye
Shade the eyebrow. Normally, I like to shade the skin underneath the eyebrow before drawing the eyebrow’s hairs. This first layer of shading can represent the shadows on the skin beneath the individual hairs. I want the space for the eyebrow to be a little bit darker than the surrounding skin. Therefore, once the skin is shaded, the darker area will help to maintain the placement of the eyebrow.
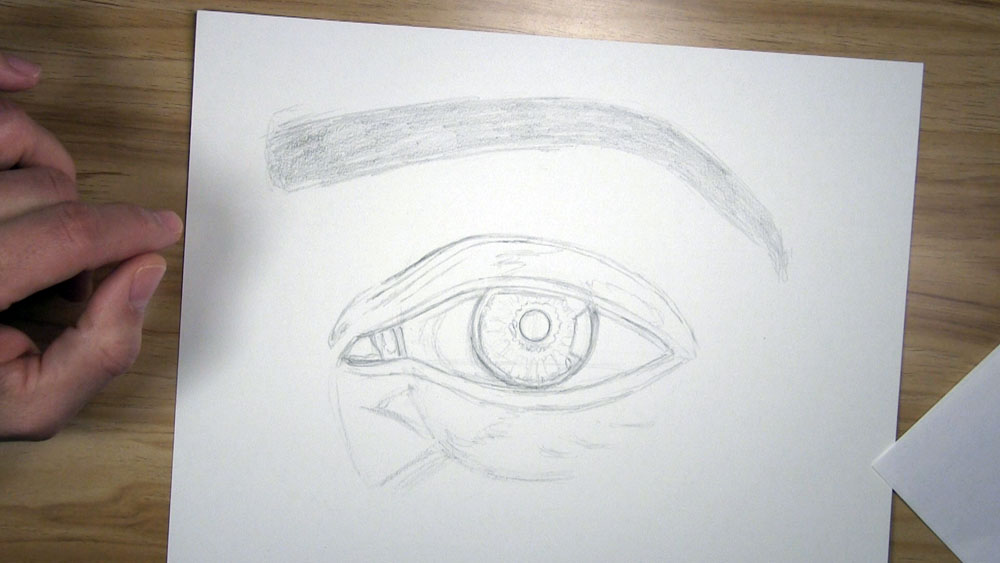
Next, lightly shade the skin tones surrounding the eyebrow. Begin with the area above the eyebrow. Shade in a direction similar to the direction of the eyebrow. When shading the skin, many artists use a hatching approach, keeping the tones very close together and going in the same direction. Many other artists use the more time-intensive circulism, with tight circles very close together, to achieve more realistic textures on the skin. Here, I’m going with a hybrid approach, using elongated circular strokes that are also diagonal.
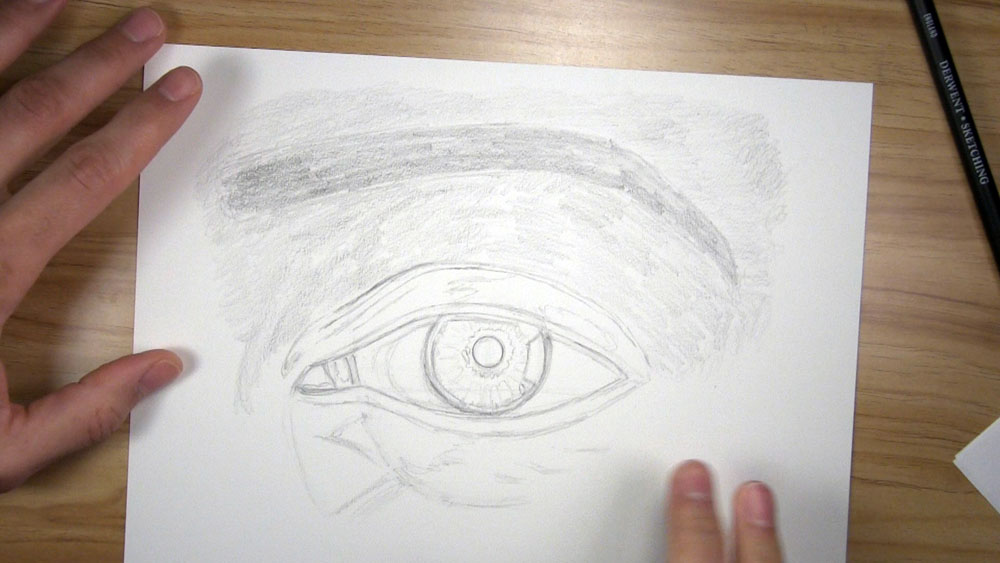
Use a blending stump to blend all of the graphite tones of the skin. Blend in a manner similar to how the pencil strokes were applied. Try to smooth over any grainy patches of graphite.
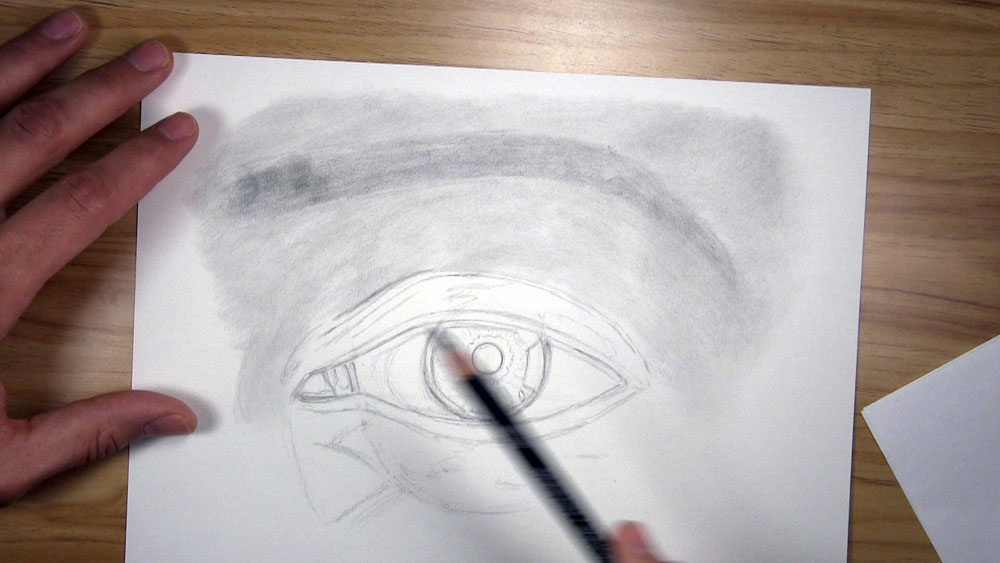
Develop Layers of Shading on the Eyelid
Apply another layer of graphite on the skin over the eye. Put slightly more shading on the left side than the right, where the light source is leaving a lighter area. Then blend these tones once again with a blending stump.
With the long, flat edge of a kneaded eraser, scoop out a few thin highlights on the surface of the skin between the outer corner of the eye and the eyebrow. Doing this will help to create some texture on the skin that can be seen more easily in the highlighted area. Use graphite residue on the tip of a tortillion to create some thin shadow marks directly adjacent to some of the highlights. This will enhance the skin texture.
I Want to Move My Eyebrow
Here’s where I decided to move the eyebrow down a little lower. I maintained the same shape and size as before, but I moved the position directly below the previous one. Again, if you are happy with the placement of the eyebrow in your drawing, you can skip this step and the next one.
Then I used a kneaded eraser to blot the dark area where the eyebrow was originally going to be. The purpose of this blotting was to lighten the tones so they have the same value as the surrounding skin.
Begin Shading the Eyebrow
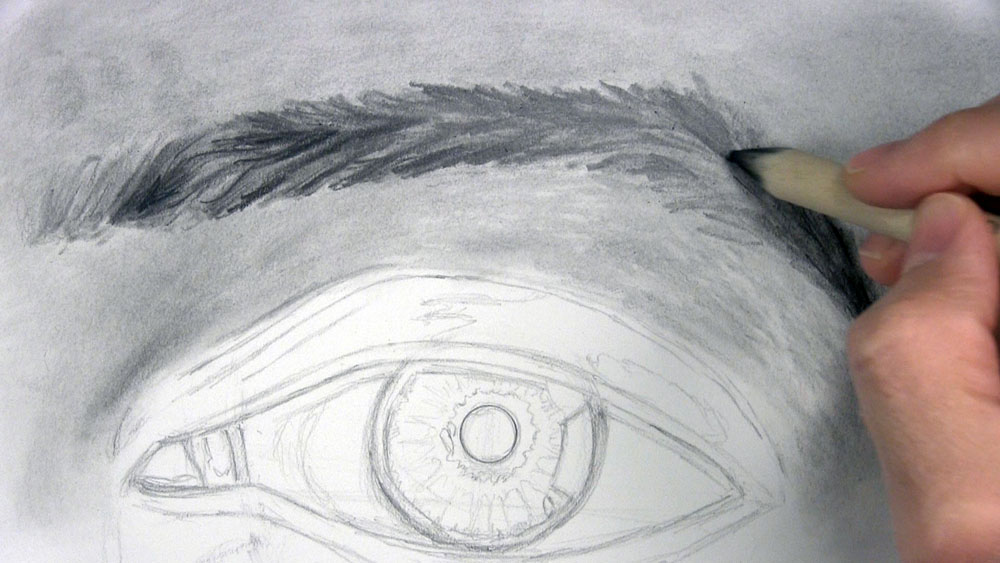
Begin drawing the hairs of the eyebrow. Starting on the left, make light pencil strokes from the base of the eyebrow going upward. Make these lines twist and curl in the same general direction as the hair growth.
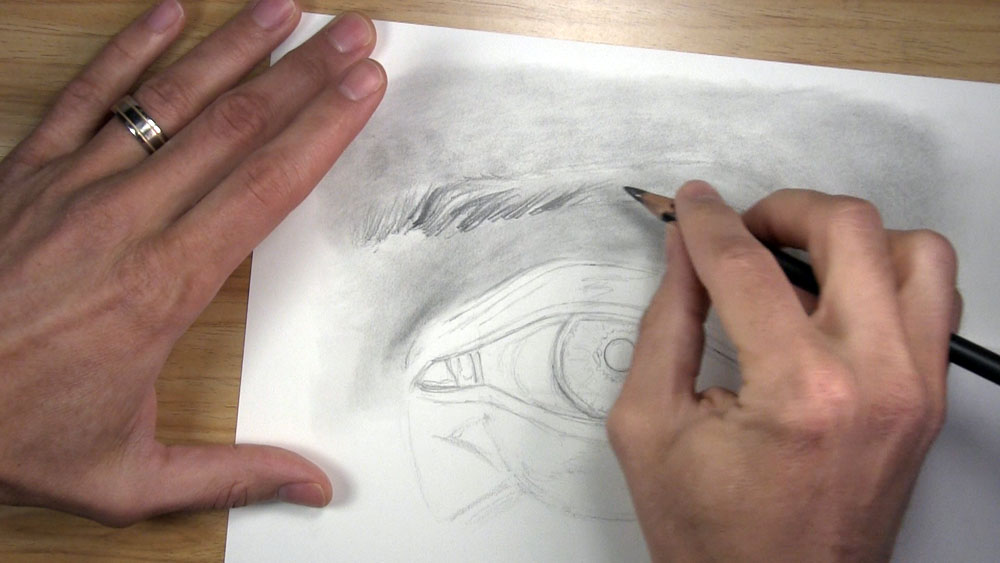
Continue drawing the hairs of the eyebrow. Look at the reference photo to help you decide how the hairs are growing and which clusters of hair are thicker than others and require heavier graphite. Draw hairs jetting inward and to the right from the top and bottom edges. Leave some gaps between some of the hairs. Notice how the eyebrow gets a little thicker at the end and then tapers to a point near the right end.
Blend the tones of the eyebrow with a blending stump. Again, follow the direction of hair growth.
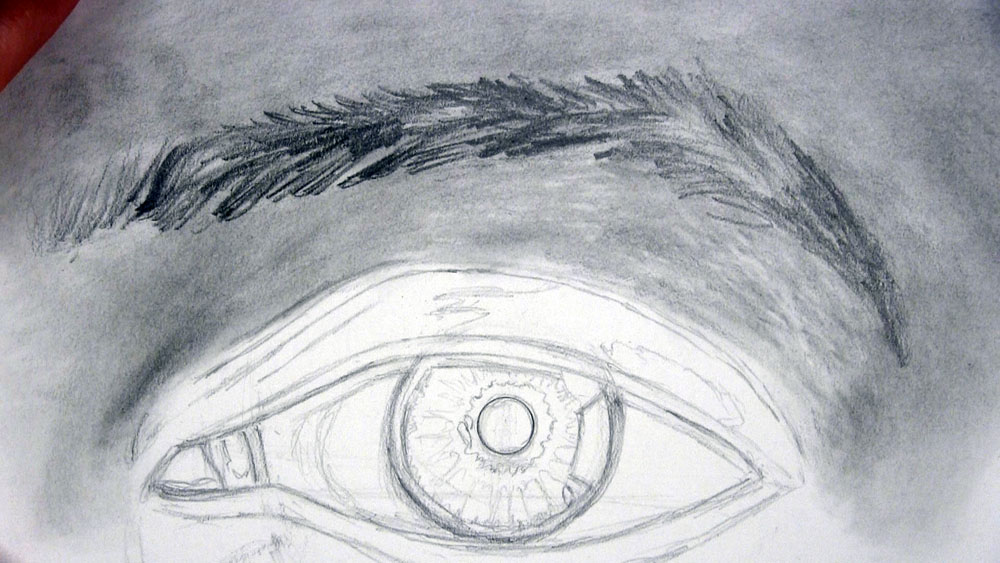
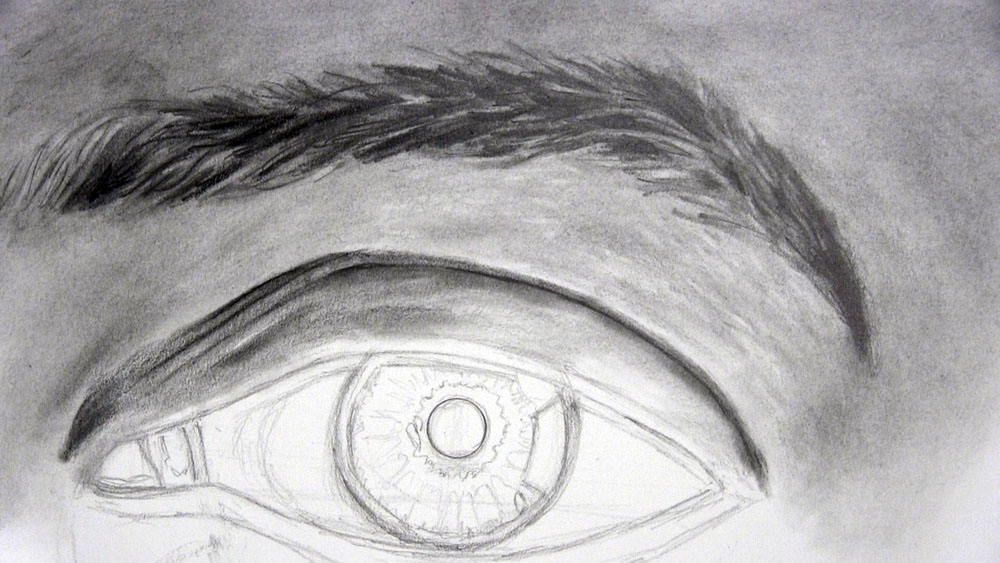
Build the Eyebrow Up in Layers
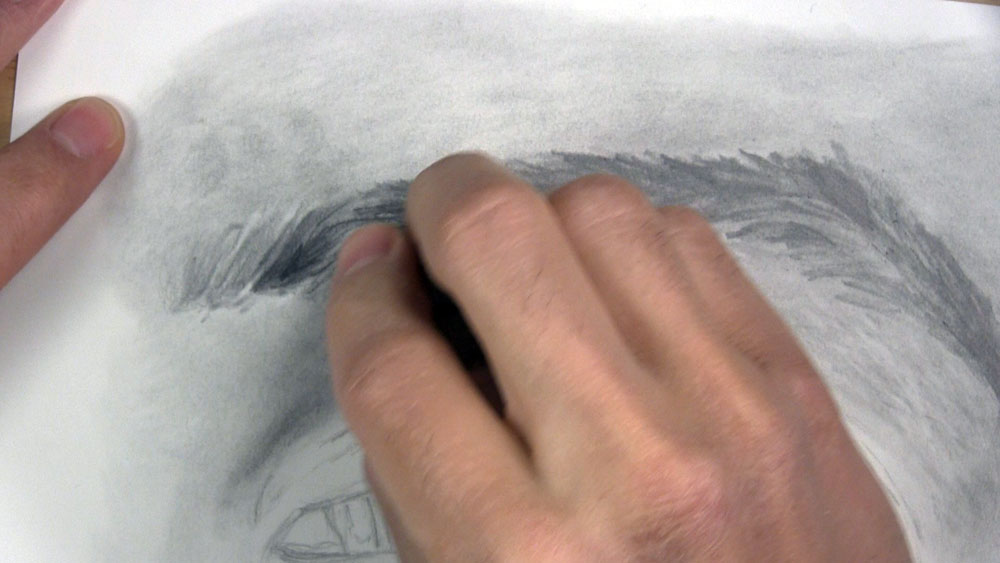
Draw another layer of hairs over the eyebrow. These additional layers add volume to the eyebrow. Then blend the markings.
Use a kneaded eraser to lift streaks of highlights from the eyebrow. If you have always wondered how to draw realistic eyebrows, these highlights mixed among the darker values go a long way towards creating that realism.
Use a mechanical pencil to draw fine hairs that are apparent within the highlighted areas of the eyebrow.
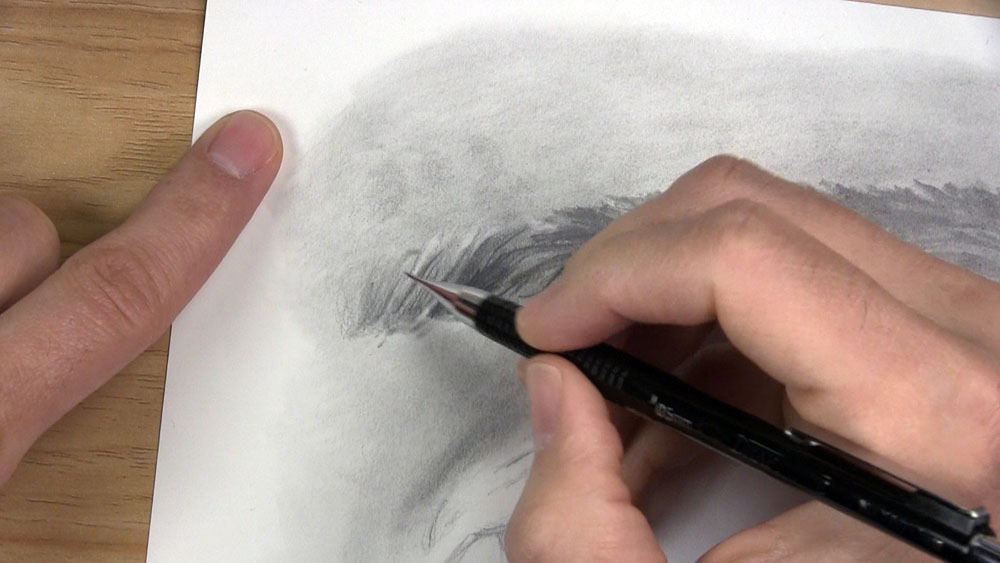
Use a tortillion to blend over the fine hairs. Keep working to add small details to the eyebrow.
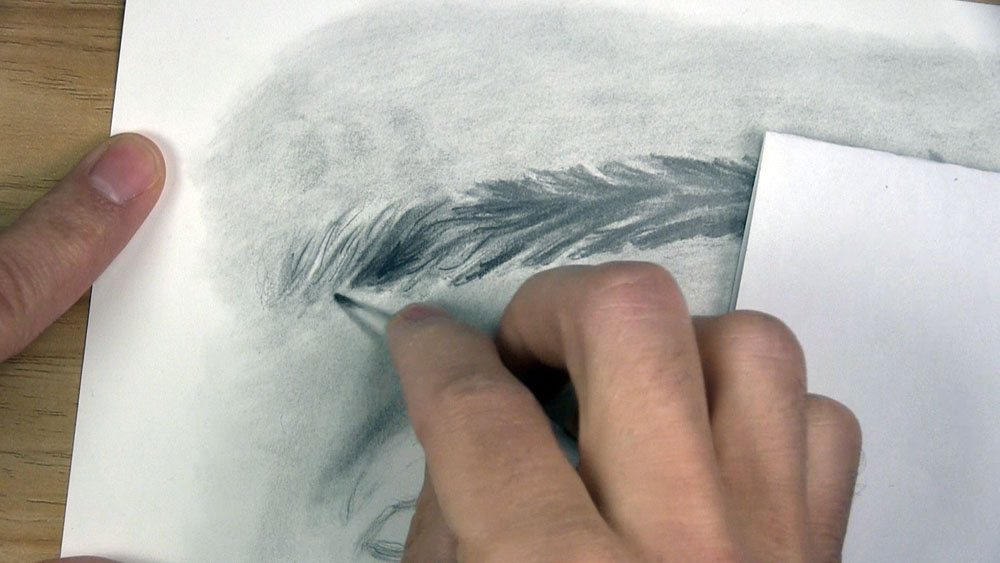
Work your way across the entire surface of the eyebrow. Alternate between the pencil, kneaded eraser, and tortillion to build multiple layers of hair over the eyebrow. You can achieve this look of drawn hair by drawing darker streaks next to lighter streaks. Occasionally, draw hairs that come from the darker areas and extend into the highlighted patches. Make several stray strands of hair on the outer edges as well as strands overlapping lighter areas. Continue layering additional details over the eyebrow until it is complete.

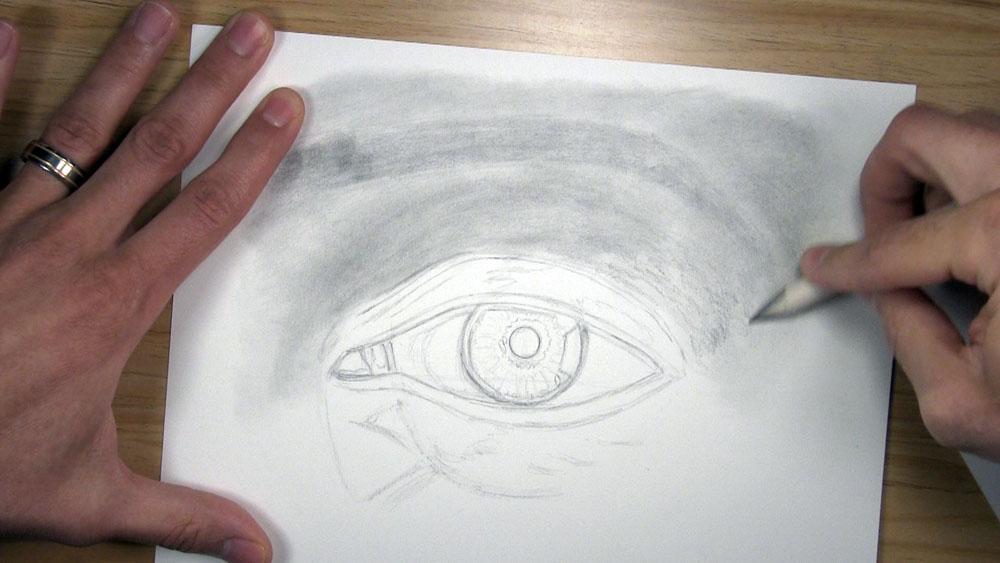
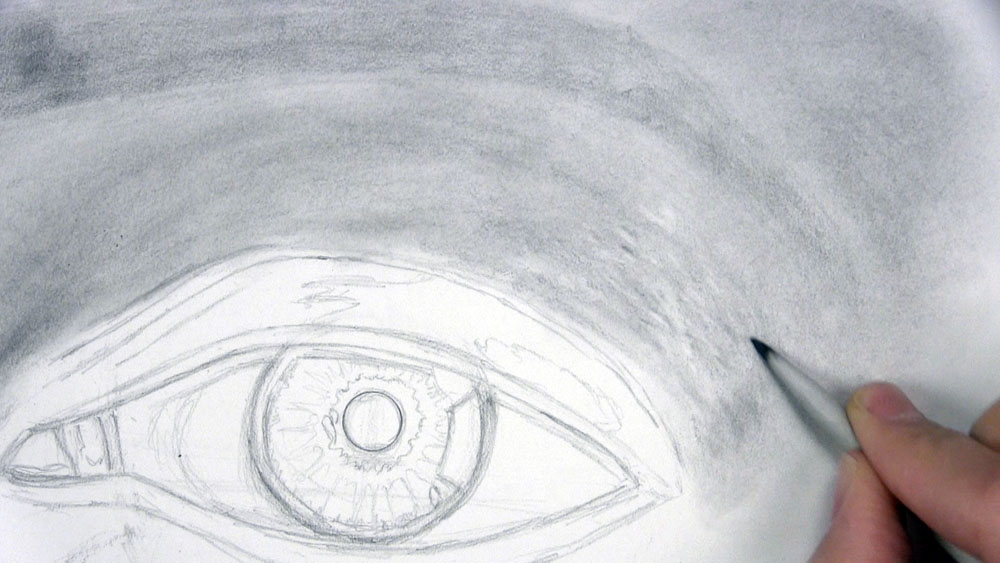
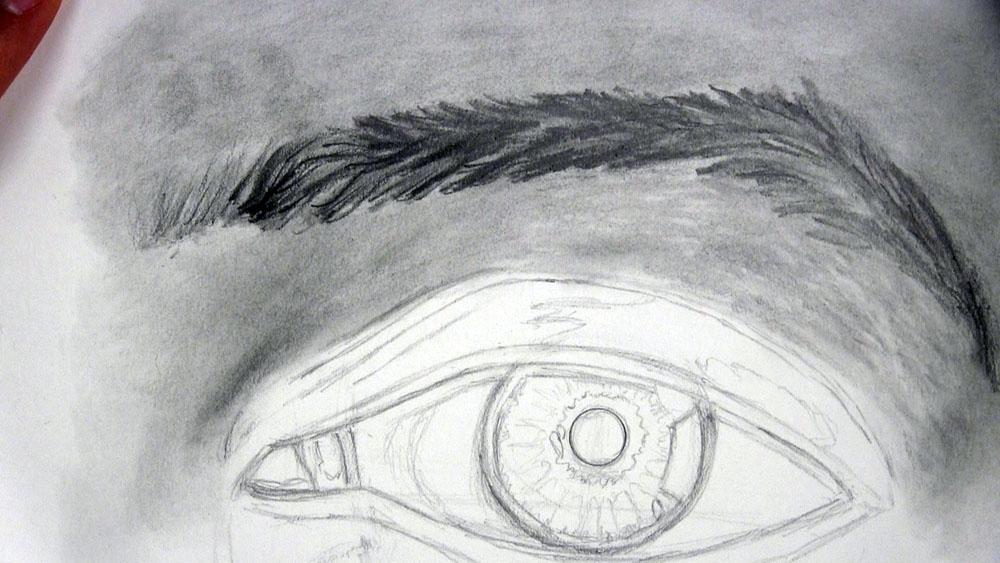
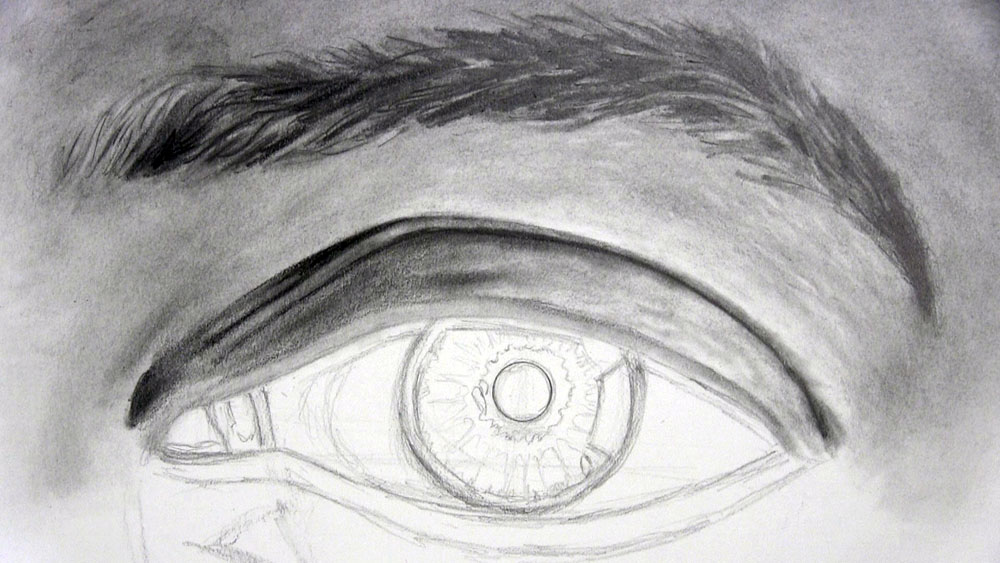
Shade the Upper Eyelid
Put shading along the upper edge of the top eyelid. While doing so, also outline the wrinkle lines so they stand out against the darker tones.
Bring this shading farther down the eyelid. Use the guidelines from the line drawing to help you make decisions about which areas need more shadow. In this drawing, the light source is coming from our right side, so there should be more shadow on our left.
Put lighter applications of tones on the right side of the eyelid. Then blend the tones. As you blend, try to preserve some of the highlighted areas.
Put another layer of darker shadow tones on the left side of the eyelid. Place the darkest tones at the corner and just to the upper right of it, while at the same time using the contrast of darks and lights to better define the eye socket. Use a kneaded eraser and tortillion to create texture in the skin on the right side of the eyelid. Oh, and don’t forget to shade the lower edge of the eyelid too!
Place an extra layer of blended shading at the corner of the eye. Use a kneaded eraser to lift highlights at the corner.
Shade the Inner Corner of the Eye
Begin shading the lacrimal caruncle, which is the first little pink tissue at the corner of the eye. Put more shading near the bottom.
Then shade the next tissue, the plica semilunaris. Fun fact: this vestigial feature is sometimes referred to as the “third eyelid”. Be sure to preserve a couple of areas for highlights.
Smooth out the tones with a blending tool. Then lift highlights with a kneaded eraser. Alternatively, you can use an electric eraser to create sharper highlights and a more “wet” appearance.
Build additional layers of shading, blending, and lifting highlights to complete the details at the corner of the eye.
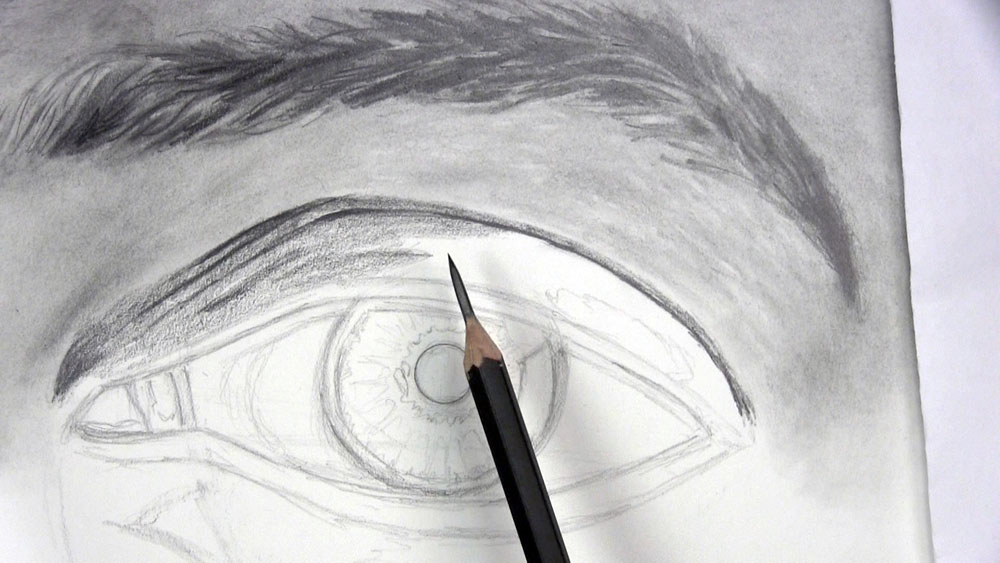
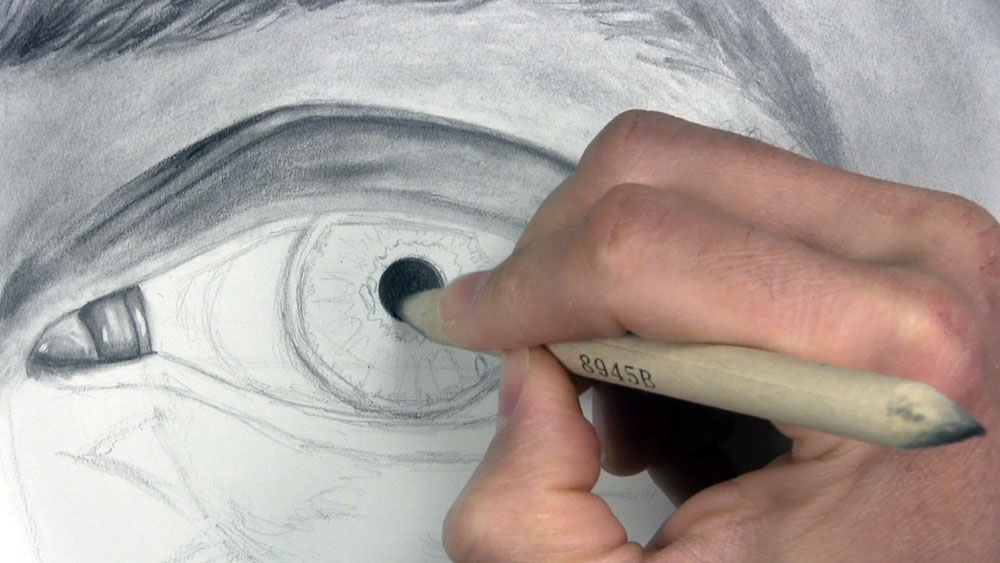
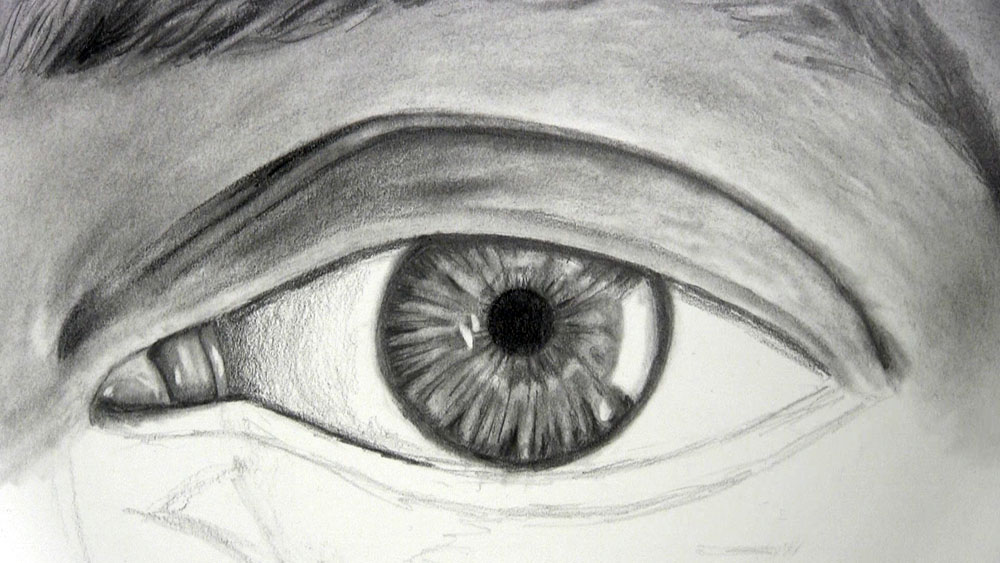
Shade the Pupil
Next, shade in the pupil. Use a circle template to make sure your pencil marks stay within the boundary of the pupil.
Go over the pupil with another layer of shading and a blacker pencil, like an 8B pencil. The pupil should be the darkest part of the eye. Afterwards, blend the pupil.
Shade the Iris
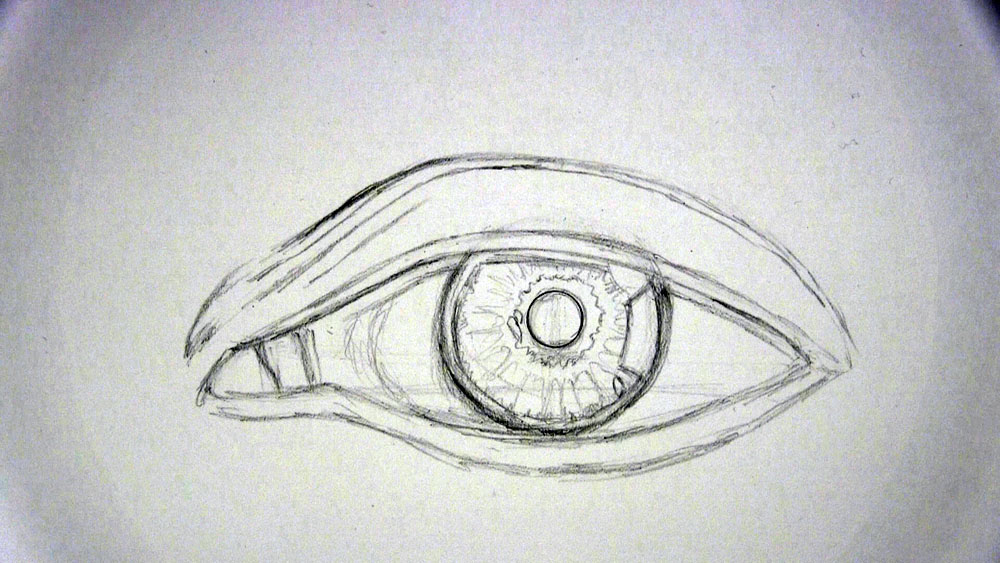
Now, let’s see how to draw a realistic iris. Shade the limbal ring, which is the dark ring going around the outer edge of the iris. Make some short markings radiating from the outer edges toward the center of the pupil. Keep these markings close to the limbal ring, though. Also, place some shading on the iris directly underneath the upper eyelid.
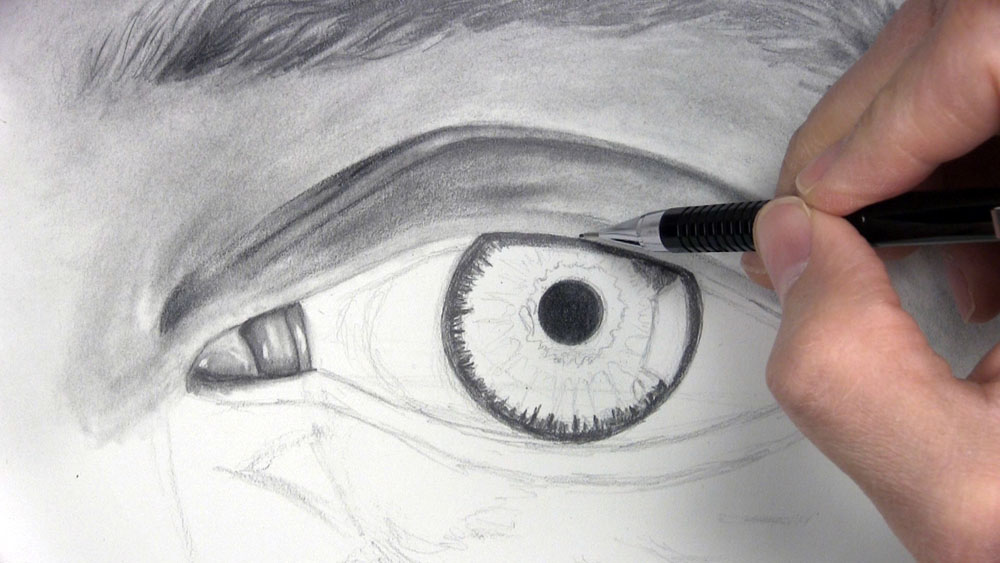
Make similar short markings around the pupil. Again, take care to make these marks appear that they originate from the very center of the pupil. Do not extend the marks beyond the squiggly line that surrounds the pupil. Round the tiny space on the edge of the pupil between each of these little marks. Do this by making little “u” or “n” shapes. Though subtle, this process replaces the perfect pupil border created by the circle template with a more natural and realistic border.
Next, shade all of the spaces on the iris that are between the sunshine ray design pattern that we created during the line drawing. Make sure to leave the large highlight on the right side of the iris untouched.
Put another layer of shading on the iris. Still shade around the highlight and the ring pattern, but this time, emphasize some of the shading directly next to the pattern.
Use a tortillion to blend the tones of the iris. Very lightly glaze over the white areas of the iris too, with the exception of the highlight on the right.
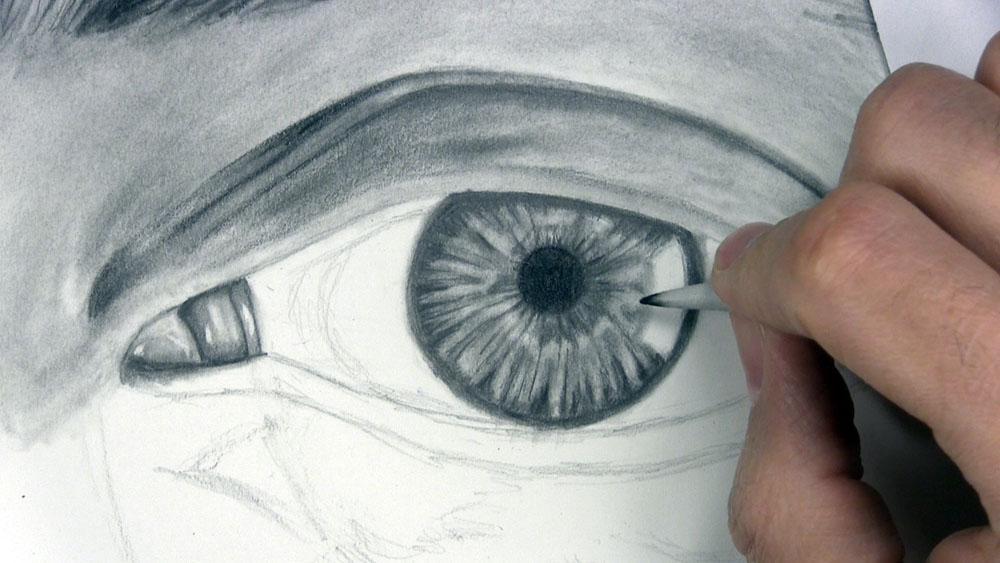
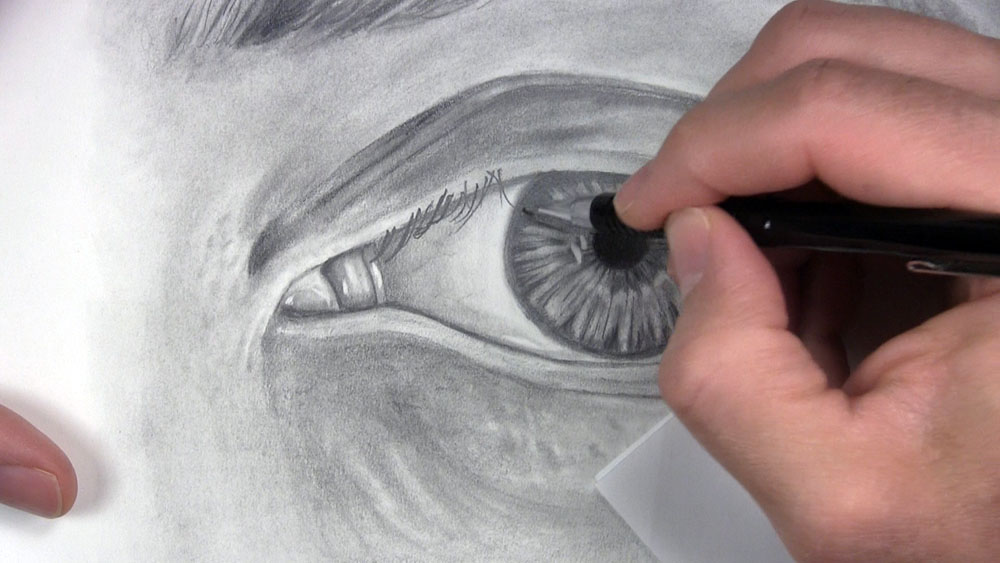
Add a final layer of details by drawing fine lines from the limbal ring toward the center and vise versa. Draw lines in between the ray pattern to better distinguish them. Use an electric eraser to lift some of the smaller highlights near the pupil and below the large highlight.
Shade the White of the Eye
Start shading the white of the eye, also known as the sclera. Put some shading directly under the upper eyelid, which is leaving a cast shadow directly below it. Put some directly over the lower eyelid too, on the left side. Then, very lightly shade the white of the eye to the left of the iris. Your pencil strokes should follow the same curvature as the iris and the spherical eyeball. Make your shading slightly heavier near the corner of the eye.
Blend the tones of the sclera. Blend the cast shadow below the upper eyelid. Use some of the graphite accumulated on the blending tool to put some very light shading on the right part of the sclera, at the corner and near the bottom. If necessary, use a kneaded eraser to lift areas close to each side of the iris so they remain white. Draw very fine lines on each side of the eye for veins.
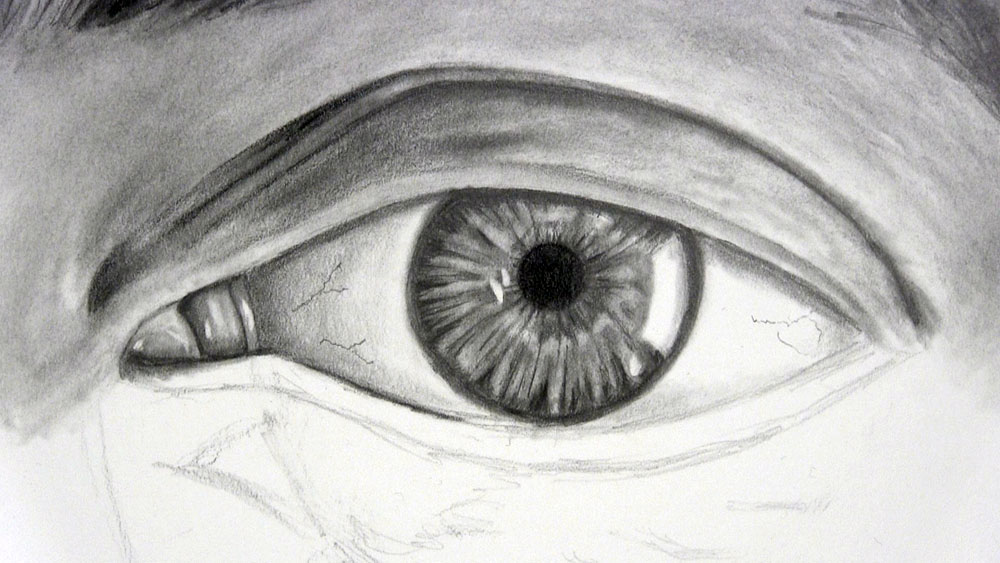
The veins on the sclera should be barely noticeable, so blend them. Lift them with a kneaded eraser if they appear too dark.
Use an electric eraser along the bottom of the eye to make some streaks of moisture.
Shade the Lower Eyelid and the Area Below the Eye
Now, let’s focus on the area below the eye. Begin by shading the upper edge of the lower eyelid. Even here, just as everywhere else in the drawing, you should be aware of variations between lighter and darker areas.
Then, shade the entire area below the eye. Use the guidelines from the line drawing to remember which areas should be darker, like under the inner corner, and which areas should be lighter, like under the right side of the eye.
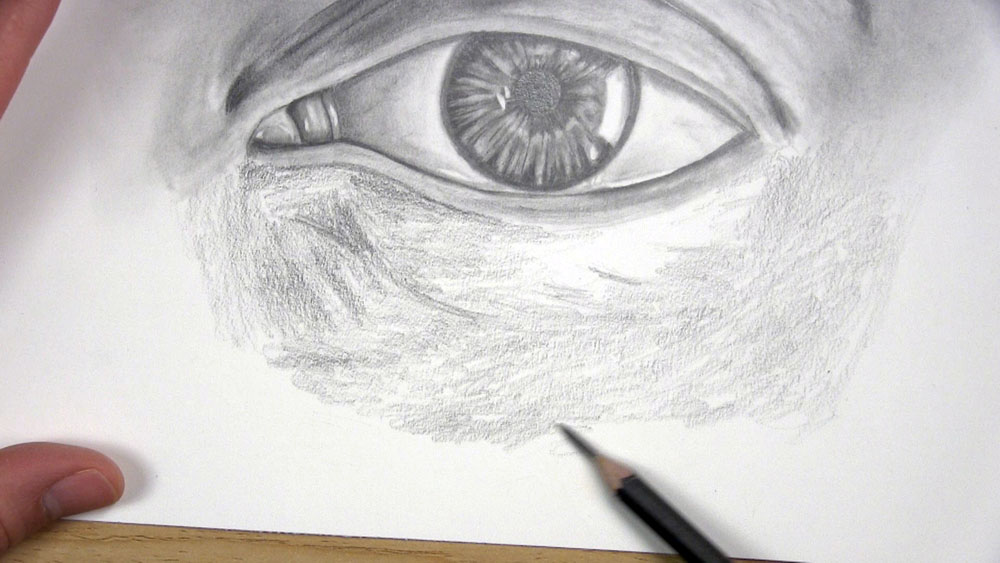
Use a blending stump to blend the skin tones. Blend around the highlighted areas.
Place another layer of shading over the skin. Put extra shading under the inner corner. In the highlighted areas, use a kneaded eraser and graphite from your pencil or blending tool to create textured areas of skin, just like we did for above the eye.
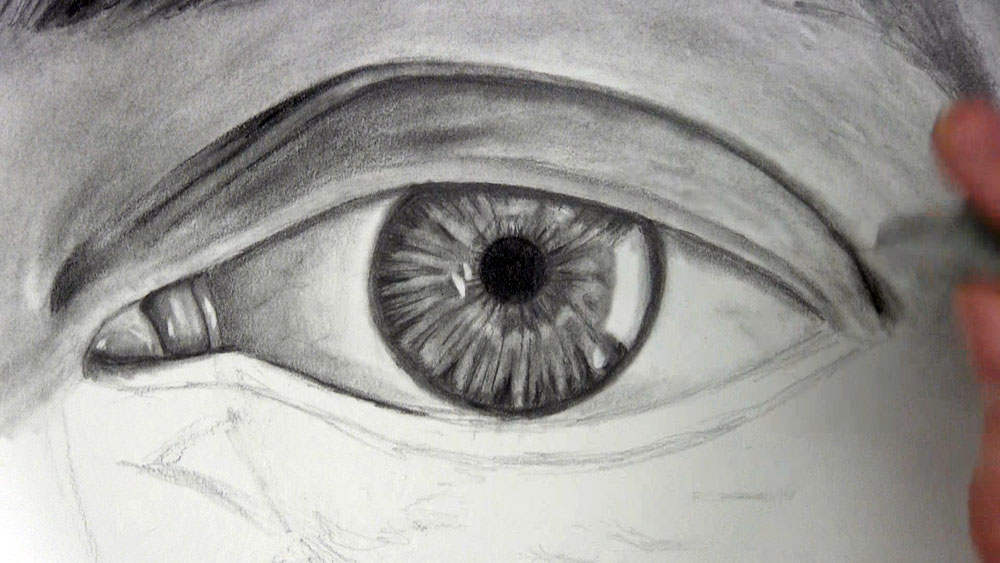
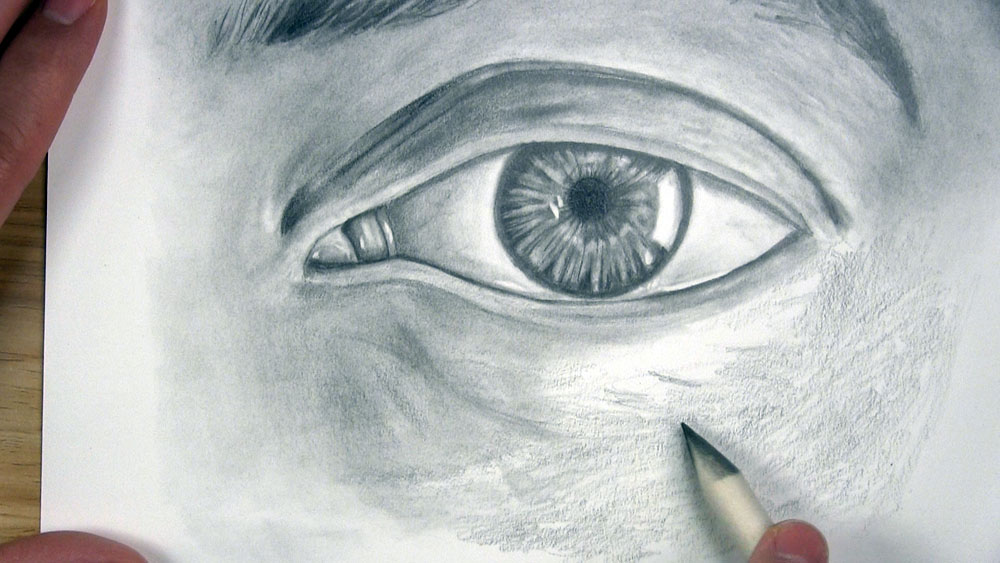
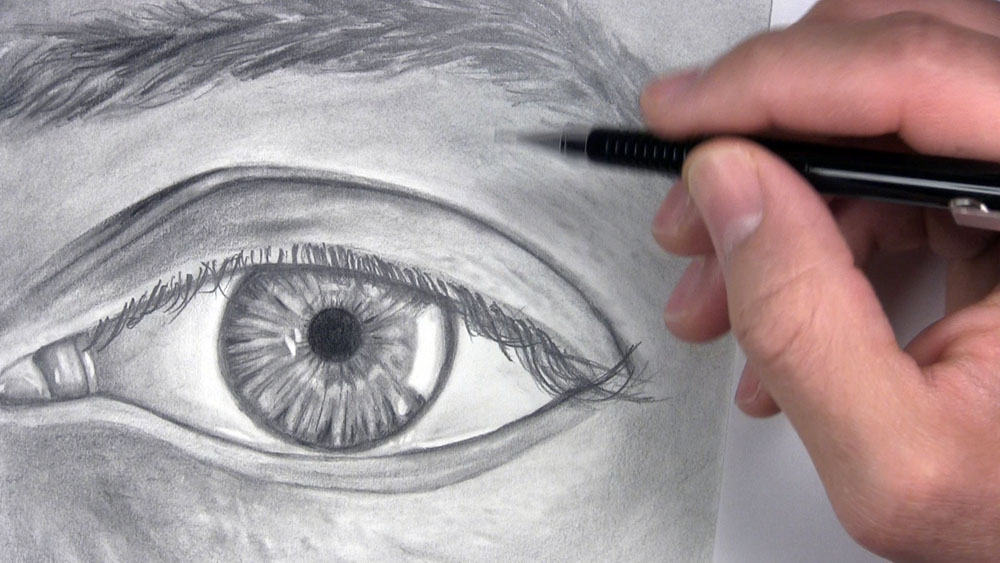
Draw the Eyelashes
Whenever I draw an eye, I always save the eyelashes for last. Here is how you can draw realistic eyelashes. Begin drawing eyelashes coming down from the upper eyelid. I like to start at the eyelid, or the root of the eyelash, and work my way to the end, tapering the eyelash with a gentle lift of my pencil.
Use the reference photo to help you place the eyelashes. Don’t draw stiff, evenly-spaced lines. Make your eyelashes look more realistic by drawing some close together and some space farther apart. Draw some shorter and some a bit longer. Draw the longest eyelashes at the outer corner of the eye, with big swoops down and back up again.
Gently blend over the eyelashes with a tortillion. This softens the eyelashes while also creating a little bit of shadow from the eyelashes onto the eye behind it.
Use a sharp pencil to draw the reflection of the eyelashes in the highlight of the iris. Start from the edge of the iris and draw inward with a slight curve and diagonal.
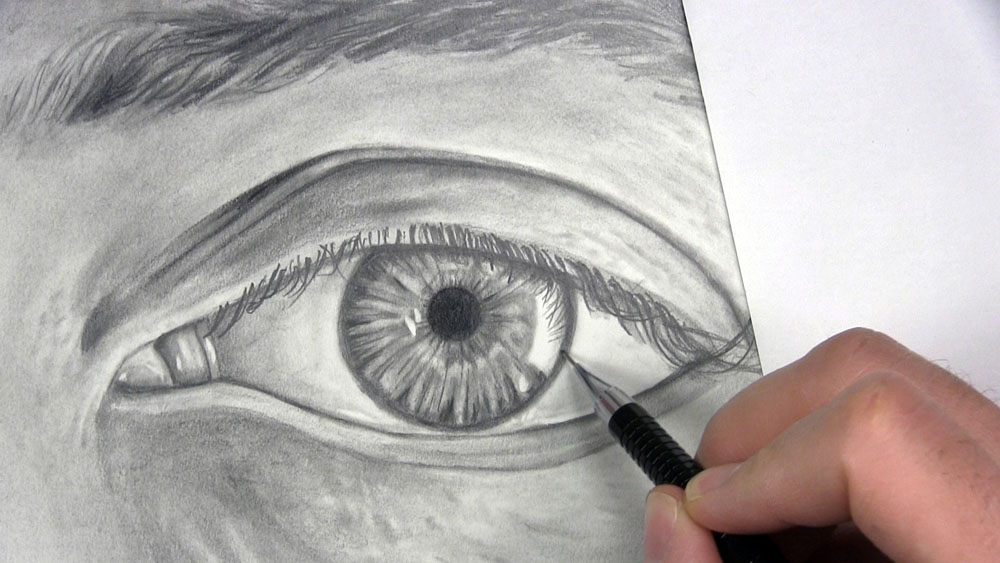
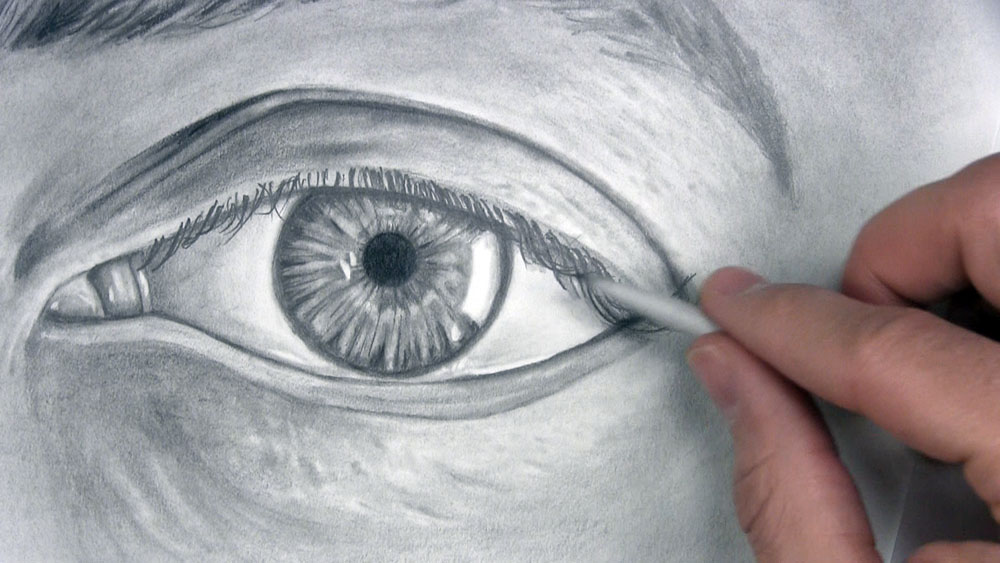
Next, draw the eyelashes on the lower eyelid. These eyelashes are not as plentiful as the ones on the top eyelid. They are also more scattered and have a different curvature.
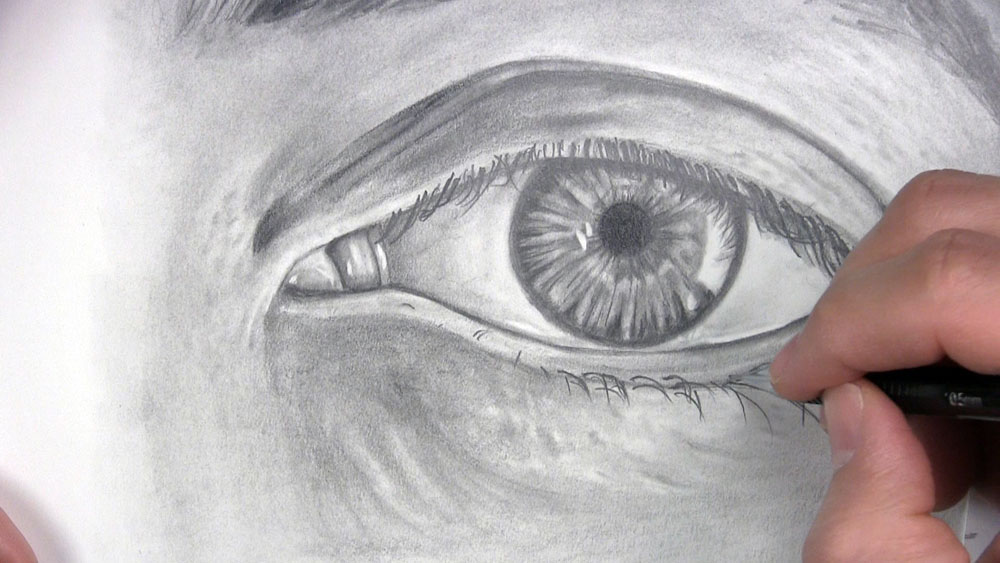
Finish drawing the remaining eyelashes on the bottom and a few longer ones from the top that extend well beyond the outer edge of the eye.
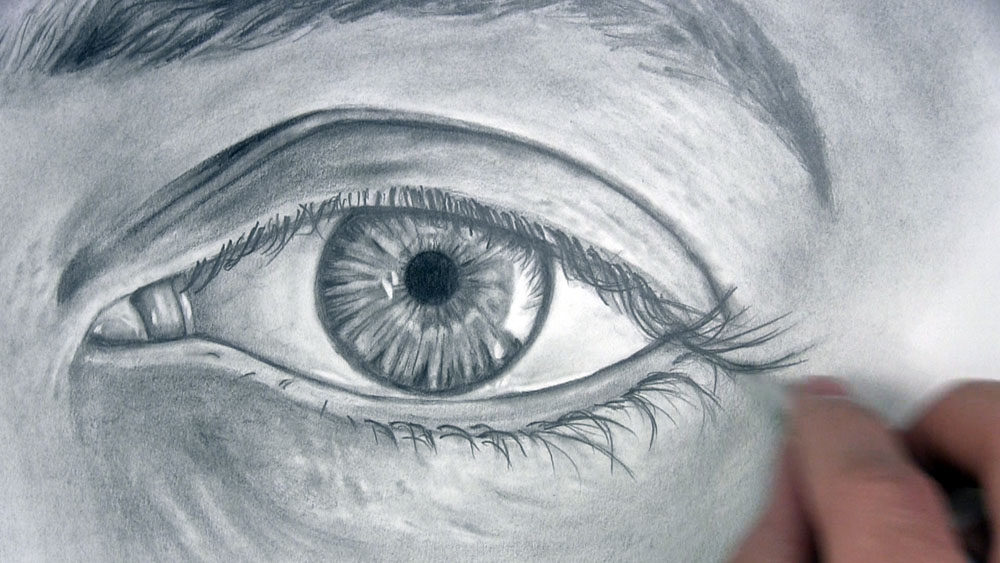
Take a final look at your eye drawing. Add finishing touches by applying darker tones from a 6B pencil next to lighter ones to build contrast. Lift any highlights that need to be brighter. Touch up any areas and edges that need to be sharper or more blended.
And that is how to draw a realistic eye!
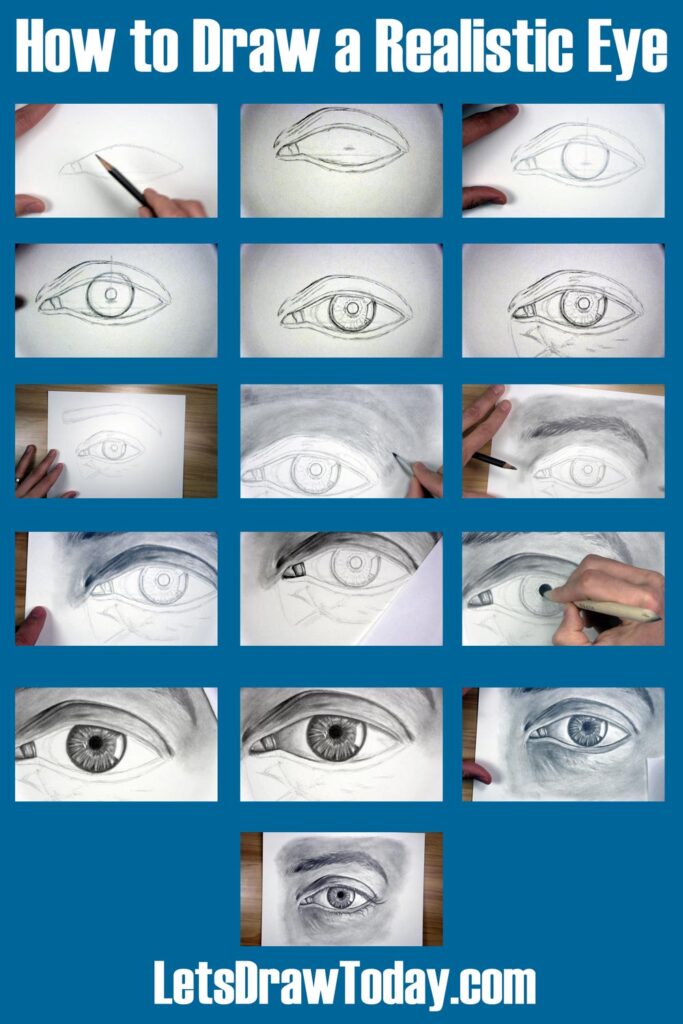
Tutorial Recap
For a quick visual recap of this tutorial, take a look at the image below. It shows you a progression of the main steps for how to draw a realistic eye.
Tips to Remember the Next Time You Draw a Realistic Eye
The next time you are looking to draw a realistic eye, here are a few tips to keep in mind:
- Use a reference photo so you can include all of the little details about the eye that you might not think about if you were drawing from background knowledge alone.
- While using a reference photo, still remember to allow yourself a little bit of flexibility. If you are only drawing the eye of a person and not the entire face, there is less of a need to capture an exact likeness that resembles a person’s face. This means you can keep that eyebrow a little bit higher, you can include more or fewer eyelashes, or you can vary the amount and placement of moles or wrinkles on the skin.
- Consider using both a color and a black-and-white version of your reference. You can use both photos together to give you information about light and dark values as well as changes in color, such as the variations found in the colorful design pattern of the iris.
- Try drawing a variety of eyes in a realistic way. Try drawing eyes looking in different directions. Maybe you can draw an eye from the side view. To create even more meaningful artwork, try drawing eyes that convey different emotions, like surprise, sadness, or even anger.
If you have ever struggled with drawing an eye and making it look real, hopefully you have found this eye-drawing tutorial helpful! More importantly, I hope you were following along and drawing an eye of your own step-by-step with me. If not, now is the perfect time to practice!