How to Draw a Tree with Leaves in a Surprisingly Familiar Way
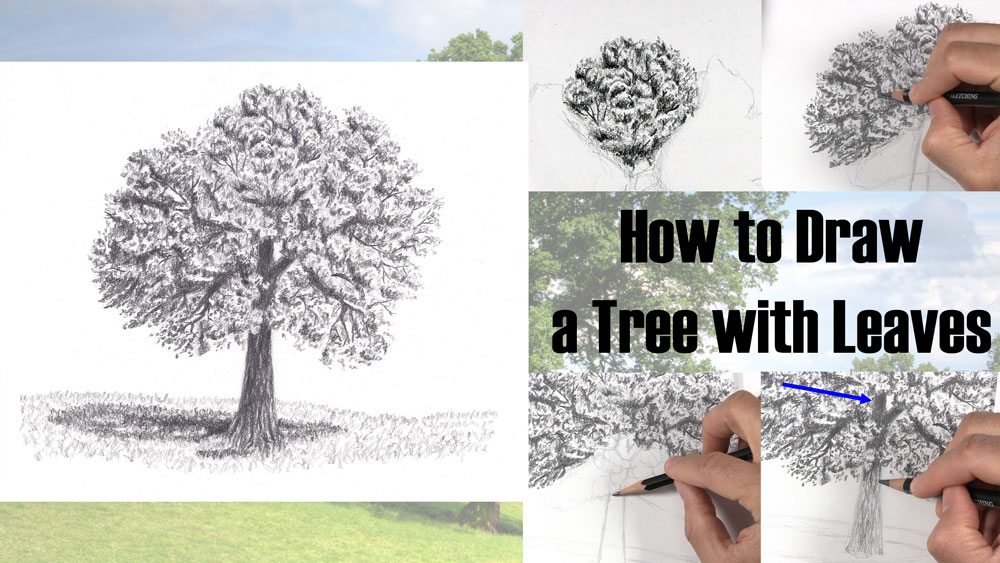
For many of us, the tree we drew in grade school consisted of a simple, bushy cloud shape sitting on a stump. This may surprise you, but what if I told you that you can draw a realistic tree with leaves the same way?
Drawing a leafy tree, much like drawing anything else, is all about starting with very general, very broad basic shapes, just like that tree from grade school.
From this basic framework, we can break the tree down into even smaller shapes and develop details, one small shape at a time.
There are many approaches to drawing a tree. In this tutorial, I will show you one of those approaches. You will learn how to draw leaves on a tree, as well as branches, a tree trunk with bark texture, and even some grass.
Join me so together we can draw a tree with leaves!
Table of Contents
Use a Reference Photo to Draw a Tree with Leaves
The reference photo for this tutorial happens to be a big oak tree. I chose to omit some of the lower leaves as well as the other trees in the background. Additionally, I decided to make the ground level a little flatter.
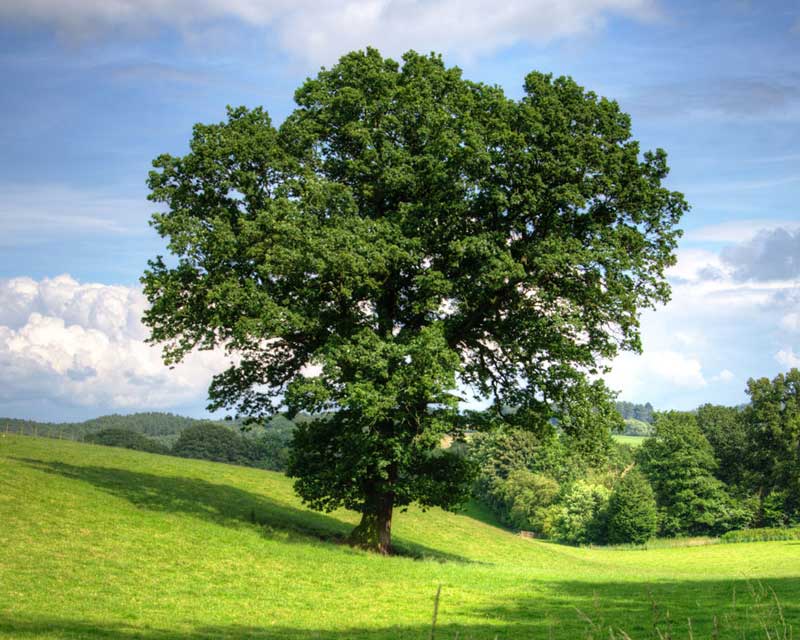
You can use the same concepts you learn from this tutorial and apply them to drawing other trees.
Materials Used to Draw a Tree with Leaves
Here is a list of the materials I am using for this drawing.
If you don’t have some of these materials, that’s okay. You can still make do with a regular pencil and eraser, as long as you just get started!
If you wish to purchase any of these materials, they can be found at your local art store, or you can buy them using the links below.
Affiliate Disclaimer: The links on this page are affiliate links. I will receive a small commission if a purchase is made through one of these links. Learn more here.
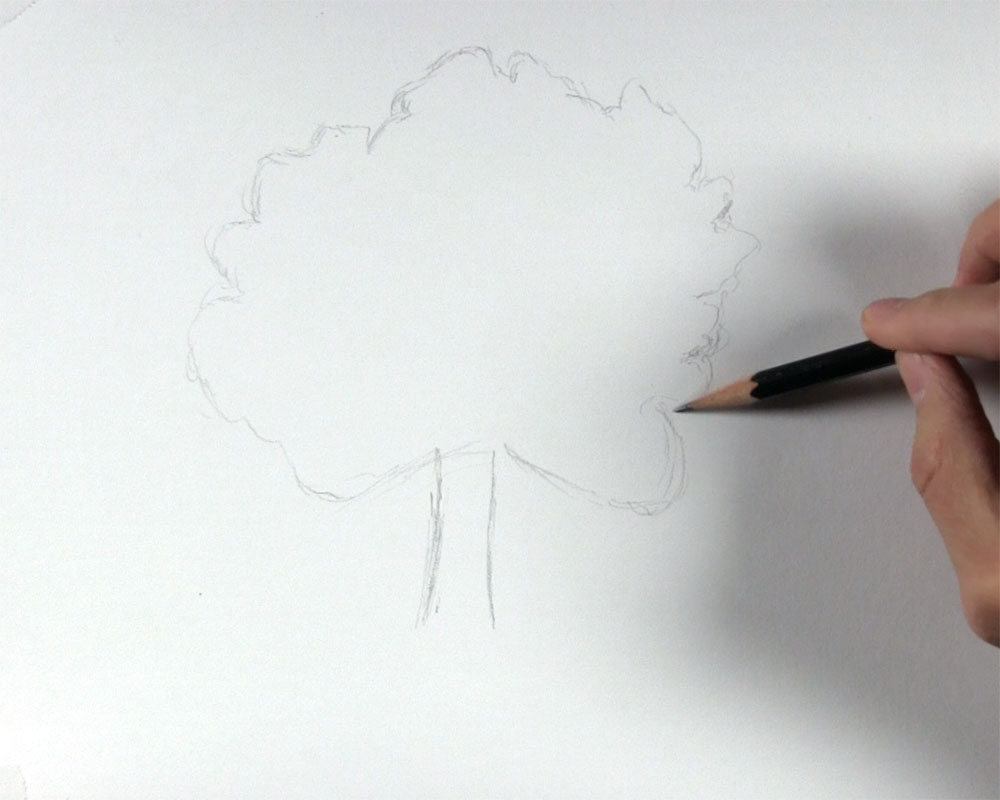
Draw the Tree’s Basic Outline
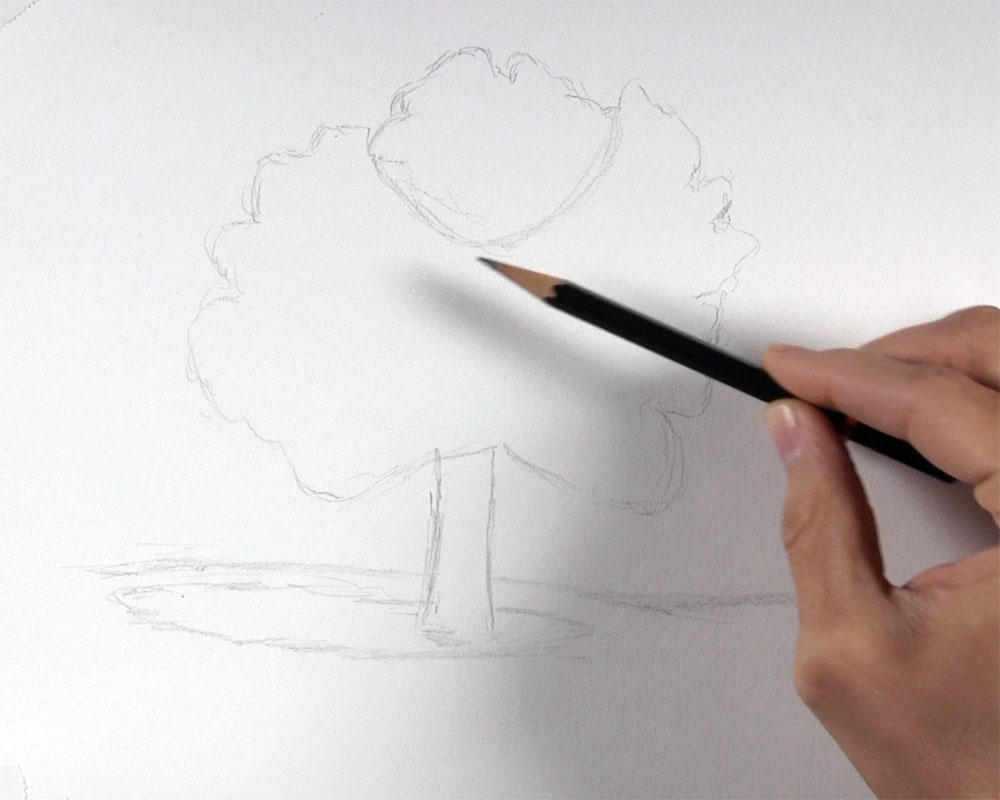
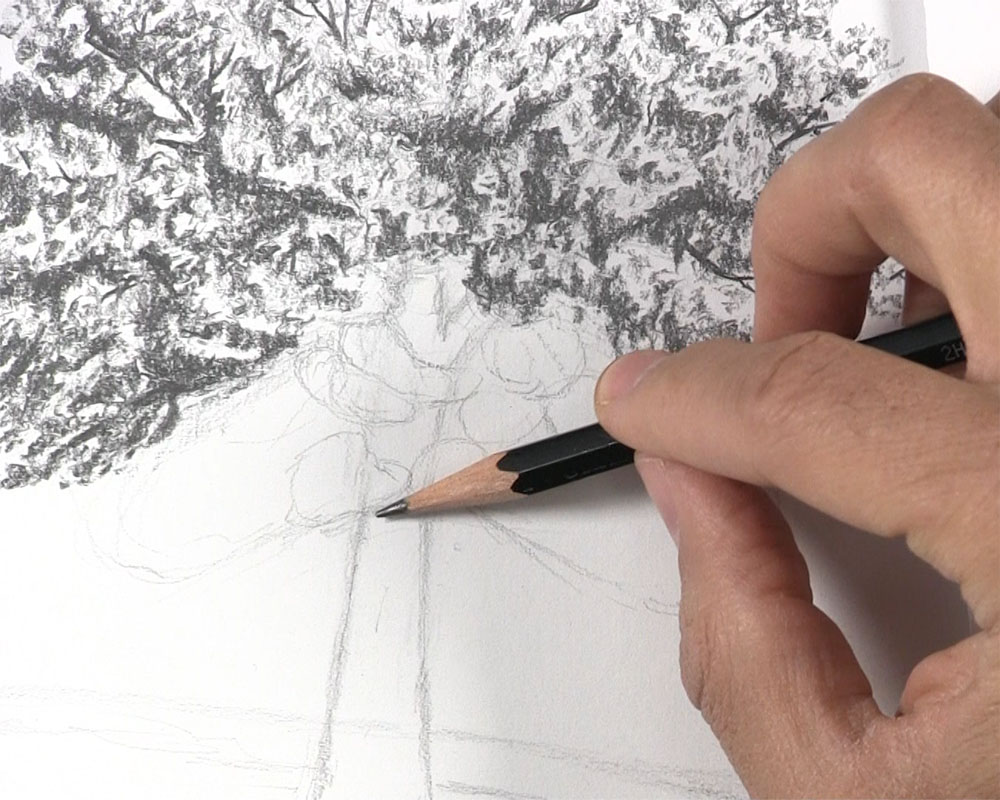
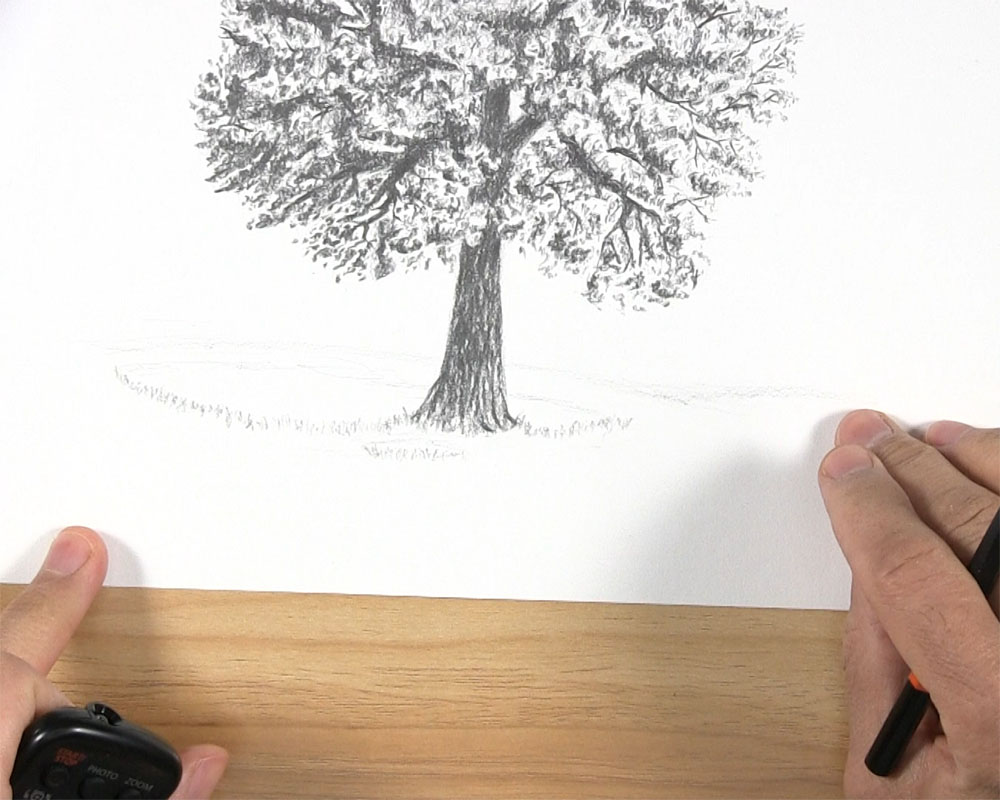
To begin, use a 2H pencil to draw something very similar to a tree you might have drawn in grade school. Draw two lines for the trunk. Then draw an irregular contour for the outer edges of all the leaves. You can use the reference as a rough guide or create a similar irregular shape.
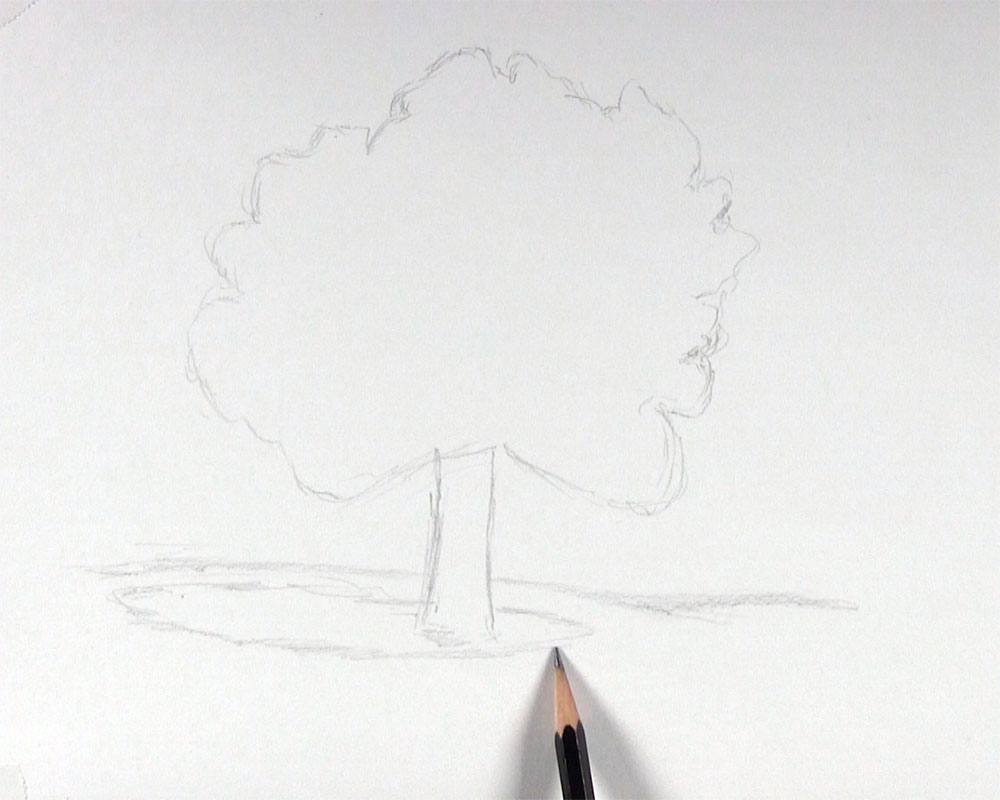
Next, draw a line for the ground. The tree from our reference photo is on the side of a hill, but I decided to make my ground a little more level. After that, draw the outline of a shadow. Since the sunlight is coming from the upper right, I drew the shadow under the tree mostly to the left side.
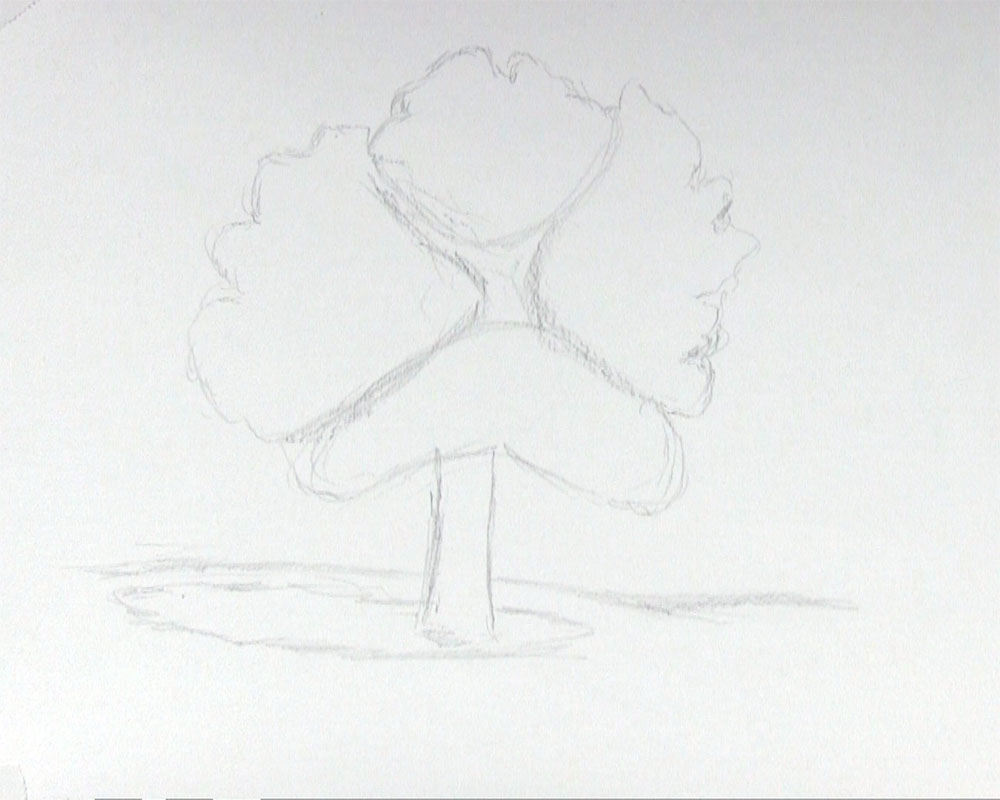
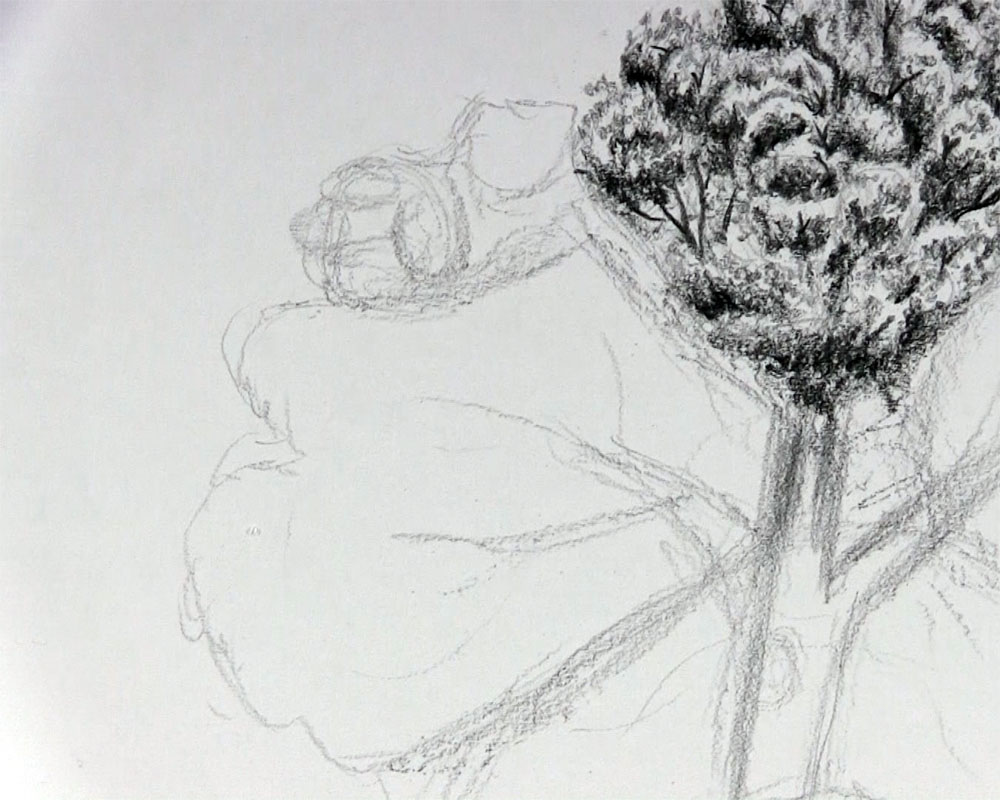
In order to make our grade school tree look more like a real tree with leaves, we will need to draw more details! It’s best to start by breaking our basic shapes down into smaller basic shapes. For this particular tree, I’ve identified four major sections of branches and leaves. I’m marking off the top section here.
Then I marked off the three remaining sections in a similar manner. There’s a big section on the left, another on the right, and one at the bottom. The reference shows us another section below all of this, but I decided to omit that so I can have more of the trunk exposed in the drawing.
Divide the Top of the Tree into Individual Shapes
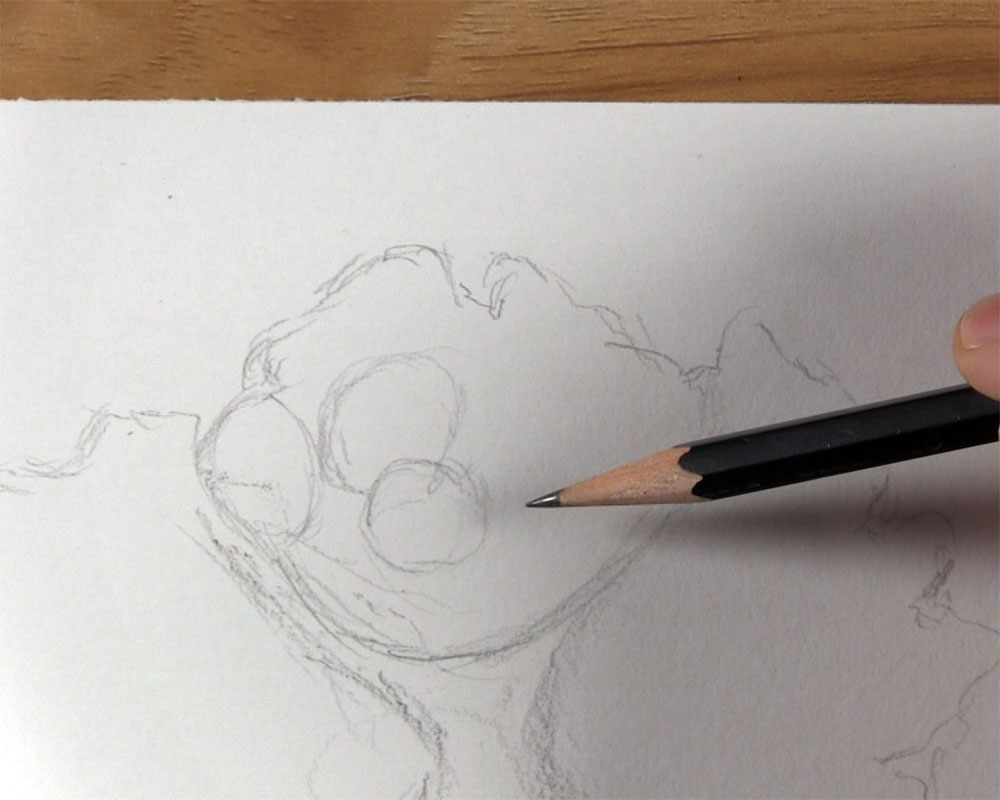
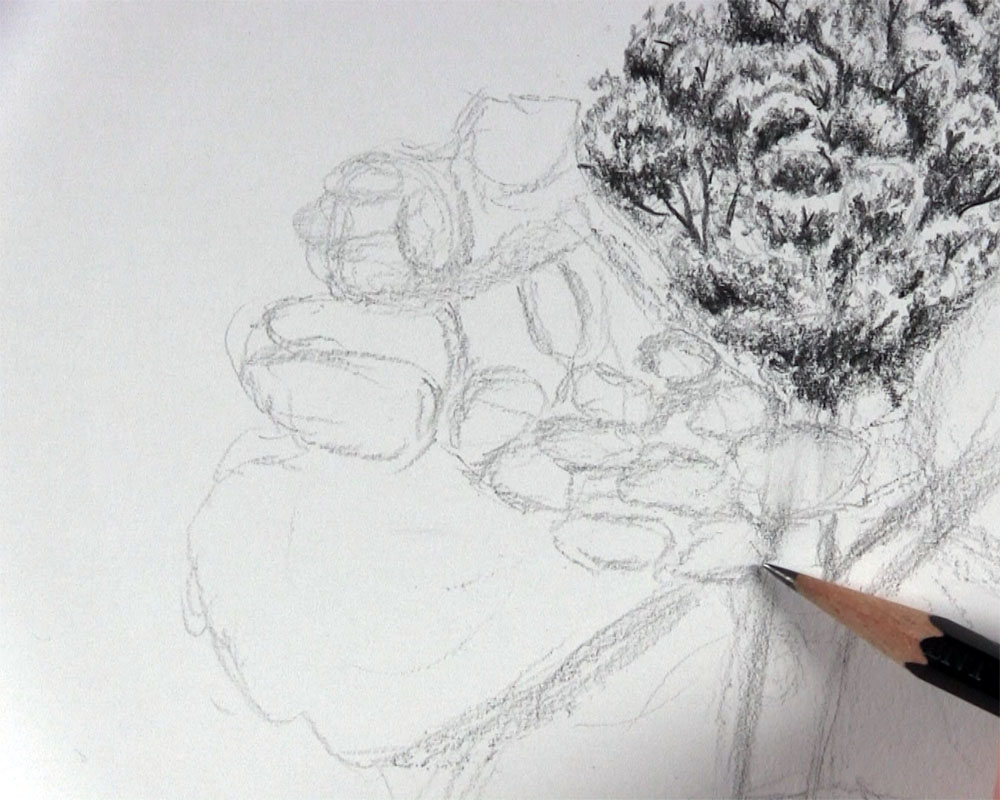
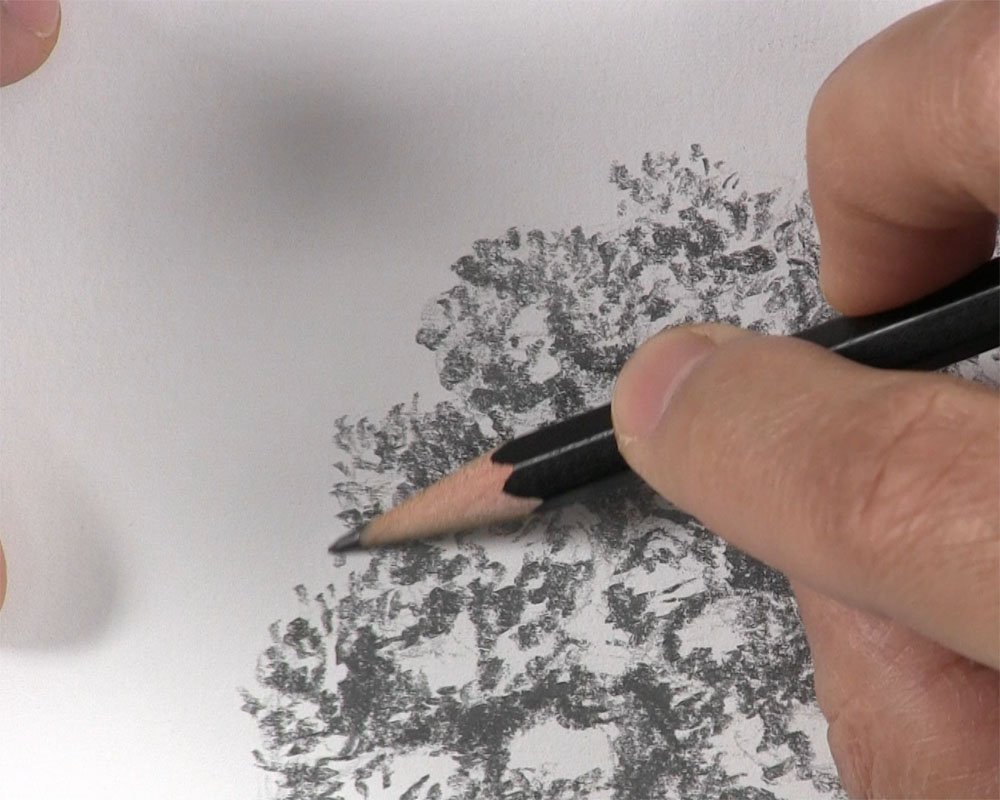
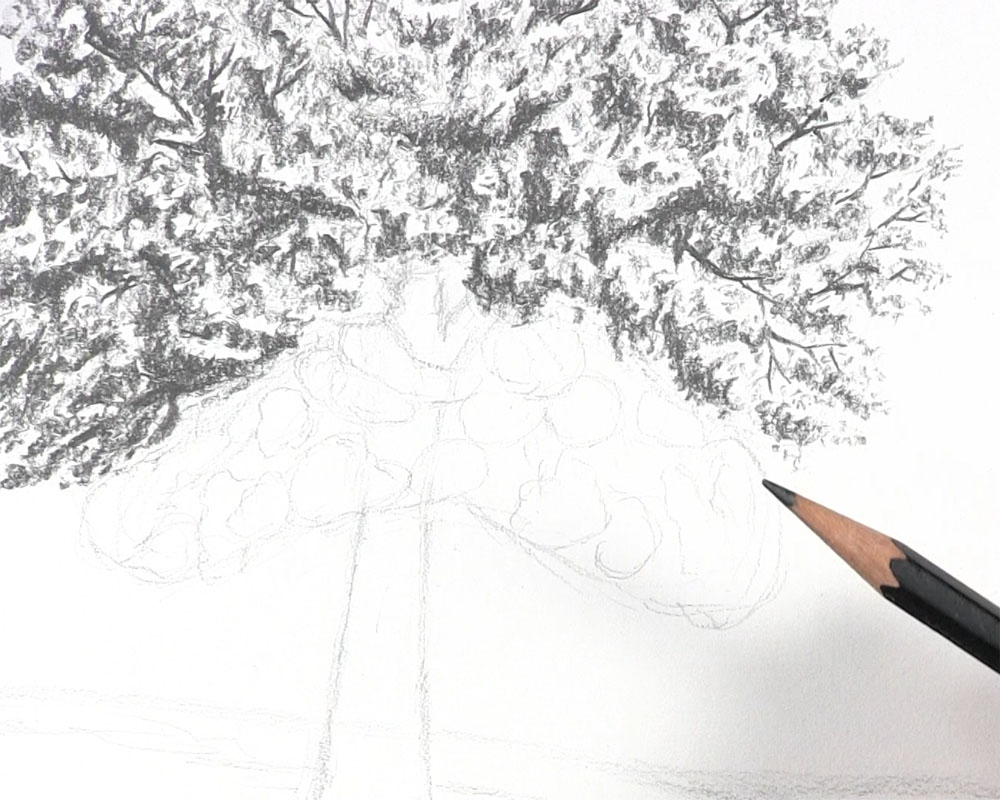
Just like we divided the leafy area of the tree into four sections, we are now going to divide each of those sections into smaller collections of leaves. Still using a 2H pencil and the reference as a rough (not exact) guide, begin to draw smaller round shapes in the top section of the tree.
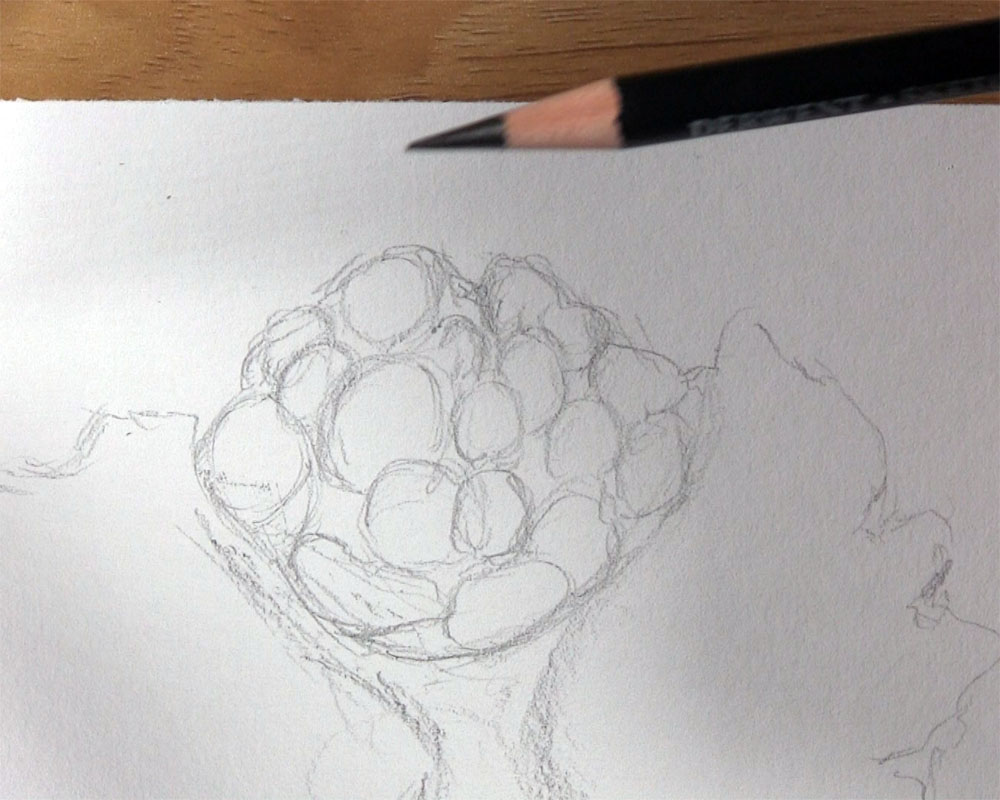
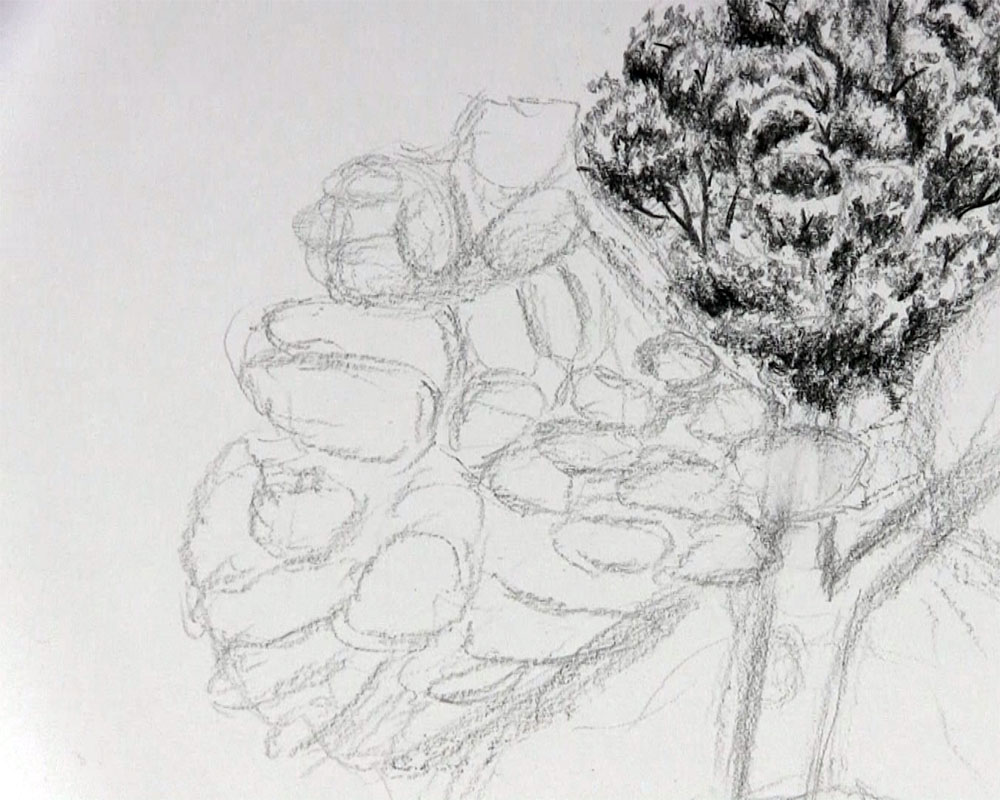
Continue drawing shapes in this manner until the entire top section of the tree is full. As you can see, most of these are circular or oval shapes, but some of them are more irregular. Additionally, it’s a good idea to draw some of the shapes overlapping each other. Now, if you are wondering how to draw tree leaves out of these round shapes, I will show you exactly how in the next several steps!
Each of these round shapes represent a collection of leaves and branches bunched together. In order to shade the leafy area of the tree, we can think of each of these collections as an individual object, at least at the start. Since the sunlight is coming from the upper right, use a 2B pencil to apply most of the shading on the lower left area of each round shape.
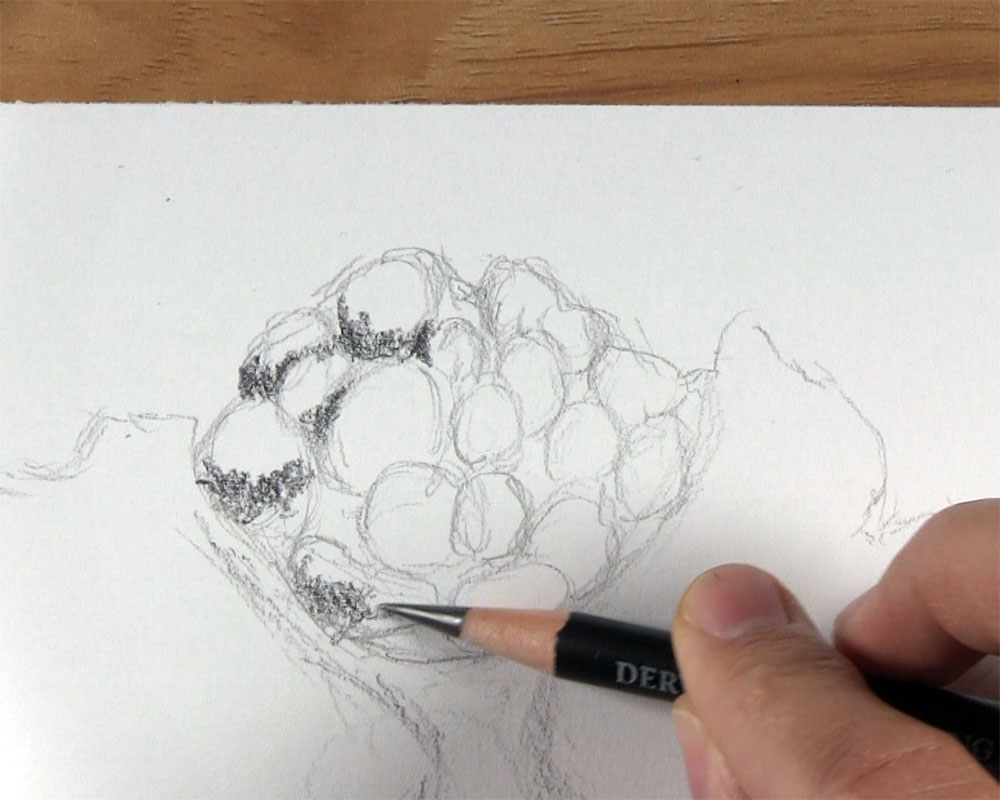
Leave a few spaces between the shapes untouched, as they will represent the open areas between the leaves and branches where the sky can be seen. Continue shading until there is shadow in the lower left area of most of the shapes.
Draw Leaves on the Top of the Tree
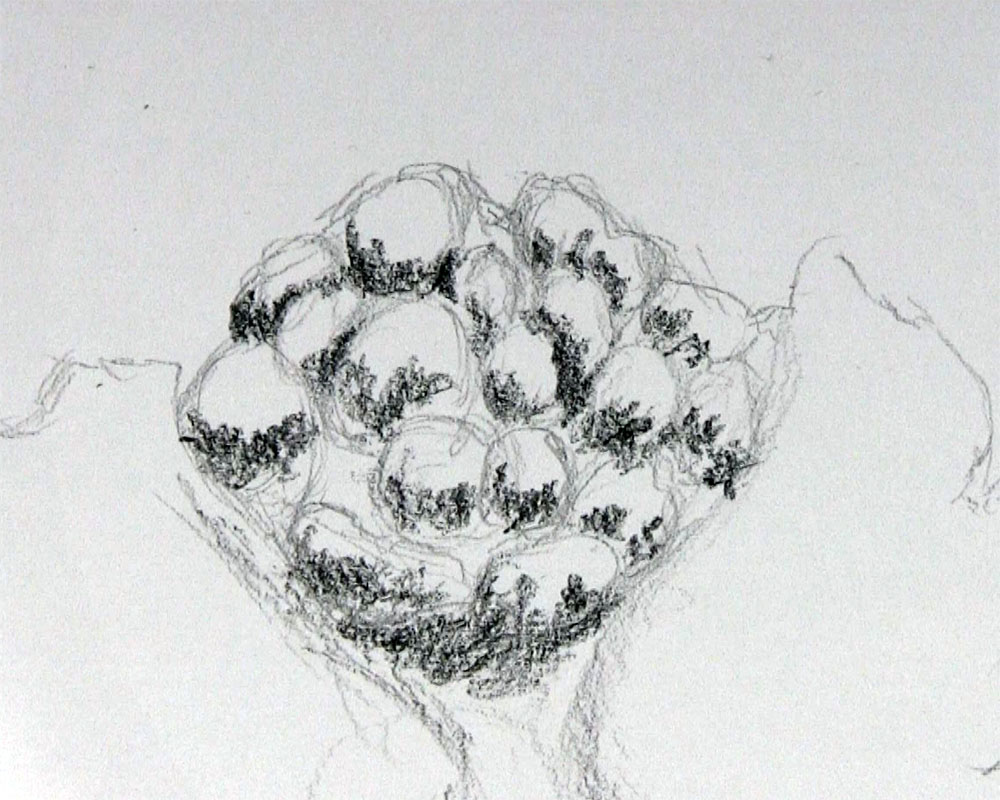
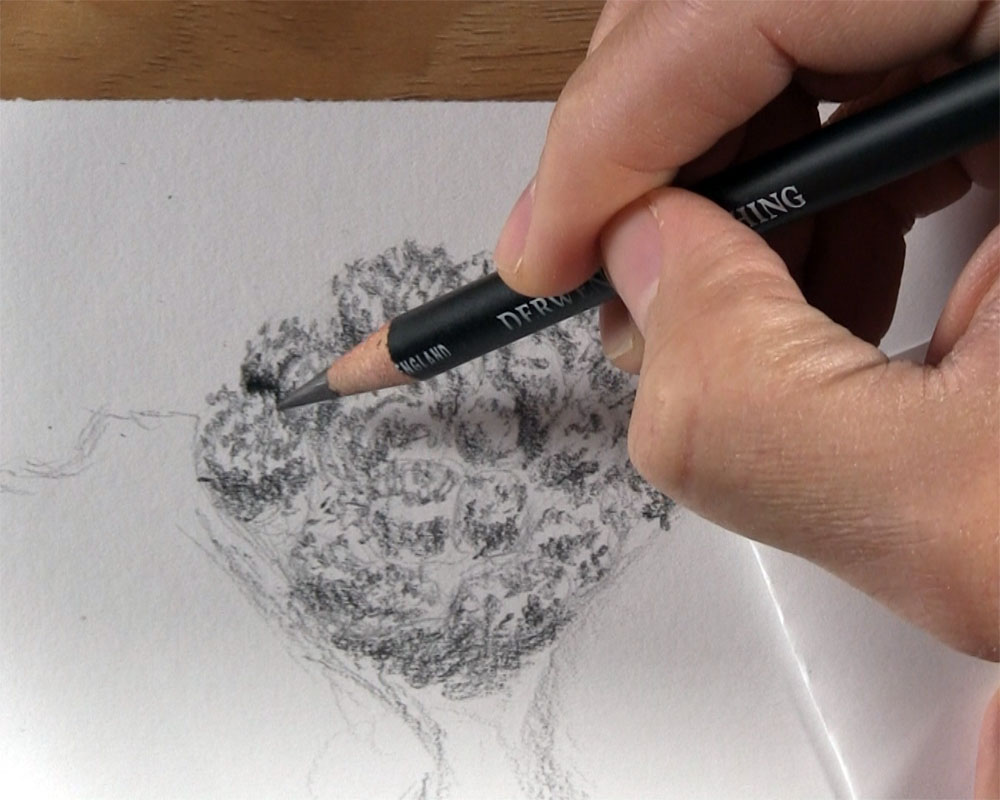
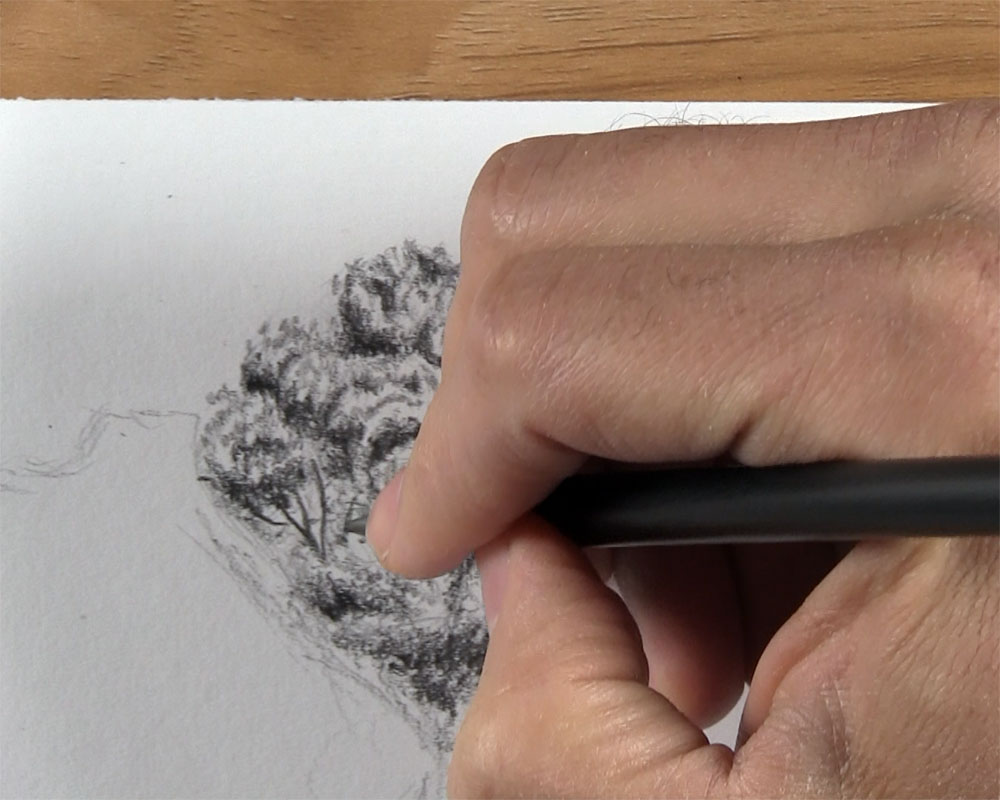
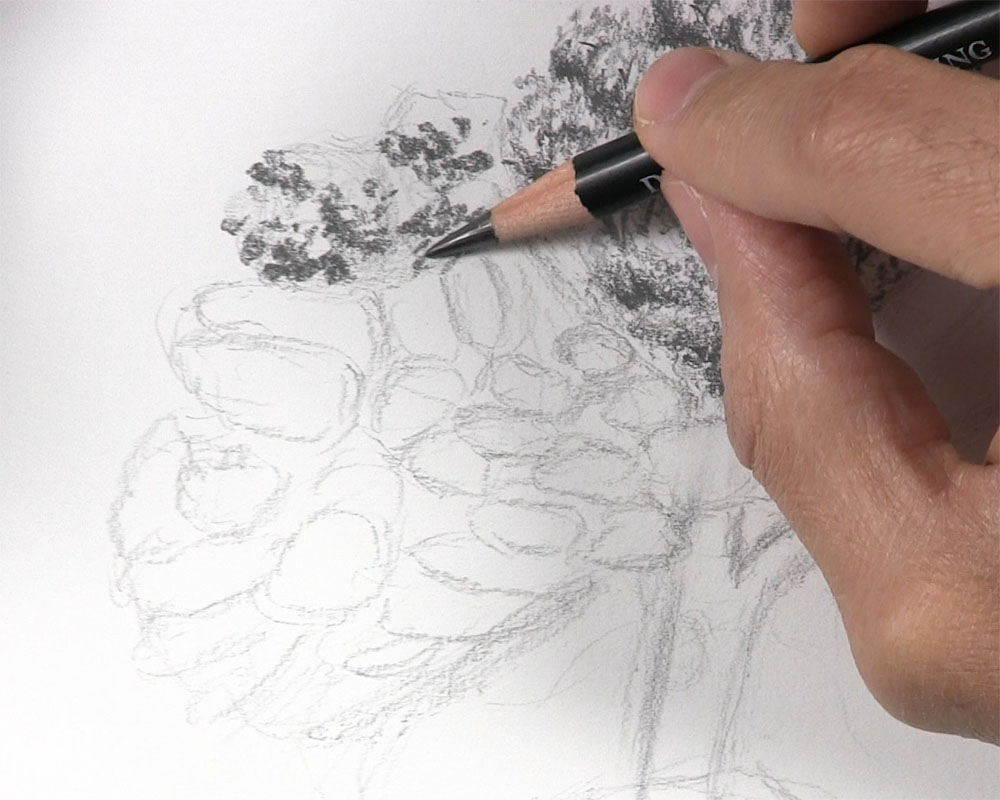
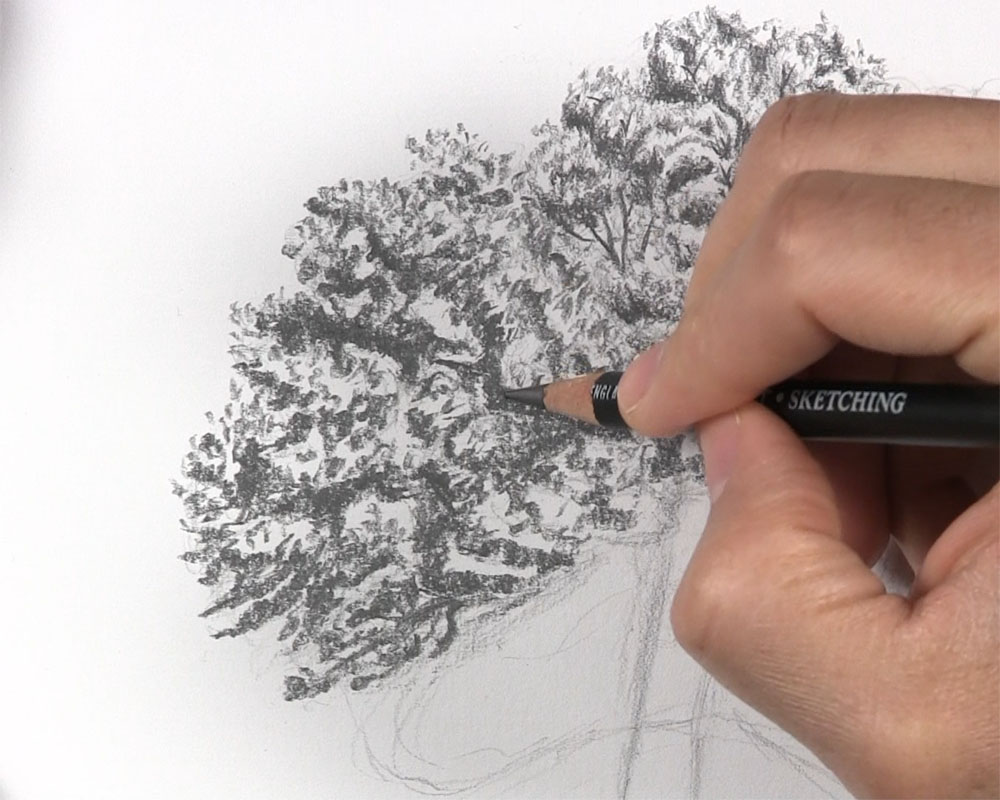
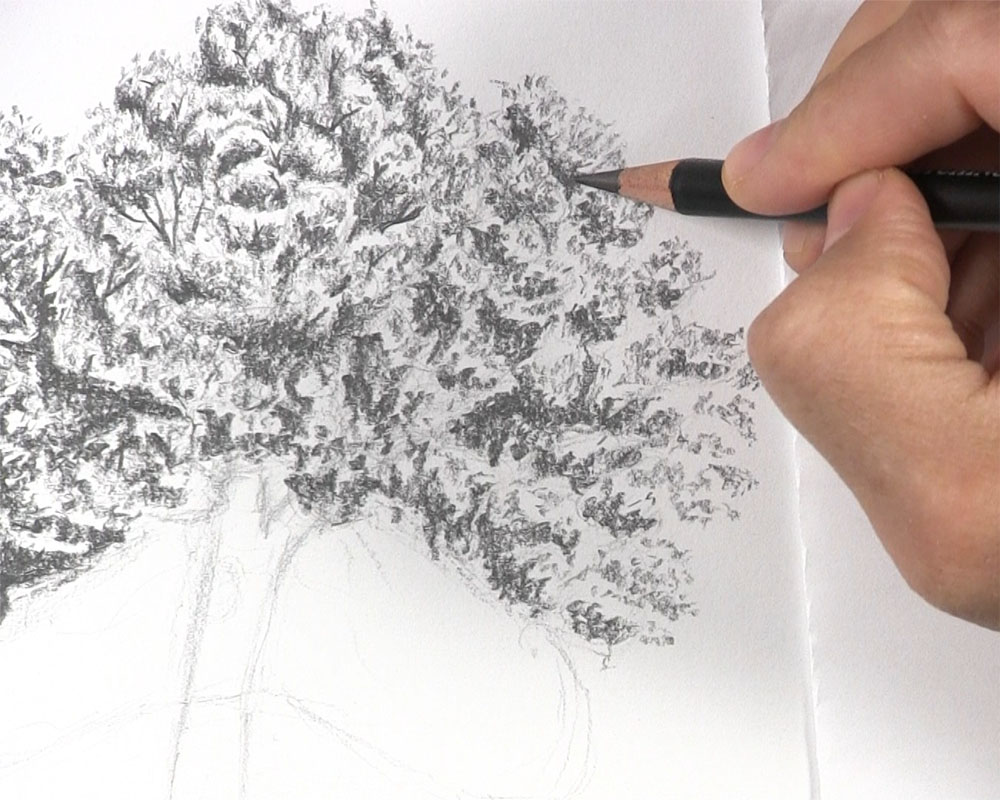
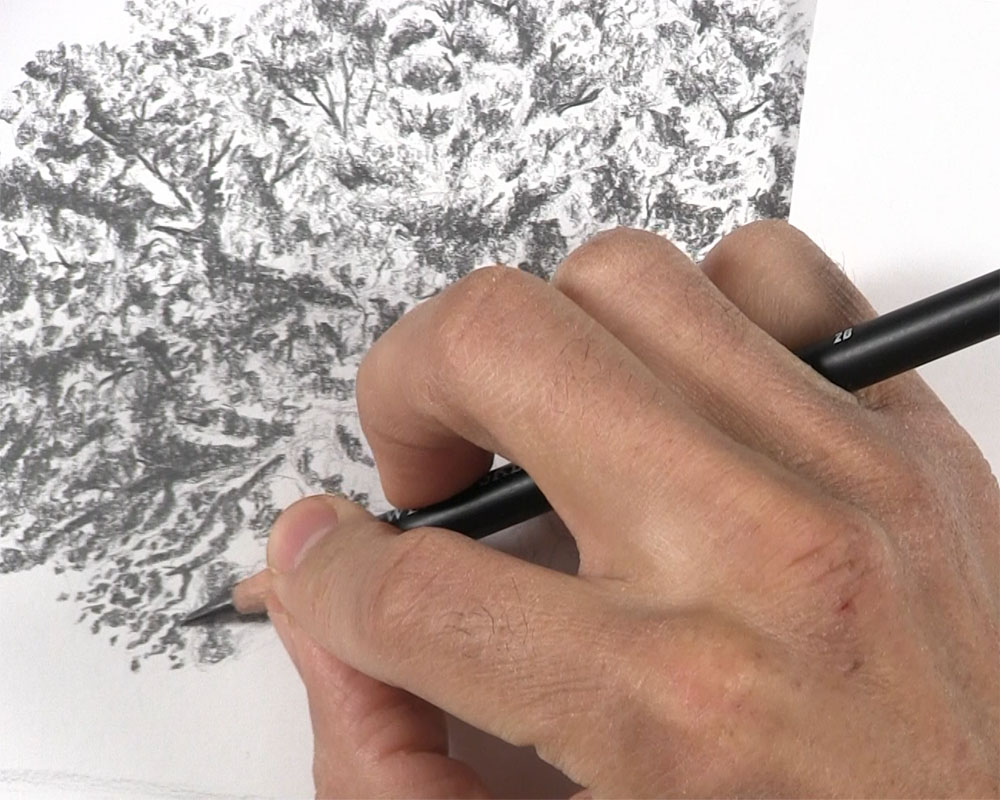
Use an HB pencil to begin developing the lighter areas of each round shape at the top of the tree. You can develop these areas by making some tiny squiggly lines and other markings in the white part of each shape. In order to draw leaves on a tree realistically, these little markings are the big secret!
As you get closer to the outer edges of each shape, use a kneaded eraser to lift these guidelines away from the paper. This allows you to make the same tiny squiggly markings along where that outer edge of the shape was and even beyond it.
Doing this will give the appearance of random leaves sticking out of the contours of the tree. This will give our tree a more realistic look. Continue to draw tiny leaf markings along all of the shapes bordering the top edge of the tree. Make sure to draw random markings to make plenty of leaves beyond the edge of the tree.
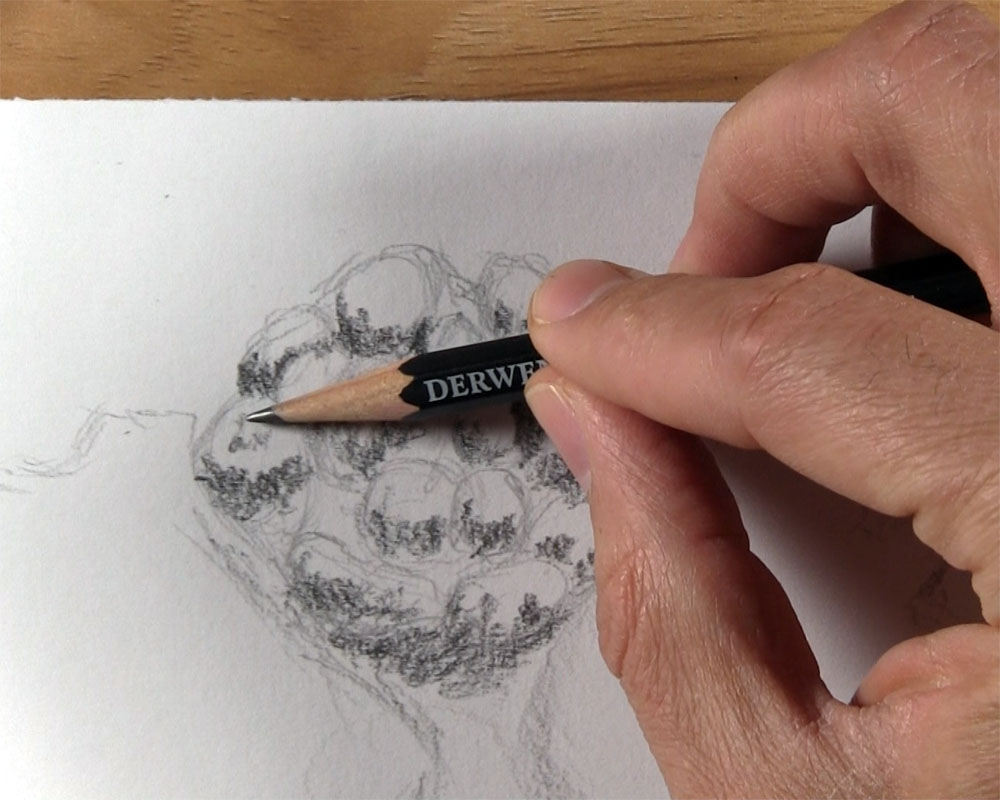
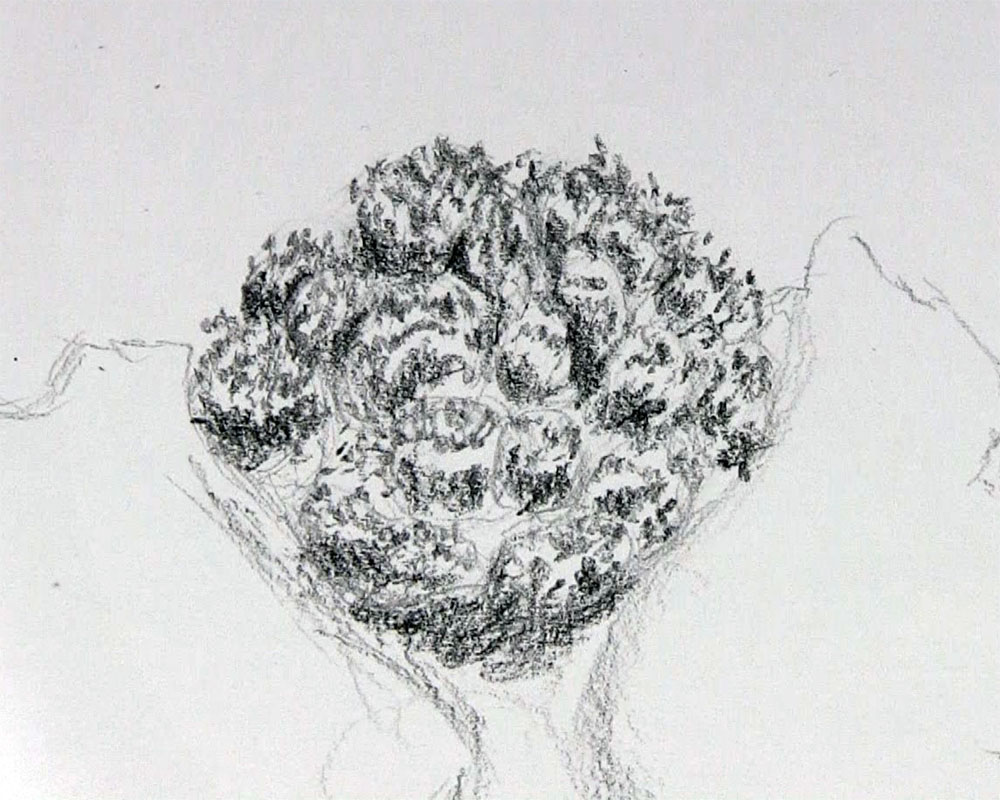
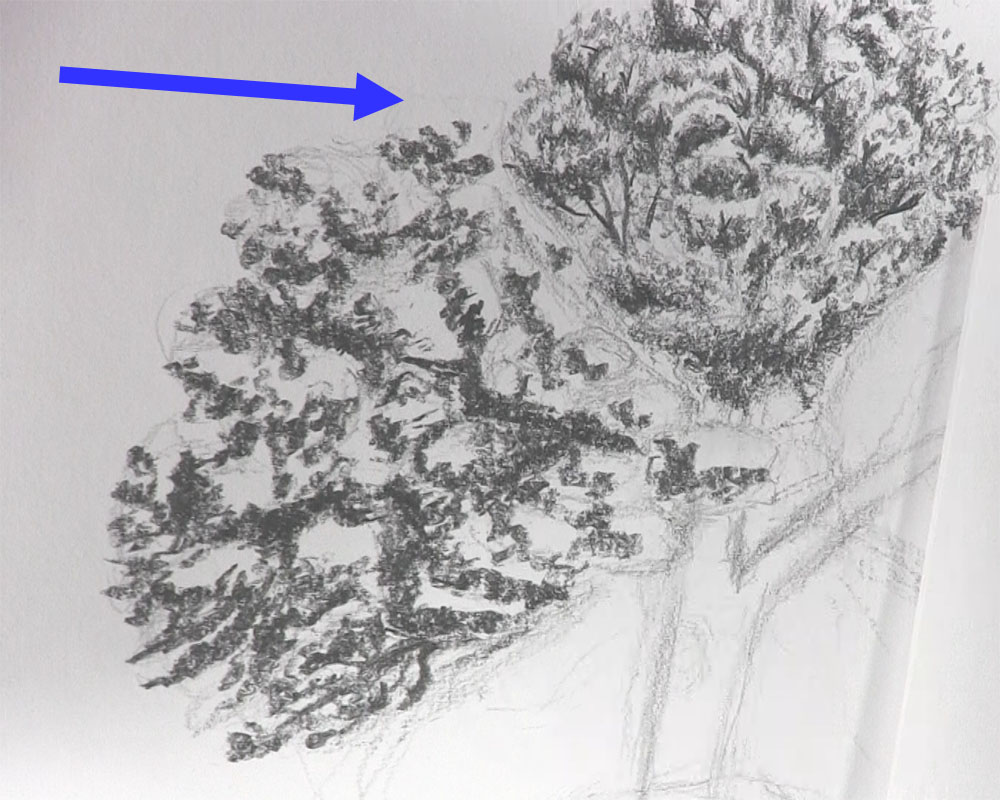
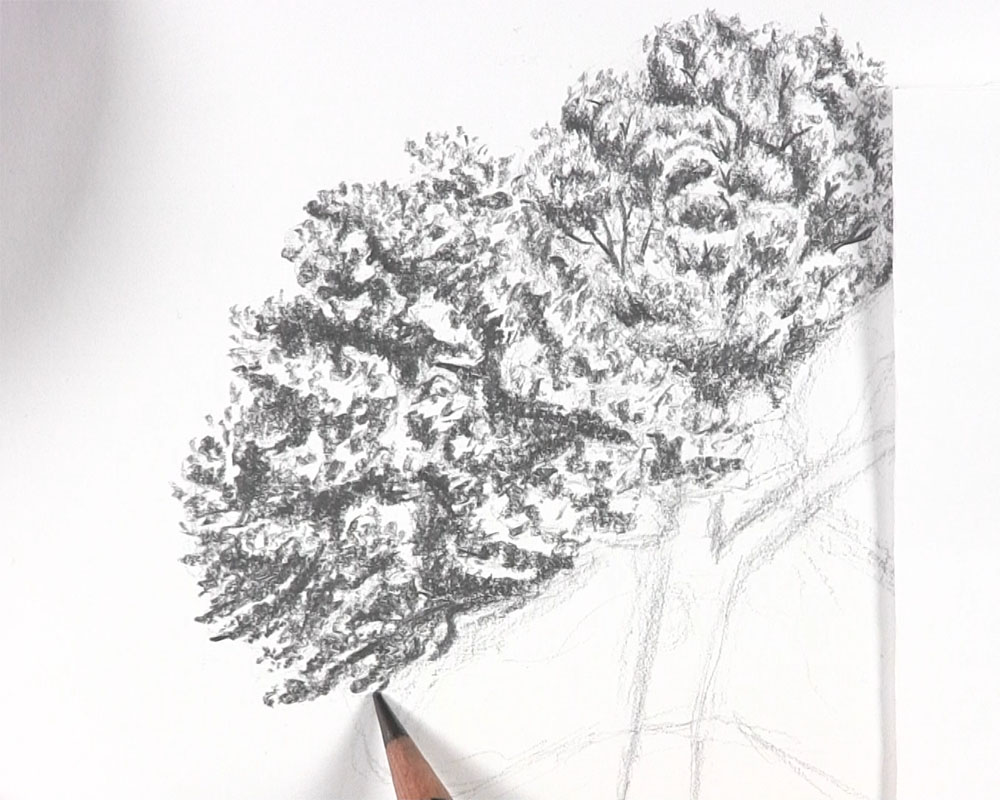
Continue using the HB pencil to draw markings in all of the remaining round shapes at the top section of the tree. Leave a few areas opened for some sky and branches peaking through later on.
Finish the Top of the Tree
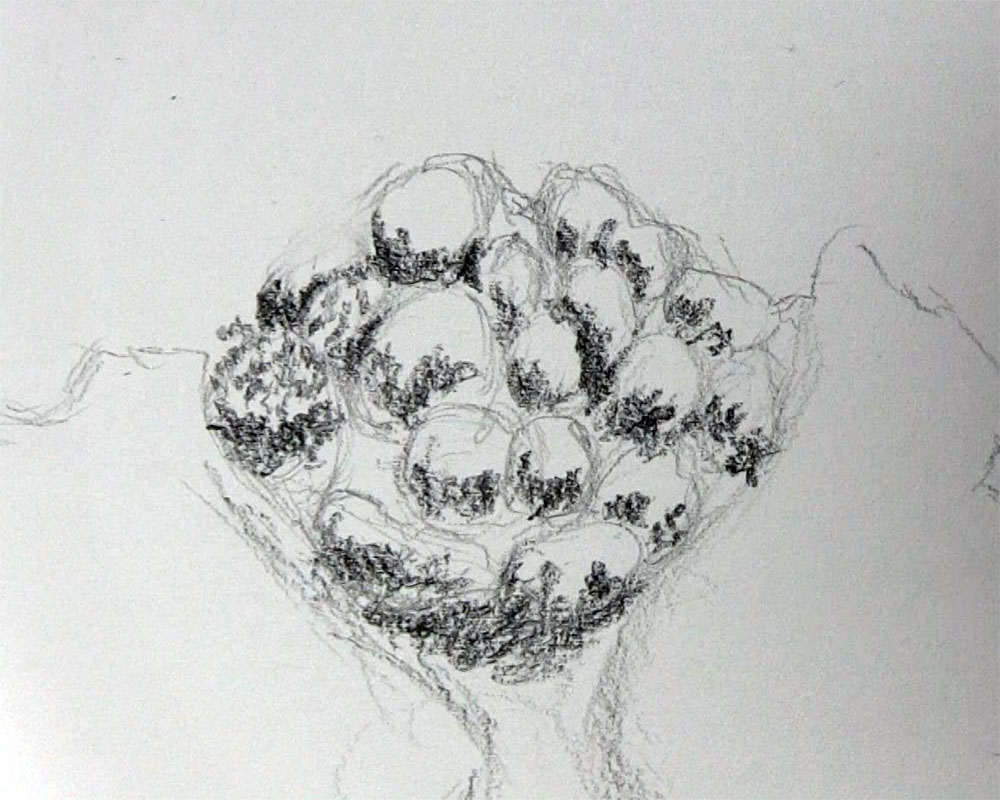
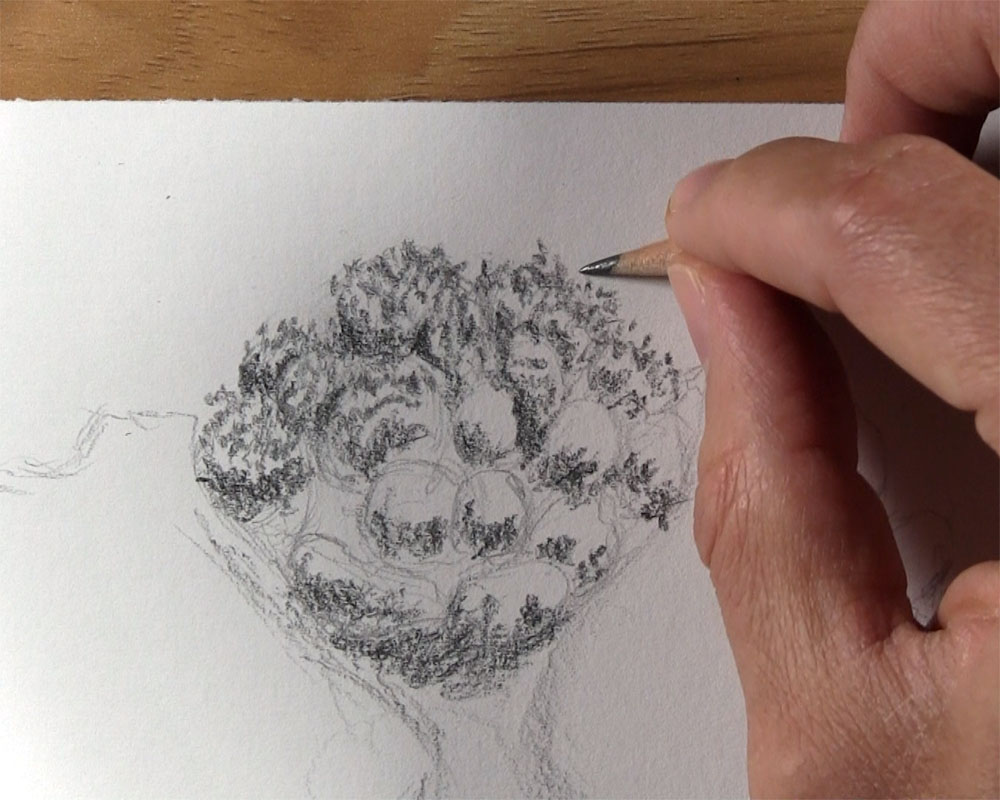
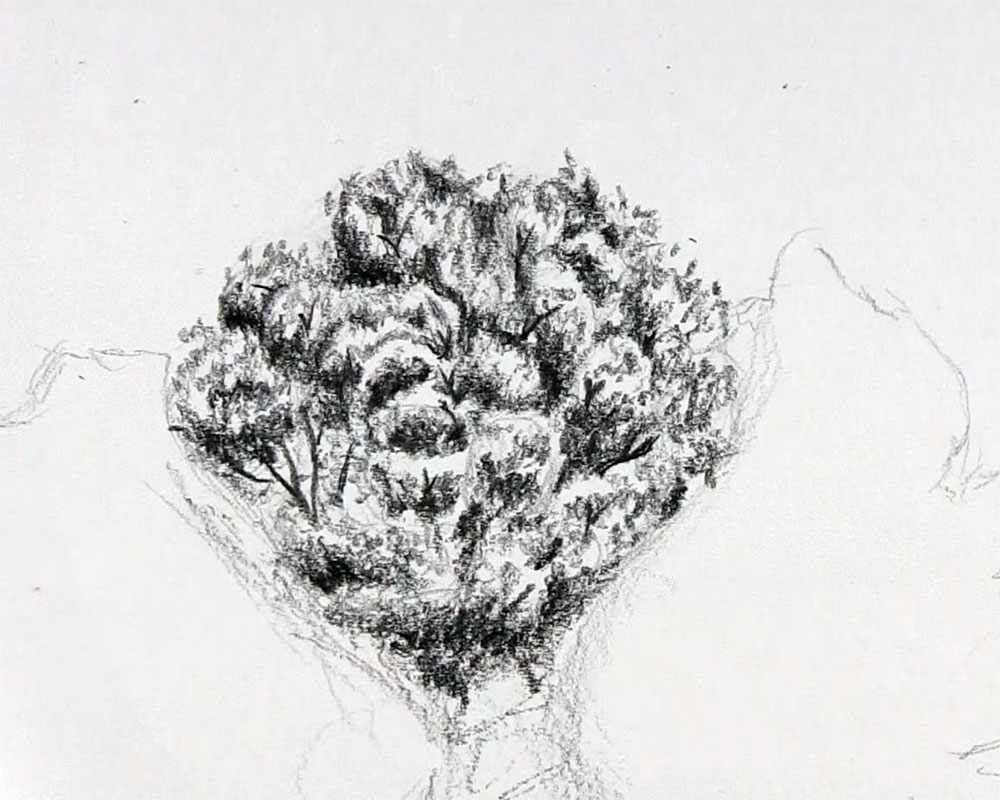
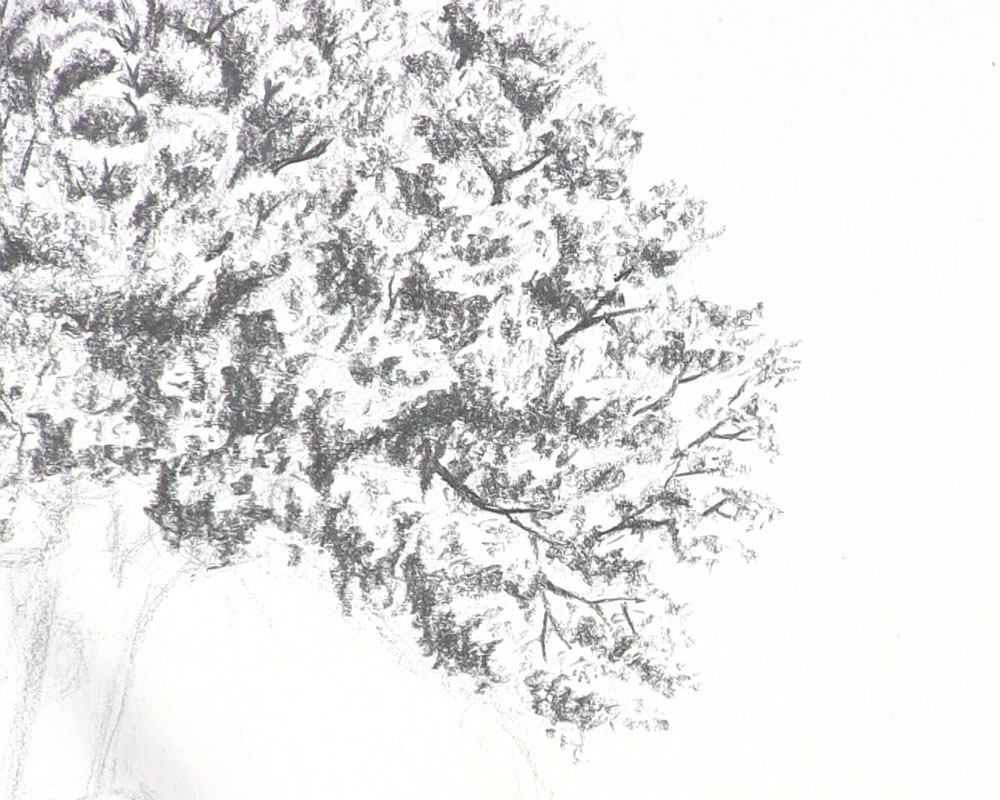
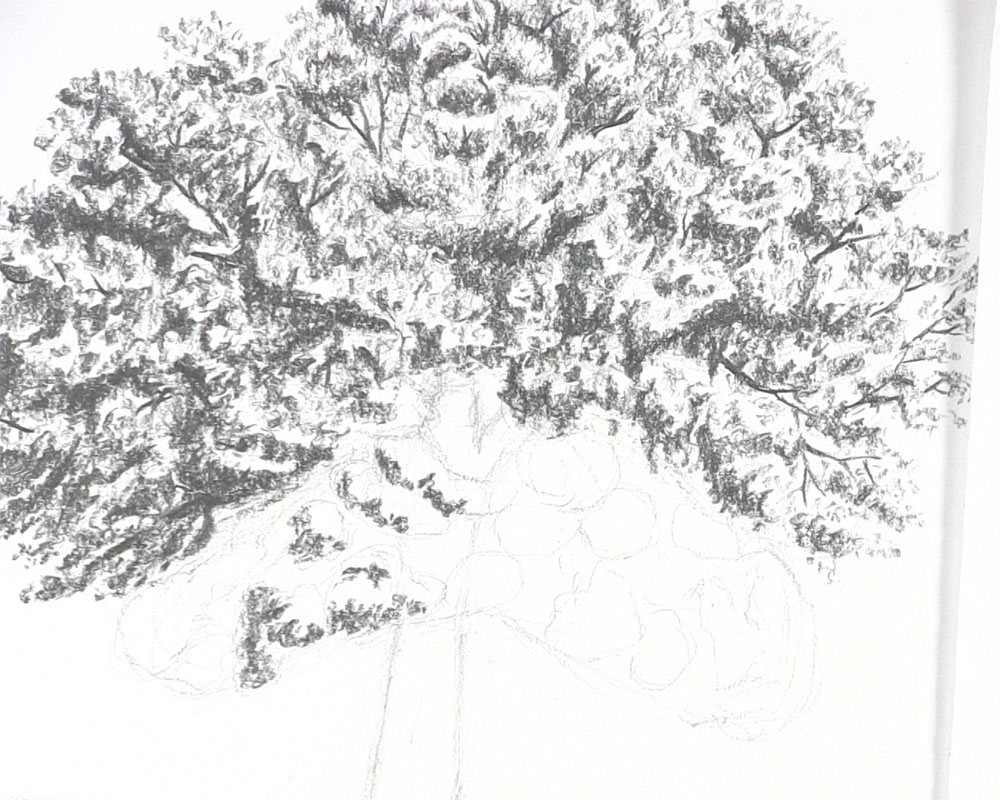
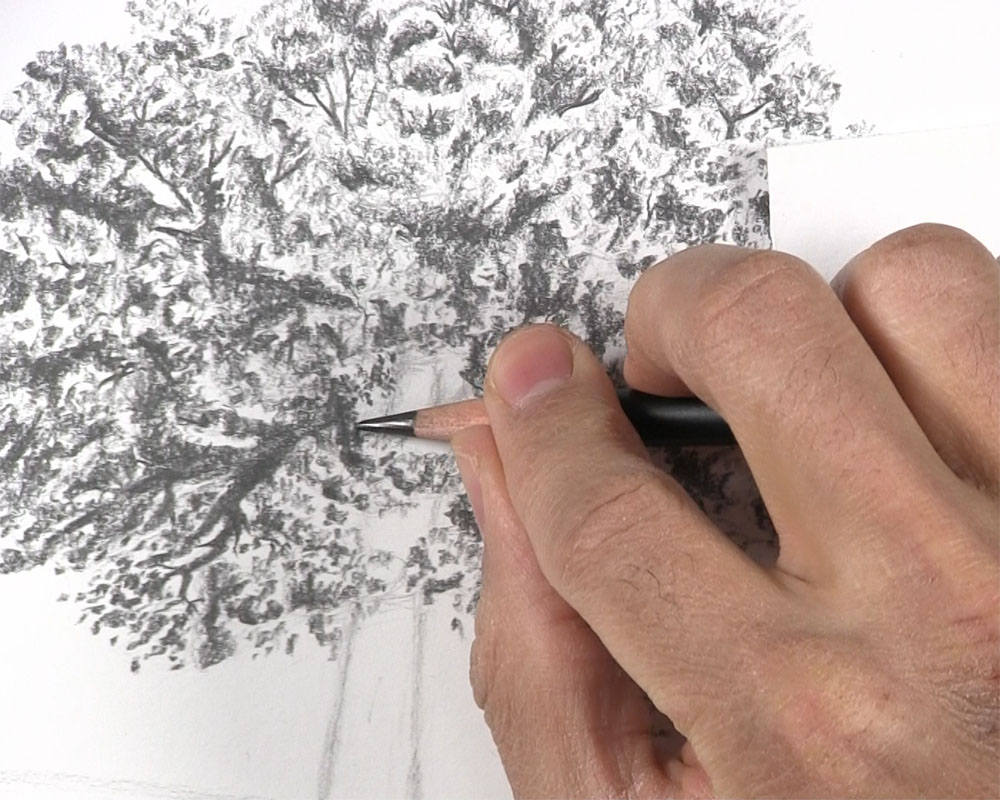
With a 4B pencil, begin to shade some of the darker shadow areas. Look for the round shapes from earlier and put additional shading over some of the tones previously applied with the 2B pencil. Keep most of these darker shadow areas away from the lighter areas of the same shape. However, you can still put the dark shadow of one leaf collection shape against the lighter leaves of a different collection. Doing this will create some contrast that will help to distinguish the various patches from one another, ultimately leading to a more pleasing end result.
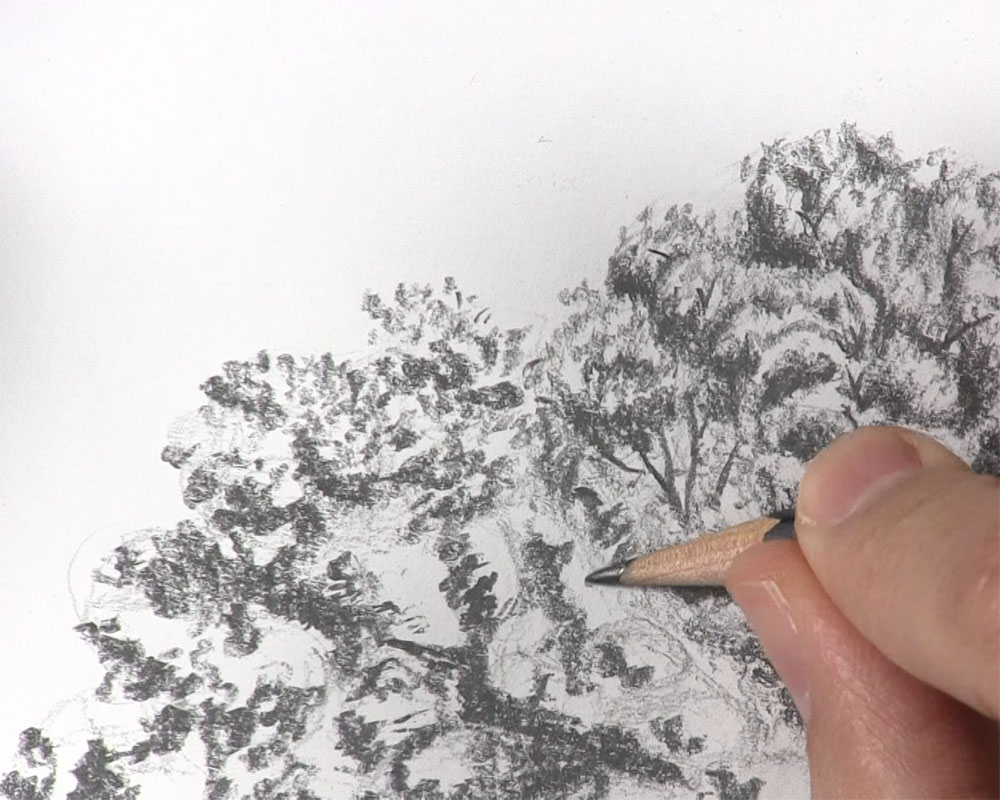
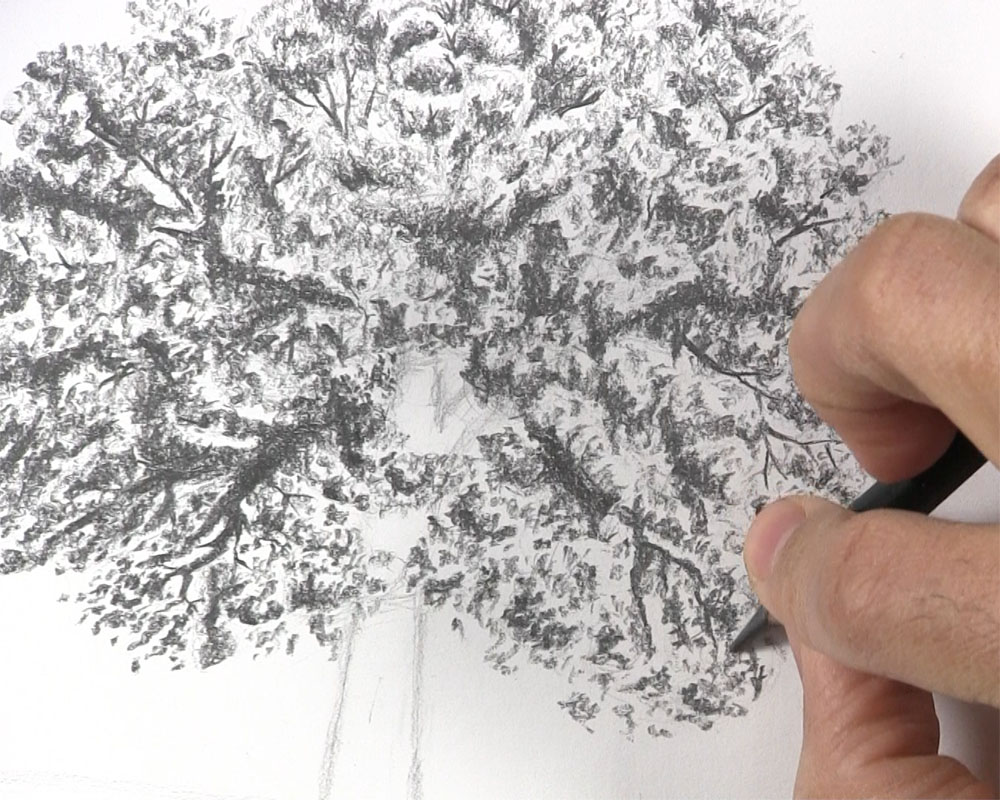
Keep working in the same manner. Continue to look for the different collections of leaves and put shading on and between each one. Use the same short, abstract markings from earlier to create a leafy texture. Keep in mind that the sunlight is coming from the upper right, so you should emphasize the shadows in the lower left area of each group of leaves.
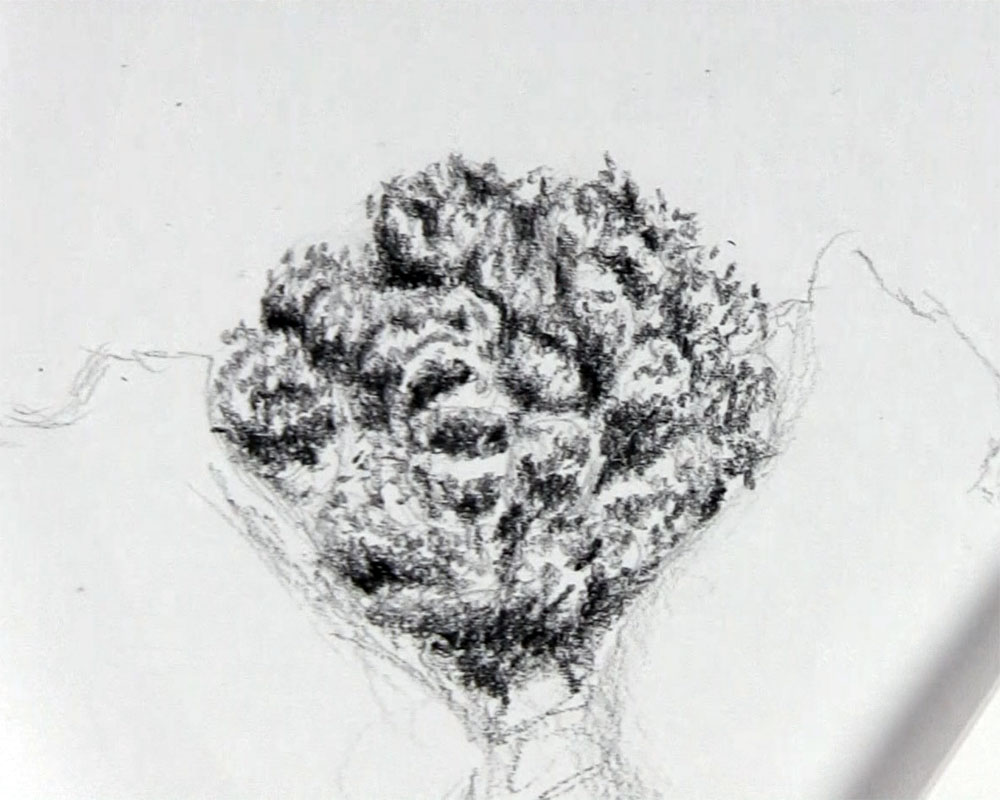
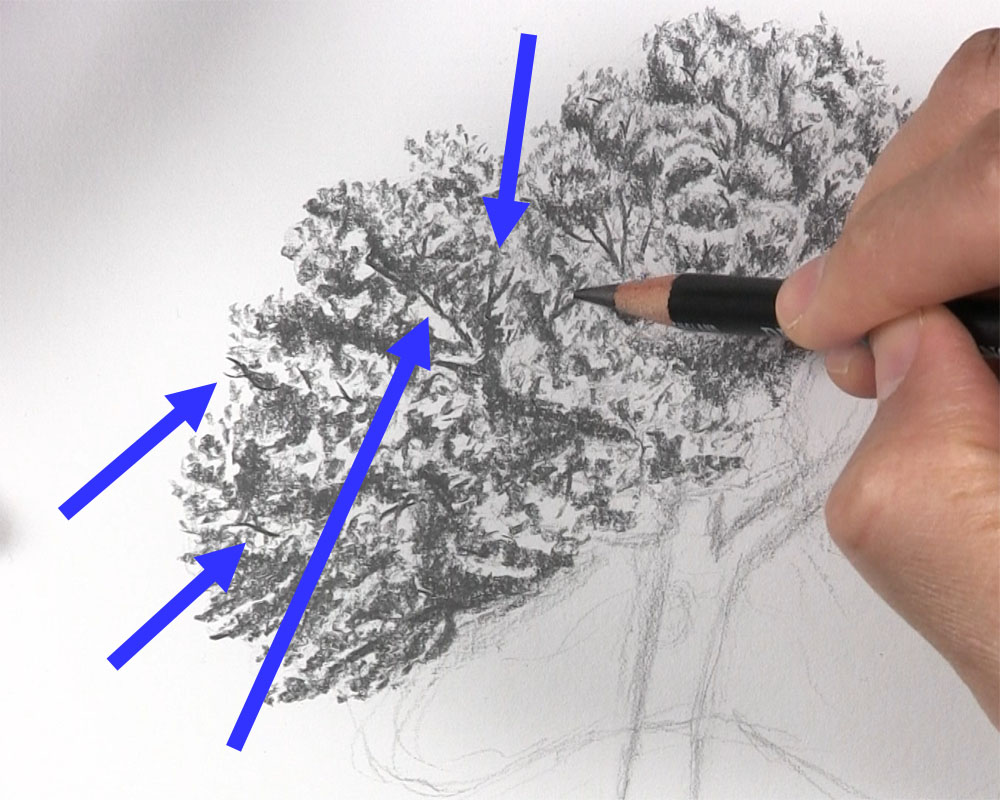
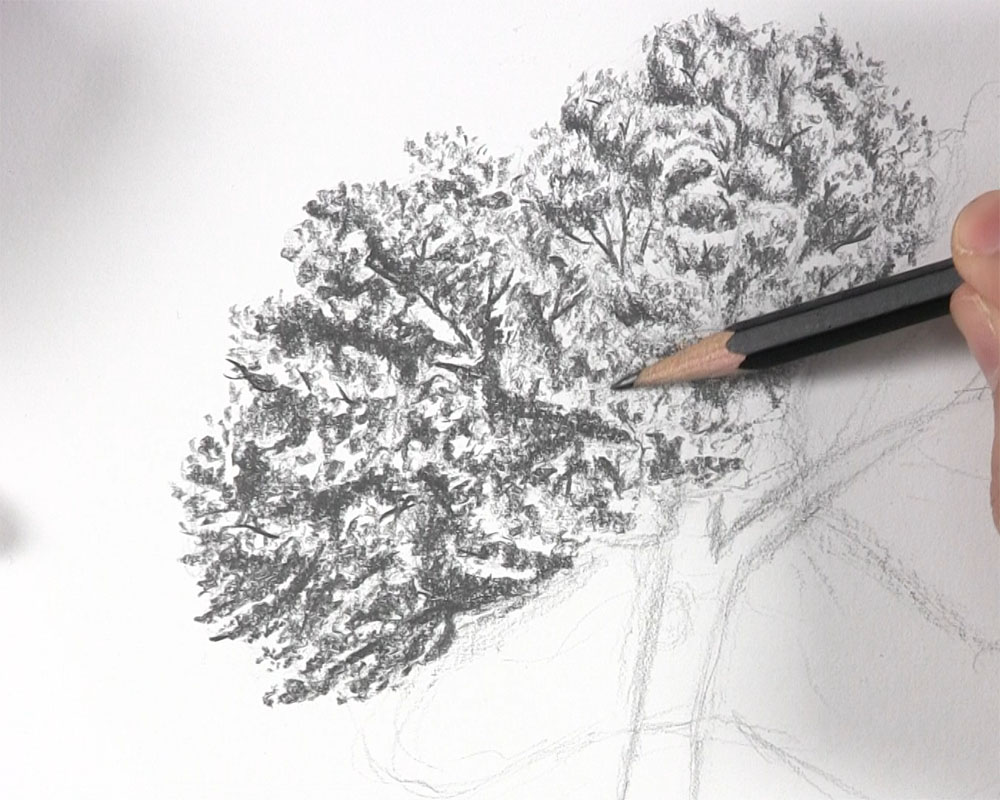
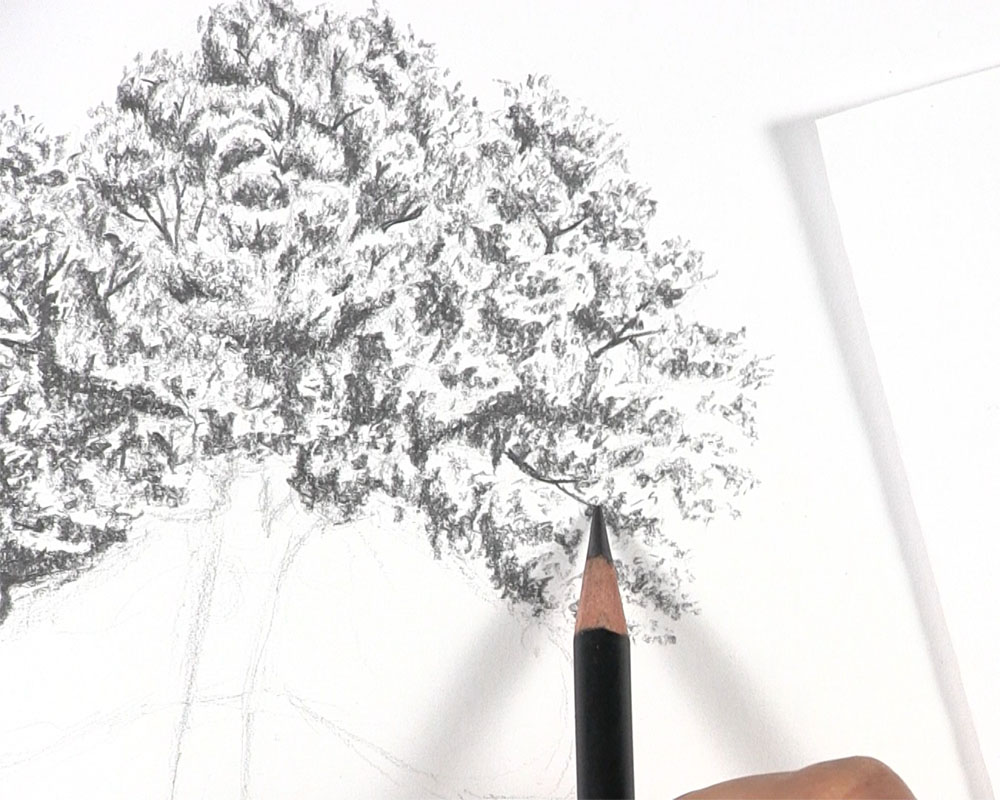
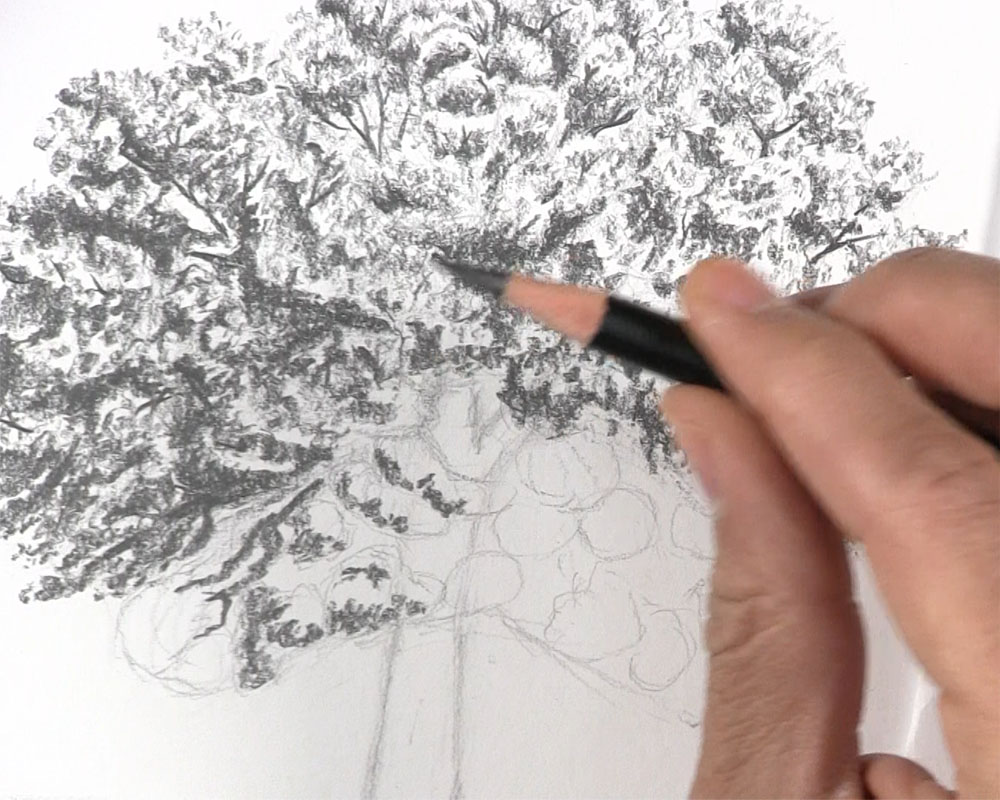
Begin to draw some branches showing through some of the openings on the top area of the tree. Be aware of the path the branches are likely taking from the main trunk of the tree. Although these tinier branches are mostly hidden behind the leaves, they still have an important role in the structure of the tree. Therefore, you should draw branches that reflect that structure.
Continue to draw a few more branches. Use the reference photo as a guide, but feel free to draw some of your own branches. Just make sure they follow a realistic path behind those leaves, as I just mentioned!
Check the Thickness of the Trunk
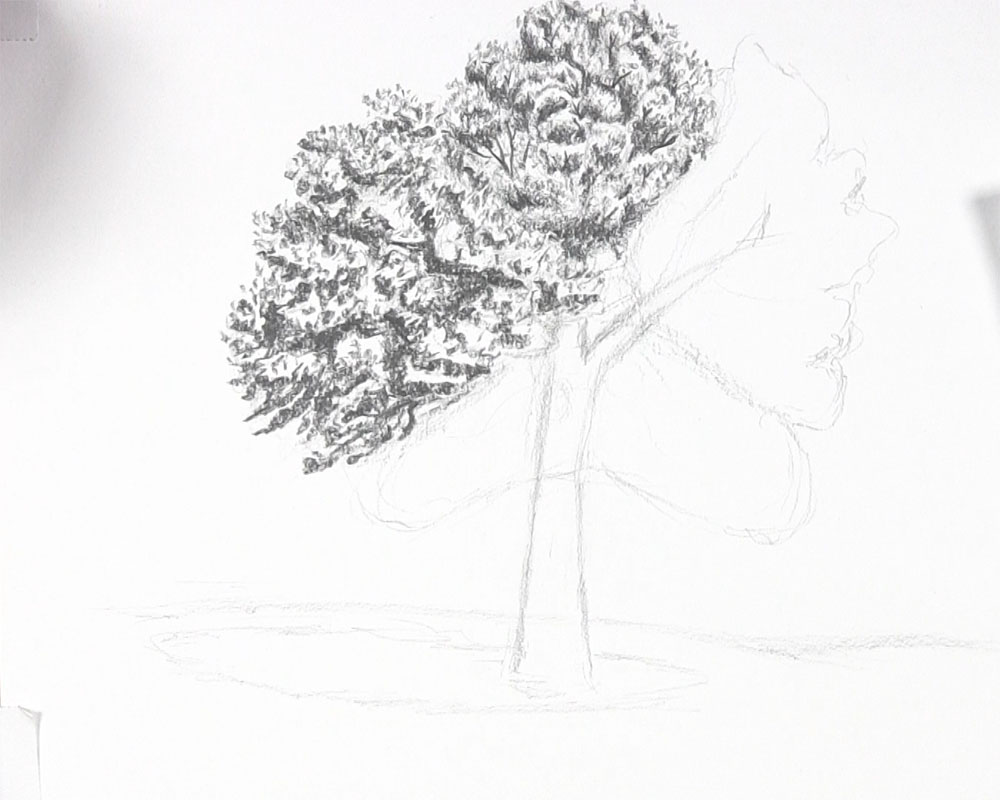
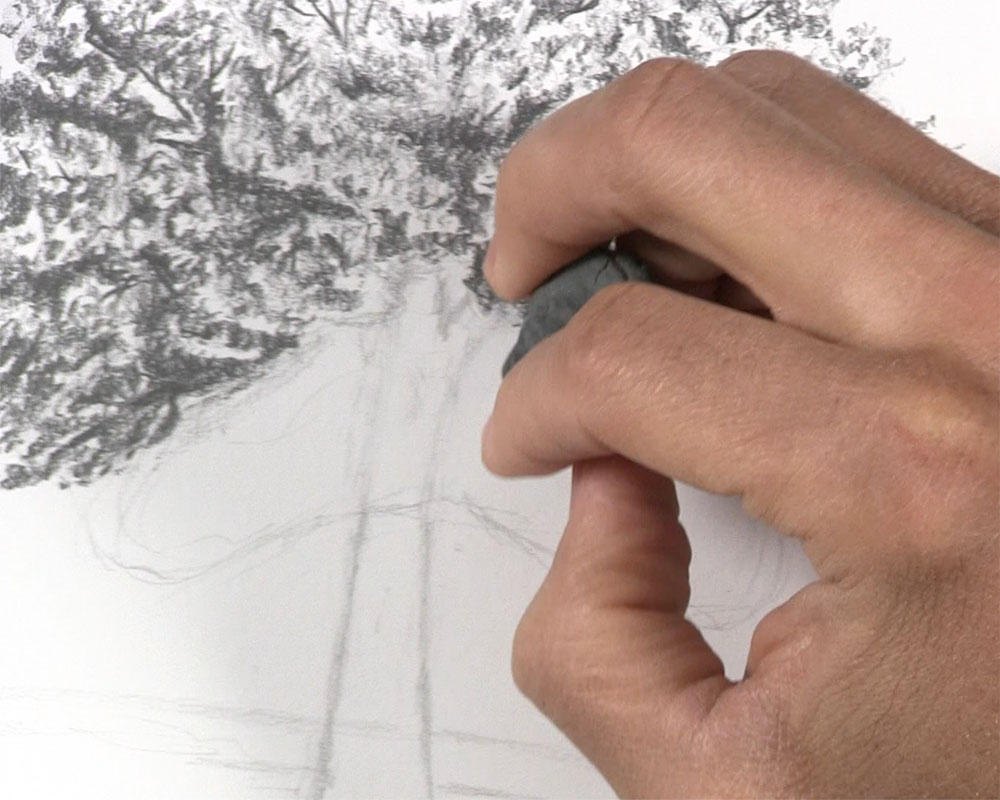
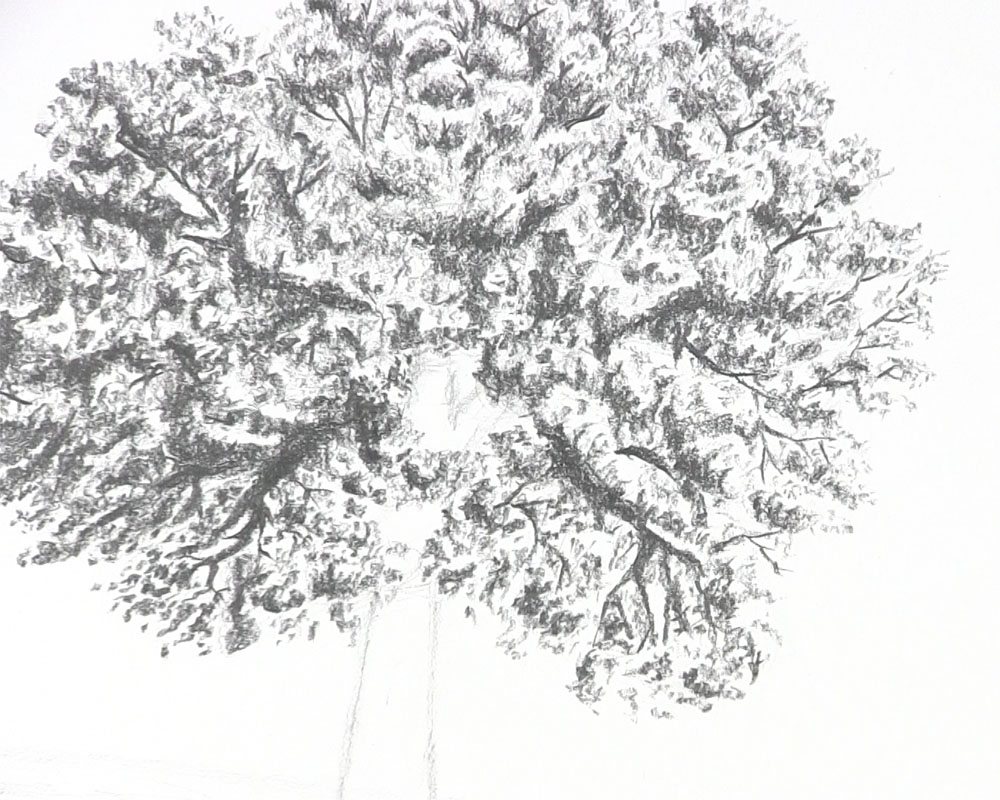
Now that the top of the tree is essentially complete, we will soon focus our attention on the left side of the tree. Before doing so, however, let’s double-check the thickness of the trunk to make sure there is a realistic flow of the branches into the various areas containing the leaves.
We can begin by sketching some of the main arms of the tree that are likely to diverge from the central trunk. Here, I’m sketching a neck for the top and an arm for the right side. Notice how I’m keeping the neck (for lack of a better word) thinner than the trunk below it but thicker than the branches above it. There should be a smooth and believable transition in size from the thick trunk at the base of the tree to the tiniest branches at the tree’s outer edges.
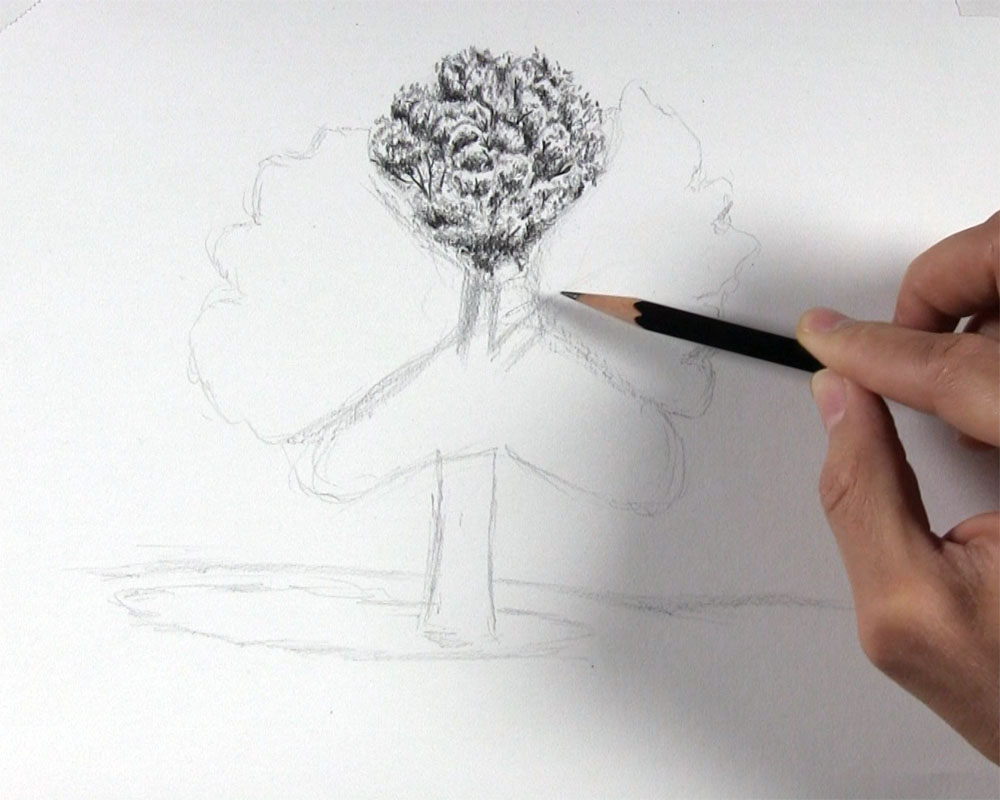
After that, I drew another arm branching from the trunk to the left side of the tree. As this hidden structure takes form, I can now see that I should make my trunk slightly thinner than I originally had it.
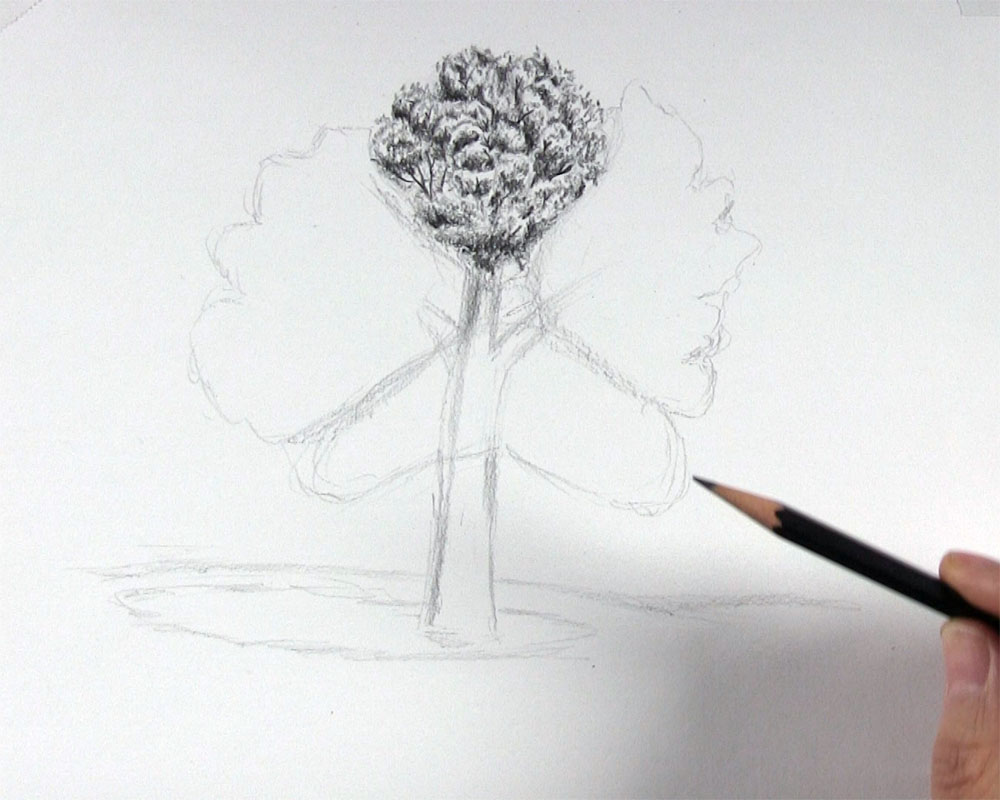
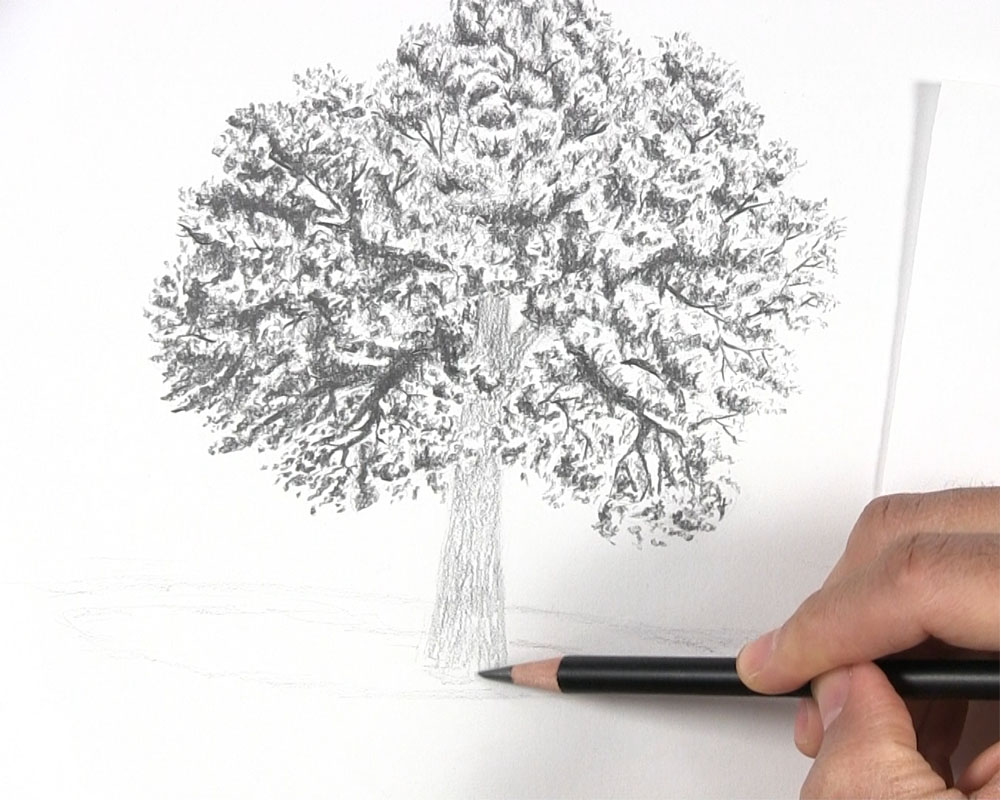
At this point, I finished reshaping the trunk and erasing its initial outline. I also sketched a few smaller branches on the left and right side of the tree. This is more of an optional step and was primarily meant to demonstrate how you might draw most of the tree’s branches first if you were drawing a tree without too many leaves. However, since this tutorial is meant to show you how to draw a tree with leaves, we shouldn’t draw too many branches to begin with. If we did, it would be difficult to draw all of the leaves over them.

Divide the Left Side of the Tree into Individual Shapes
Returning now to a 2H pencil, begin to divide the left section of the tree into smaller shapes. Just as we did with the top section of the tree, these smaller, round, oval-like shapes should represent individual groupings of leaves and branches that are clumped together. You might find yourself dividing your first shapes into even smaller shapes. Again, these lines can be very loose and rough. In the image below, you can see how I did this for the top portion of the left section of the tree.
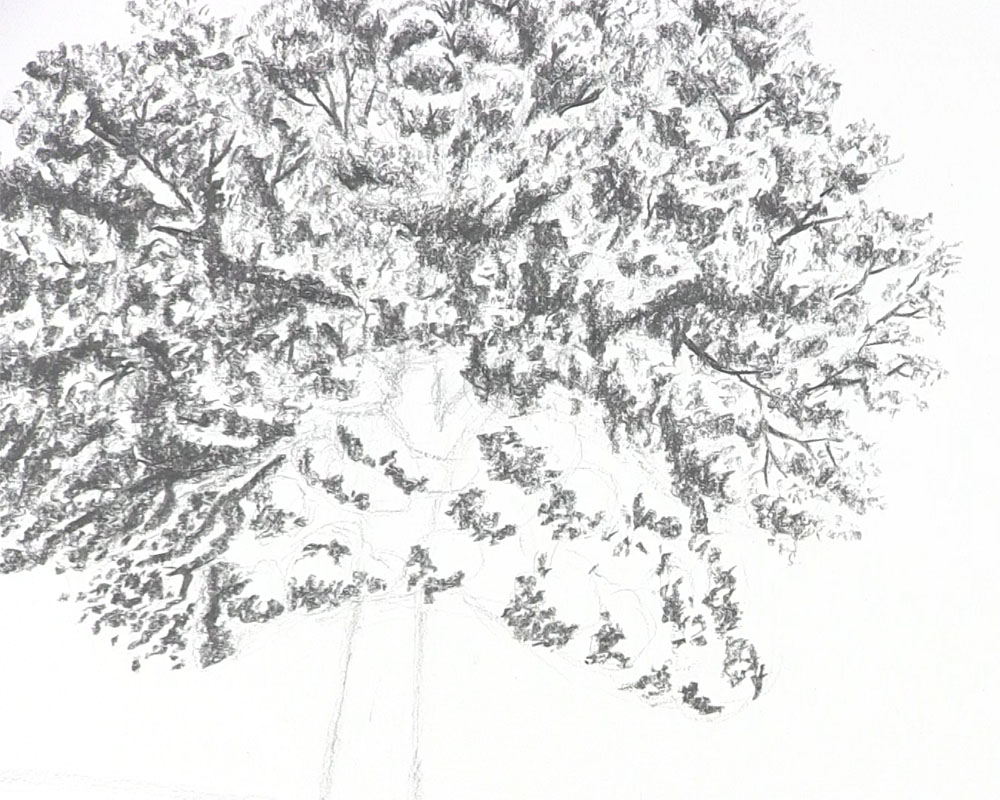
Keep drawing circle and oval shapes that roughly represent the clusters you see on the reference photo. Make a mental note of where open areas exist, showing more sky than leaves. You can also put a cluster shape or two in the foreground over the main trunk. Just make sure to eraser the portion of the trunk that is hidden behind the cluster.
As you finish dividing the left side of the tree, sketch a few long, narrow shapes to indicate some of the branches sticking out along the bottom edge. These branch clusters will have leaves as well, but they are more separate and distinguishable from the main clusters that are closer together.
Begin Shadowing the Clusters on the Left Side of the Tree
Use a 2B pencil to begin applying some shadow tones to the individual leaf clusters. Keep in mind that the light source is coming from the upper right. This means that the primary shadows will be on the lower left side of each cluster. Here’s how the first clusters will look after you draw the shadow tones.
Continue shading the clusters along the left edge of the tree in the same manner. It’s a good idea to use the side of your pencil rather than the tip. This way, you can keep your markings wider and more representative of the tree’s foliage. You can still create a similar effect with your tip, though. It’s all a matter of style and preference. Make sure to shade in between some of the clusters to show some clusters farther in the background. This will add some depth and thickness to your tree.
Sketch a few long shapes to represent branches and leaves sticking out of the lower end of the clusters. Although these branches are in the foreground, you can draw these mostly in shadow. The reason for this is the clusters directly above these branches are casting their shadows onto the branches below.
Shade the remaining clusters just like the first ones. Remember to make random, scribble-like, short and thick markings to resemble the leaves. Remember also to keep this initial shading primarily along the lower left portion of each cluster.
Draw a few more branches along the lower edge. Like the others, these can be mostly in shadow. You can draw a few secondary branches coming from the primary branches, too.
Draw Leaves on the Left Side of the Tree
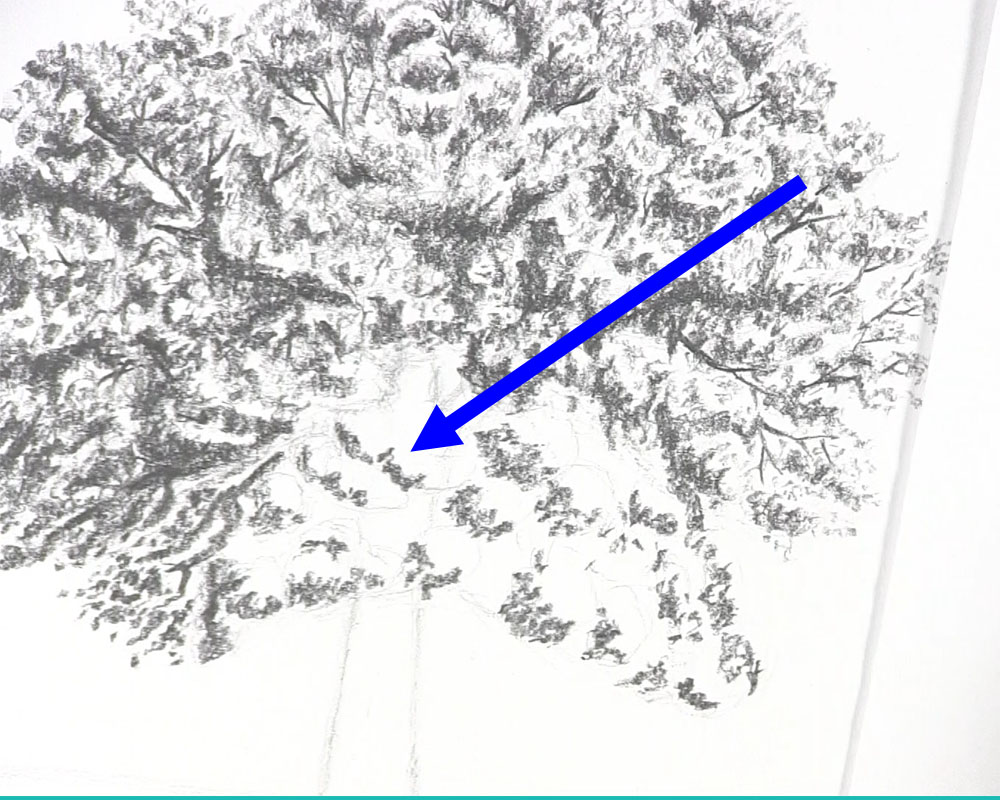
Just as we did with the top of the tree, we can now draw the indication of leaves in the highlighted areas on the left side of the tree. First, choose one cluster shape and erase the light border guideline along the edge. The arrow in the image below shows where there used to be a guideline that is now erased.
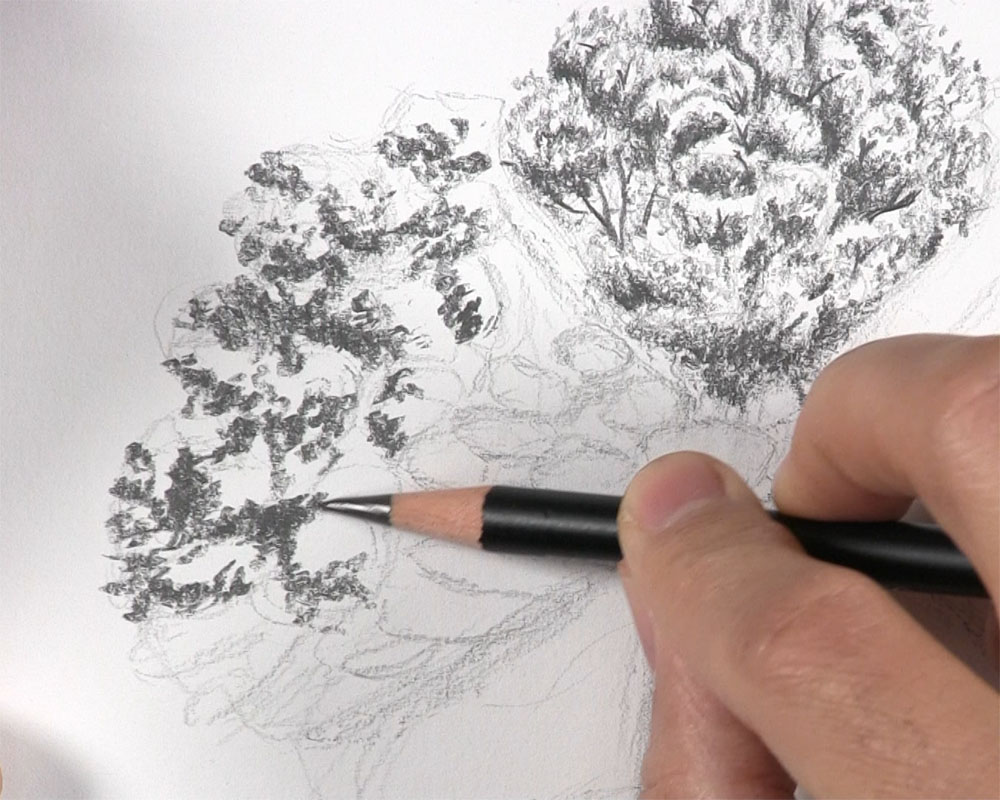
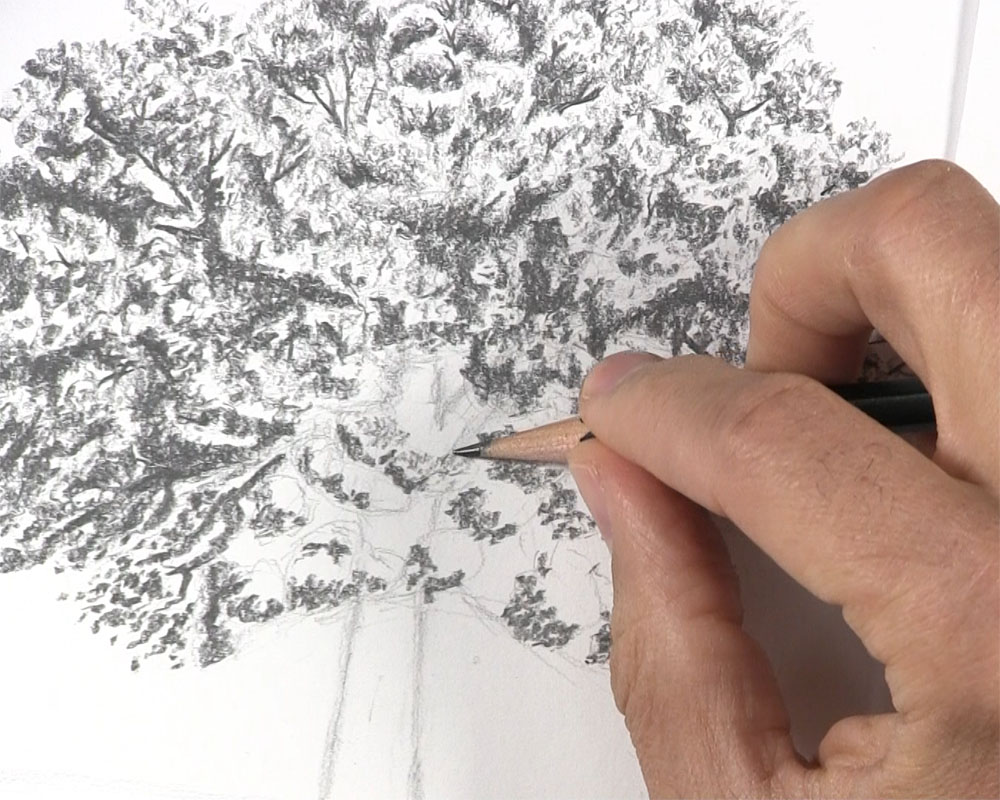
Next, use an HB pencil to lightly sketch some short markings where the guideline used to be. Draw some of these short leaf markings in the highlighted area of the cluster too.

Begin doing the same thing in other clusters on the left side of the tree. Draw leaves in the lighter areas of each cluster. If you have a narrow gap between the top section and left section of the tree, you can draw some leaves there as well to fill the gap and make the crown look whole.
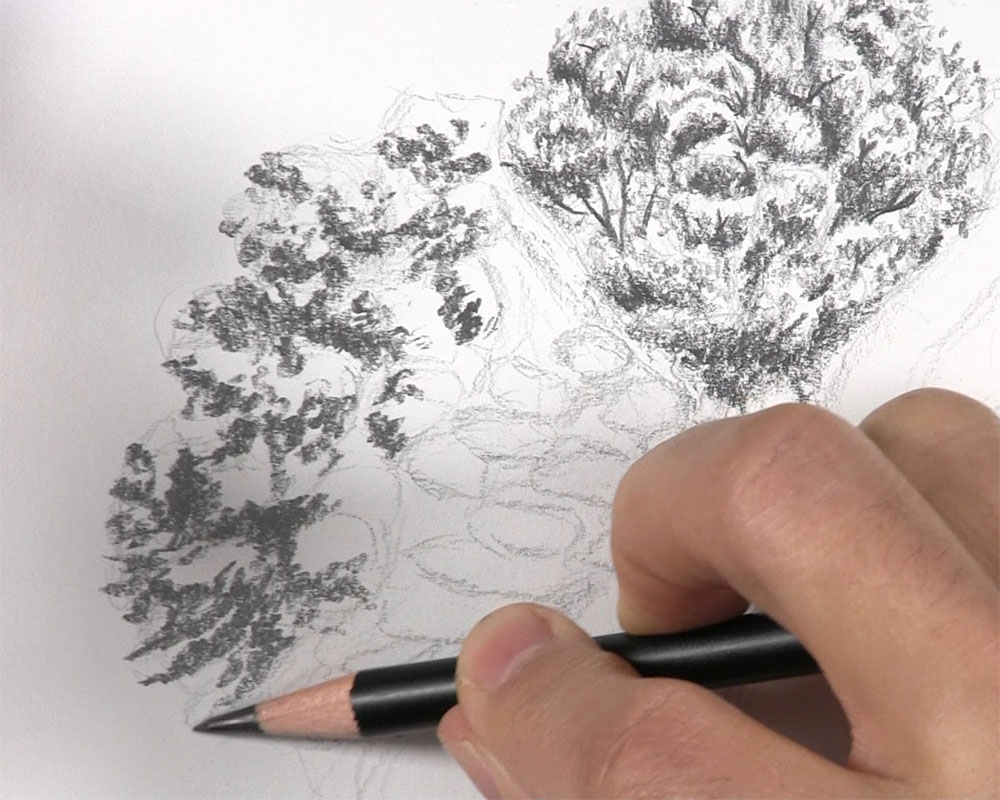
Remember, as you get to the clusters along the left edge of the tree, erase the guidelines so they will no longer show in the final drawing. Additionally, draw leaves that extend beyond the edge of the crown of the tree.
Stay steady, patient, and consistent with your markings until you have leaves showing in all of the highlighted areas of the left side of the tree.
Finish the Left Side of the Tree
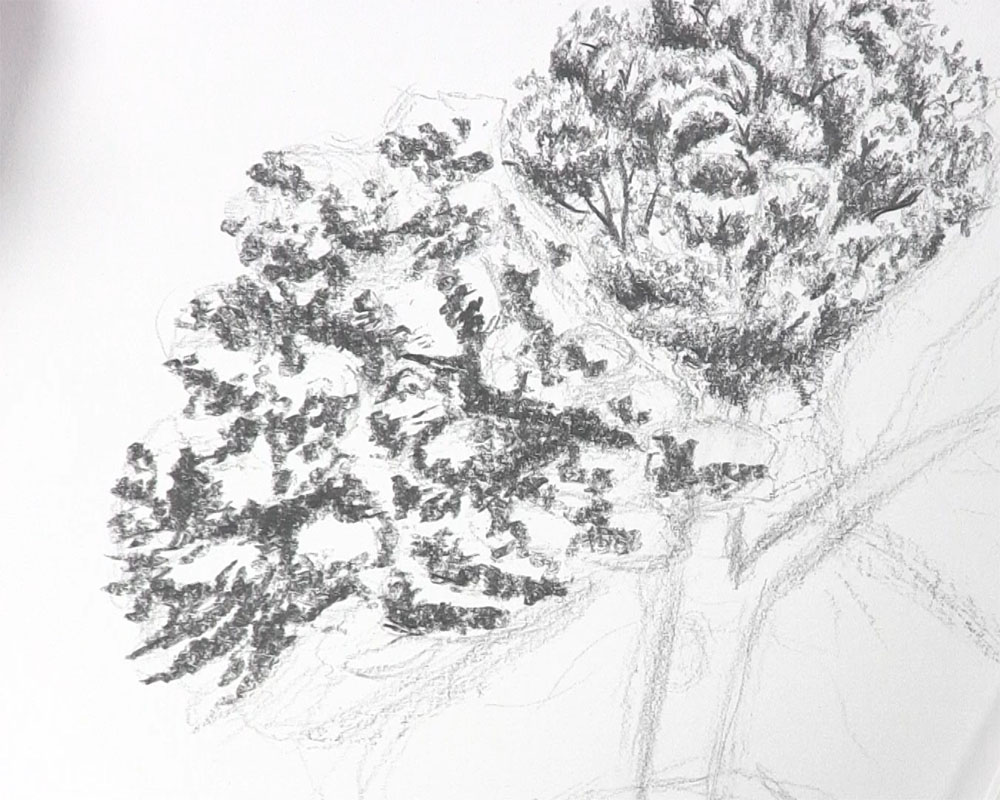
Use a 4B pencil to layer additional shadow tones over the areas already identified as shadow with the 2B pencil. Include the areas of each cluster that are farthest away from the light source. Additionally, include those clusters that are completely in shadow because they are farther away and behind the clusters in the foreground. Remember to shade in between the clusters, too. This adds to the fullness of the crown.
Draw some additional leaves on the branches along the lower left edge of the tree. Like these branches, these leaves can be dark in value due to them being mostly in shadow.
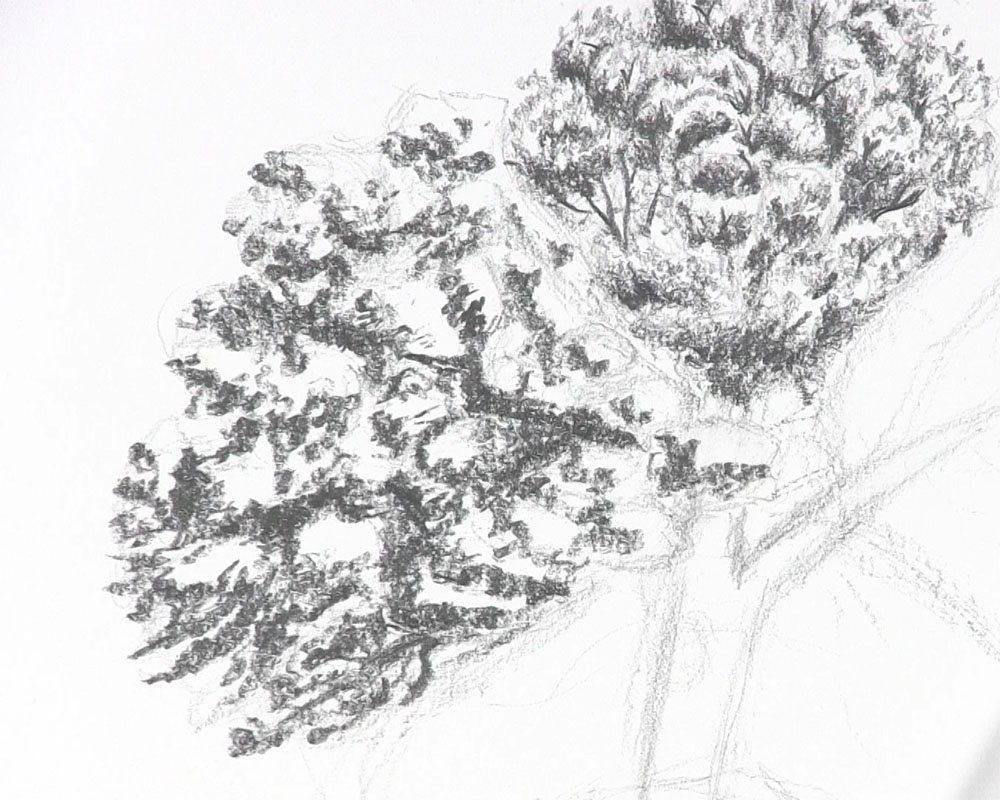
Now, draw several branches that can be seen through some of the tree’s openings. As you draw each branch, plan how a natural pathway from the trunk to the branch might look if we could see beneath the tree’s thick, leafy foliage. Don’t get careless while drawing your branches here. Rather than drawing random lines on top of all of the leaves, draw short lines to represent the segments of the branches that we can see between (or behind) the leaf clusters.
For this next step, I decided to use my HB pencil to pull the left side of the tree together with the top. I did this by lightly shading some of the highlighted areas of the left side so they would look similar to the highlighted areas at the top.
Divide and Begin Shading the Right Side of the Tree
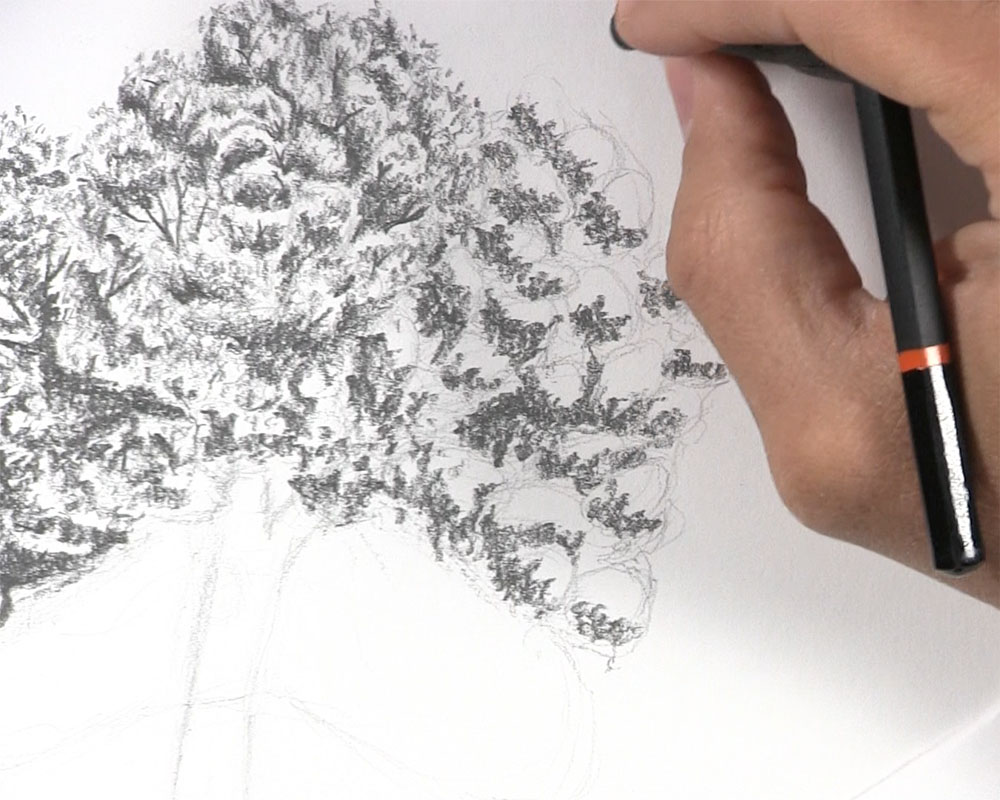
Start dividing the right side of the tree into smaller, individual, oval-shaped clusters. Just as before, you can use the reference photo to help you locate and position the various clusters. Alternatively, you can disregard the photo and place there anywhere you wish!
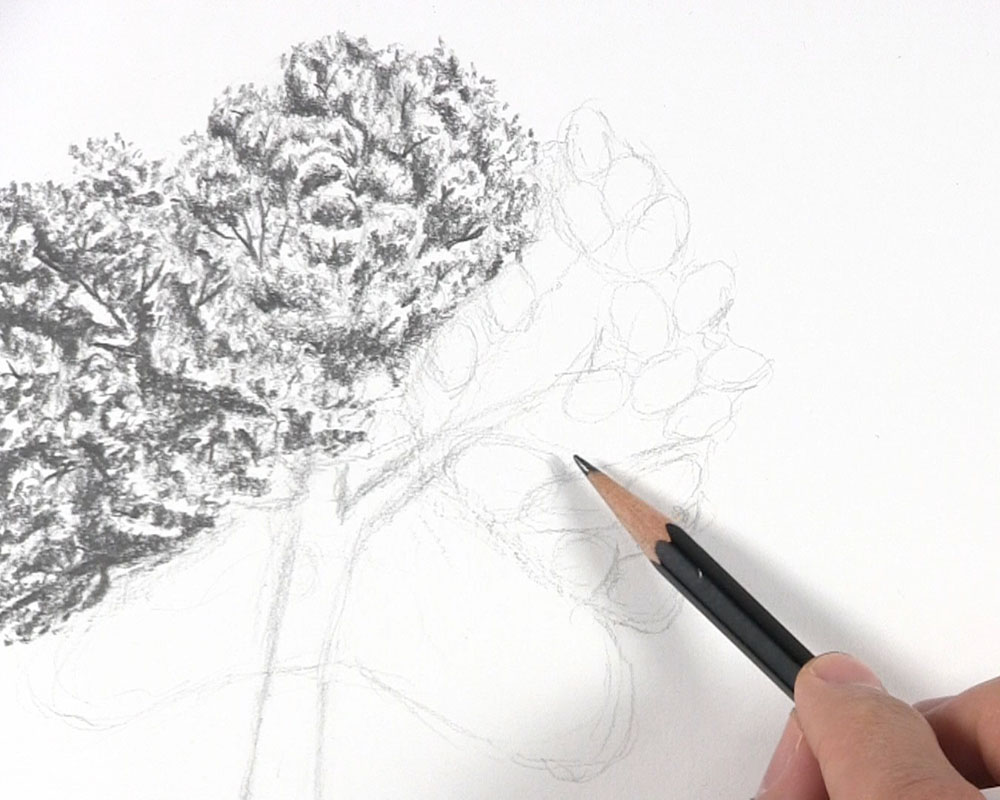
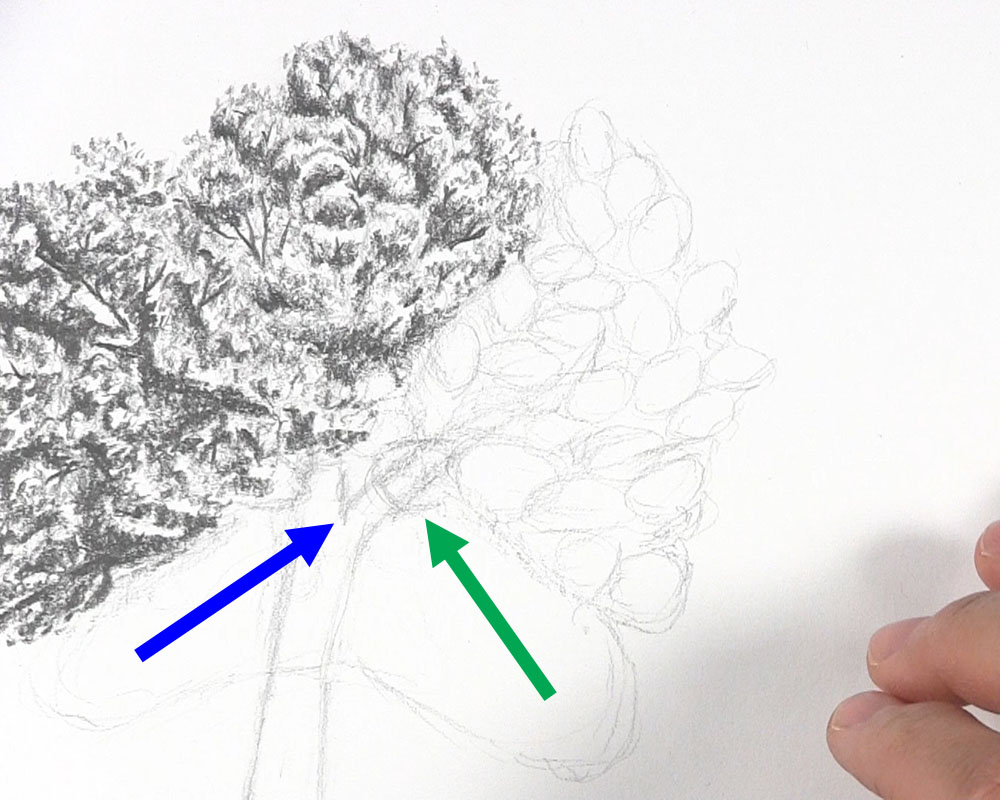
Continue to place clusters until most of the area encompassing the right side of the tree is filled. Remember to leave a few gaps between some of the clusters so the open sky can show through. Also, don’t be afraid to draw a cluster or two in front of the main branches and trunk of the tree. For the purposes of realism, it’s important to have clusters in front of the branches as well as beside and behind them.
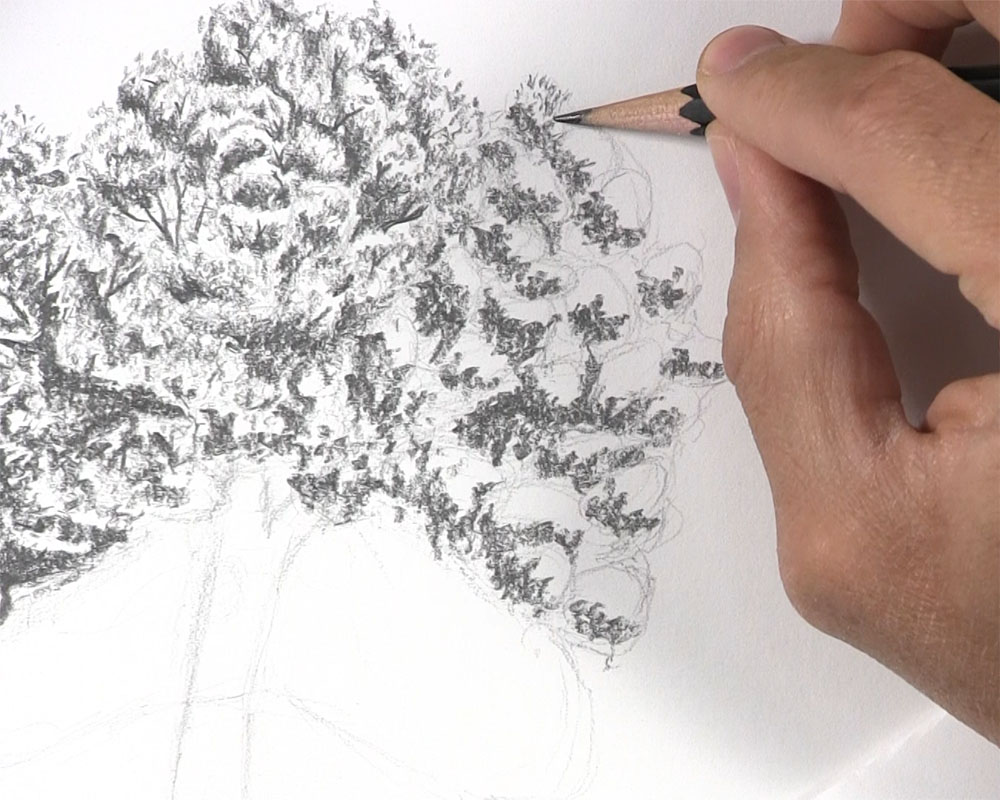
Start shading the lower left portion of each cluster. Keep using short, choppy pencil strokes as you draw to loosely resemble a mass of distant tree leaves.
Continue this process until all of the clusters on the tree’s right side have some shading. You can also shade between some of the clusters that are close together to indicate branches deeper inside the crown.
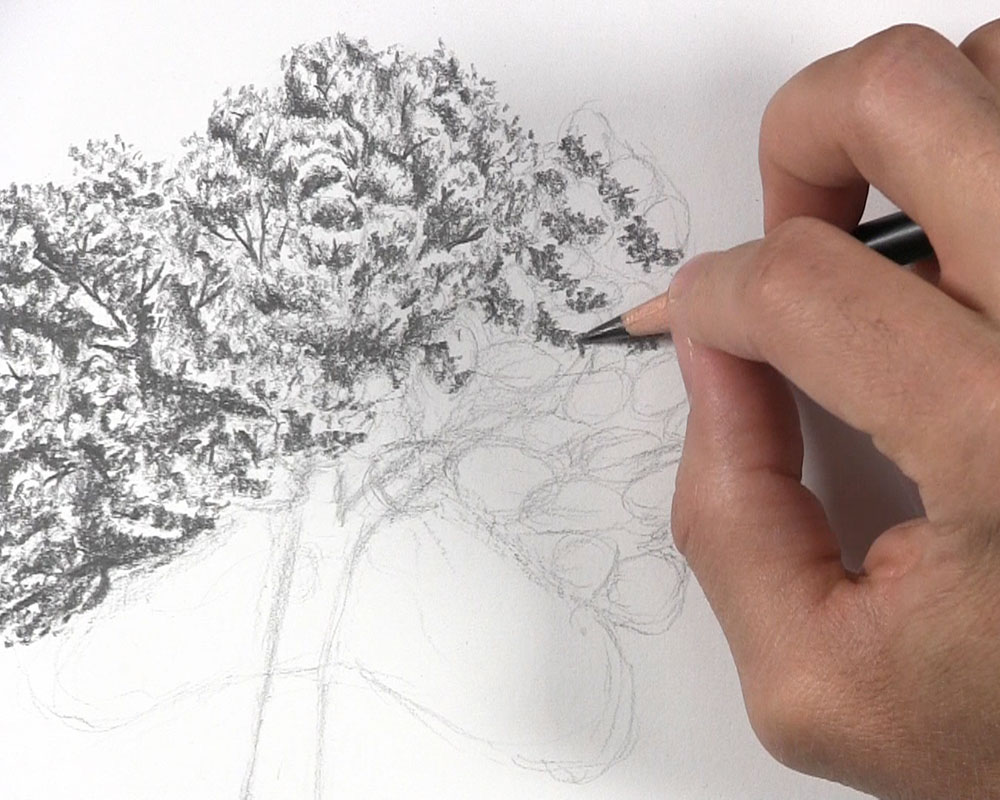
Draw Leaves on the Right Side of the Tree
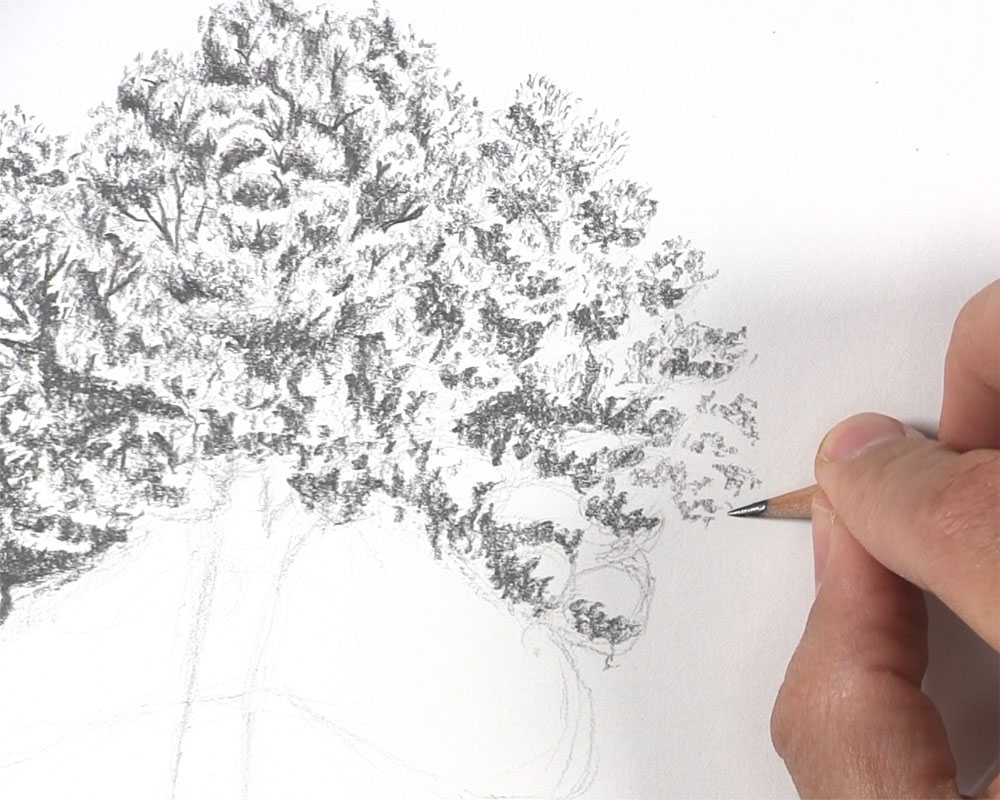
Now, let’s draw the more visible leaves that are in the highlighted areas of the tree’s right side. Choose a cluster along the edge. Gently erase the outer edge.
Use an HB pencil to make short marks in the blank area of the cluster as well as along the edge that was just erased. Leave spaces between the markings.
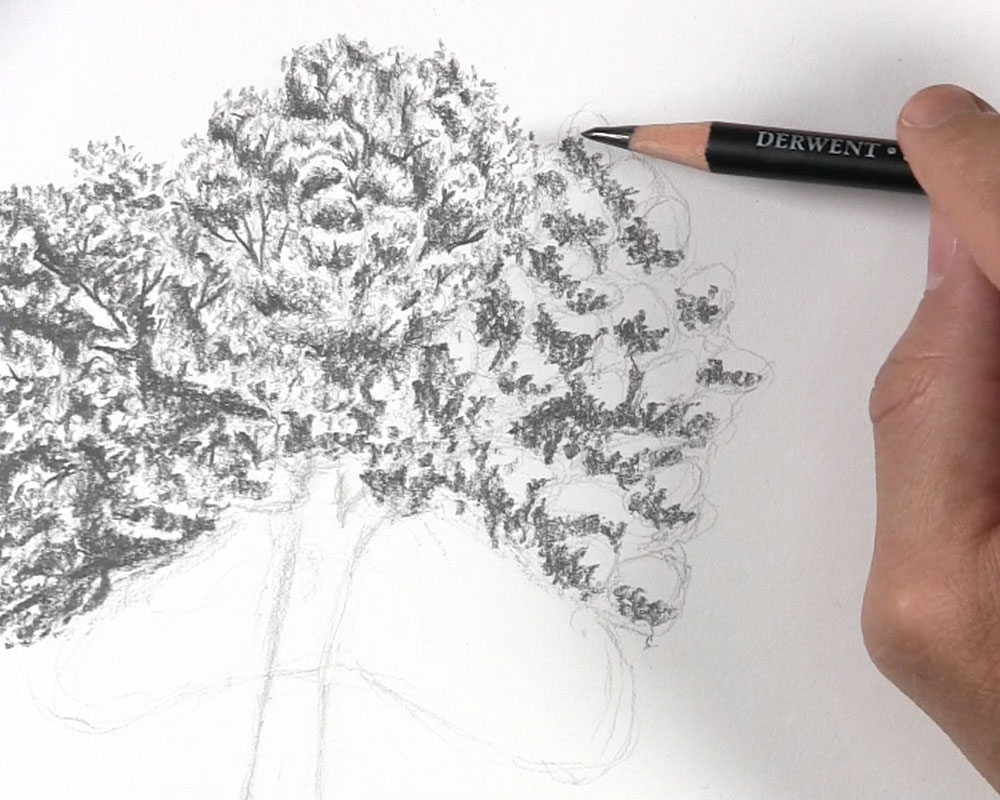
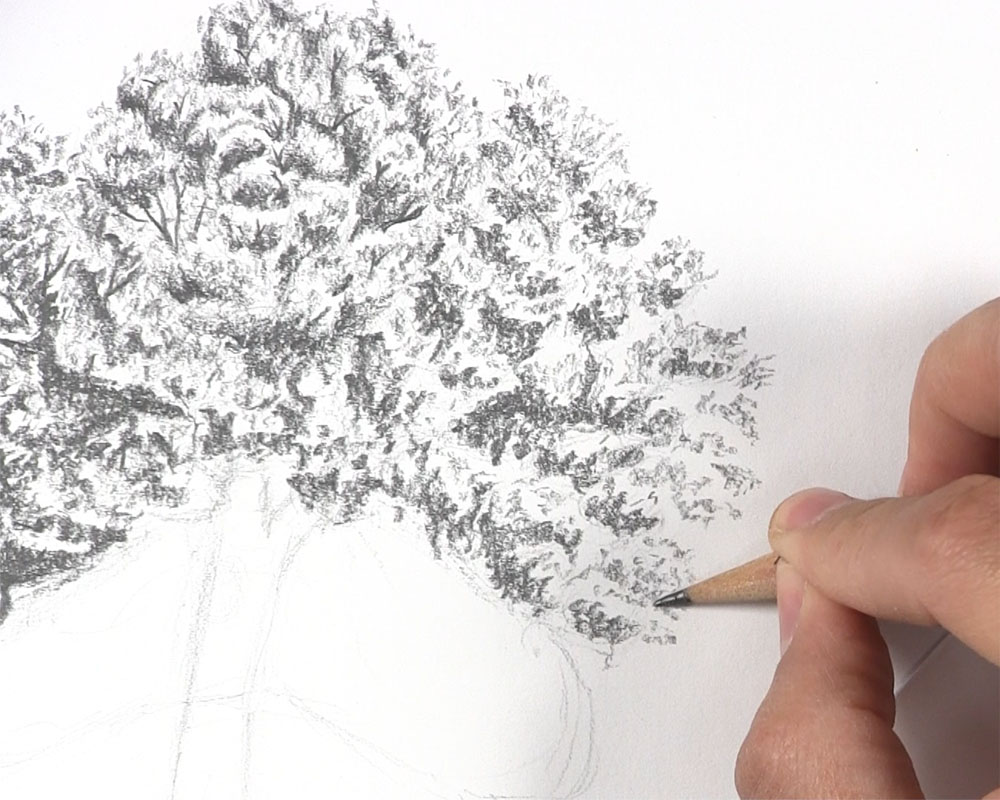
Keep at it as you work your way down the other clusters of the right side. Remember to erase the guidelines before sketching the leaf markings. Also, remember to sketch some stray tree leaves extending a little bit beyond the outer edge of the crown.
Fill in the remaining clusters. It takes patience and persistence to draw the leaves of a tree, but you will be happy with the results if you stay consistent!
Finish the Right Side of the Tree
Now, switch to a 4B pencil to put some darker shading on the clusters. This darker shading will be along the edges that are farthest away from the upper left light source. As it so happens, this shading will also be adjacent to the highlighted portion of many of the leaf clusters, creating some nice contrast.
As you continue to apply these darker values, they will work with the lighter values to give depth and volume to this massive collection of leaves on the tree.

Next, begin to draw branches that are visible in some of the open areas between the leaf clusters. Be mindful of how the branches are likely flowing underneath all of those leaves. Draw the base of each thin branch from a position where it is likely to continue or connect from a thicker branch.
The branches that you draw should become thinner and thinner the farther away you get from the trunk. As you approach the outermost leaf clusters, try tapering the outer branches to a fine point.
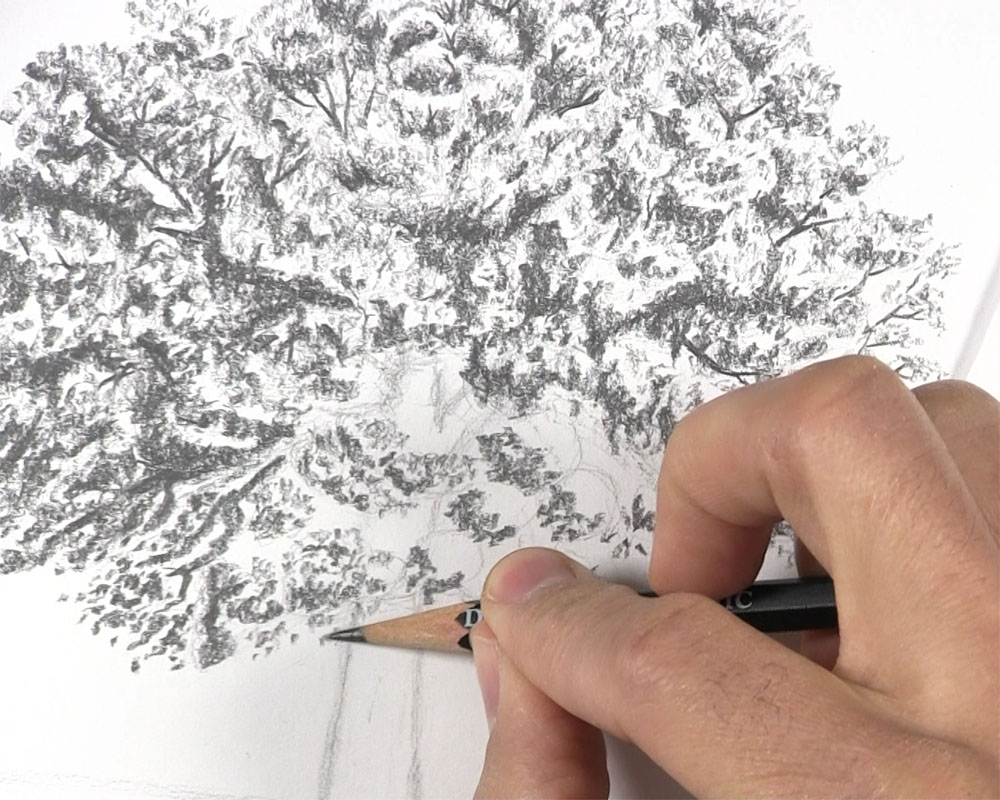
Divide and Begin Shading the Lower Part of the Crown
The next phase of drawing our leafy tree is to complete the lower portion of the crown. We will do this in the same manner as we did with the top and the sides. However, before doing so, it might be necessary to soften the edges of the trunk hidden behind the leaves. In the image below, you’ll notice that I’m still keeping the top of the trunk and a primary branch untouched. I want this opening to remain visible.
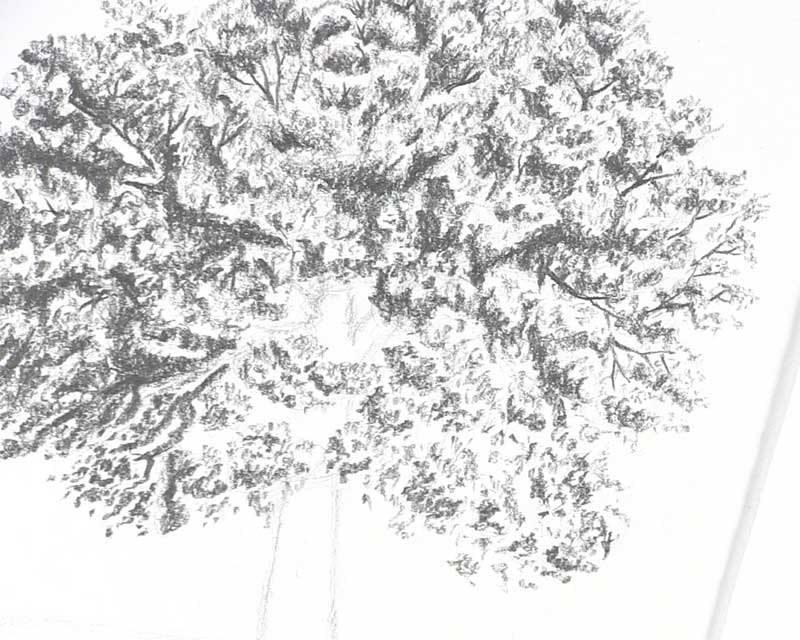
Once that is done, begin to lightly draw the cluster outlines with an HB pencil. Make them similar in size, but vary the shape occasionally. These can be irregular in shape as well as oval-shaped. Use your reference as a guide.
Draw the cluster shapes until they fill the lower crown area.
After that, use a 2B pencil to begin applying the initial patches of shading to each cluster. Stay consistent with the process and focus on shading the areas farthest away from the light source.
Okay, here I’m taking a brief pause with shading the clusters. On the reference photo, I see a large branch arm extending to the outer edges of the tree. Since this is a rather thick branch that is clearly visible in the foreground, I’m taking a moment to sketch it out.
This cluster is a bit different from most of the others drawn up to this point. Since the branch is not hidden behind the leaves, I don’t need to sketch the leaves first and the branches last. Now that the framework of the branch is drawn, I can sketch the leaves attached directly to the branch.
Resume applying the initial layer of shading on the remaining clusters of the tree.
Draw Leaves on the Lower Part of the Crown
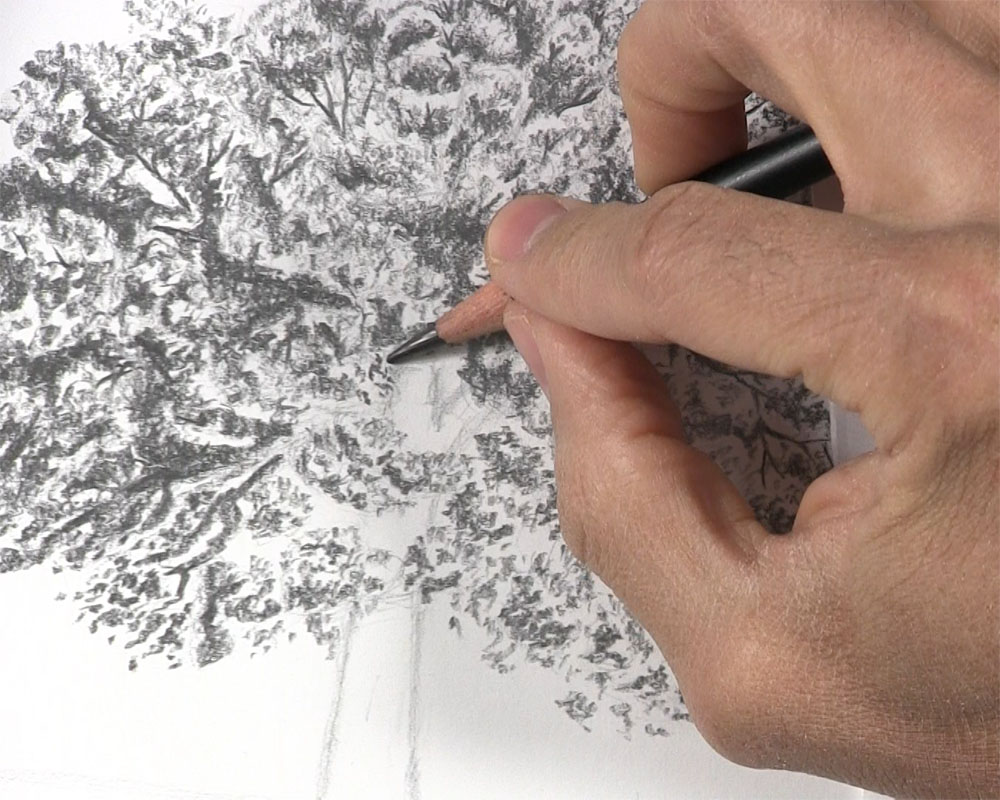
Let’s again sketch some markings to represent leaves in the highlighted areas of the clusters. Choose one cluster and erase the visible edge, as shown below.
Then, sketch short markings in the white space of the cluster as well as along the edge you just erased. I’m using an HB pencil here just like I did for the highlighted areas in the other parts of the tree. Also, notice that I am keeping the space above this particular cluster open so we can see the trunk behind it.
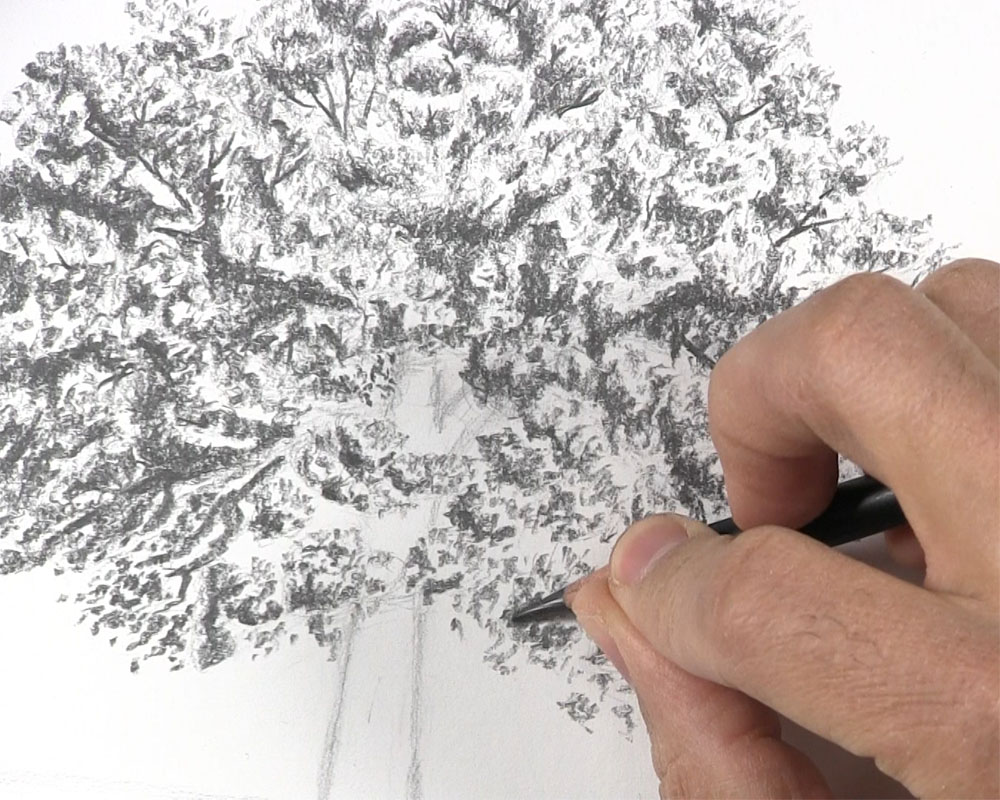
Use the same process to draw the leaves in the clusters below. Make sure to sketch some stray leaves beyond the lower edge of the crown.
Keep going with the remaining clusters. Leave some white space between your markings to represent highlights and gaps between the leaves and branches.
Draw Branches and Finish Shading the Lower Crown
We’ll use these next few steps to finish drawing the leafy portion of the tree. In the image below, I’m sketching the indication of a few leaves in one of the openings of the crown near the trunk.
Now that I’m done with that minor detail, I’m using a 4B pencil to place the darkest tones on the backside of each leaf cluster, just as we did with the previous clusters of the tree.
Remember that heavy branch that I sketched out a few moments ago? There is a lot of shadow around this branch, and it can even stand to be thicker. I’m using my 4B pencil to shade around it and add tinier branches extending from it.
You can draw a similar branch on the other side, too. This works because I left enough space between my clusters to allow for it. Depending on the positioning of your clusters, you may have to draw just the visible portion of the branch behind the leaves. Remember to draw a few arms reaching out to the far leaf patches along the edge.
Keep drawing smaller branches extending from the bigger branch. Take time to draw the branches in the empty spaces between the leaves. Make sure to taper them to a fine point near the outer tips. Now you should have a full crown of leaves and branches for your tree!
Add Texture and Shading to the Trunk
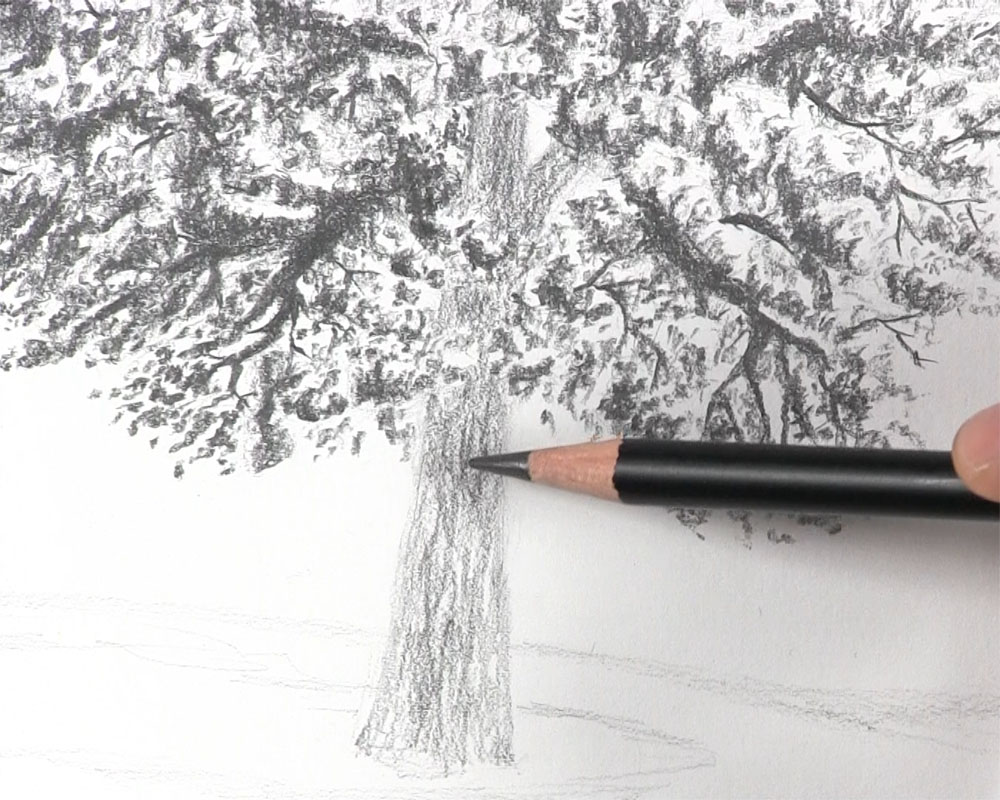
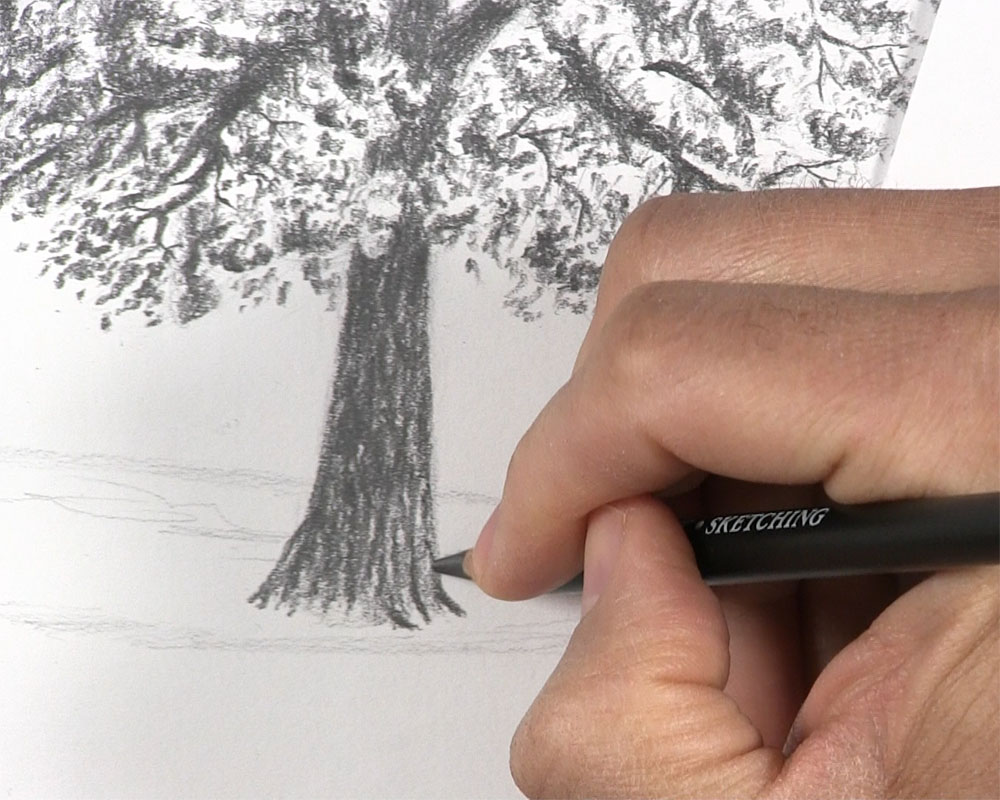
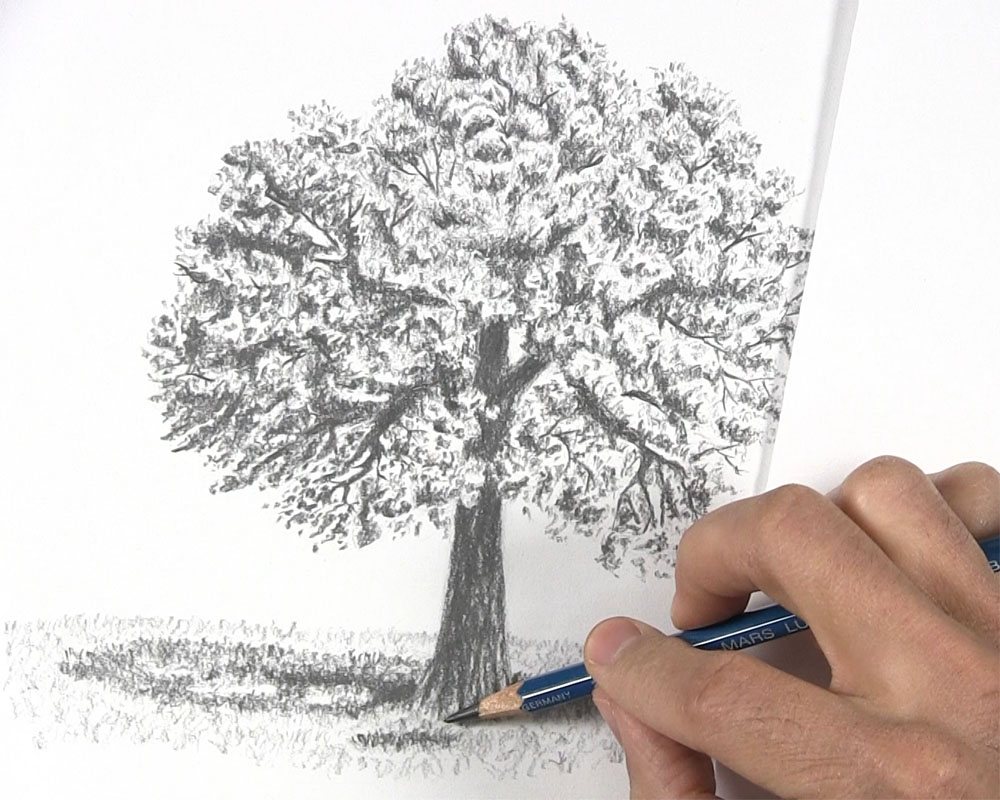
Now that we are essentially finished with the leaves of the tree, it’s time to draw more of the trunk. With a 2B pencil, lightly shade the visible portion of the tree trunk. At this point, you can also begin to sketch some subtle indications of the bark pattern. To draw this bark pattern on the tree trunk, draw mostly vertical lines that occasionally veer to the right or left and intertwine with the lines next to them.
After that, use light pressure over some of the bark pattern to make the lines slightly darker and heavier. This helps us to slowly build up the texture in layers.
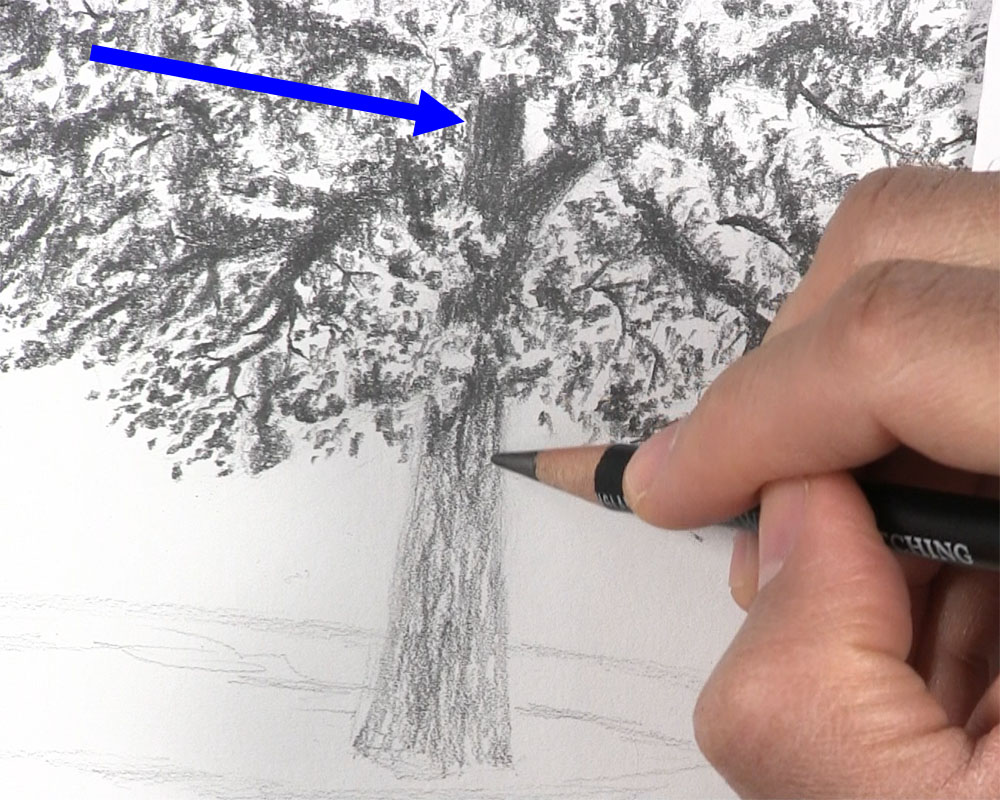
Now with a 4B pencil, start at the top of the visible portion of the trunk. Shade in a mostly vertical direction. Most of the trunk’s surface will have very dark tones. Leave a few slightly lighter spots along some of the lines creating the bark pattern. Additionally, leave a thin strip of reflected light along the left edge of the trunk, as indicated by the blue arrow.
As you shade the portion of the trunk below the leaves, focus more on tracing over the lines of the bark pattern rather than the spaces in between them. This part of the trunk is receiving more sunlight, so we should have lighter values on the bark than we do in the shadowy crown area.
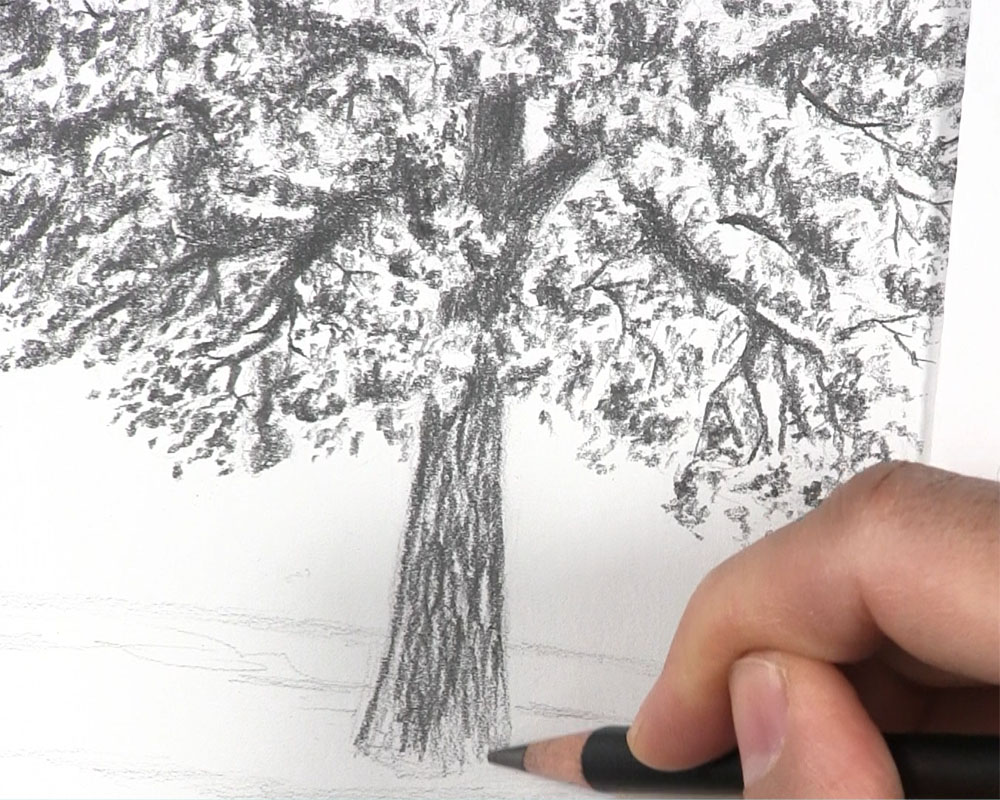
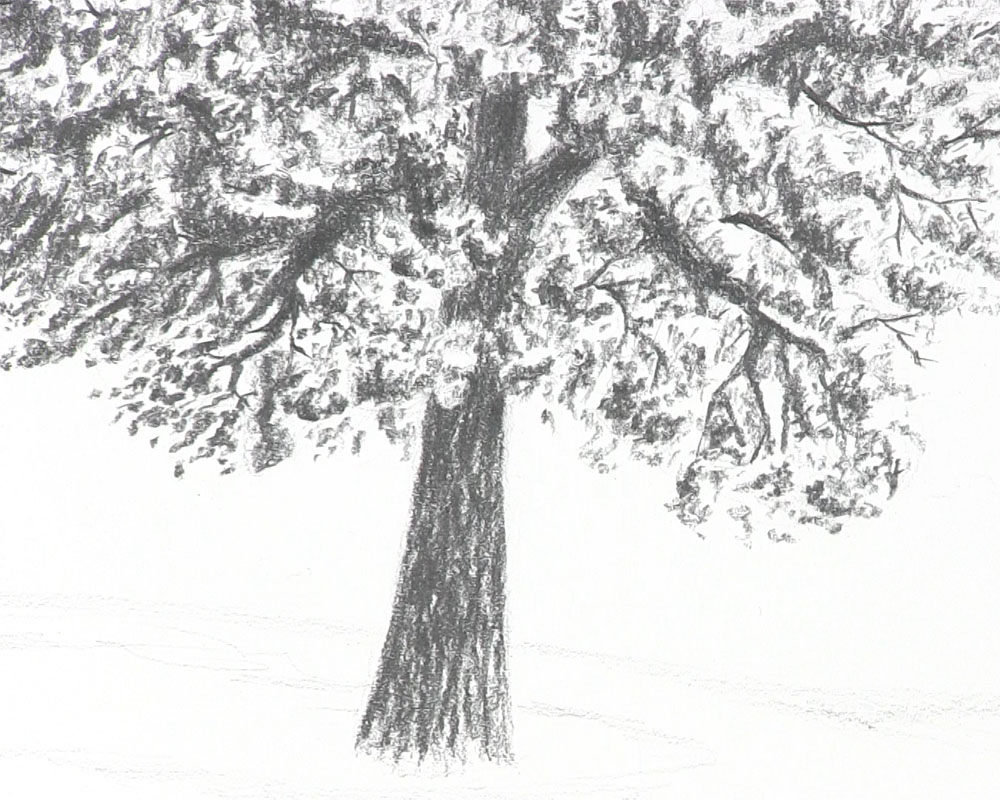
Now, begin to shade the lighter areas between the lines of the bark pattern. Focus on applying more shadow on the area just below the leaves as well as the left side of the trunk. Although the trunk should consist of mostly dark tones, you should still be able to see subtle changes in value that create a rough, bumpy bark texture.
Begin Drawing the Grass
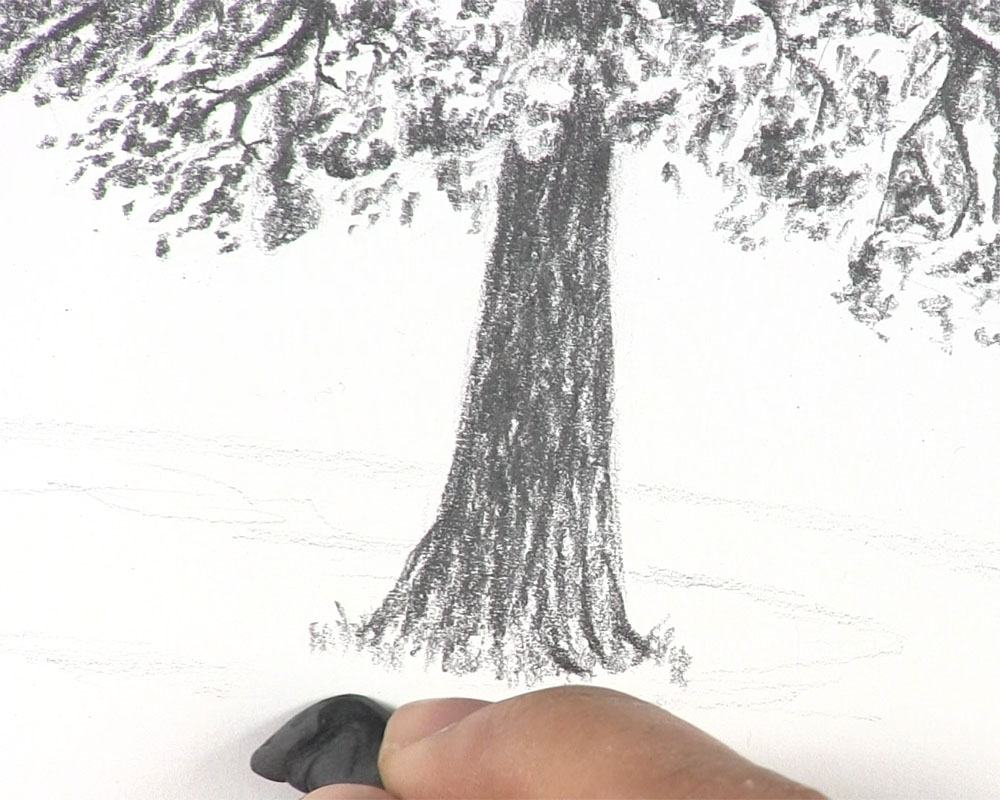
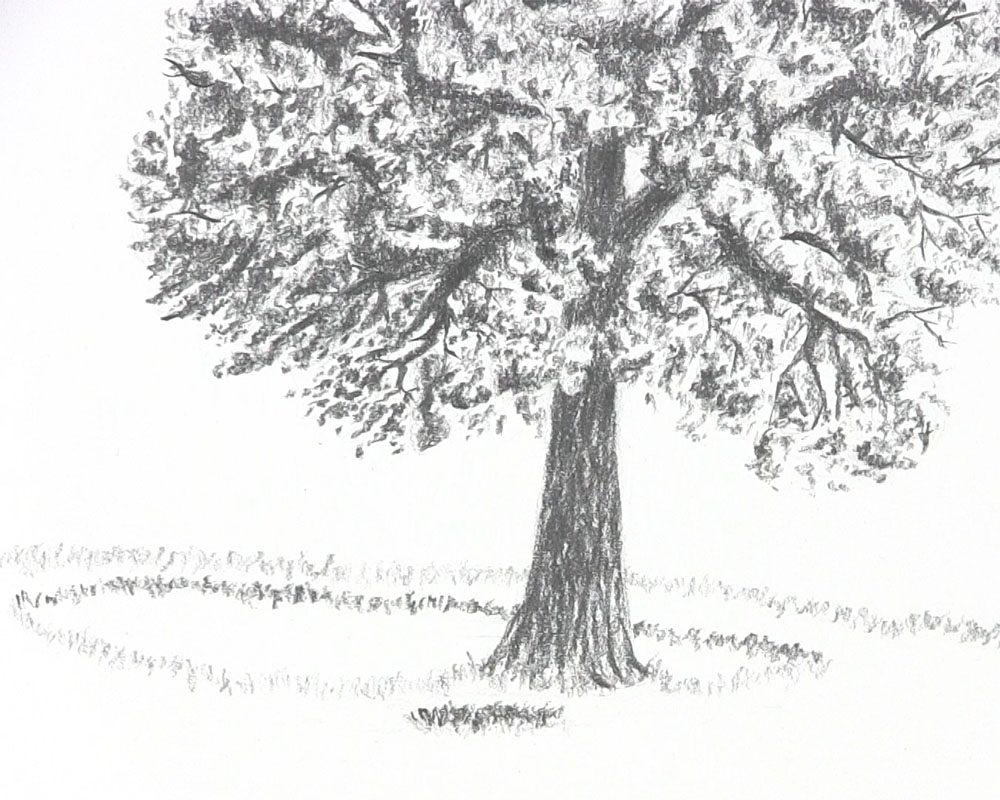
We’re just about ready to begin drawing the grass. Before we do so, however, we should develop the base of the trunk that will be surrounded by grass.
Simply draw a few lines from the bottom of the trunk that curve out and away from it. These lines will help to bulk up the base as well as create the appearance of some roots.
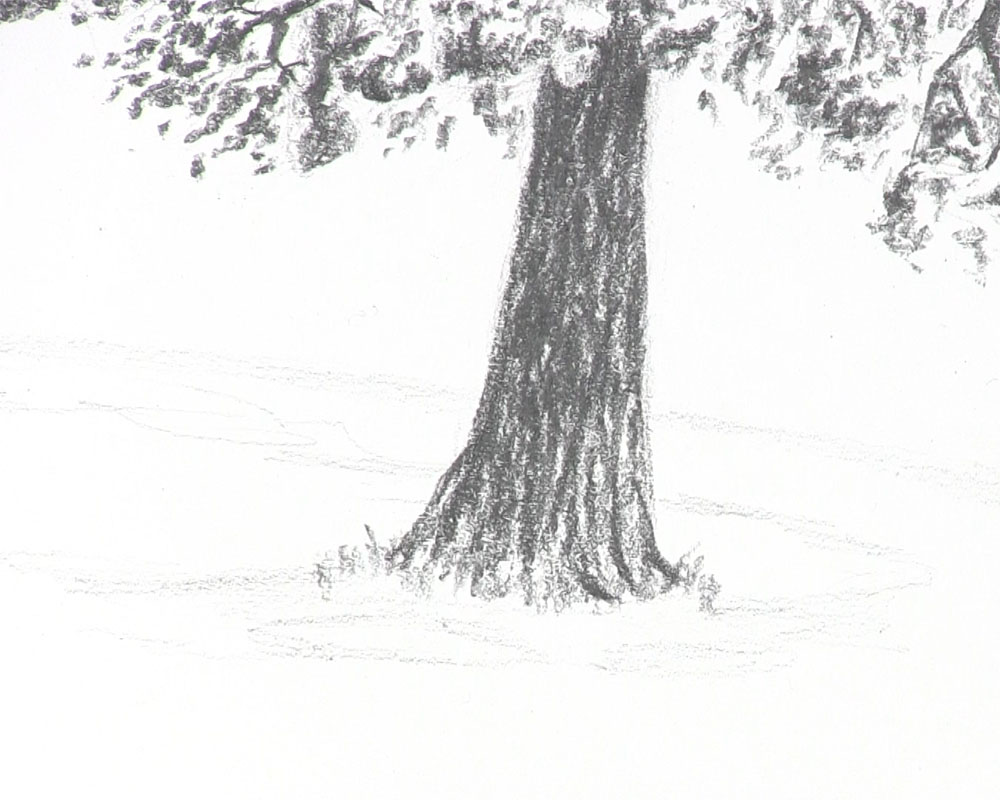
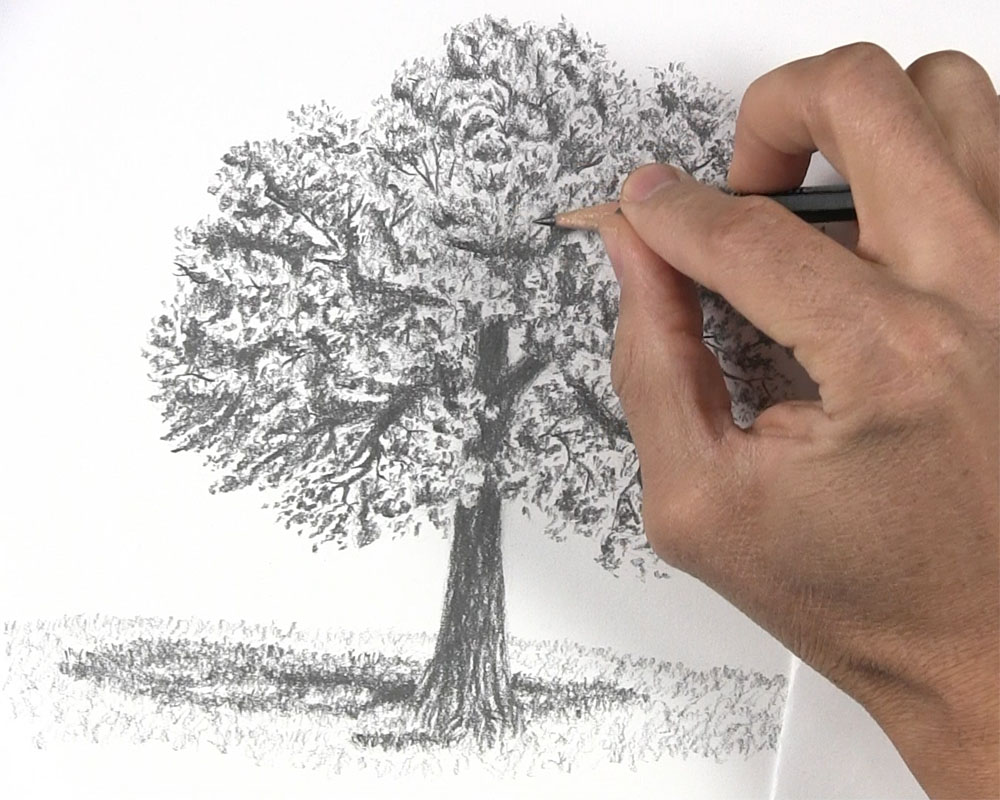
Now for the grass, use an HB pencil to sketch a few short blades at the foot of the tree. In this image, you’ll notice that I’m erasing a portion of my original guideline of the tree’s shadow. I’ll adjust this in the next step.
I decided to move the edge of the shadow slightly back so it aligns with the trunk. In effect, this moves the sun a little more into the foreground. Even so, our light source is still at the upper left. I also sketched the outline of a much smaller shadow in front of our trunk. This shadow can easily be from the protruding leaf clusters overhead.
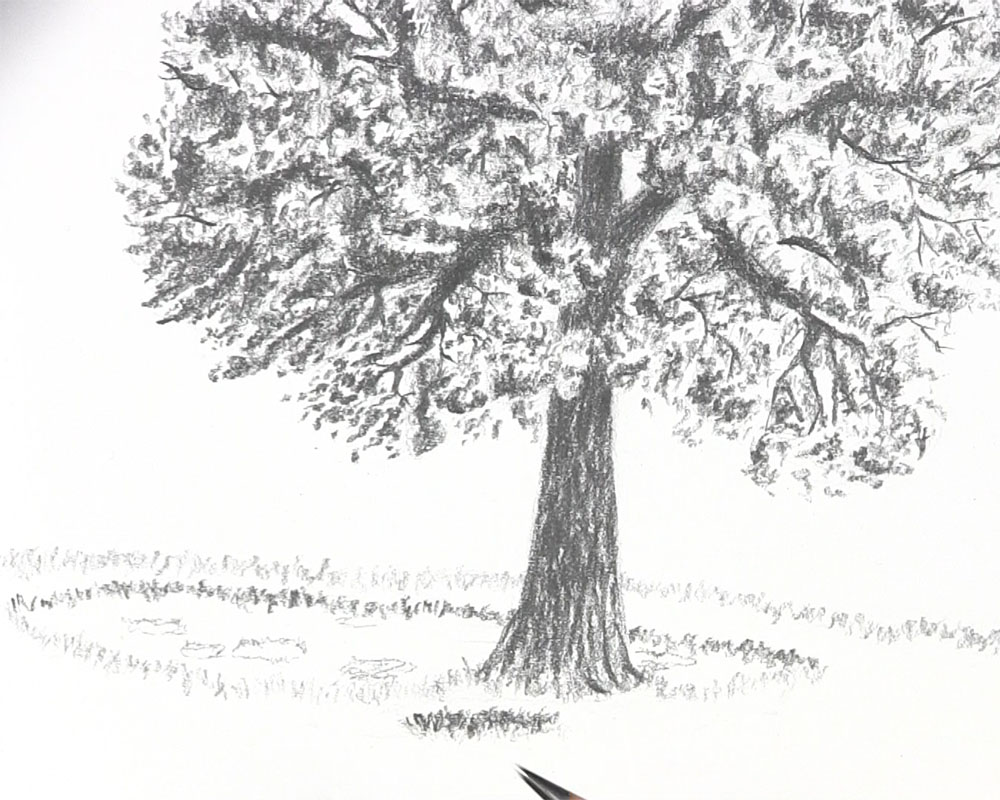
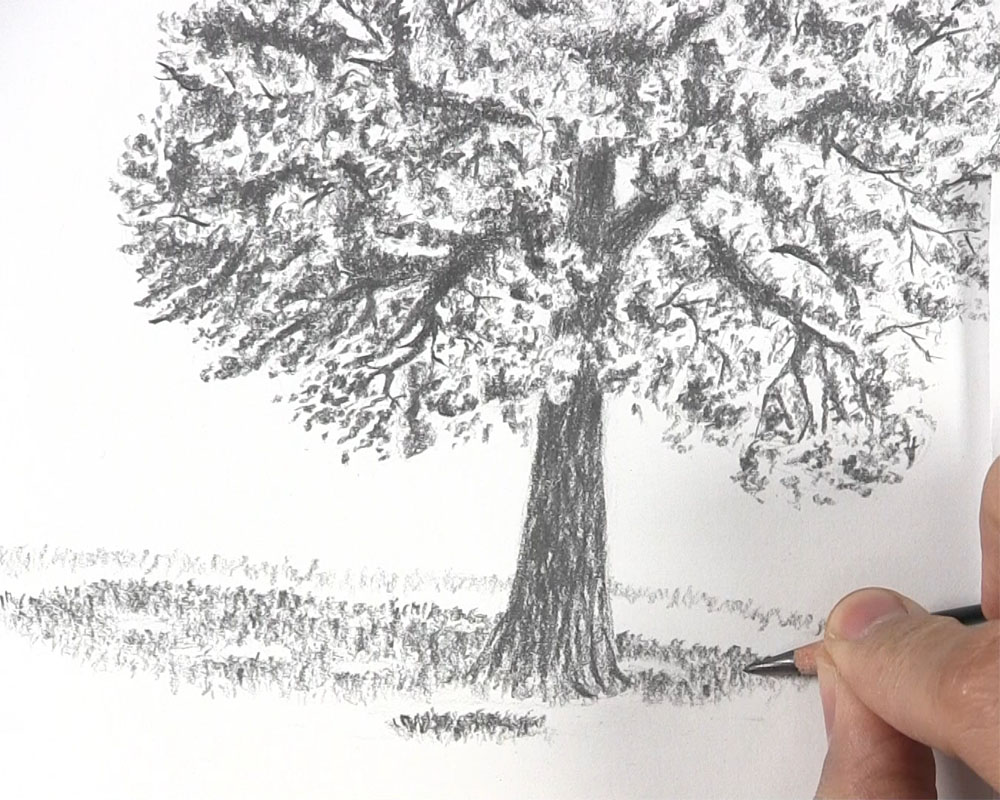
Next, begin to sketch the grass along the border of the shadows. Keep these marks very light. Additionally, only sketch the grass along the border in the foreground.
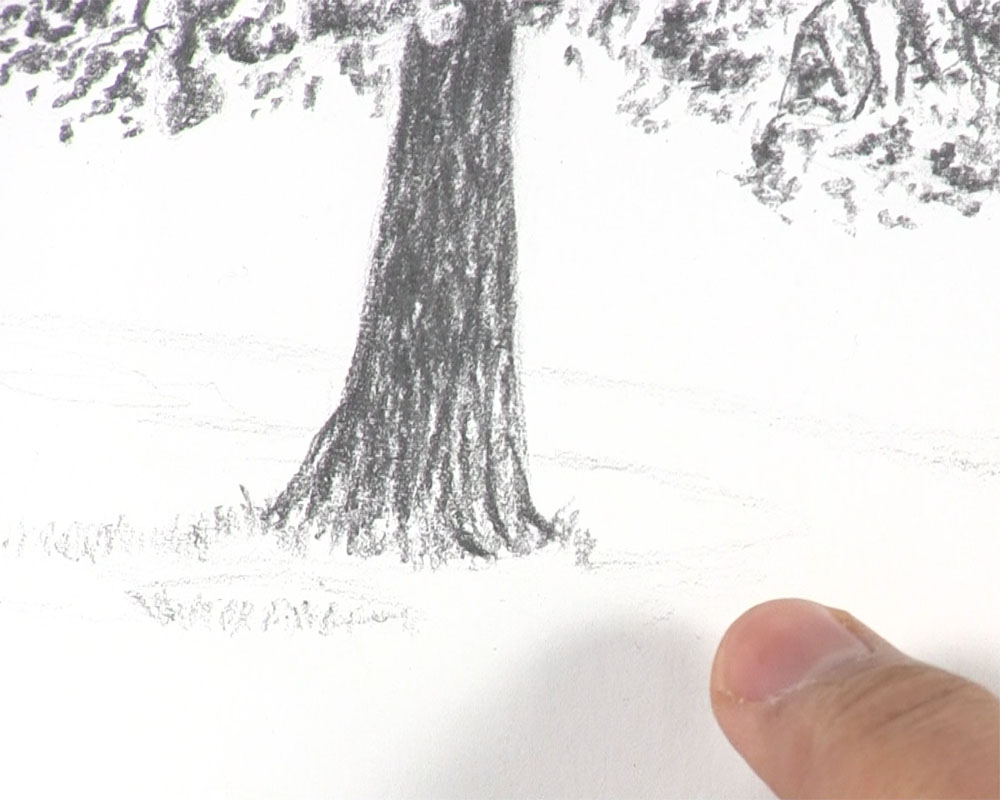
Continue sketching blades of grass along the shadow border until you have grass along the entire edge in the foreground. All of the grass drawn so far will be in sunlight. That’s the reason we are being so careful about where we place these lighter tones.
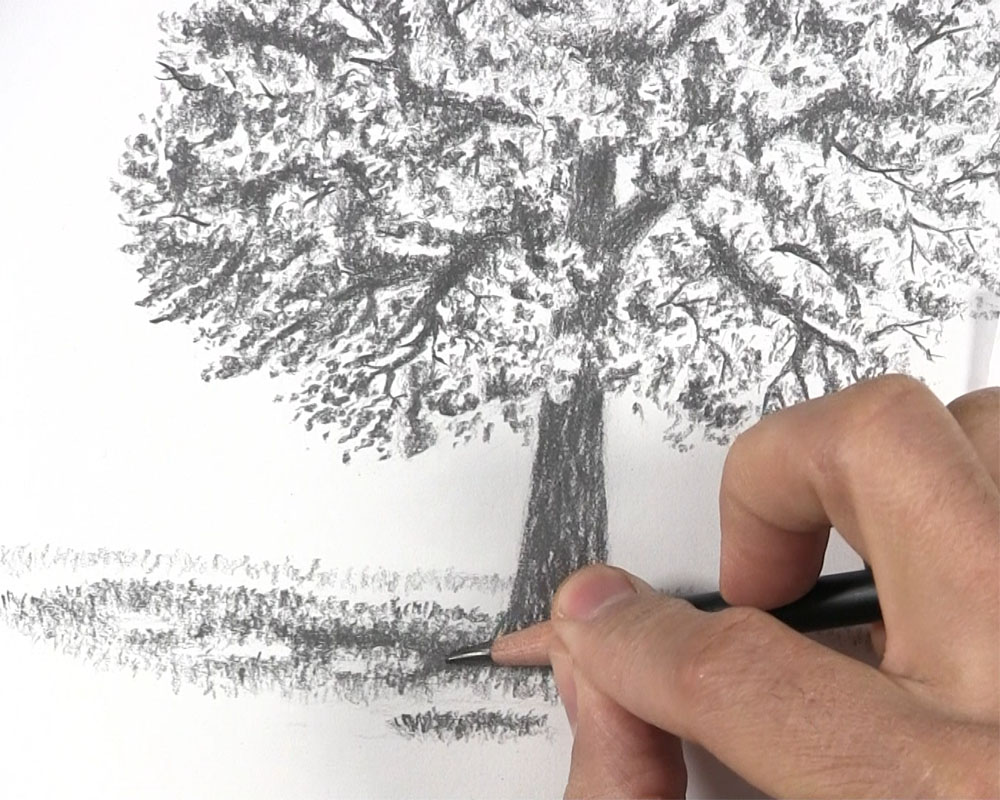
Use a blacker pencil, like a 4B, to finish drawing the grass along the shadow border. The edges in the background are darker in value because we will soon fill in the shadow area with grass of a similar value.
Finish Drawing the Grass
Before we fill in the shadow from the tree, we need to sketch a few long, narrow oval shapes in this shadow area. These narrow shapes come from the sunlight shining through the various gaps found in between the tree’s many branches. I’m using a 2B pencil for this step.
This shadow will not be one solid black value. Instead, it will have subtle gradations. For this reason, we are going to sketch a light base layer of tones in the shadow area before applying anything much darker. Use the same short, vertical strokes that you used when drawing the first blades of grass. Make sure to shade around the little narrow shapes.
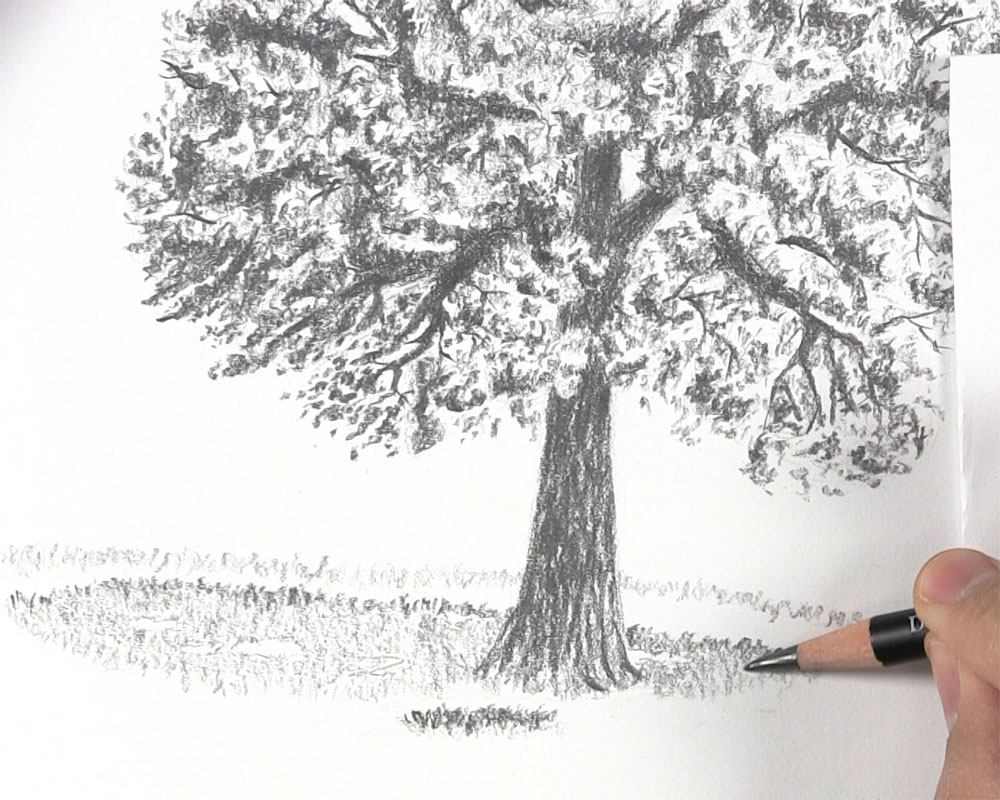
With the same 2B pencil, go over this shadow area a second time using the same methods. Just as we built up the leaves of the tree in layers, it’s a good idea to draw grass in multiple layers as well. This is especially true in areas that have more shadow and less sunlight.
Now, with a 4B pencil, apply a third layer. This time, focus on the center of the shadow and the portion closest to the trunk. This cast shadow from the trunk will be the darkest part of the shadow. Again, apply your marks in the same manner as before when drawing the other grass.
With an HB pencil, sketch lighter marks to represent the grass in the sunlit areas of the ground. Use one layer to avoid getting it too dark and to keep the value consistent with the sunlit areas of the tree’s leaves.
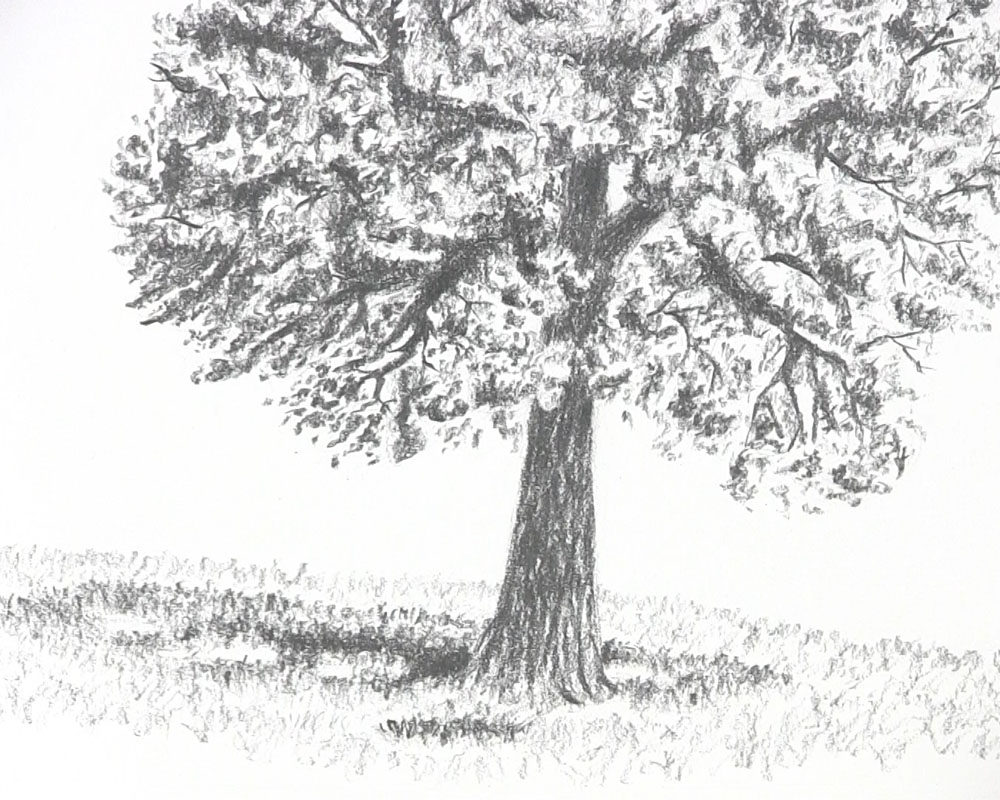
If necessary, use a 2B pencil to go over the shadow again to build up contrast between the shadow’s edges and the highlighted grass next to it.
Add Finishing Touches to the Tree
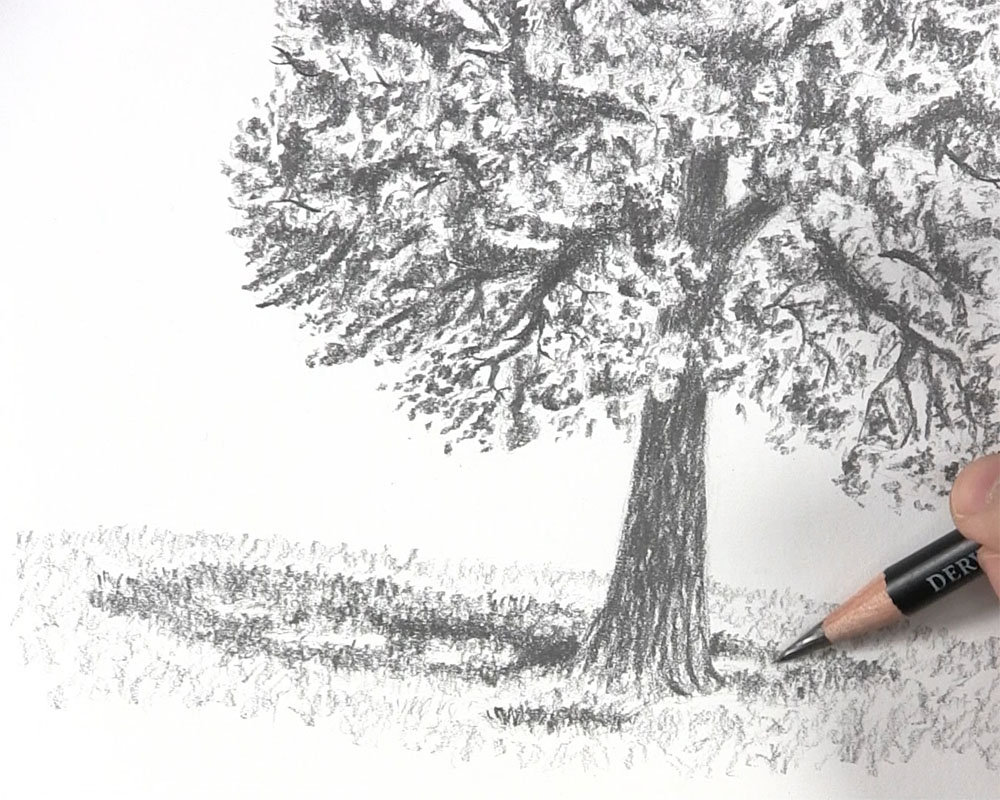
Look at your tree and seek opportunities to enhance the drawing. Look for where you can achieve more contrast between dark and light areas. A good place to start is with the trunk. Use a 6B pencil to go over the darkest areas of the trunk. Specifically, shade the upper portion at the center of the crown and the right side.
Remember to maintain some of the tones that indicate the bark. You can also alternate between the 6B and slightly harder pencils to develop the foot of the tree with the grass around it. Use a kneaded eraser to lift blades of grass around the roots.
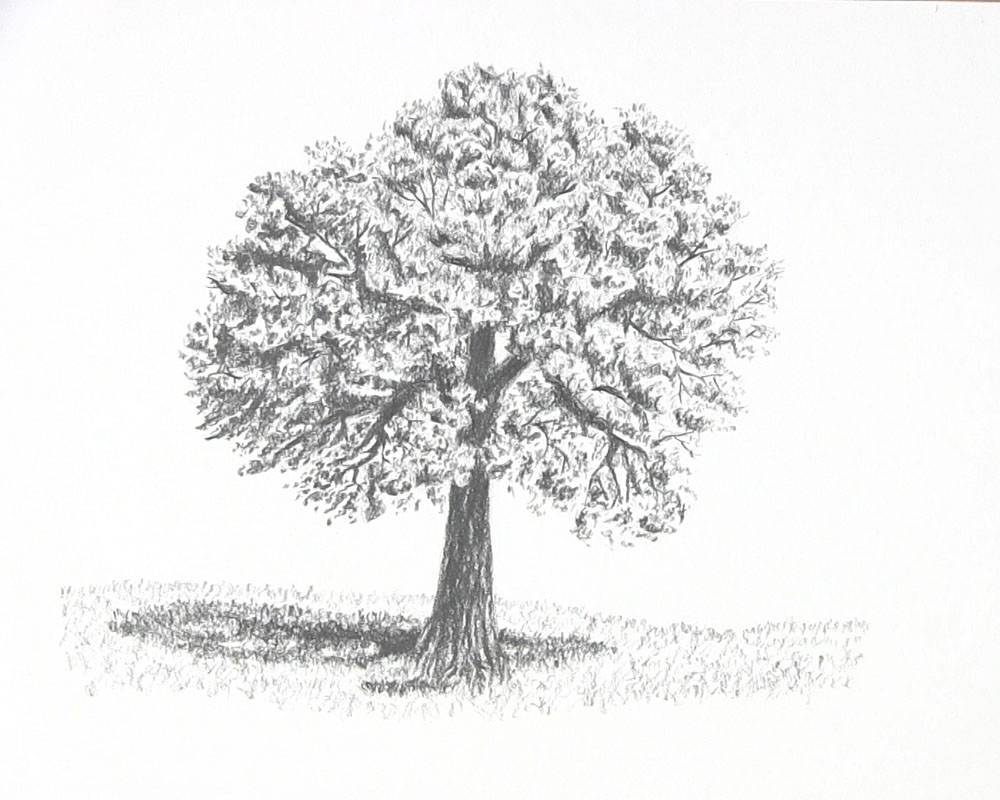
Look for any other areas where you want to apply finishing touches. You may wish to develop the volume in thin patches of grass or certain leaf clusters that are not as full as others. Keep adding small details until you feel like you are satisfied and can bring your tree drawing to a close.
And that is how to draw a tree with leaves and branches!
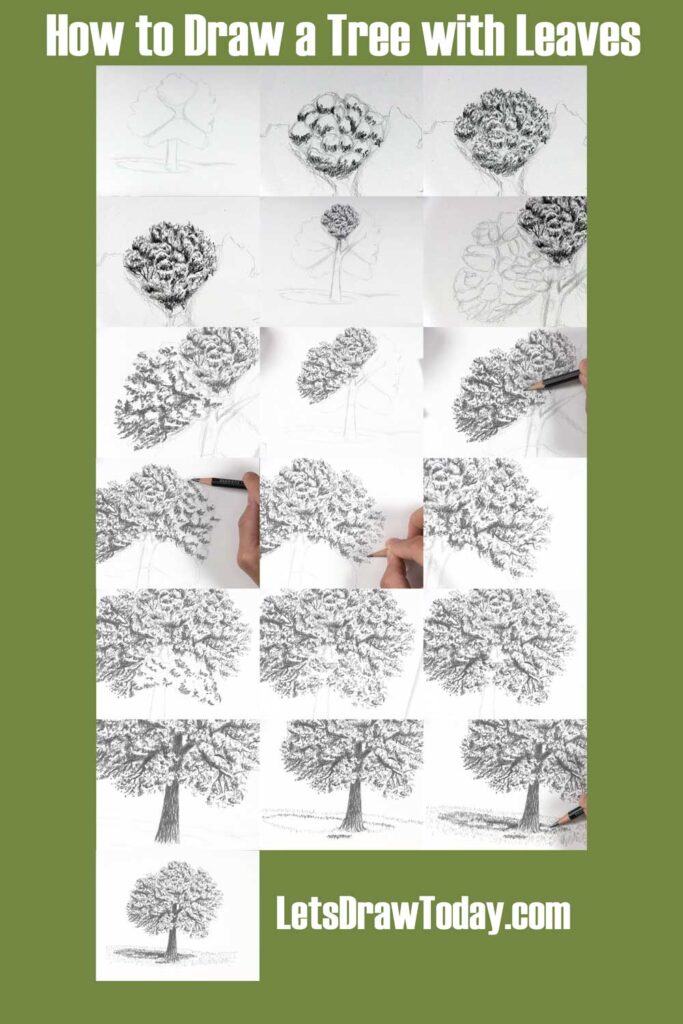
Tutorial Recap
For a quick visual recap of this tutorial, take a look at the image below. It shows you a progression of the main steps for how to draw this large, realistic tree with leaves.
Draw Any Tree, No Matter How Many Leaves
The next time you would like to try drawing a tree with leaves, I hope you remember some of the tips mentioned throughout this tutorial:
- Begin by sketching the overall basic outline of your tree. This includes the trunk and crown. This first step is similar to those simple trees you may have drawn in elementary school.
- Break the leafy crown of the tree into three to five main sections. Then plan to focus on developing one section at a time.
- Break each section down further into smaller sections. These smaller sections will represent the various leaf clusters of the tree. Draw each cluster in a sort of oval or round way but still irregular.
- Determine the primary light source and shade each cluster on the opposite side of the light.
- Draw leaves on the tree using short marks in the highlighted section of each cluster. Erase guidelines as you go.
- Continue to add shading and draw branches in between the clusters and leaves to give your tree volume and realism.
- Draw a bark pattern on the tree trunk using mostly vertical lines with slight curves that intertwine.
- Draw some grass underneath the tree. Include the shadow the tree is casting onto the grass.
- Try drawing a variety of trees with leaves. Perhaps try drawing a birch or an elm tree. Draw trees with leaves of different shapes and sizes. In addition to drawing a single tree in isolation, try to draw multiple trees in a landscape drawing with flowers, bushes, and other types of plants.
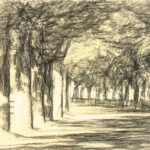
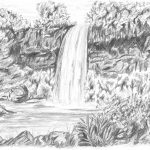
These are not hard and fast rules. Feel free to deviate from these tips to express a tree in different ways. For example, this waterfall landscape drawing had so much foliage that I omitted drawing the separate oval sections.
Some people are hesitant to draw a tree with leaves. All of the leaves seem like too much, and people feel they will be more successful at drawing a tree without leaves or with very few leaves. With a little patience, persistence, and inspiration from those early grade-school tree drawings, you can draw any tree you want, no matter how many leaves it has!

This is very useful, as long as you have the drawing tools, and makes my art look really good! Have you done a close-up of a tree? That would be good as well. Thanks!
A close-up would be an interesting topic for a future tutorial, so thank you for your suggestion and your comment, Vincent!
Incredible content. So detail oriented and it made me want to pick up a pencil immediately. Thank you.
You’re welcome, Courtney! Thanks for the compliment!