Drawing Animals Is As Easy As Putting Together a Puzzle
The next time you think about drawing animals, approach the task in the same manner as you would to assemble a puzzle.
When you put a puzzle together, you take small pieces of a picture and assemble them so they eventually form the complete picture.
You can think of drawing animals the same way.
Animals are classified according to their characteristics. Animals with furry bodies are mammals. Then you have animals with beaks and wings that help them fly. We call these animals birds. Animals that live in water and on land are called amphibians. The list goes on. You get the idea!
There are too many species of animals for me or anyone else to teach you how to draw in a single blog post. However, if you know how to draw some common characteristics of animals, you can combine that knowledge to draw many animals that share those characteristics.
Table of Contents
How to Draw Animal Fur
Most of the animals people love (many pets come to mind) have fur. So, if you want to know how to draw animals, it goes without saying that you should be good at drawing fur.
In order to draw animal fur, you first need to consider what kind of animal fur you should draw. What kind of fur does your animal subject have?
Does Your Animal Have Long Fur?
If so, you can create a realistic fur texture by sketching layers of fur in the general direction of growth. Begin with a light base layer. Then, with a bit more pressure or a softer pencil, apply a layer of midtones. As you do this, use a sharp pencil and draw the individual hairs the appropriate length relative to your animal subject. After that, build up the details with additional layers of fur, using an even softer pencil for the shadowy areas.
Is the Fur Fluffy or Coarse?
Here are a couple of approaches for drawing these two very different types of fur. You can draw soft fur by drawing sections of hair that are clumped together and gradually building up layers of suggestive value. For more coarse fur, you can use a sharp tool such as a stylus or clay tool that creates grooves in the paper for individual strands of hair. Then, shade the area with a soft pencil, blend the graphite, and keep adding layers of detail.
Does the Animal’s Fur Have a Color Pattern Like Stripes or Spots?
You can start by outlining these patterns in the animal’s fur. Then, you would shade these areas just as any other. Even though they will be darker than the surrounding fur, there will be slight variations of the values found in the design patterns themselves, depending on where light might be present.
Regardless of the type of fur your animal has, there are a few universal rules to remember when drawing it. First of all, pencil shading will create a resemblance of fur. Remember this when you feel the urge to draw every strand of hair. The amount of additional pencil strokes and the level of realism is up to you. Secondly, you need to create a range of light and dark values that consider highlights and shadows. Last but not least, whenever you are drawing animal fur, always draw in the direction of hair growth!
How to Draw Horns and Antlers
Some animals not only have fur, but they have horns or antlers too! When it comes to drawing animals such as deer, moose, cows, or goats, you need to know enough about their antlers or horns in order to draw them.
Characteristics of Horns and Antlers
First, it might be helpful to note that horns and antlers are not exactly the same. Antlers like on a deer or moose are branched and part of the actual skull of the animal. On the other hand, horns are not branched and they are separate structures from the skull.
Horns can be large or small, long or short, curved or wavy or coily. Horns have different textures depending on the animal. Some horns are much bumpier than others. Antlers tend to have a much softer texture than horns, being more hair-like and velvety.
Use a Similar Process for Drawing Antlers and Horns
Regardless of whether you are drawing horns or antlers, the process is similar.
Make sure you have a reference photo so the horns or antlers you draw stay true to the look of the animal. Compare with the head in the reference to judge proper size, shape, and positioning.
Draw the basic outline of the shape of the horns or antlers. Use a combination of 2D shapes to build a 3D framework.
Expand on the shape by outlining the horns or antlers in more detail. If drawing horns, this might involve bringing more attention to its bumpy texture.
Add shading around the bumpy surface of horns to make the texture realistic and believable. If drawing antlers, add softer shading with fewer light and dark contrasts. Maybe you will even add a few indications of hairs to suggest the velvet covering.
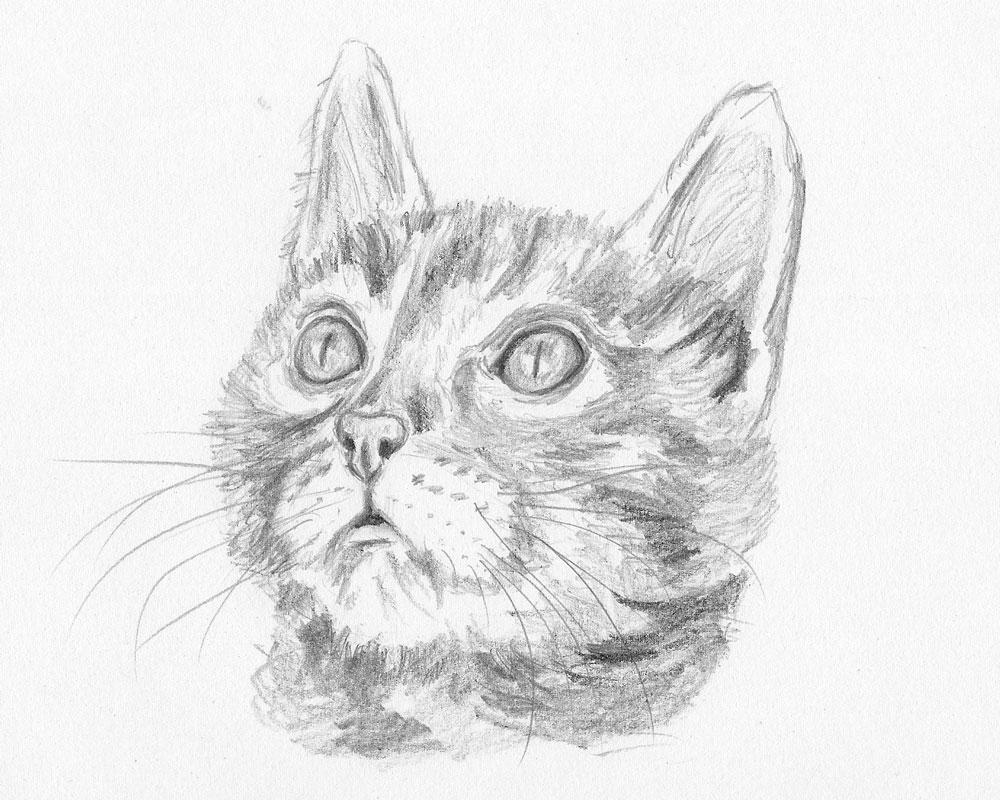
Tutorials for Drawing Mammals
Animals with fur, horns, or antlers belong in the mammal class. Here are a couple of drawing tutorials on two of the most well-known and beloved furry mammals of all.

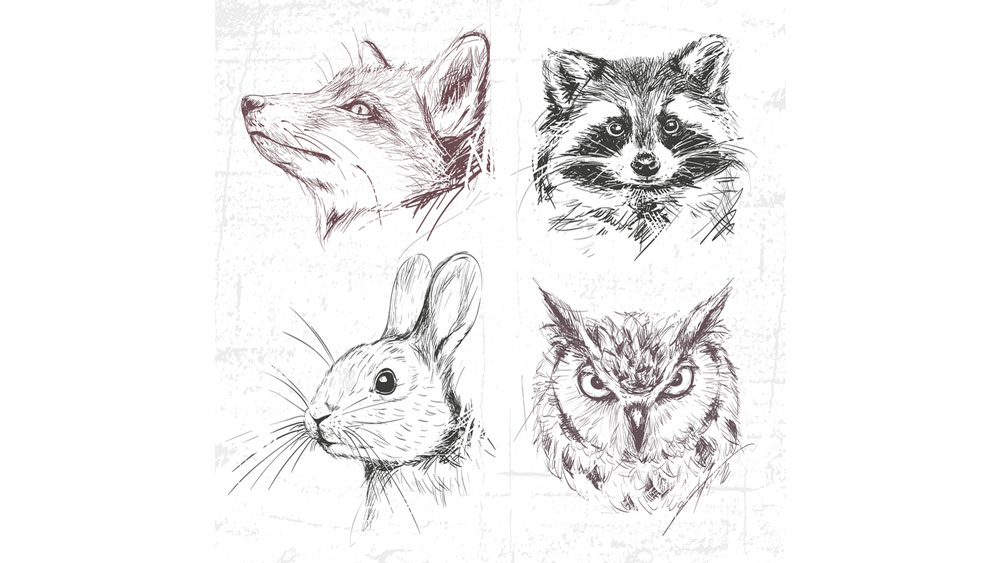
How to Draw Feathers on a Bird
Feathers make birds truly unique. Feathers are the one thing that set birds apart from all other animals on the planet.
While it is good (and kinda cool) to know how to draw a single feather, it’s a little different when drawing a collection of feathers on a bird. That’s where I want to direct these following few tips.
When drawing feathers, it’s important to use a reference photo of the bird whose feathers you are drawing. Start with a simple line drawing outlining the bird. Identify and sketch an outline of some of the more prominent feathers, especially on the wings and tail.
Then, gradually develop the line drawing into a closer resemblance of feathers by using a mix of light and dark values.
Apply a layer of light shading over the feathery area first. Next, put dark shading over the first layer of lighter shading.
As you shade, keep your pencil strokes going in the direction of the feathers. This is really important in creating a feathery appearance. Keep working in layers to build up texture.
Look where some feathers overlap others and create cast shadows underneath. Use your darkest values in the most shadowy areas (like underneath and between feathers) to contrast with the lighter vales.
Drawing Wings from Different Angles
What if you want to draw expanded wings? What if you want to draw a bent wing?
If drawing wings in different positions, it’s helpful to have knowledge about the anatomy of a bird’s wings in addition to a reference photo. Understanding how the joints of a bird’s arm work (hint: think about your own arm) and how the feathers are attached to the arm will help you to make better decisions about the placement of the various feathers.
How to Draw Beaks
Unlike feathers which are exclusive to birds, you might encounter beaks while drawing a few other animals too. The parrot fish, the platypus, and turtles have beaks, to name a few. Still, the vast majority of beaks belong to birds.
Knowing how to draw beaks will help you to draw all of these animals. For the purposes of these tips, I will be referring primarily to drawing birds.
Beaks come in all shapes and sizes, and they serve many different purposes. Getting familiar with a variety of beaks is the first step to drawing them better.
Look for an assortment of beaks to sketch on a regular basis. Consistent practice is the second step.
When you are ready to draw beaks a little more realistically, you should approach them in much the same manner I suggest to draw other things.
Start with a good reference and an outline of the beak. Make sure the beak is placed on the head of the bird properly. It might help to think of the bird’s head as a sphere and draw a perpendicular axis through its center, pointing outward. This will ensure the beak is not at the wrong angle.
After you have established the outline, start shading layers of value. Begin with light values and gradually add darker values. Make sure to include details specific to the beak you are drawing that will make it both identifiable and unique.
How to Draw Animal Scales
Wanna draw fish or lizards? If so, you are going to have to draw lots of scales!
Even though different animals have different scale patterns, the method for drawing scales remains basically the same.
Make sure you invest a little time in studying the animal you wish to draw and its scale pattern. Pay attention to how the scales are aligned with one another. Also, some scales might be larger than others in certain places on the body.
When you are ready to draw the scales on your animal outline, lightly draw a grid pattern first.
The grid pattern depends on the animal. It could form perpendicular blocks, or the blocks could be staggered like a brick wall.
Your grid should curve to the contours of the surface on which it lays.
Then, draw the shape of the scales over your grid squares. Again, the shape will depend on the animal. Some scales might be shaped like hexagons. Other scales might be more oval-shaped.
Remember foreshortening. Make scales smaller or narrower as they wrap around and get closer to the edges of a limb or other curved body part.
Drawing scales can be tedious and time-consuming, but the end result is well worth it. If you’d rather not make such a realistic representation, then there’s nothing wrong with taking a more suggestive approach.
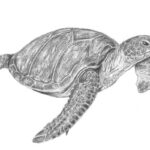
Tutorial for Drawing a Reptile
Here is a drawing tutorial on a reptile who happens to live underwater. Additionally, this tutorial will give you plenty of practice with drawing scales.

How to Draw Fish Fins
While knowing how to draw scales comes in handy when you want to draw a fish, it’s equally as important to understand how to draw fins.
Just as with any animal you wish to draw, it pays to study the unique characteristics of the fish you are drawing. This is especially true of its fins.
First, choose a reference photo of a fish to draw. Then, when it comes to drawing the fins, ask yourself questions. How many fins does my fish have? Where are the various fins placed on the body? Are their singular fins or pairs of symmetrical fins? How big is each fin in relation to the fish’s body and the other fins? What is the general shape of each fin?
When you are sketching your fish outline, consider the answers to the above questions and sketch the basic shape of each fin.
When you are ready to add details to your fins, begin with the thin fin rays that extend from the body to the tip. The fin rays likely have unique characteristics as well, depending on your fish.
Then add light and dark values for shading and/or any level of additional details you desire.
Start Putting Your Animal Puzzle Pieces Together
Now that you have learned a little about drawing some basic characteristics for many common animals, it’s time to start putting it all together with a complete animal drawing!
Of course, your animal is certain to have other traits besides fur, horns, antlers, feathers, beaks, scales, or fins. That’s okay though!
Throughout the course of reading this post, maybe you noticed some common themes to drawing these animal traits. In case you missed them, let me sum them up for you:
- Use a reference photo.
- Study what you are drawing.
- Use guidelines if necessary.
- Begin with basic shapes for the outline.
- Slowly add light values.
- Build up additional darker values.
- Build up layers of detail.
These are the basics of drawing anything, really.
If it seems overwhelming to draw an entire animal, take it one piece at a time, just like a puzzle.
Take one small part (or piece) of the animal, and focus on finishing that part. Then focus on drawing the next piece. Before long, every piece of the puzzle will be in place, and you will be finished drawing your animal.
If you keep these tips in mind, not only can you draw the animal traits I covered in this post, but you will be drawing more animals than you ever realized you could draw!