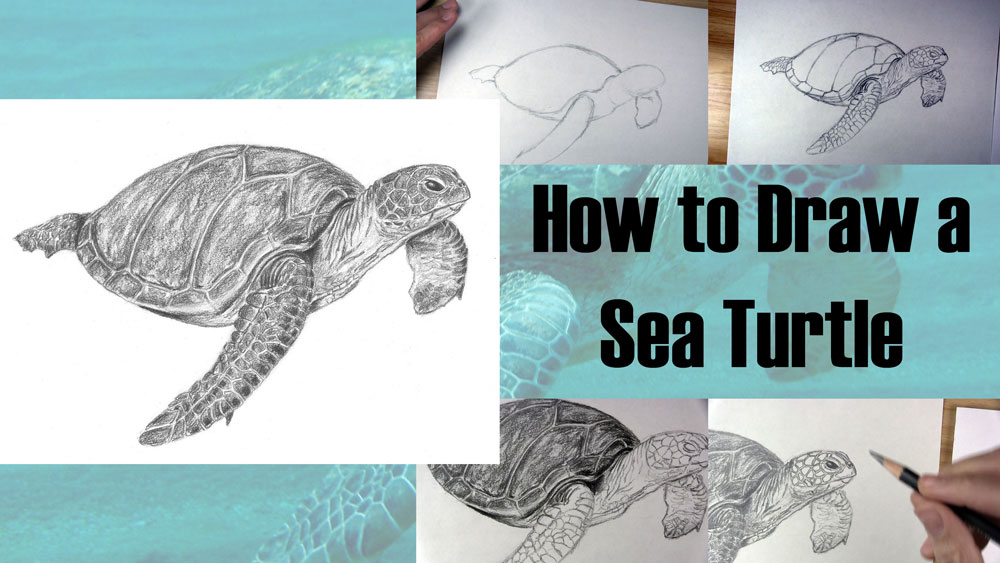
How to Draw a Sea Turtle Step by Step
Would you like to improve your ability to draw reptiles? More specifically, do you want to know how to draw turtles? Even more specifically, how would you like to know a step-by-step way to draw a sea turtle?
Turtles are my favorite reptiles. I remember having a pet turtle as a kid. I thought the slow way in which it moved was so cool, and I loved to watch it pop its head in and out of its shell!
That’s why I decided to do a drawing tutorial featuring a turtle. I also felt like doing a sea creature, so I settled on a sea turtle!
If you can learn how to draw a sea turtle, with its many scales, wrinkles, and possibly challenging shell, then you will feel more confident while drawing other reptiles too.
I created this tutorial to help you do just that. Read on to learn how to draw a swimming sea turtle step by step!
Table of Contents
Use a Reference Photo of a Sea Turtle
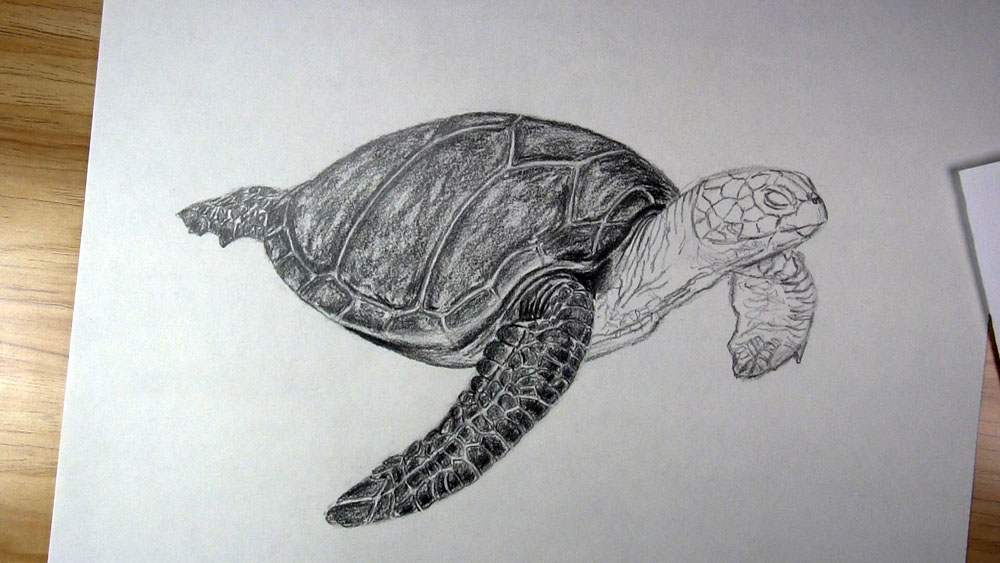
I decided to draw a picture of this green sea turtle for the tutorial.
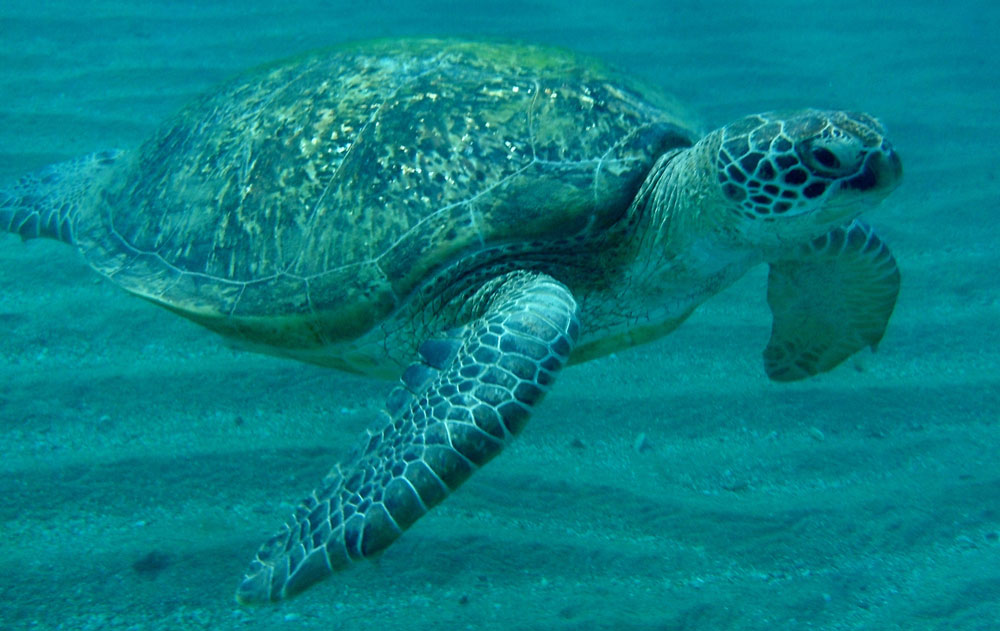
As you draw along with the step-by-step images, I hope you occasionally look at this sea turtle photo too.
I will not be drawing the surrounding ocean environment. I will just draw the sea turtle itself.
Materials Used for This Drawing
Here is a list of the materials I am using for this drawing.
If you don’t have some of these materials, that’s okay. You can still make do with a regular pencil and eraser, as long as you just get started!
If you wish to purchase any of these materials, they can be found at your local art store, or you can buy them using the links below.
Affiliate Disclaimer: The links below are affiliate links. I will receive a small commission if a purchase is made through one of these links. Learn more here.
- 2B and 6B graphite pencil
- Drawing paper
- Sheet of folded paper to prevent smudging
- Kneaded eraser
- Plastic eraser
- Dusting brush
How to Draw a Sea Turtle Video Tutorial
You can watch the time-lapse video version of this tutorial below. Watch it once all the way through to get a sense of the overall process. Then watch a second time and draw along with me, pausing as needed.
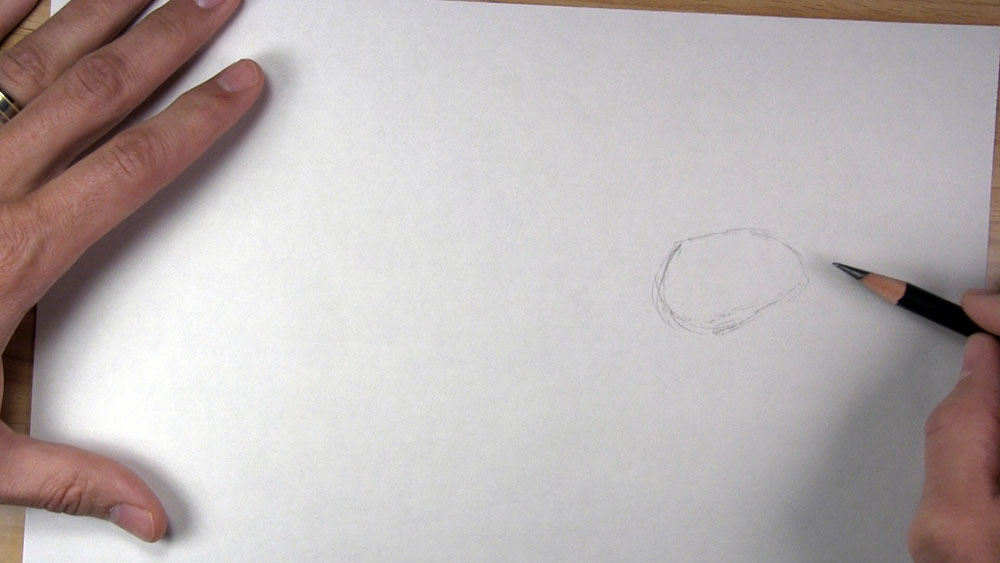
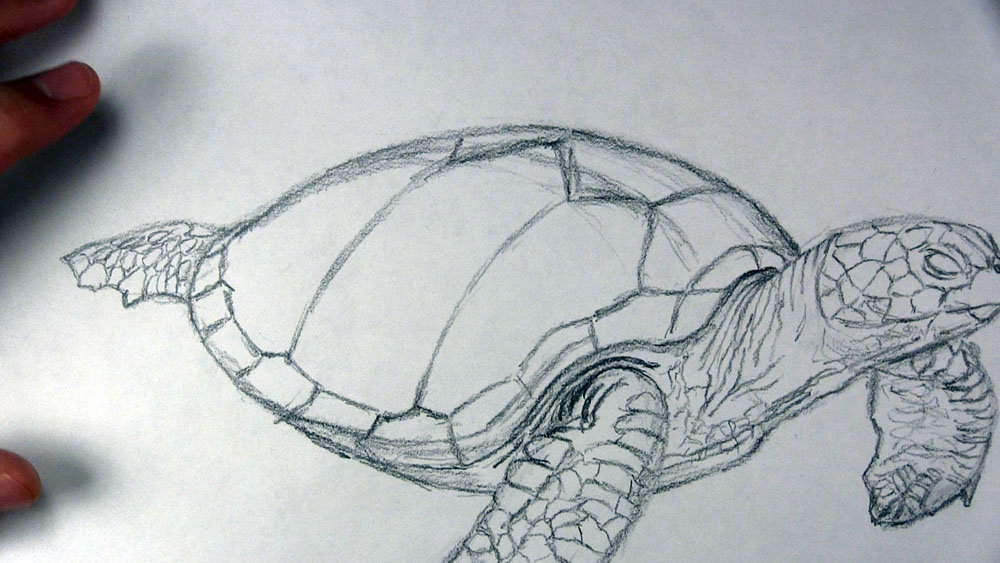
Outline the Sea Turtle’s Head and Shell
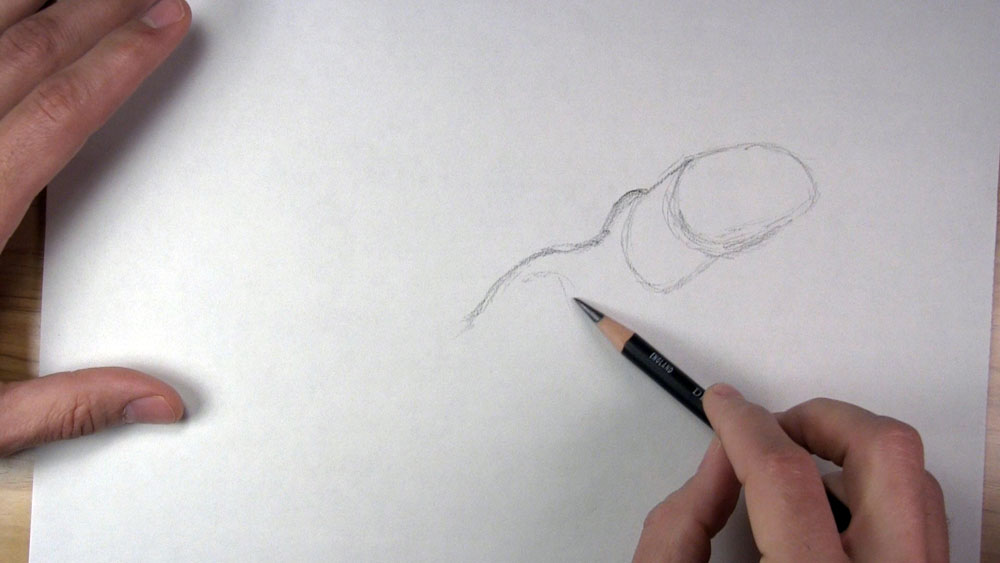
We are going to use some basic shapes to sketch the initial outline of the sea turtle. Begin with a 2B pencil and an oval shape for the head. This should be almost like an egg shape tilted on its side. Make the left side a little wider than the right. The turtle’s beak will be on the right.
Next, draw two lines coming from the head. This will be the sea turtle’s neck, which is shaped like a cylinder. Keep the lines parallel. Then connect the two lines with a curved line that follows the same curvature as where the head meets the neck.
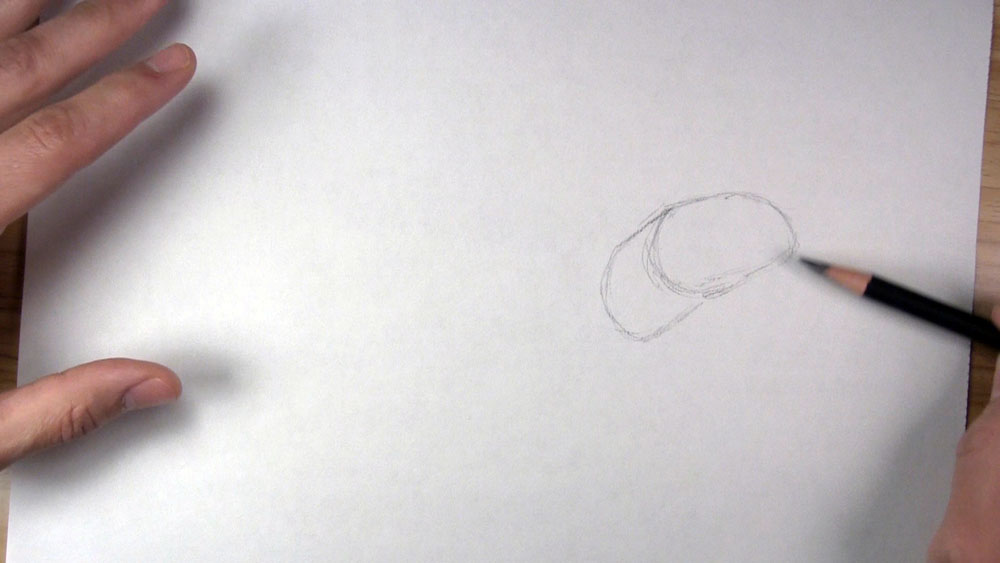
Now, draw a wavy line for the front part of the shell on the sea turtle. Draw the first part of the line curving just over the top of the neck. Then bend the line toward the left and curve it downward again. This longer curve will be just over the turtle’s flipper.
Continue extending this line toward the left side of the paper. Curve the line slightly downward and then back up to form the lower edge of the turtle’s shell.

Now, I want the top edge of this turtle’s shell to be at a level a little bit higher than its head. I sketched a temporary horizontal guideline to help me with the placement. After that, it’s just a matter of drawing a curved line from the back of the shell to the top and back down toward the neck.
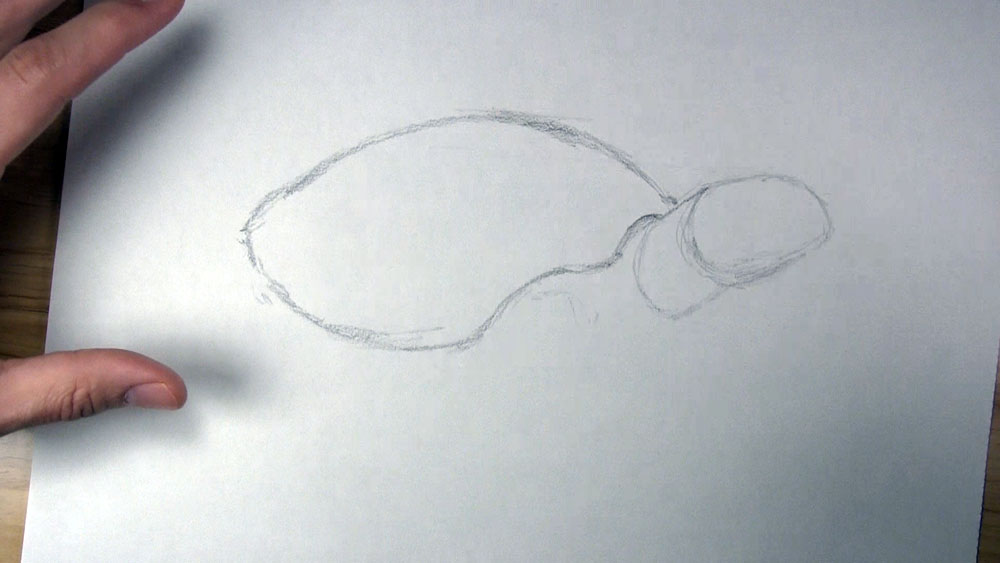
Draw another curved line from the bottom of the shell to the base of the sea turtle’s neck. This completes the basic shape of the turtle’s shell and main body. Next, we will add some flippers.
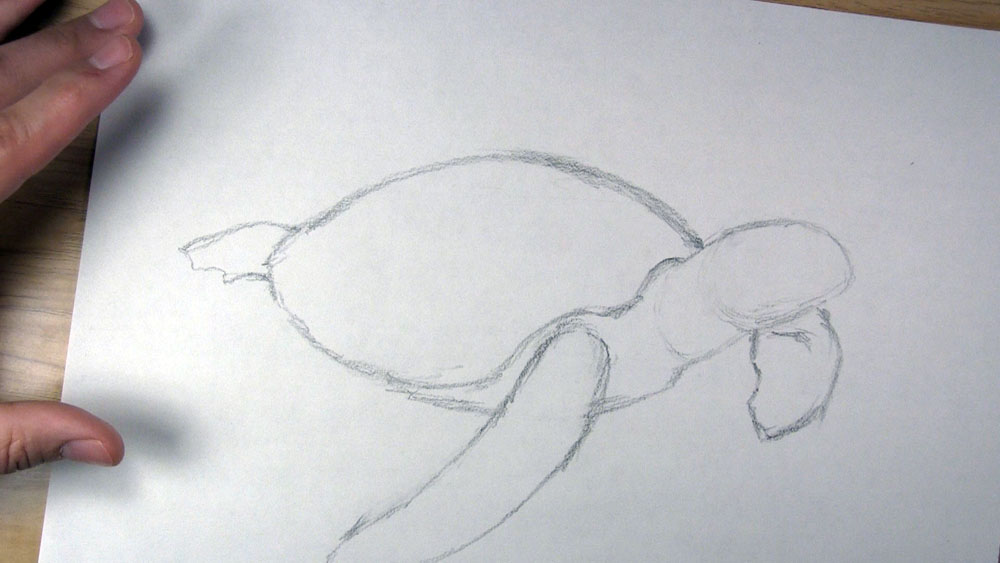
Outline the Sea Turtle’s Flippers
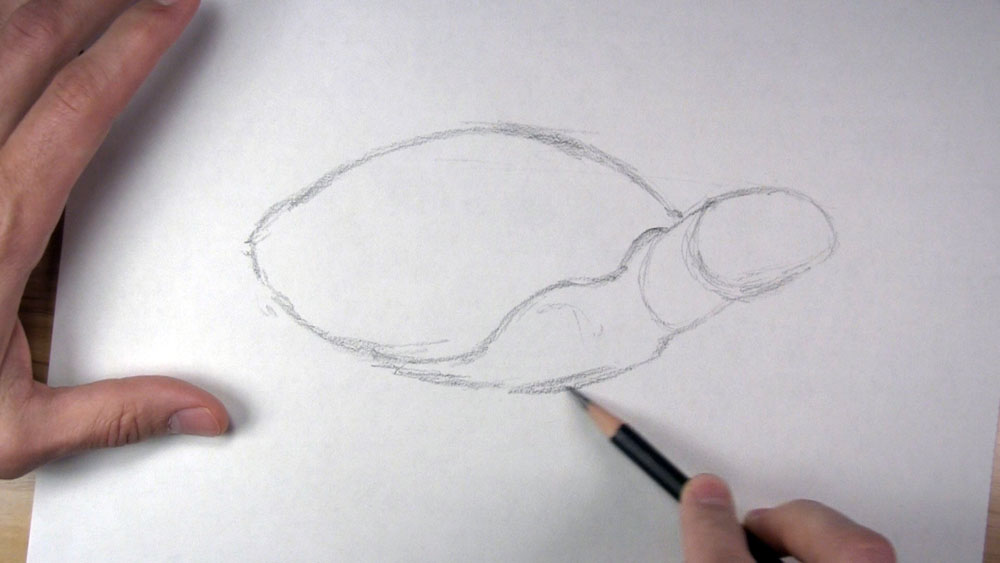
Draw a long, curved shape with a slight bend for the front flipper in the foreground. Make it so it is angled toward the back. Align the tip of the flipper almost as far back as the rear of the turtle’s shell.
Then draw the front flipper on the other side of the sea turtle. This should also be a curved shape, but it should be much shorter and wider than the first flipper. Draw a line on the flipper just below the head to indicate where the flipper is bending.
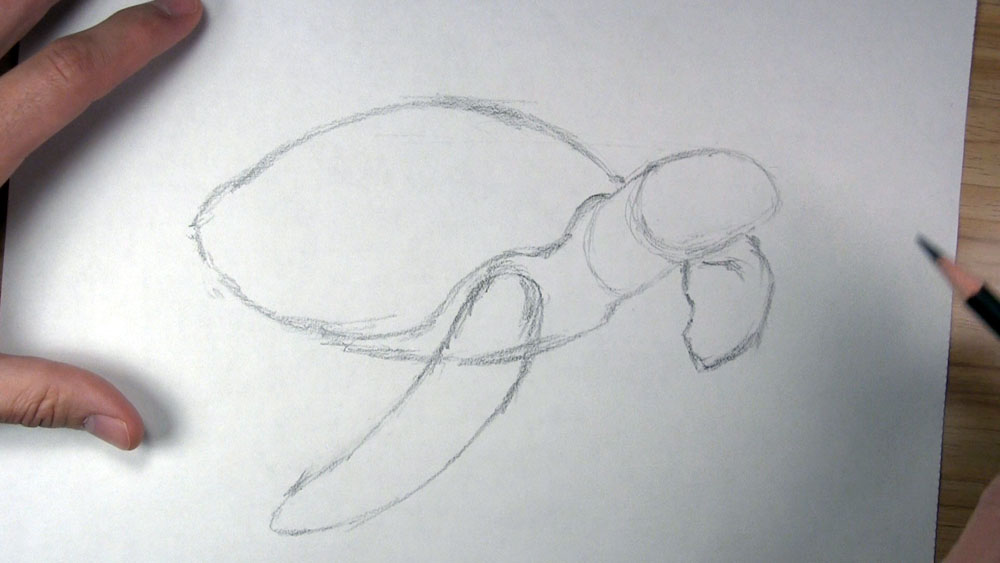
Sketch the outline of the hind flipper with a pointy claw along the lower edge. This flipper should be very short and shaped almost like a foot. After that is done, erase some of the looser guidelines that are no longer needed, such as the line behind the front flipper and the curved lines at the base of the neck and head.
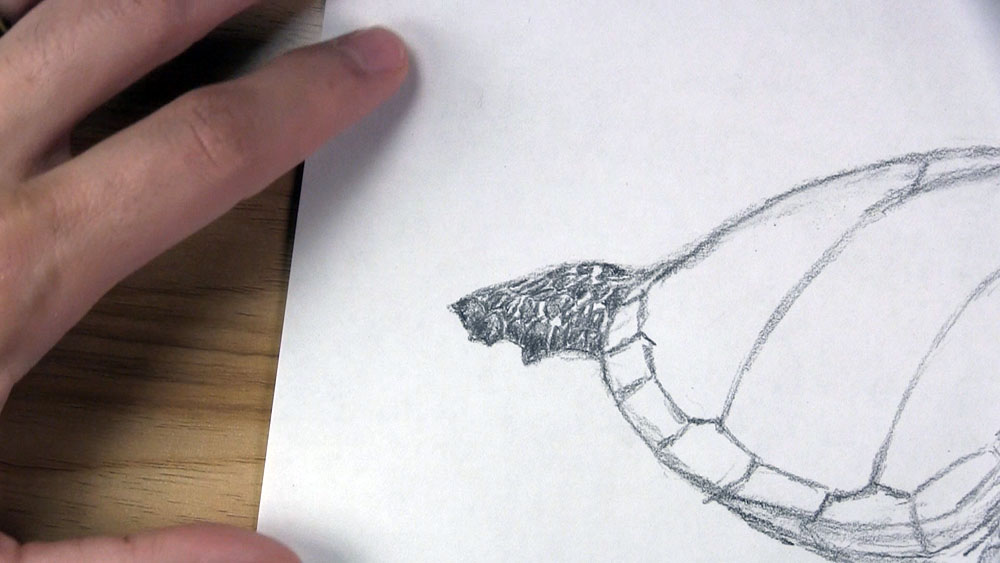
Draw the Head and Neck of the Sea Turtle
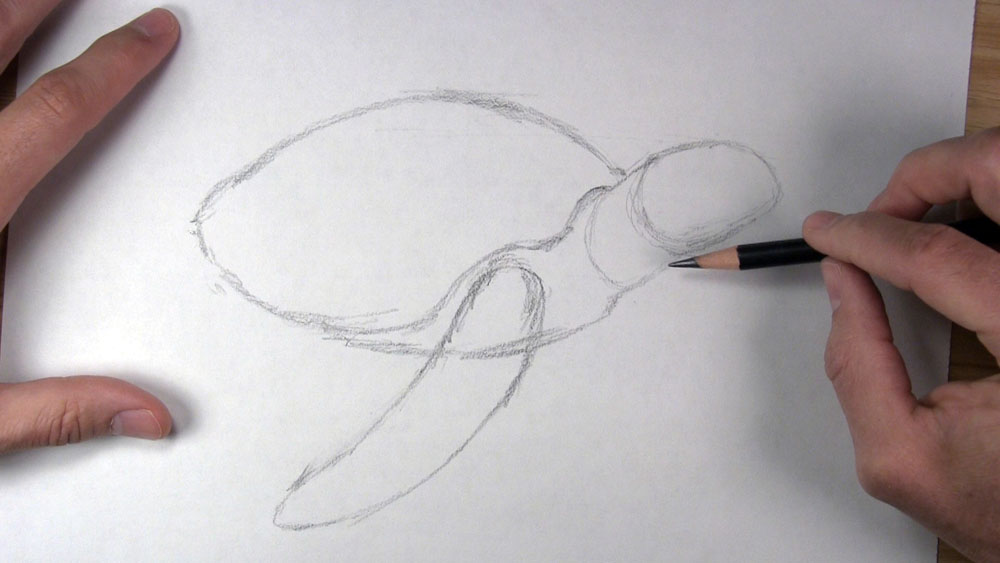
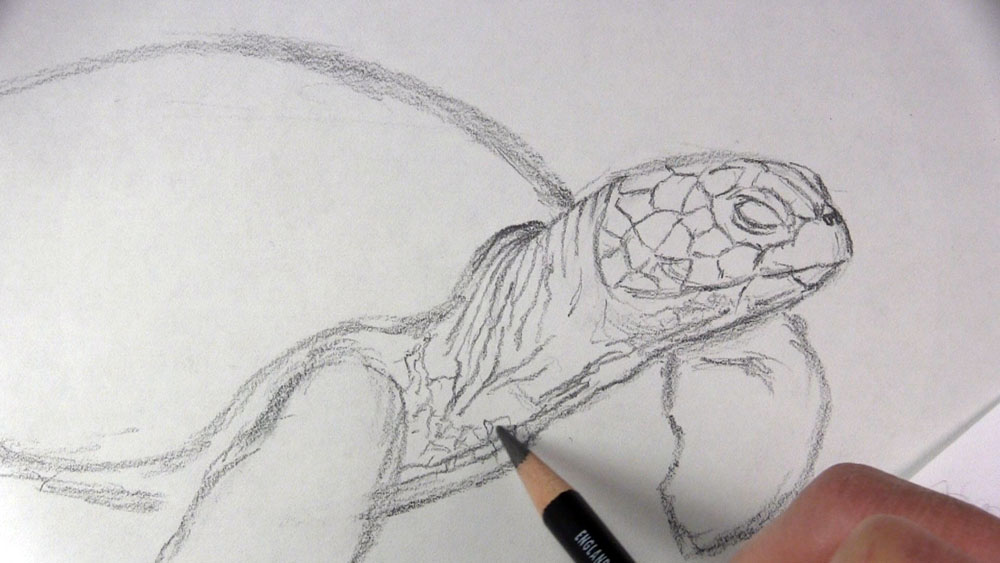
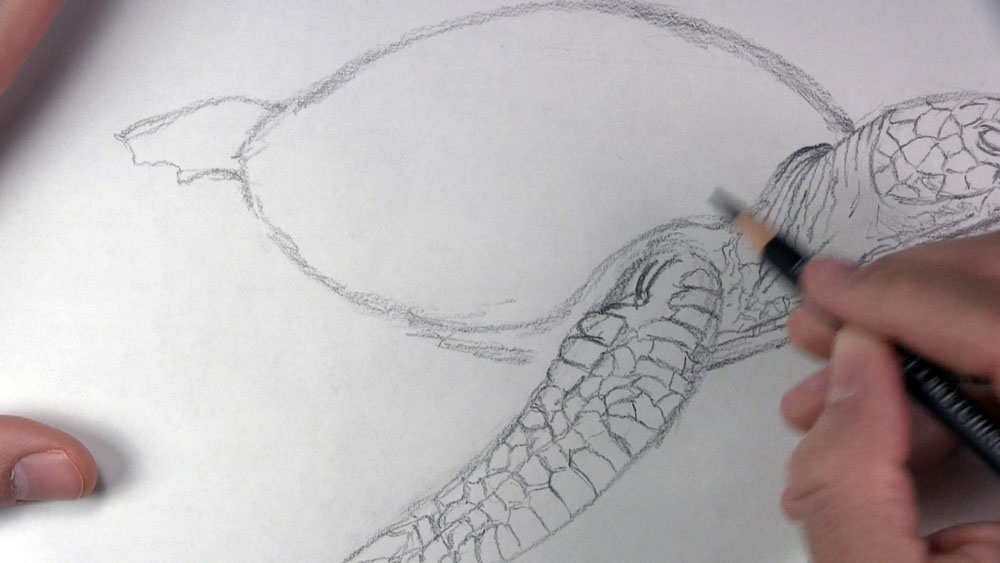
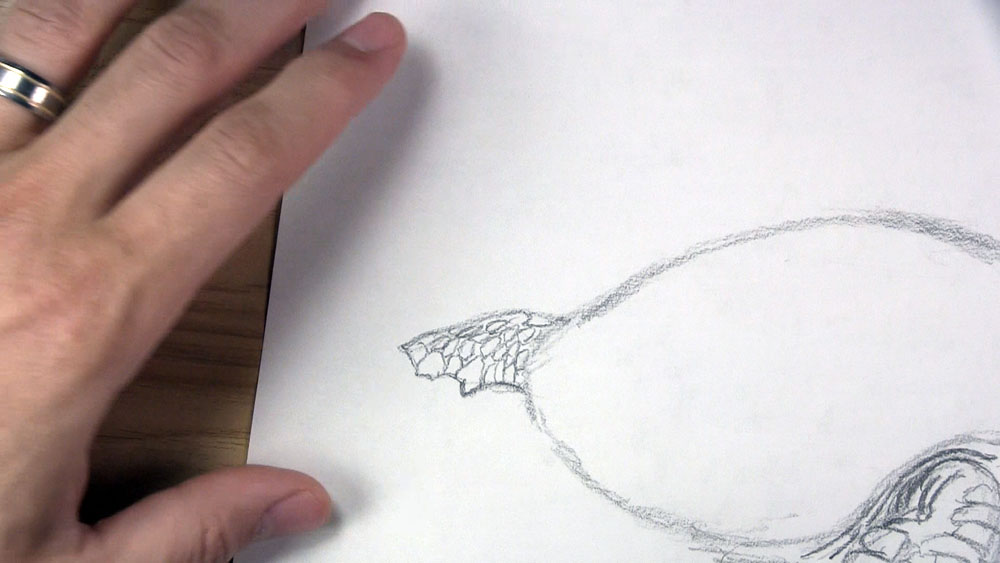
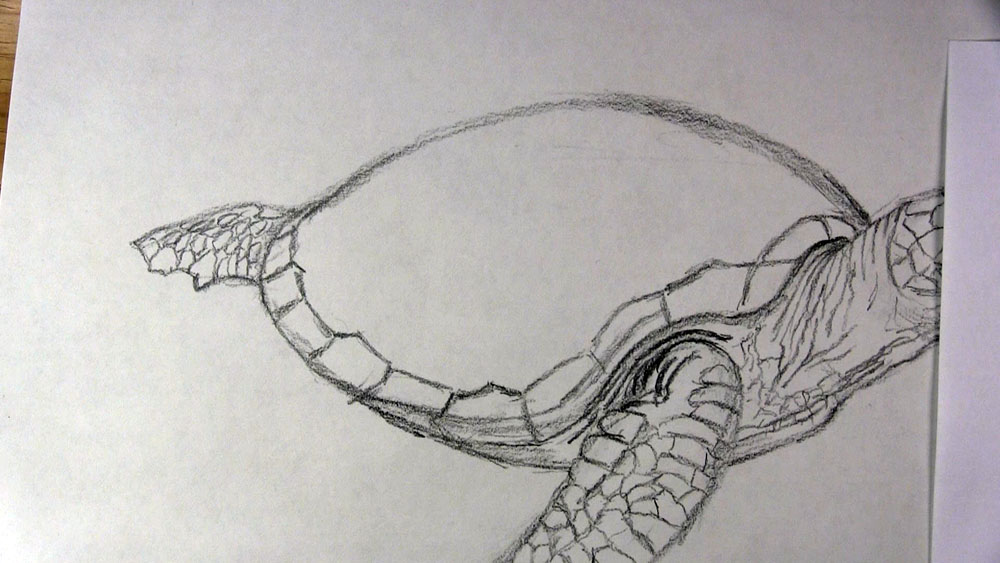
Now, it’s time to draw details on the sea turtle to make it look more realistic. We’ll start with the sea turtle’s facial features. Draw a sharp curved line to better define the separation between the head and neck. From here, draw a line to the front of the turtle’s face to represent the mouth. Then, shape the beak above the line and the upper eye on the other side. After that, draw an almond-shaped eye with an overlapping upper eyelid. Draw two tiny nostrils, a line between the eyes, and the side of the beak curving around the eye.
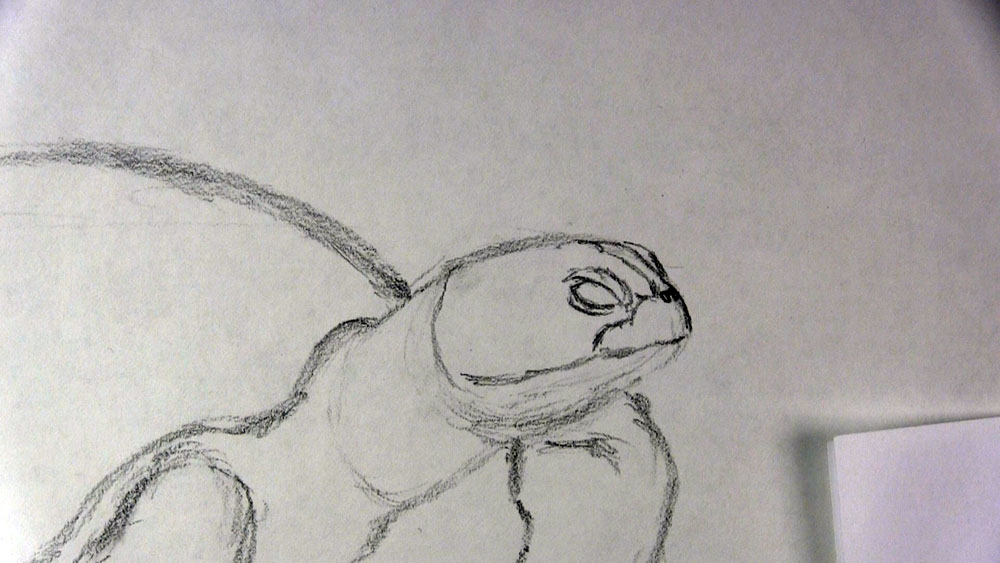
Draw a series of scales covering the turtle’s face. These scales can have a shape somewhat similar to triangles, squares, pentagons, or hexagons. Wrap the scales around the eye area. Then cover the rest of the upper face. Keep them generally similar in size. Draw the lower beak and some lighter marks and scribbles for more subtle scales and wrinkles on the lower jaw.
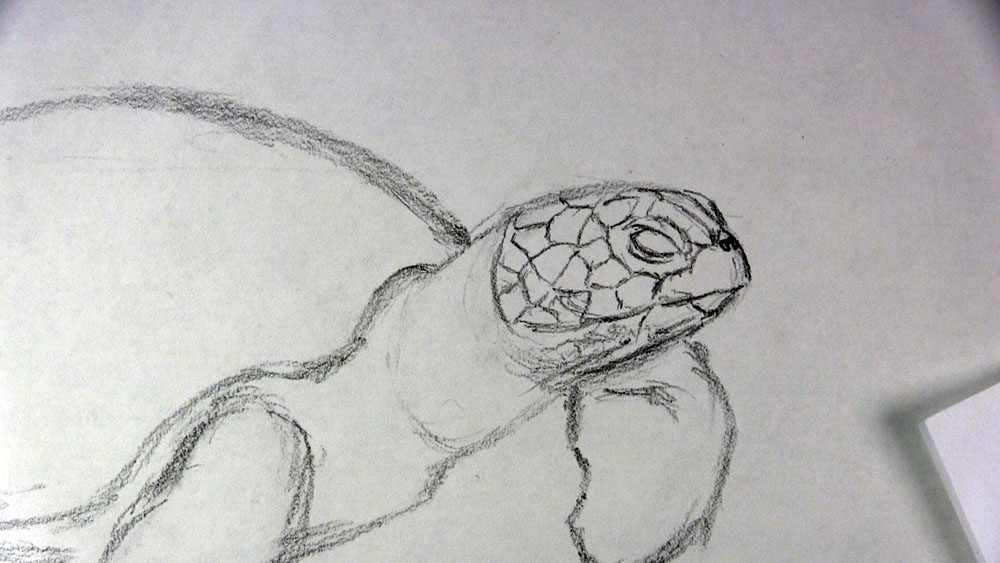
Draw wrinkles on the top of the sea turtle’s neck. Make sure the lines wrap around with the curvature of the neck. Draw a couple of long wrinkles between the base of the neck and the shell. Build upon these by sketching lines for even more wrinkles stretching down the neck. Finish up with the visible part of the underside of the shell and a few more wrinkles and loose scales nearby.
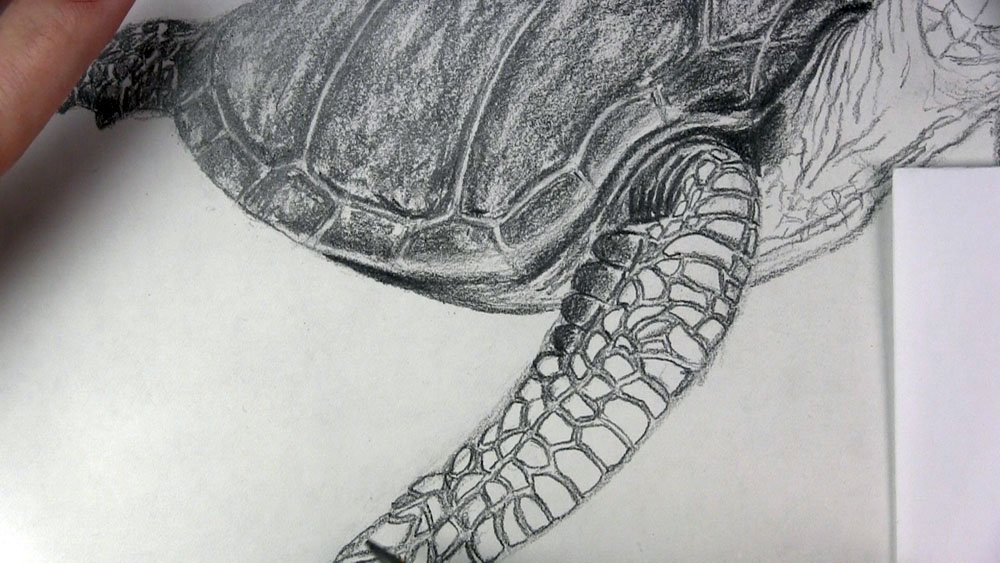
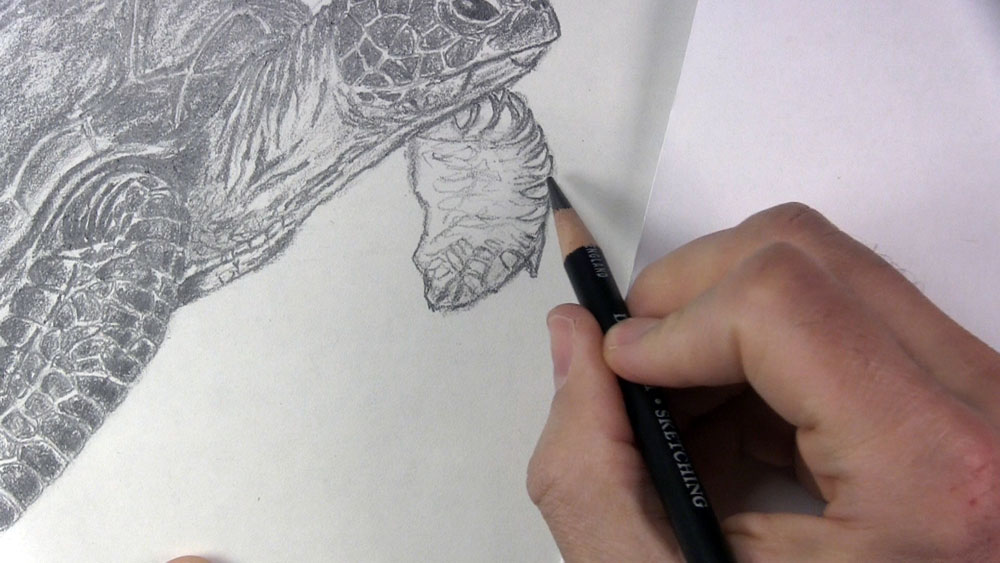
Draw Scales on the Sea Turtle’s Flippers
Begin drawing scales on the front edge of the sea turtle’s far flipper. These scales should be similar in size and shape to the scales on the face, although more of these scales seem to resemble a pointy, triangular shape on the flipper’s underside. Notice also how the scales should wrap around the flipper’s front edge.
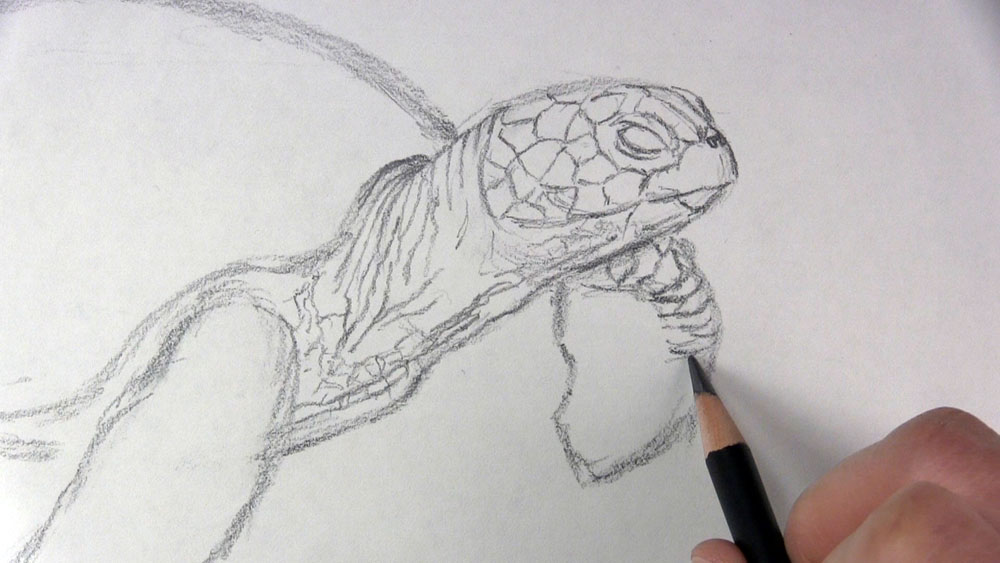
Continue to draw scales down the length of the flipper. As you approach the bottom of the flipper, draw a sharp claw protruding from the edge. Draw a few more oval or rectangular scales on the flipper’s underside near the tip. Then sketch some similar shapes with much lighter pressure on the rest of the flipper’s underside.
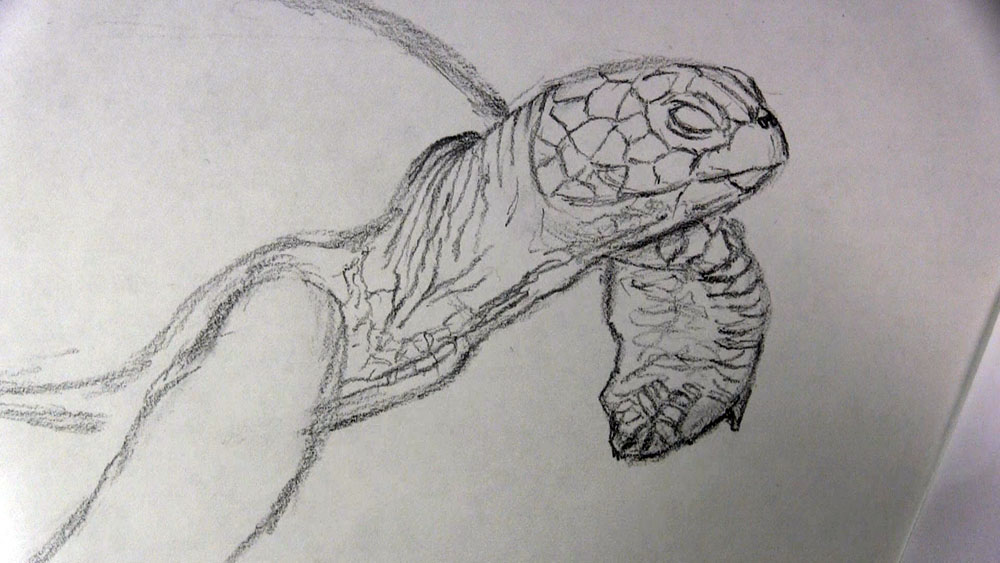
Begin drawing scales on the front edge of the long flipper in the foreground. Begin near the top. As you work your way down the edge, draw one or two scales per row. About midway down the flipper, start drawing only one scale for each row. Make these scales with straight edges on the top and bottom but pointy on the sides. Use a triangle shape for the big scale at the tip of the flipper.
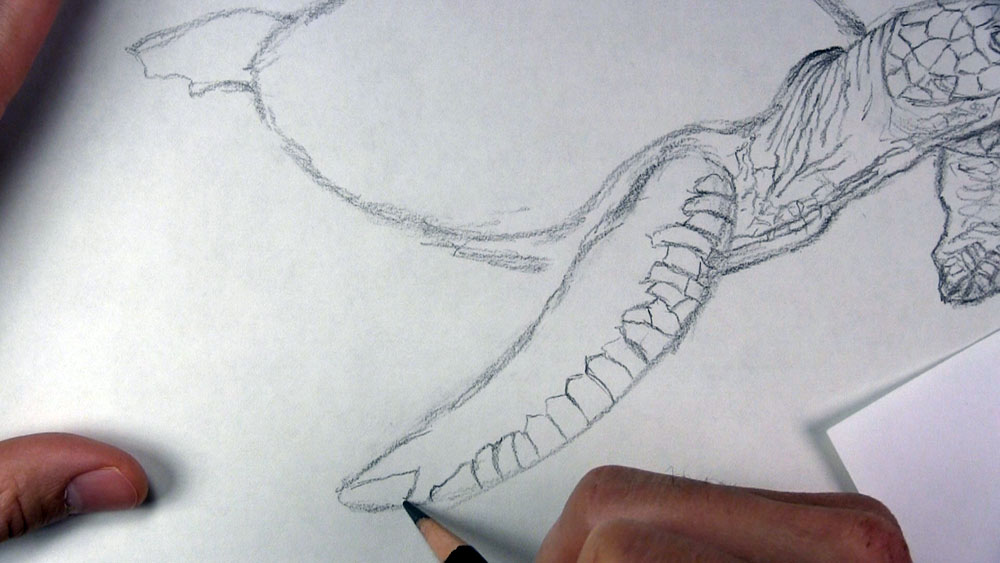
Draw a line from the tip of the flipper that goes down the middle. You can use this line to divide the remaining space into smaller scales. Draw some larger scales near the top. Draw curved lines to form the top of the sea turtle’s flipper where it joins the body and bends over.
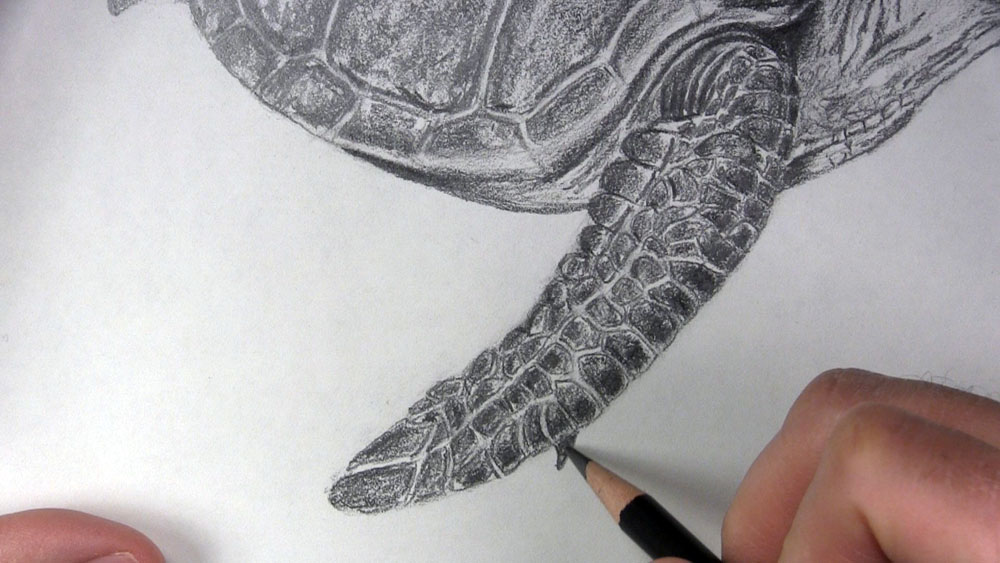
Next, draw scales on the hind flipper of the sea turtle. Start with the front edge. Draw the scales in such a way that they wrap up the side and over the top. Fill the remaining surface with mostly oval-shaped scales. Make the scales narrower as they recede farther away.
Draw the Line Pattern on the Shell
Now let’s start to draw the pattern on the shell of the sea turtle. The various shapes that form the design on the turtle’s shell are called scutes. We’ll draw the smaller ones first. Begin with the scutes around the neck. Make the outer edge parallel to the curve around the neck with shorter lines going inward. Then bring these similar box shapes down along the shell’s edge around the flipper. Finish drawing the scutes along the edge of the shell’s side. Keep most of them rectangular in shape with a few of them having pointy tops.
Okay, let’s look at the larger shapes on the shell. The large scutes on the right and left side of the sea turtle are called lateral scutes. The ones along the top of the shell and the turtle’s spine are called central scutes. Draw a line from the bottom of the shell and another from just above the flipper. Connect these lines with the shell’s outer edge to complete one large lateral scute and two smaller central scutes.
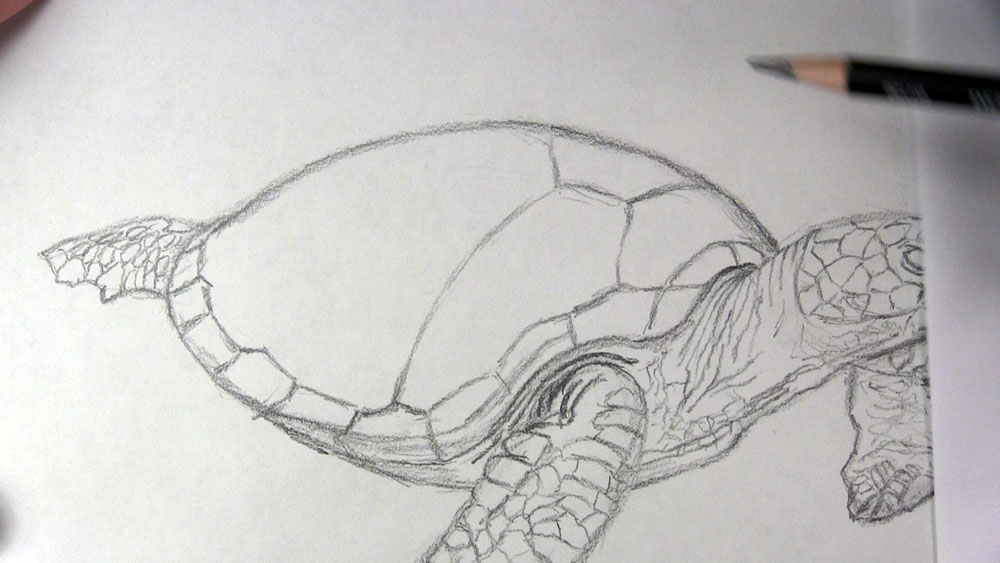
Starting from the bottom edge of the shell again, draw another line going toward the top of the shell for the next lateral scute. It’s important to point out that when drawing these lines on the shell, you should follow the natural curvature of the shell’s surface. Form the triangular spaces between the top of the lateral scutes that belong to each central scute. If necessary, draw curved guidelines along the top of the shell to help you align each of the points.
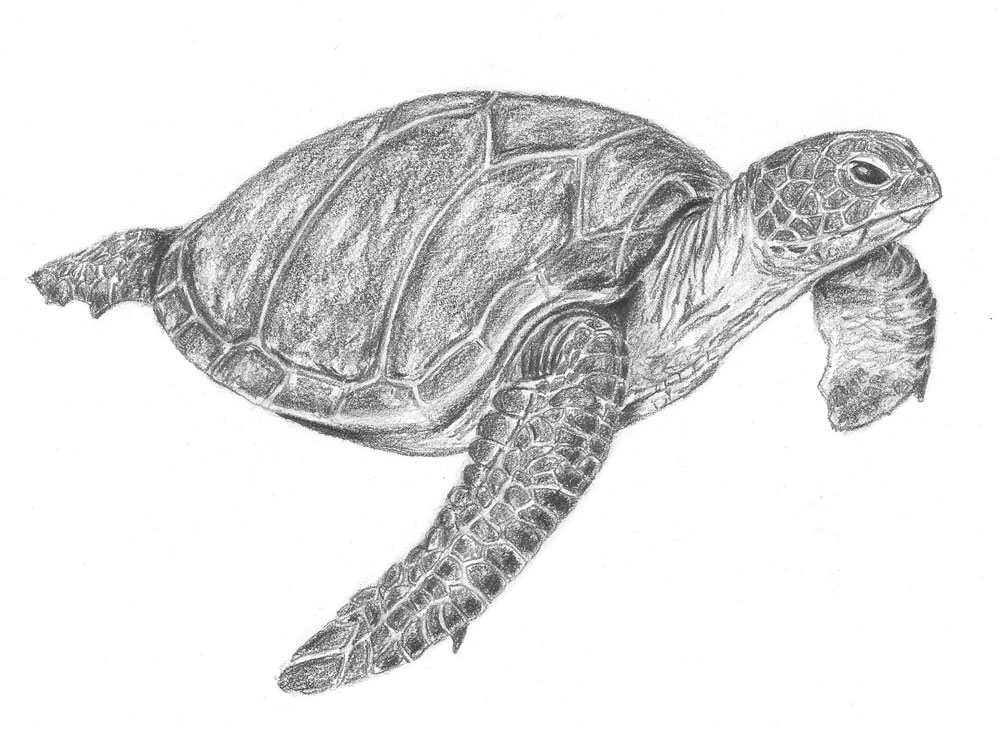
Erase any guidelines you may have. Now you are left with a detailed line drawing of a sea turtle! Let’s add some shading in the remaining steps.

Shade the Hind Flipper and the Shell
Beginning with the hind flipper, shade each of the individual scales. Put a little touch of darker shading on the claws along the front edge. Leave white space between each of the scales.
Next, let’s start shading the sea turtle’s shell. Outline the individual scutes on the rear section of the shell. Leave a narrow gap in between each scute. You can use a kneaded eraser to remove graphite from these gaps to make them lighter in value. Afterwards, put a light base layer of shading over the area, followed by a darker layer. Leave some splotchy areas open for the lighter base layer to show through. This helps to create an irregular spotty design on the sea turtle’s shell.
Shade the rest of the turtle’s shell in much the same manner. Alternate back and forth between outlining the scutes, shading a light base layer, and overlaying a darker layer of tones. Remember to keep the gaps between the scutes lighter in value. It’s also helpful to put a streak of darker shading along the border of some of the scutes, riding along the gaps in between. This gives the individual scutes a slightly raised appearance. Make sure to put the heaviest shadow areas just under the shell on the side, between the flipper and the neck, and over the neck.
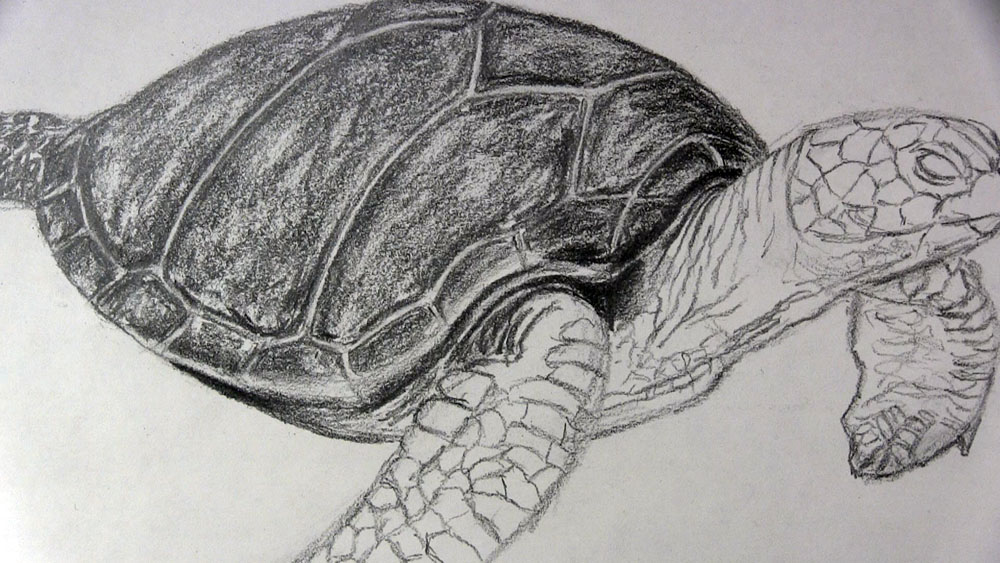
Shade the Front Flipper of the Sea Turtle
The next step is to shade the flipper. Put some shading near the top area where the flipper is joined to the sea turtle’s body. Then outline each of the individual scales just like we did for the scales on the hind flipper and the scutes on the turtle shell.
Shade inside each of the scales on the sea turtle’s flipper. Leave the gaps between each scale a lighter value. Go back and lift stray graphite from these gaps with a kneaded eraser if necessary. Place darker shading along the front edge of the flipper to help distinguish this front plane from the flipper’s side plane.
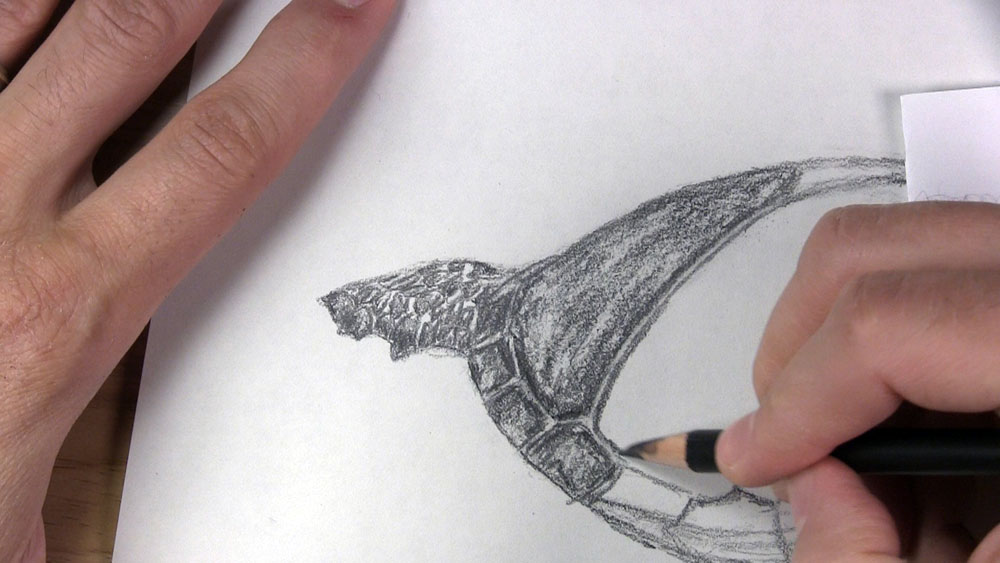
Shade the Sea Turtle’s Neck and Head
Outline the wrinkles at the top of the sea turtle’s neck. These helps to make the wrinkles appear deeper. Do the same with other wrinkles on the neck. Draw details and a little shading on the lower part of the shell. Lightly outline some of the scales on the neck and lightly shade the entire neck area.
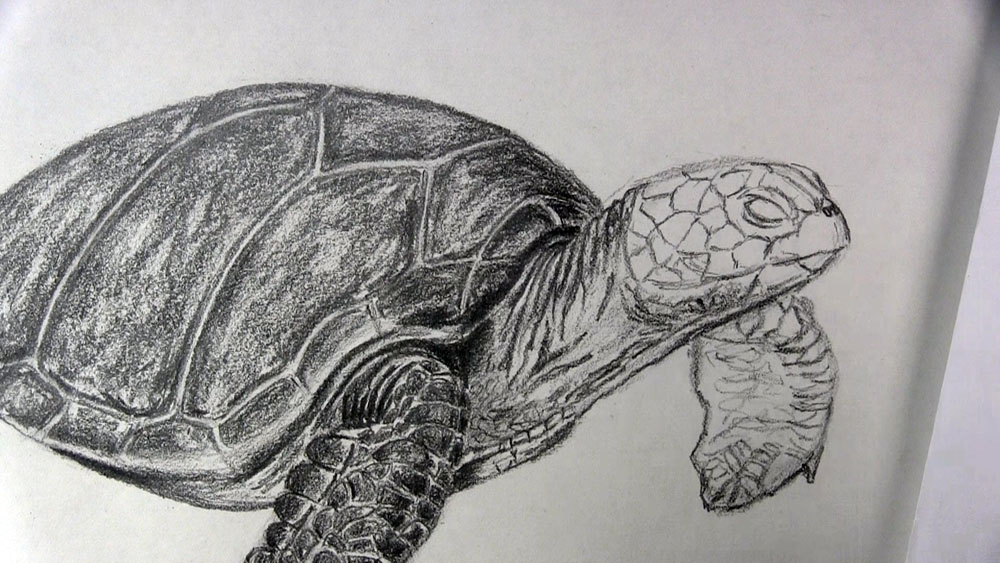
In order to shade the sea turtle’s head, we’re going to repeat the same process that we have been doing for the other scales and the shell. Outline each of the scales on the head. Shade the sea turtle’s eye a dark black. Leave a tiny highlight. Shade the nostrils too.
Now shade each of the scales on the turtle’s head. Continue to leave the thin light gaps between the scales. Shade the beak as well. Place a lighter layer of shading on the lower part of the mouth. Keep this value similar to what was used for the neck.

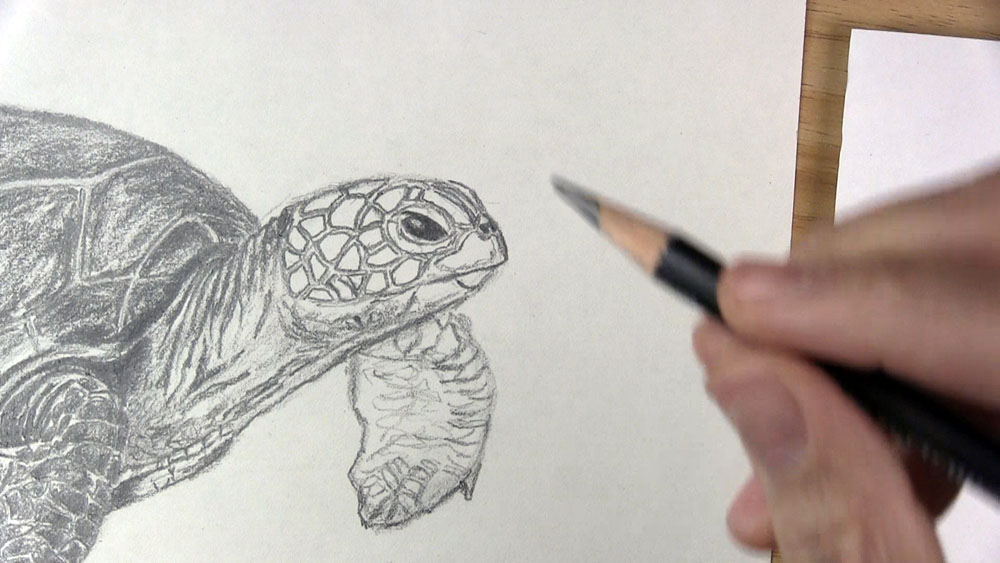
Draw the Finishing Touches on the Sea Turtle
On the far flipper, outline the scales seen along the front edge and the ones close to the tip. As for the scales in the middle of the flipper, go over them lightly but not nearly as dark as the others.
Shade the scales of the far flipper. Leave the gaps between the scales lighter. The area in the middle of the flipper should be a lighter value too. Use the same level of shading for this area as that used for the neck.
Put a claw on the flipper in the foreground similar to the one that is on the far flipper. Use a 6B pencil to go over the darkest shadows on the sea turtle. Erase any smudging around the drawing and dust away any residue.
And that is how to draw a sea turtle step by step!
Tutorial Recap
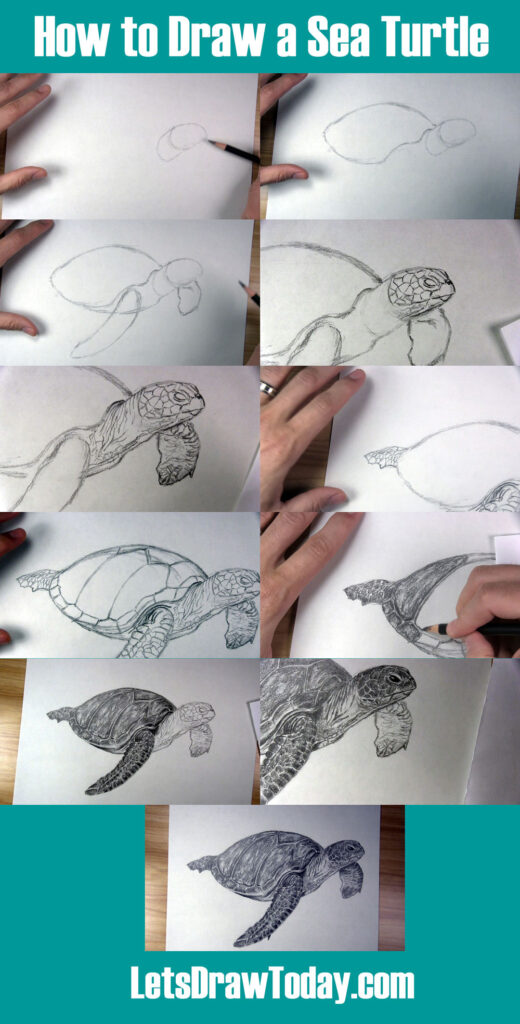
For a quick visual recap of this tutorial, take a look at the image below. It shows you a step-by-step summary progression for how to draw a sea turtle.
Tips for Your Next Sea Turtle Drawing
The next time you wish to create a realistic sea turtle drawing, here are a few reminders:
- Try using a reference photo while you draw the sea turtle so you can be sure to include its realistic traits for an accurate representation.
- Start off by sketching basic shapes to establish the general proportions and positions of the head, neck, shell, and flippers. Don’t worry about perfection. Then build on additional details and adjust your basic shape guidelines as you go along.
- Consider using both a color and a black-and-white version of your reference. You can use both photos together to give you information about light and dark values as well as subtle changes in color, such as the slight variations between the lighter and darker shades of green on the turtle’s neck, scales, and shell.
- Try drawing a variety of sea turtles. Draw sea turtles in different positions. You might find that a distant view from overhead looking down at the top of the shell will be easier. For more of a challenge, try drawing a view from under the sea turtle looking at the bottom of its shell.
- Try drawing a regular turtle, tortoise, or another reptile. Once you are more comfortable drawing a sea turtle, you should find it easier to draw other animals that are similar.
Keep practicing while implementing these ideas, and you will soon be amazed at how easily drawing sea turtles comes to you! Have fun!


Took your 10 free….LOVED them all. I think your very good at teaching and explaining as you go along. Some of the ten were very light and hard to see this one was PERFECT. Can’t wait to try it.
Thank you very much, Joyce!