Why Paint Them When You Can Be Drawing Landscapes Instead?

Most people think of a landscape as a painting. However, drawing landscapes can produce beautiful works of art, too.

I had a phase earlier in my life when I was fascinated by painting landscapes. I blame Bob Ross for this. He inspired me to get out of my comfort zone and try oil painting. I loved how effortless he made it seem to create beautiful landscape paintings.

This lasted for a couple of years, but eventually I parted ways with it. It was not because I was no longer interested in Bob Ross or landscapes. It was because I rediscovered the medium which I consider my first love…the pencil!

I grew tired of the mess and the need for ventilation and the cleanup that paints required. I welcomed back into my life the simplicity that accompanied the use of pencils to create art.

If you can relate to this story because you also prefer pencils over painting, then please read on!

I will share with you how to combine your love of pencils with a desire to draw landscapes.

How to Get Started with Landscape Drawings

If you are new to drawing landscapes, one of the best things you can do is pick up a sketchbook and just start filling it with landscape sketches!

There are an endless variety of landscapes from which to choose. To name a few, landscapes can include mountains, cities, oceans, deserts, farms, parks, and forests.

Go out there to the setting of your choice, find a spot to sit, and sketch away. You can also sketch from photographs. Look through your phone for some scenic snaps.

Don’t worry if you don’t know what you are doing. Don’t aim for perfection. Make your sketches brief. Put a time limit to your sketches. Spend no longer than 10-20 minutes on each sketch.

Just sketch regularly. Making a routine out of this exercise will help you to make better observations and improve your drawings over time.

General Tips for Drawing Landscapes

When you are ready to go beyond a rough sketch and draw more detailed landscape pictures, here are a few general tips to help you achieve the look you want.

  • Overcome the feeling that you must draw every detail in your landscape scene. It’s okay to simplify things like leaves, water, grass, and distant hills without sacrificing a quality drawing.
  • Begin by drawing a simple outline of your landscape. Make sure to draw lightly at first.
  • It’s okay to create a scene that differs from your reference. It’s possible that a larger tree, a mountain on the other side of the picture, or a cloudier sky will make for a more interesting composition. Use examples from your current reference or pull other references to achieve this.
  • From your landscape outline, layer on tonal shading. Look for areas of light and dark values that are adjacent to each other.
  • On top of the tonal shading, start drawing finer details. These details might include more visible foliage or more apparent textures on rocks in the foreground.

In general, work from the distant background toward the foreground. Objects in the background will not be as clear or have as much detail. You can use lighter, harder graphite pencils like an H or even a 4H to shade these. As you shade objects that are closer to the foreground, you can use softer pencils like a 2B or a 4B.

Additionally, some artists find it helpful to sharpen pencils by hand rather than using a traditional pencil sharpener. They carve the wood away with a razor blade to expose more graphite for broad strokes. Also, by moving the tip of the pencil back and forth over sandpaper, they form a flat edge on the graphite. This flat edge can be more useful than a pointier tip for sketching foliage and other common landscape details.

Specific Tips for Drawing Things Found in Landscapes

As you draw more and more landscapes, you are bound to discover that they share many common elements. Here are some pointers to keep in mind as you encounter them.

Drawing the Sky

You can draw a sky by making light shading back and forth with your pencil. Use the side of your graphite for broader strokes. To make clouds, you can carve them out of the sky by lifting the graphite from the paper with a kneaded and plastic eraser.

Alternatively, you can very lightly outline the clouds before you shade the sky. If you do this, be sure to erase the marks when lifting the clouds. Make the tops whiter against the sky, and blend in some light shading with a blending tool.

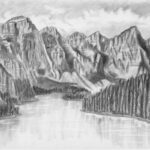
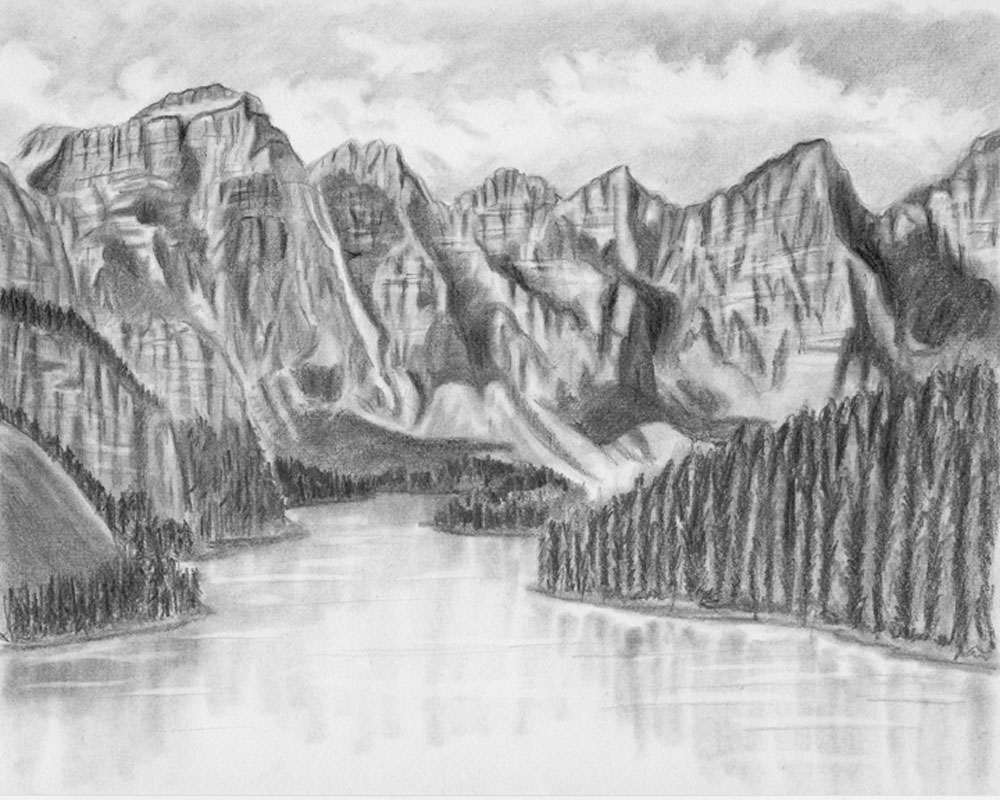
Drawing Mountains, Rocks, and Hills

Distant mountains and hills will have a haze to them. They will be lighter in value and have less detail than hills and mountains up close.

As you draw rugged mountains and rocks in the foreground, learn to perceive the various planes that exist and make up their surfaces. You can study these planes to distinguish which ones deserve more shading and which ones are receiving more sunlight.

Sketch in some marks to indicate texture for the lighter areas. In other areas, look for where you should draw darker values, cast shadows, and cracks in the rock. Pay careful attention to the curvature of or angles on the surface of the rock to decide how these cracks should flow.

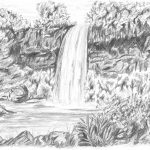
Drawing Trees, Bushes, and Grass

Look at the collective group of leaves on a tree or bush. In order to draw the foliage, break the collection of leaves into smaller sections that are grouped together. Focus on developing one section at a time.

One strategy is to begin with harder pencils and hatch lines. Then, use a softer pencil to layer additional hatch and even crosshatch lines over the first layer. This will produce a resemblance of leaves without you having to draw each individual leaf. When drawing leaves, strike a balance between detail and suggestive marks. However, the decision is up to you as to the level of detail you desire.

Pay attention to where the sunlight is coming from, and leave sunlit areas lightly shaded without extra layers. Place shadows on the opposite side of where sunlight is apparent, like on the underside of leaves. When sketching grass, you can utilize negative space.
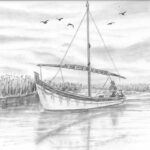
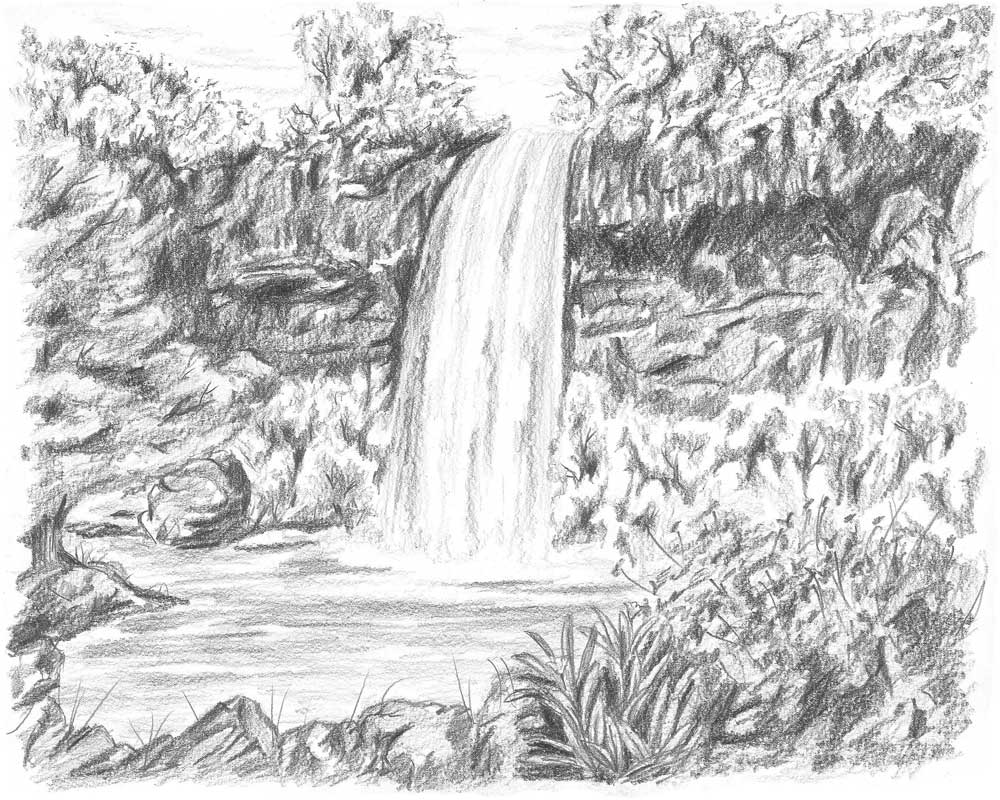
Drawing Water

A simple method for drawing still water like a lake is to use graphite from a blending stump for reflections. Simply align the blending stump under the objects along the edge of the lake and pull straight down. Then, use a kneaded eraser to make horizontal streaks that cut across the reflections. These streaks can represent subtle ripples in the water.

For water with more active ripples, you can draw wavy patterns in the water. These wavy patterns should be closer and tighter if they are farther away. They should have more space between them if they are closer in the foreground.

Next, you should shade between some of the water patterns. Pay careful attention to how light or dark any reflected objects are. If the reflected object has a dark value, you should shade on the reflection. If the reflected object has a light value, you should shade the water around the reflection.

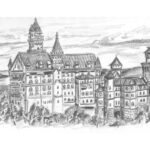
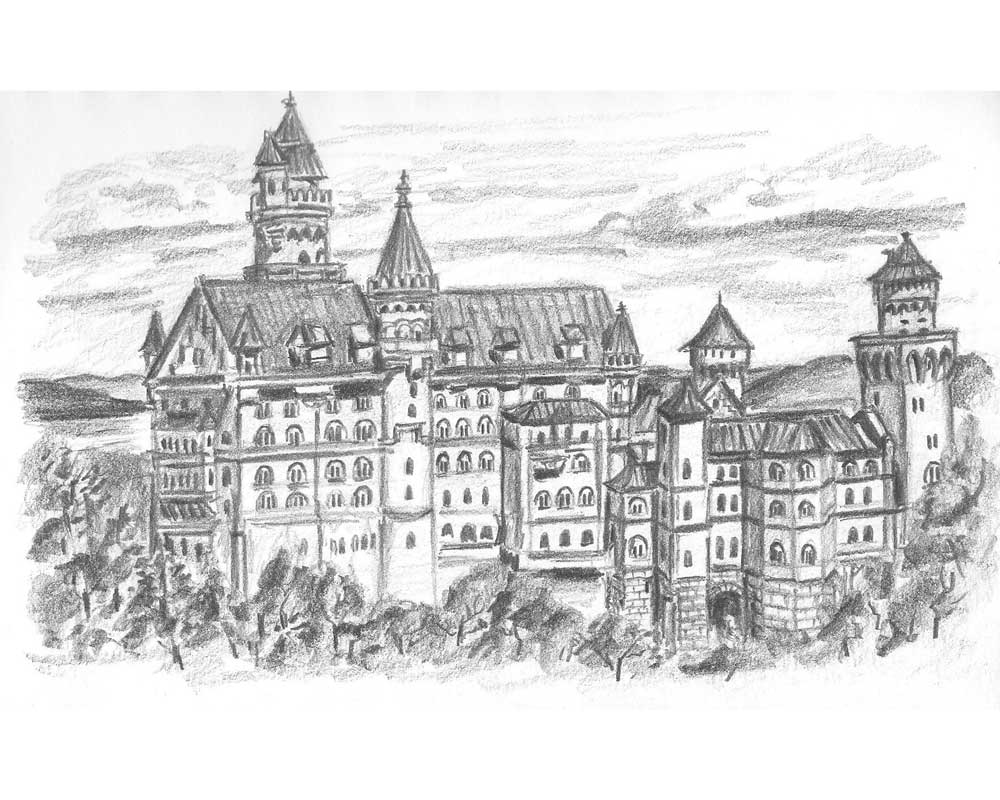
Drawing Buildings and Structures

Not all landscapes consist of purely natural elements. The centerpiece of a landscape can just as easily be a man-made bridge, single building, or city skyline.

Study buildings and structures to be more comfortable with various elements of design. Study real-life examples as well as photos.

A terrific strategy for drawing buildings is to use perspective. Perspective drawing involves identifying a horizon line and establishing one, two, or multiple vanishing points.

When drawing buildings and structures, begin by sketching the main shape. Then break this into smaller pieces and focus on adding finer and finer details.

Tutorials for Drawing Landscapes

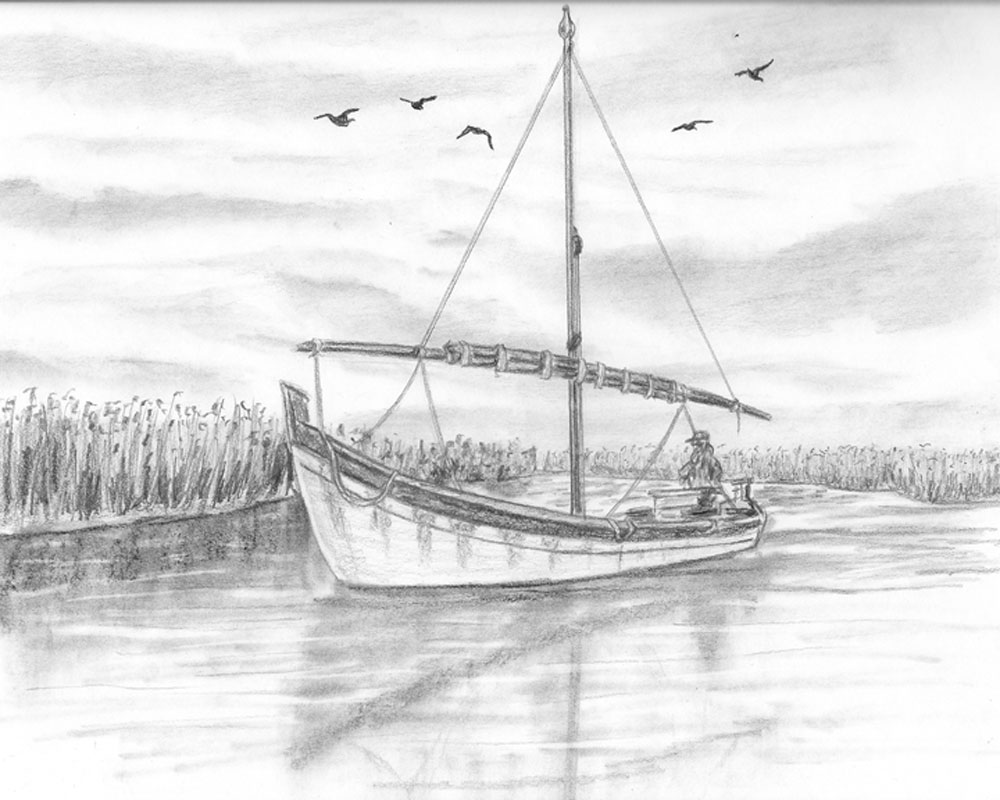
Here are links to some tutorials on how to draw landscapes. As you can see, landscape drawings can consist entirely of nature elements, or they can include man-made elements too.

how to draw a waterfall featured image
Learn how to draw a waterfall, foliage, and rock texture in the landscape to create a realistic and beautiful waterfall Read more
how to draw a medieval castle featured image
Castles served as both the grand homes and fortresses of rulers from centuries ago. Looking at the immense size and Read more
how to draw a boat on a lake
Great landscape drawings often have elements of nature as well as man-made elements. That is one reason why pictures such Read more
how to draw mountains
In this drawing tutorial post, I am going to show you how to draw mountains! Learn how to sketch the Read more

Some Final Thoughts on Drawing Landscapes

If you are ever unsure as to what to draw, deciding on a landscape drawing can be a beautiful solution that can bring a lot of satisfaction. Before you start, though, here are a few final thoughts.

As mentioned earlier, visiting scenic locations in person and sketching landscapes from life can do wonders for your observational and perception skills. It can bring more energy and emotion into your overall process as well as the final drawing. This is because you will be drawing a picture of a setting that you are experiencing in real life.

There are a couple of considerations when drawing a landscape from life. First, keep in mind that the same location can look vastly different depending on what time of day or year you are there. The weather of the day can also have an effect on the look of the land. Secondly, remember that Mother Nature will not stay perfectly still while you draw her. A breezy day is certain to blow things out of place. Additionally, the sun will not sit still during your drawing session. Instead, it will distort the placement of your landscape’s shadows as it travels across the sky.

If you choose to draw from life, just allow for these factors and make flexible adjustments in your drawing. There is also nothing wrong with drawing from a photograph while in the comfort of your own home.

Just don’t let anything stop you from creating a beautiful pencil “painting”. Go ahead and start drawing your very own landscapes today!

How to Draw a Waterfall in a Beautiful Landscape

Home » Draw Landscapes » Why Paint Them When You Can Be Drawing Landscapes Instead?

how to draw a waterfall title

Looking at a waterfall brings feelings of bliss and delight. You might be wondering; how do you draw a waterfall landscape in a way that captures its beauty?

A waterfall can often be described as a river flowing from the upper reaches of a mountain, cliff, or other steep land formation. This river then flows over the edge, sometimes descending breathtaking distances toward the bottom. The rocky surroundings that frame a waterfall are often accompanied by a variety of trees, shrubbery, and other plants.

There are many separate things contributing to the overall beauty of a waterfall landscape. Even so, it does not have to be difficult to draw these things to create our own beautiful waterfall drawing.

Even if you are a beginner when it comes to drawing, I encourage you to try this waterfall tutorial. You might be surprised by what you can create with a basic outline and an easy, step-by-step shading process.

Using pencil, I will show you how to draw a waterfall, foliage, and rock texture.

Keep reading to draw a realistic and beautiful waterfall landscape!

Use a Reference Photo of a Waterfall Landscape

In this tutorial, I will show you how to draw waterfall scenery by using the following photo as a reference:

how to draw a waterfall reference

Image by Heiko Behn from Pixabay

When creating this tutorial, I decided to replace the waterfall on the left with a tree. That allows focus to remain on one waterfall in the center.

This photo was taken at the Iguazu Falls in South America, on the border of Argentina and Brazil. You can’t tell by this photo alone, but if you were to pan out, you would see just how massive and impressive these falls really are!

Materials Used for This Drawing

Here is a list of the materials I am using for this drawing.

If you don’t have some of these materials, that’s okay. You can still make do with a regular pencil and eraser, as long as you just get started!

If you wish to purchase any of these materials, they can be found at your local art store, or you can buy them using the links below.

Affiliate Disclaimer: The links below are affiliate links. I will receive a small commission if a purchase is made through one of these links. Learn more here.

Draw the Landscape Outline, Sky, and Top Trees

In order to draw a waterfall landscape, the first step is to sketch a basic outline. Then we can work on the sky and trees at the top of the drawing.

Sketch an Outline of the Waterfall Landscape

Use the reference photo as a rough guide as you sketch the contours of the main parts of the landscape. Start with an HB pencil and a sloping zigzag line near the top of the paper, followed by two almost parallel and mostly vertical lines coming down to represent the sides of the waterfall.

draw waterfall outline

Next, draw two squiggly lines under the top of the right cliff. During the shading process, these two lines will help us to create the appearance that the cliff is jutting out near the top. Above the waterfall and along the top edge of the cliff, draw the bushy outline of the upper trees and bushes.

draw waterfall cliff right side

Sketch a rough outline of the cliff to the left of the waterfall. Along with it, sketch the outline of some additional foliage. Keep your lines very loose and don’t stress about creating an exact match to the reference photo.

draw left cliff

As mentioned before, I’m replacing the waterfall on the left side of the reference with a tree. If you are doing the same, you can sketch the outline of a tree now. Feel free to shape your tree slightly different from mine. In addition, let’s draw the outline of the foliage at the bottom of the cliff. You can do so by outlining the top of the bushes, just about halfway between the top and bottom of the waterfall.

draw tree and foliage

Finish the outline by drawing the contour lines of the plants and rocks in the foreground, as well as a little piece of land for our tree on the left side to live on.

draw waterfall foreground outline

Begin Drawing the Sky and Top Trees

The reference photo shows a clear sky. I wanted to do the same for my drawing. So, with the exception of a few lightly-sketched clouds that you can barely see, I left the sky pretty much untouched. There are other methods for drawing clouds. If you want to make the sky in your waterfall landscape much cloudier, you might wish to refer to how I drew clouds in this previous tutorial.

draw light clouds

Okay, now let’s see how to draw foliage for our waterfall landscape. Trees and bushes are made up of numerous clusters of leaves and branches that are grouped together. Starting with the left side of the drawing, use the side of a 2B pencil to create patches of shading within the mass of foliage. These patches of shading represent where less sunlight is reaching the various clusters within the foliage.

draw foliage shading

Rather than drawing every leaf and other little detail we see, we can make the suggestion of these small details, which is still often enough to create a realistic representation. Suggest the leaves by making tiny marks within the highlighted areas of the trees and bushes. Make a few marks along the outer edges as well. Draw a few branches poking out of the open areas between the leafy clusters.

suggest leaves in highlighted areas

Let’s do the same thing with the next bunch of foliage near the top of the waterfall. Draw random patches of shading within the foliage shape. Make some of the shading darker in some spots than others. As you get into the lighter areas, make a gradual transition from the darker patches. Draw a few branches within the leafy mass as well as some branches sticking beyond the outer edge.

draw waterfall top foliage shading

Finish Drawing the Top Trees

Continue the same process to finish drawing the trees and bushes along the top of the cliff. Start by establishing the shadow areas of the foliage. Keep in mind that some of the leaves overlap the top edge of the right cliff.

finish foliage at the top

Then apply a darker layer of graphite over a few spots of the shadow areas you just made. Gradually make short markings for leaves as you work your way into the lighter areas. Make a few leaves sticking beyond the edges of the foliage. Draw several visible branches to complete the top trees and bushes.

draw waterfall foliage branches

Draw the Landscape to the Waterfall’s Left

Now let’s focus on the landscape to the left of the waterfall. During this part of the tutorial, we will draw the left cliff and the trees, bushes, and a boulder below it. Then, we will draw a tree in the place of the waterfall on the far left in the reference photo.

Draw the Rocky Texture of the Left Cliff

First, let’s see how to draw a cliff. We’ll start by creating some rocky texture on the cliff just to the left of the waterfall. Use the reference photo as a rough guide as you draw a series of lines and shapes that resemble the outline of a rugged cliff. You might include a narrow shape along the base of the portion that juts out. Additionally, draw cracks, grooves, and lines to help form the texture.

draw cliff texture

We can further create the appearance of a rocky texture by using a combination of light and dark values. Apply dark tones within some of the shapes and along some of the cracks and grooves you created in the last step. Apply lighter tones in between these darker areas.

draw waterfall left cliff shading

Use the same process for the middle part of the left cliff. Vary the direction of the lines you draw on the surface of the rock. Whenever you draw rocky cliffs, embracing randomness and avoiding symmetry is key. Put extra shading near the top of the cliff to help separate the cliff from the trees and bushes above it. On the far left side of the drawing, apply a very light base layer of shading. Refrain from drawing details here since we will draw the tree in this spot later.

draw rocky cliffs texture

Draw the Bottom Foliage of the Left Cliff and a Boulder

For the trees and bushes along the bottom of the left cliff, we can use the same methods as we did for the trees at the top. Begin by placing some shadow tones to separate the different clusters of leaves.

draw shadow left clusters

Then sketch some short markings in the lighter areas of the foliage. It’s important to remember that, when you draw foliage, it is not necessary to draw every leaf.

draw light leaves

Here at the base of the foliage is a good spot for a boulder. Draw an outline for the big rock, which can be seen in the reference photo. Include curved lines to distinguish the major faces and planes of the boulder.

draw boulder outline

Apply some dark tones on the right face of the boulder. Place some lighter tones on the left face. Leave a thin strip of white along some of the edges and cracks of the rock. This will help to create a range of values on the rock’s surface.

begin shading boulder

Go over some of the darker spots of the boulder with a 4B pencil. This will help to create an overall greater value range. Add a few extra details on the highlighted side of the rock, such as bumps and cracks, to finish up the rough texture of the rock.

finish shading boulder

Switch back to a 2B pencil to finish up the shrubbery at the base of the cliff. Place emphasis in the darker areas to create greater contrast with the lighter areas. This will help to separate the leafy clusters. Also, you might want to put additional shading on the lower surface of the cliff just above the foliage. Again, this will create more contrast and help to distinguish the cliff from the bushes.

draw waterfall lower shrubbery

Draw the Left Tree

Here is the point in the drawing where I replaced the waterfall at the left edge of the reference photo with a tree. In my tutorial on how to draw a tree with leaves, I mentioned that you could sketch oval shapes to identify the different leafy clusters. In this drawing, I’m taking a similar approach. However, rather than drawing the oval shapes, I’m shading the dark patches, or negative space, between the clusters to identify them. This is the same approach that we have been using for other foliage in this drawing.

draw branches in bushes

Next, start sketching the indications of some leaves. Begin in the darker areas and use a mixture of short markings and small circular strokes to gradually move into the lighter areas. Leave the lightest values along the outer edge of the tree.

draw leaves on tree next to waterfall

Sketch some of the tree’s branches in between the leaf clusters. You might also see some of the trunk running vertically behind some of the clusters.

draw tree branches and trunk

If the values used in the tree are very similar to the values on the surface of the cliff, it might be necessary to do some touching up. You can use a kneaded eraser to brighten the clusters along the edge of the tree. Then, you can apply another layer of shading over the cliff, especially along the edge of the tree.

tones separate tree and cliff

Draw a small piece of land for the base of the tree. Continue to build layers of contrast between the tree and the cliff as needed.

draw base of tree

Draw the Waterfall and the Water Below

Now we have come to the focal point of our drawing – the waterfall! Let’s see how to draw a realistic waterfall step by step, as well as the water beneath it.

Draw the Waterfall

Start by using an HB pencil to gently draw lines going from the top of the waterfall to the bottom. The lines should curve over the edge of the cliff. Then they should come down at the same angle as the edges of the waterfall.

draw realistic waterfall lines

Continue to sketch more lines within the waterfall. Add some wiggle to some of the lines, especially near the bottom. Draw more lines along the edges to show where the waterfall gets thinner. Make fewer lines down the center portion where there is more water.

sketch more waterfall lines

Add volume and thickness to the waterfall by sketching more lines. Sketch over some of the thicker, wavy lines with the side of your pencil’s graphite. Draw more thin lines with the tip of your pencil, especially near the top and along the sides.

draw waterfall lines thick thin

Use a 4B pencil to shade the cliff along the left edge of the waterfall to create some contrast. Also, draw some tiny spots in the water along the edge to show how the water separates as it falls, revealing the cliff behind it.

draw water separating from falls

Continue to build any necessary contrast along the edge of the waterfall, as well as the top where the water pours over the cliff. When you draw with contrasting values, like the dark cliff next to the light water, it helps us to frame and create a beautiful waterfall.

draw contrasting values for beautiful waterfall

Draw the Water Beneath the Waterfall

What would a waterfall be without the water beneath it? Our waterfall has some mist at the base surrounded by rippling water. There are many ways to draw water ripples. A simplified version begins with drawing very thin sideways shapes with an HB pencil to indicate some of the ripples.

draw water ripples

Afterward, shade the space between the shapes. Use a sideways motion to easily move between the thin ripple shapes. Shade along the mist area at the base of the waterfall, too. If some of the ripples get harder to see, use a kneaded eraser to lighten them while applying more shading along the ripple edges with your pencil.

draw darker ripples under waterfall

Draw the Landscape to the Waterfall’s Right

Now that we have drawn the waterfall and the cliff to the left of it, let’s finish framing the waterfall by drawing the cliff on the right side and some foliage at the bottom.

Identify the Darker Areas of the Right Cliff

We can draw the cliff face by first identifying the darker areas. With a 2B pencil, draw some mostly vertical lines and a few tall triangle shapes to carve out the rugged surface of the top of the cliff.

draw cliff face dark outline

Draw several thin, irregular shapes under the top part of the cliff. Unlike the lines and shapes at the top, these shapes can be more horizontal, since they form the rock under the upper part of the cliff that juts out.

draw cliff irregular shapes

Use a 4B pencil to shade along and inside the thin shapes on the face of the cliff. This shading will represent shadows on the various bumpy faces of the cliff as well as shadows within some of the cracks and grooves. Apply a heavy layer of shadow just under the top portion of the cliff (under the vertical markings). This heavy shading will help to create the illusion of the rock protruding.

draw shading in waterfall cliff cracks

Finish the Rocky Texture of the Right Cliff

With your 2B pencil, shade the open areas of the upper cliff area. Apply a midtone value that is darker than the big shadow area created by the 4B but lighter than the trees and bushes overhead. As you shade next to the darker grooves in the cliff, gradually transition to lighter tones nearby. This creates a three-dimensional effect on the rocky surface.

draw midtone on waterfall cliff

Now, let’s work on the middle part of the right cliff. Put some light base shading on the rocky surface just above the lower trees and bushes. Use darker patches of pencil markings in various directions to further mold the rough texture on the cliff.

light shading middle cliff

Continue to build up the rugged surface by using midtones and highlights between the darker crevices. Draw additional grooves and cracks in the rocks. Whenever you draw rocks and cliffs, a range of values combined with a few extra details can help to bring out the texture you would expect.

draw rocks and cliffs values

Draw the Bottom Foliage of the Right Cliff

Start shaping the shadow areas of the trees and bushes along the bottom edge of the right cliff. Sketch abstract shapes that will allow the various leaf clusters of the foliage to form.

shadow foliage bottom edge

Now, we can develop the foliage here just as we did in the other parts of the drawing. Pick one area of shading. Make a small portion of that shading darker. Then, as you get closer to the lighter areas, gradually lighten your touch. Use a mixture of short circular and choppy markings to suggest the leaves in the highlighted parts.

suggest leaves highlighted parts

Repeat this process to suggest the leaves in the rest of the trees and bushes. You can use the short and choppy markings in the tighter areas. If you wish, you can also use longer hatch marks in some of the more open areas. Also, add some darker tones to the cliff area if more contrast is necessary between the cliff and the top of the foliage.

darker tones cliff area

Draw a few tiny branches coming from the darker areas into the lighter areas of the leaves. When you draw branches, it’s a good idea to move your pencil from the bottom of the trunk or branch upward, and taper the lines as you approach the end of each branch. Even though we are drawing tiny, far-away branches, the process is very similar to drawing larger branches.

draw branches in lower waterfall foliage

Draw the Foreground and Finishing Touches

Our waterfall drawing is coming along! Let’s finish up by drawing rocks and plants in the foreground. Then we can add some final details.

Draw Rocks in the Foreground

Let’s first draw some rocks in the foreground of the waterfall. Start by drawing a few rocks in the lower left corner.

draw waterfall foreground rocks

Sketch a light, rough base layer of tones along the bottom edge of the drawing. Vary the direction of your pencil strokes so they mimic the collective shape of additional rocks. Also, create a combination of darker and lighter surfaces while keeping the overall layer light in value.

shade base layer rocks

Create a base layer of light shading over the remainder of the foreground. We will draw some plants here pretty soon.

shade foreground base layer

Next, return to the lower left corner. Add details to the rocks by applying shadow tones over the areas where the base layer is already slightly darker. Make sure to draw some additional bumps and cracks in the rocks.

rock shadow detail

Continue in this manner to draw details and shading on the rocks. As you shade the rocks, be aware of the various faces on each rock, and apply different values to each face.

shade rock faces

Draw Plants in the Foreground

I decided to take a different approach to drawing the plants in the foreground. This is mostly because these plants are much different from the foliage we have drawn up to this point. Begin by drawing a series of short markings near the top of where the plants will be.

draw plant tops

Create a series of irregular patches of shading near the bottom right corner of the drawing. Just like when drawing a patch of grass, much of this shading will serve as the negative space of shadows that will shape the highlighted areas of the plants.

draw plant negative space

Draw thin lines that connect the short markings at the top to the shaded areas near the bottom. Use a 4B pencil to work in another layer of shadow atop some of the negative space to build the density of the mass of plants.

draw lines for plants

In between the rocks in the foreground and the plants we just drew, there is another species of plant consisting mostly of tall leaves and a few flowers. Draw the outline of these tall leaves. Make a few of them curve in opposing directions and even overlap one another. Draw a few visible flower petals too.

draw outline of leaves

Use a 4B pencil to shade the space around the leaves. This helps to create shadow behind the plants while also adding some volume to the subjects in our foreground.

shade around leaves

With your 2B pencil, carefully shade the individual leaves. The tones you apply should be a lighter value than the background tones created with the 4B. Don’t forget to leave some areas of highlight on the leaves. You can do this by occasionally shading on one side of a leaf while leaving the other side untouched.

draw shading on waterfall foreground leaves

Add the Finishing Touches to the Waterfall Drawing

As always, the last steps involve looking over our waterfall picture and deciding which finishing touches to draw, if any. The finishing touches you add to your drawing may differ from mine. Nonetheless, I will go over mine to give you some ideas. First, I decided to use a 4B pencil to build additional contrast into the shadows of the cliffs. A good way to build contrast is to shade alongside areas of much lighter value, such as where the waterfall touches the cliff on its left edge.

decide waterfall finishing touches to draw

Next, I added some much smaller rocks in the water beside the big boulder. Also, I drew a few more ripples in the water next to the tree. In the tree, I added a few more leaves and used my kneaded eraser to create some highlight in the trunk.

add tree details

After that, I put a little more shading in the water. I used horizontal pencil strokes that glided along the ripples and the mist at the base of the waterfall.

more shading in water

That was followed by another layer of tones over the dark shadow areas of the right cliff.

more shading on cliff

The final step I recommend is to draw a few sprigs of thin grass between the rocks in the foreground.

draw thin grass

And that’s it! That is how to make a waterfall drawing!

make finished waterfall drawing

Tutorial Recap

For a quick visual recap of this tutorial, take a look at the image below. It shows you a progression of the main steps for how to draw a waterfall.

how to draw a waterfall recap

Keep Drawing Waterfalls

If you are lucky enough to live close to a waterfall, try to draw it from real life. If it’s easier, take a photo of it instead, or use other waterfall photos as references for practice. Just keep practicing! Use methods from this tutorial and apply them to other waterfall drawings.

The beauty in drawing landscapes is you don’t have to draw everything exactly as you see it in your reference photo (or real life). You can move things around, add things, take things away, or replace things. As long as you are drawing a decent suggestive representation of the individual pieces of your landscape, you are likely to end up with a pleasing and satisfying drawing. As you continue to practice, you will see just as much beauty in your waterfall drawings as you do in your sources of inspiration.

How to Draw a Medieval Castle

how to draw a medieval castle title

Castles served as both the grand homes and fortresses of rulers from centuries ago. Looking at the immense size and complexity of a big medieval castle might make you think it would be nearly impossible to draw.

However, that is far from the truth.

While it may be true that a realistic castle is not necessarily the easiest thing to draw, it is very possible and maybe even a little easier than you might first think.

Stick around to learn how to draw a medieval castle step by step!

Use a Reference Photo of a Medieval Castle

Here is the reference photo I used for this tutorial. This is a real castle in Bavaria, Germany. It is called the Neuschwanstein Castle.

how to draw a medieval castle reference
Image by Wolfgang Heubeck from Pixabay

Since it was built in the 19th century, it may not be a true medieval castle, but it was built in a style that replicates castles of the 13th century. Therefore, I decided it would still be a nice subject for this tutorial and beneficial for anyone wishing to draw a beautiful, fairy tale castle.

Materials Used for This Drawing

Here is a list of the materials I am using for this drawing.

If you don’t have some of these materials, that’s okay. You can still make do with a regular pencil and eraser, as long as you just get started!

If you wish to purchase any of these materials, they can be found at your local art store, or you can buy them using the links below.

Affiliate Disclaimer: The links on this page are affiliate links. I will receive a small commission if a purchase is made through one of these links. Learn more here.

How to Draw a Medieval Castle Video Tutorial

You can watch the time-lapse video version of this tutorial below. Watch it once all the way through to get a sense of the overall process. Then watch a second time and draw along with me, pausing as needed.


Draw the Left Side of the Castle

We will begin by using some very basic shapes to sketch the left side of the castle. Start by sketching a triangle. Then sketch a parallelogram shape to the right of and touching the edge of the triangle. Keep the angle of the right edge parallel to the triangle’s right edge. Next, draw three vertical lines extending from each corner and connect them with a horizontal line at the base. So far, we have a very basic house shape.

draw a house shape

Extend the three vertical lines below the house shape. Then to the right of the house shape, sketch two rectangles, one short and one taller. These two rectangles actually represent a tall cylindrical structure or tower attached to the castle. Sketch a skinny rectangle on top and a cone on top of that. Then sketch a similar but larger tower on the other side.

draw a tower next to the house

Sketch some details on the back tower in the form of vertical and horizontal lines and another tiny cone shape. Extend the roof beyond the right side of the tower in the foreground. Maintain the same angle as previously drawn with the other slanted edges of the roof. Then draw a horizontal line midway across the face, bending the line on the tower.

draw past the tower

Continue using a series of basic shapes as you draw this part of the medieval castle. Sketch a rectangular prism protruding a short distance from the side facing us. Don’t connect the top of the prism just yet. A section of roof will go here in a minute. Then draw some horizontal and vertical lines on the lower portion of the castle. Curve the line on the tower to give it a cylindrical look. Draw another shorter cylinder and cone at the upper right corner.

draw more of the castle

Draw the Middle and Right Side of the Castle

Now we are getting to another section of the castle. Keep sketching a series of rectangular prisms and curved triangle shapes for the roof sections.

draw the middle of the castle

Draw more tall rectangle shapes. Some of the rectangle shapes seen here represent an angular tower section of the castle with corners greater than the typical 90 degrees. Sketch a horizontal line for the base of the roof. Sketch guidelines for a tall tower on the right and a tree outline in front of it. Use rectangle and triangle shapes to complete the roof.

draw the roof parts

Okay, the tall tower outline on the right that I sketched here is much taller than the reference photo. This is an example of me making the mistake of using improper reference points to guide my proportions. I will redraw this later on at a proper size, so you can skip this step for now!

don't draw this right tower

Draw the Finished Outline of the Medieval Castle

Next, we’re going to sketch a series of short, vertical, rectangular-prism-like structures that jet out from the lower edge of the main roof. Each of these structures has a little roof structure of its own.

draw short vertical structures on the roof

On the left side of the castle, there is a rectangular protrusion from the main building. Draw a skinny side and an angular bottom. Then draw a line coming toward the top. On the top, draw an angled roof.

draw a protrusion on the castle's left side

Lightly sketch a rough outline of trees on the left side of the castle and in the foreground. Under the section between the main part of the castle and the right tower, draw lines extending downward to outline the stone structures at the castle’s base. Sketch a narrow arch too. Finish the base and tree outlines on the right. Sketch some rolling hills and a lake in the background. That completes the outline of the castle!

draw the finished outline of the medieval castle

Shade the Left Side of the Castle

Next, we’ll shade the left side of the castle and begin to shade the roof. We’ll also add additional details like pillars, windows, and other various structural elements. Draw several short, black, vertical marks for the spaces between the pillars on the left side. In this drawing, the sunlight is coming from the right, so most of the left side should be in shadow. Also, sketch a deep cast shadow just under the roof, shade the roof, and sketch lines from the top of the roof going downward.

shade the left side of the castle

Put a very light base layer of shading on the white part of the castle facing us. Shade the cone roof of the tall rear tower and sketch vertical lines from the top of the cone. Sketch the battlements near the top and the arch-like design underneath them. Put shadow between these spaces and a dark slanted shadow on the left.

shade the tall tower in the rear

For the multiple windows and pillars on the face of the castle, here’s how to draw them. Sketch a row of four upside down “u” shapes or arch shapes. Then draw another row. Repeat this with two more rows underneath. It may be helpful to sketch a horizontal guideline for each row to keep everything aligned. Then draw the same narrow black marks that we did on the left side of the castle. Outline the top of each arch shape to create a shadow effect.

add windows and details to the front

Shade the Middle of the Castle

Shade the cone roof of the cylinder structure in the same manner as with the taller tower. Put more shading on the left side where there is less sunlight. Sketch some arch designs just underneath. Put some windows down the center and a thin shadow along the left edge to help form the cylinder shape of the tower.

draw battlements and windows on the castle tower

Continue adding details and shading to the middle part of the castle. Repeat the process with similar steps as before. Put shading on the roof and a cast shadow underneath. Keep in mind that the face of the tower on the left side is away from the sunlight and should have more shading. Draw the rows of windows and pillars aligned with the floors already drawn.

draw windows on the middle part

At the base of the castle, draw the stone by making parallel horizontal lines on each face of the building. Then use short vertical marks that stagger with each subsequent row. This is very much like drawing the pattern of a brick wall. Put more shading on the roof and the left side. Place windows and shading on the next tower and the other parts of the castle behind it. Put dark shading under the arch and the brick pattern around it.

draw stone and an arch under the castle

Now this next section is the part with the angular corners. Looks like it might have half an octagon as the floor. Place the darkest shadow on the left wall. Shade a slightly lighter shadow on the wall to its right. Leave the next wall the lightest. Draw the windows and other structural details on the remaining part of the castle, up to the tower on the right.

finish the main part of the castle

Draw and Shade the Tower on the Right to Complete the Castle

Okay, here’s where I correct my gigantic tower and replace it with something more proportionally accurate to the real castle. I’m sketching a horizontal guideline slightly above the main roof because I want the tower’s top to align along here. Then, I want the part of the tower with the flat walls to top out along just above the lower edge of the main roof.

redraw the castle's right tower

Next, sketch the top of the tower with the curved walls and the cone roof. Mine still looks a little shorter than the reference, but I think it’s close enough for the purposes of this sketch.

draw the top of the tower

Shade the roof, putting more shadow on the left side. Draw lines from the vertex to the base. As you develop the upper area of the tower, draw a dark shadow under the roof and swooping toward the left.

draw a roof and battlements on the top

Place some windows, or maybe these are actually arrow slits, near the tower’s top. Working your way down, draw a skinny sideways rectangle. Draw two horizontal lines below that. On the top row, draw three arches on each side. Then draw lines from the arches down to the second horizontal line. Keep the angle the same as the sides. Place dark shadow along each arch structure.

draw arch designs near the tower top

Sketch more windows or arrow slits down the sides of the castle’s right tower. Shade the tower’s left side. That pretty much does it for the castle itself. Next, we’ll work on the surrounding landscape.

draw arrow slits and shadow on the castle tower

Add Shading to the Surrounding Landscape

Put some shading on the hills in the background. Use a lighter touch for the more distant hills. Additionally, making the tops of the hills darker and the lower parts lighter can help to create a hazy effect. Sketch a few horizontal water lines in the lake.

draw hills around the castle

Now, I’m just going to sketch a loose representation of the trees by first creating a base layer. Then, a few shadow areas and some indications of trunks and branches here and there will give us plenty of vegetation surrounding our castle.

shade the trees around the castle

For the sky, I decided to go with a less-cloudy look than what is in our reference. In order to do this, just lightly shade the lower part of the sky. Then sketch the shape of some clouds with heavier graphite application along the lower parts while keeping the upper parts lighter.

draw the clouds and final details of the medieval castle

And that is how to draw a medieval castle!

how to draw a medieval castle final result

Tutorial Recap

For a quick visual recap of this tutorial, take a look at the image below. It shows you a progression of the main steps for how to draw the medieval castle.

how to draw a medieval castle recap

Tips for Your Next Medieval Castle Drawing

The next time you wish to draw a fantasy castle, here are a few pointers you can remember from this tutorial:

  • Try using a reference photo while you draw the castle so you gain a more realistic representation.
  • Start off by sketching basic shapes to establish the overall frame of your castle. Then build on additional details.
  • If you are using a reference photo, don’t feel an overwhelming need to include every little detail in your drawing. You can still create a loose sketch that will result in a realistic representation of a castle. The amount of detail you add is up to you. When I started sketching the castle in this tutorial, I didn’t know what to expect because I never drew a castle before. I was a little intimidated by all of the detail in the photograph and thought my final sketch would be much looser. However, as I got a rhythm going during the drawing process, I got enough flow that motivated me to keep going!
  • Consider using both a color and a black-and-white version of your reference. You can use both photos together to give you information about light and dark values as well as subtle changes in color, such as the slight variations between the lighter and darker shades on the various faces of the castle’s outer walls.
  • Try drawing a variety of castles. You can sketch simpler castles or attempt even more detailed drawings of more complex castles.
  • Consider drawing the landscape surrounding your castle. Include the trees, any nearby water, and clouds in the sky to accurately depict your castle’s overall setting.

Thank you for visiting my tutorial on how to draw a medieval castle!

How to Draw a Boat on a Lake on a Cloudy Day

how to draw a boat on a lake title

Great landscape drawings often have elements of nature as well as man-made elements. That is one reason why pictures such as these make great drawing subjects. Such is the case for anyone who wants to draw a boat on a lake.

Of course, you have to know how to draw the man-made mechanics of the boat. Then, you have to know how to draw the lake and all of its reflections, not to mention the sky and any plant and animal wildlife surrounding the lake.

If you want to know more about drawing boats and lakes, then you are in luck! In this tutorial, we will combine the two of them into one drawing as I show you how to draw a small boat on a lake.

Use a Reference Photo of a Boat on a Lake

I’ll use this picture as my reference photo to guide me as I draw. It is a picture taken from Albufera Natural Park just south of Valencia, Spain. I guess Albufera technically has a lagoon rather than a lake. However, I think it’s close enough to a lake for our drawing purposes! Although this picture shows ten birds and a family in the boat, I will be drawing fewer birds and just one person in the boat.

how to draw a boat on a lake reference
Image by Manuel Torres Garcia from Pixabay

You can use the same concepts you learn from this tutorial and apply them to drawing similar landscapes with boats and lakes. As someone who didn’t know a lot about boats before drawing this picture (I still don’t know much really), I found the reference photo to be very helpful in drawing the various parts of the boat. I even learned a few new boat terms that I will be using throughout the tutorial!

Materials Used for This Drawing

Here is a list of the materials I am using for this drawing.

If you don’t have some of these materials, that’s okay. You can still make do with what you have or try to improvise if necessary, as long as you just get started!

If you wish to purchase any of these materials, they can be found at your local art store, or you can buy them using the links below.

Affiliate Disclaimer: The links below are affiliate links. I will receive a small commission if a purchase is made through one of these links. Learn more here.

How to Draw a Boat on a Lake Video Tutorial

You can watch the time-lapse video version of this tutorial below. Watch it once all the way through to get a sense of the overall process. Then watch a second time and draw along with me, pausing as needed.


Draw a Basic Outline of the Lake and Boat

Start by drawing a slightly wiggly horizontal line for the shoreline. I’m using an HB pencil for this. Make sure to make these first guidelines light. Then sketch the tops of the tall grass. Don’t sketch this line too far away from the first one.

draw the lake outline

Sketch the basic outline of the boat’s hull. First, sketch a horizontal line in the lake. Then draw the top of the hull with a sharp curve upward for the bow, or front, of the boat. Keep the bow aligned with the top of the grass.

boat outline

Draw a line under the top edge of the boat’s hull. This line should maintain the same curvature as the edge. The top of the bow here should not be curved back so much, so I’m going to make it more vertical. After that, draw the metal piece at the tip of the bow.

line under hull top

Sketch the outline of the inside of the boat. Since there is an upward curve to the boat, we see only a small sliver of the inside. We’ll add more details to the inside and the stern, or rear of the boat, later on.

draw the inside of the boat

Draw Landscape Features Surrounding the Lake

Next, use a very light touch to sketch an outline of the clouds. You can create the appearance of a cloudy day by sketching the outline of the negative space between the clouds. Sketch thick and thin shapes across the sky.

draw the outline of the clouds

To shade the sky and clouds, fill in the outlined shapes with graphite. This will represent the sky, and all of the white areas are clouds. Next, smooth out the graphite with a blending stump while preserving the white clouds. Then, use small, circular strokes with an eraser pencil along the bottom edge of the clouds. You can better define some of the edges with extra shading in the sky if necessary.

shade the sky

To draw the tall grass along the lake’s shoreline, first use horizontal strokes to shade along and just above the shore. Then, use short vertical marks to create a base layer of shading for the grass. Use the guideline to determine the height of the grass. The left side should be taller since it is closer to us in the foreground. Add another layer of grass and shading for more detail, especially with the grass in the foreground. You can use a 2B and even a 4B for extra shadows. Sketch tiny specks near the top of the grass.

how to draw a boat on a lake with clouds and grass

Draw an Outline of the Mast and Boom

I decided I wanted to make the upward slope of my boat a little higher. Additionally, this is an excellent time to erase guidelines inside the boat. Our boat has several ropes connected to its spars. Sketch a rope near the bow. Then sketch ropes from the sides of the boat that meet at a point above.

draw ropes on the boat

Sketch a line connecting the ropes. I’ll refer to these horizontal spars as the boom. Near the middle of the boat, sketch a vertical guideline for the mast. Use a ruler to make the vertical guideline straight. Then make the other side of the mast, gradually converging at the top.

draw the mast and boom

Along the horizontal guideline, sketch the two spars that make up the boom. There’s a slight curve to these, so I’m choosing to not use my ruler. Each one roughly begins with a curved end where the ropes meet and tapers almost to a tip at the other end.

draw the boom

There are several straps connecting these two spars. Draw them so they overlap the lines for both spars. Draw them with a slight curve to show that they wrap around. In addition, make sure to place straps where the ropes meet the spars.

draw straps on the boom

Shade the Boom and the Mast

Now let’s add some shading to the boom. Shade between the straps from the previous steps. Try to keep the edges a little darker than inside the lines. With a kneaded eraser, carefully erase the guidelines inside the straps. After that, touch up the edges of the straps with a pencil, then lightly shade inside each of the straps. Finish up the boom spars by using a 4B pencil to put shadows along the edges of each spar. Place some shadows along the straps as well.

shade the boom

At the top of the mast, draw a little circle and two curved lines to represent one of the pulleys found here. Then put a little shading on each side.

draw the top of the mast

With a ruler and a 2B pencil, darken the outline of the mast. Then, since sunlight is coming from the left, shade the right side of the mast. Now, I’m drawing a couple of little disk-like shapes to represent the other pulleys or connections found along the mast. I don’t need too much detail here. Using the ruler, draw ropes very close and parallel to the mast.

shade the mast

We are almost finished with the outline of the boat. We still need to add a few more ropes and some details to the stern and the inside. Oh yeah, we need a sailor too!

Draw Ropes and Extra Details to the Boat’s Outline

Use the ruler again to draw straight lines representing ropes going from the boom to the top of the mast. One line should connect on the boom near the front of the boat where the two ropes form a triangle. The other line should originate from the boom near the back of the boat.

connect the boom to the mast

Draw a short strip of rope hanging from the rear of the boom. Then, we’ll do some preliminary defining of the ropes by darkening their outlines. We will thicken these lines to make them look more like ropes soon enough.

draw ropes on the boom

I’ll devote the next few steps to adding some details to the hull of the boat before we get into shading. First, I’m sharpening the outline of the bow. Next, the stern of the boat should be pointy rather than flat.

draw the stern

Now, sketch a few basic shapes that make up the various things we can see inside the boat. A kneaded eraser can get rid of any stray guidelines. Then there is this little structure sticking up at the very back of the stern. Perhaps it is the tiller. Drawing some thin rectangle shapes will do the trick.

draw the inside of the boat

Add Details to the Inside of the Boat

Okay, now let’s draw a sailor in the boat. I’m doing this by erasing a spot for him and then starting to sketch a basic outline of the face. Then, I’m sketching some indications of a jacket and a cap. Now add some shading to the sailor. Keep it basic and suggestive.

draw the sailor

Next, shade the objects on the inside of the boat. Put more shading on the right since the sunlight is coming from the opposite direction. Thicken the ropes by drawing a thin line parallel to each line already present. Draw two short ropes near the man and a longer rope near the bow. Draw two additional lines running the length of the hull near the top.

draw ropes over the hull

Shade the Boat

Lightly shade the hull of the boat. Use horizontal strokes that also follow the upward curvature of the hull. Use a kneaded eraser to erase a thin strip at the front of the boat. Then shade beside the strip to sharpen its edge. Extend the edge up the top of the bow.

shade the hull

Use the side of your pencil to shade the stains going down the side of the boat. Make them thicker at the top and tapering near the bottom. Use the tip of your pencil to sharpen a few of the edges. Then, outline the overlap along the side of the hull.

draw stains on the hull

Put dark shading along the top of the boat’s hull. Be careful when shading around the ropes. Keep your pencil marks between the lines as you shade along the boat. Make the shading just under the rim even darker for a cast shadow.

how to draw a boat on a lake and shade the boat

Continue shading the top rim of the hull. Keep the top rim a slightly lighter value than the dark part just below it. Use outlines to distinguish the black part of the hull from the white part underneath.

shade the top of the hull

Draw Birds in the Sky

I’m going to use a sharp 4B pencil to draw the birds in the sky. Because the birds are far away, a silhouette for each bird is all that is needed. Just draw a pointy shape for each wing and the body in the middle. The reference photo gives ideas as to the shape, size, and positioning of the birds and their wings. I’m drawing five birds in all rather than the ten birds in the reference photo.

draw the birds

Begin Drawing Reflections in the Lake

Now that the boat and sky are complete, it’s time to work on the lake. The lake is often an eye-catching element of a landscape drawing, such as it is in this mountain landscape. Therefore, we want to do it justice. You can use the following general and easy steps for any lake drawing you wish to create after this one.

For the ripples on the far side of the lake, draw a few short horizontal marks. Then rub a blending stump over the ripples. In the foreground of the lake underneath the boat, sketch an outline of the boat’s reflection. Use your pencil to make sure features of the boat line up with features of its reflection to draw a mirror image in the water. However, the outline of this mirror image does not need to be perfect. Then shade the outline of the boat’s reflection. In addition, shade the reflection of the grass in the foreground. Use a blending stump to pull the tones straight down from the shoreline and boat and into the lake.

draw the reflections

Finish Drawing the Lake

Now that we have drawn the reflections in the water, we can add other details to the lake. Begin by drawing horizontal lines where the base of the hull makes ripples in the water. Then blur the tones with a blending stump.

draw ripples in the water

Outline the shoreline in the foreground to better define and distinguish the grass from its reflection in the lake. Since there are already a lot of dark values here, I’m using a 4B pencil to make my marks stand out. Put a little more shadow in the grass if necessary. Then lightly blend the outline of the shore.

blur the ripples

Since the shoreline on the other side of the boat is farther away, it doesn’t need as much detail. Therefore, I’m just outlining the shoreline, putting a tiny bit more shading in the grass, and shading under the grass for the reflection.

add shadows to the grass

Using graphite that is already accumulated on the blending stump, make horizontal streaks across the surface of the lake. Make sure that some of the strokes overlap the reflections in the water. Cover most of the open areas of the lake with these streaks.

blur ripples in the water

Form a wedge shape with your kneaded eraser. Use the edge of your eraser to make more horizontal streaks in the lake. Make sure the streaks go across the dark values of the reflections as well as the lighter areas of the water. This is another way to draw ripples on the surface of the water.

lift highlights from the lake

Lightly draw a line along the top edge of some of the white ripples. Spread your markings across the foreground of the lake. If you feel the need, you can use the graphite from your blending stump to amplify some of the tones between the ripples in the reflections.

how to draw a boat on a lake with reflections

And that is how you draw a boat on a lake!

how to draw a boat on a lake final result

Tutorial Recap

For a quick visual recap of this tutorial, take a look at the image below. It shows you a progression of the main steps for how to draw a boat on a lake.

how to draw a boat on a lake recap

Tips to Remember the Next Time You Draw a Boat on a Lake

Here are a few tips to keep in mind for the next time you want to draw a boat in water.

  • Work from a reference photo so you can better make the features of the particular boat you are drawing as well as what is happening with the water in the lake.
  • Break the boat into simple geometric shapes. Then focus on one area and draw one feature or detail at a time.
  • Consider using both a color and a black-and-white version of your reference. You can use both photos together to give you information about light and dark values as well as subtle changes in color, like the subtle color variations in the sky and the lake.
  • Try drawing a variety of boats. Try rowboats, sailboats (with sails), and motorboats. You will get better the more you practice and even learn more about boats along the way!

Bodies of water are always a beautiful addition to landscape drawings that feature them. I hope this tutorial has inspired you to draw more landscapes with water, whether or not they have a boat.

Thank you for participating and for taking the time to draw this boat and lake scene along with me!

How to Draw Mountains Near a Beautiful Lake

how to draw mountains title

In this drawing tutorial post, I am going to show you how to draw mountains!

Learn how to sketch the entire outline of a mountain landscape. I’ll show you how to sketch the mountain peaks, the clouds in the sky, rocky details on the surface of the mountain, shadows, trees, and even a beautiful lake.

If you are searching for ideas for what to draw, I hope you consider participating in this drawing tutorial with me.

Use a Reference Photo of Mountains

As inspiration for this course, I am using a reference photo of the mountains around Moraine Lake in Banff National Park in Alberta, Canada.

Even though we are using a reference photo, please don’t feel the need to draw every little detail exactly like the photo. It is up to you whether you want to draw the picture exactly as I am or put your own style and uniqueness to it!

how to draw mountains reference
File ID 178941633 | © Surangaw | Dreamstime.com

You can use the basic concepts you learn from this tutorial and apply them to drawing other mountains. Although you have some artistic freedom from drawing mountains exactly as they are depicted in a photo, it’s still wise to use a photo as a reference when drawing them.

I did most of the initial drawing with an HB pencil. I used a range of other pencils during the shading process, including a 2B, 4B, and 6B pencil.

How to Draw Mountains Video Tutorial

You can watch the time-lapse video version of this tutorial below. Watch it once all the way through to get a sense of the overall process. Then watch a second time and draw along with me, pausing as needed.

Draw the Skyline

Starting with an HB pencil, begin to lightly sketch the outline of the top of the mountains. I am using the reference photo to try to closely match the shape of the peaks, but if you wish to change the shape or height of your mountains, that is perfectly fine too.

In order for you to better learn how to draw these particular mountains, I have identified specific peaks that we will focus on throughout the tutorial. There is a tall peak to the left, three shorter peaks in the middle, and two taller peaks on the right. The peak on our far right will not be completely in our view. There will also be another mountain on our left in the foreground, but we will not see its peak either.


Now sketch the outline of some clouds. In this picture, there will be a band of clouds going across the sky. Make sure to sketch very lightly. We want to identify the shape of our clouds with these sketched guidelines, but we don’t want to leave the outline of the clouds in our final picture.

Draw the Basic Shapes of the Mountain Landscape

As with drawing any landscape, it is important to draw some basic shapes to set up the lay of the land. Start with a light outline to establish the presence of the mountains, trees, and lake.

Begin with the mountain on our left side. This is the mountain I was talking about earlier, the one that does not have a visible peak. Here, I am sketching two steep formations along the shore of the lake. We will sketch some trees along the very bottom a little later.


Sketch more of the lake’s shoreline. Sketch a long, narrow path of snow to separate the left peak from the shorter peak next to it. Then sketch the slope of these two peaks all the way down to near the base. There is also a large area of smooth rock separating the trees from the bumpier, much rockier parts of the mountain. At first glance of the reference photo, this area almost looks like sand.


On the right side of our picture, there will be some tall evergreen trees along the lake. For now, we will just sketch the basic shape of this collective group of trees. From the perspective of the viewer, the trees will appear to be shorter in the center and get taller as they approach the right edge of the paper. This is because the center trees are farther away than the ones on the edge.


Next, let’s continue to add the basic shapes of the slopes and jagged surfaces belonging to these other middle peaks. A great way to do this is to look for similarities to common two-dimensional shapes. Here, I can see some almost pentagon or warped triangle-type shapes.


Now, draw the mountains on the right side. Begin by making a line sloping down from the peak. We’re also going to make this peak here on the edge taller too. Sketch a few more wiggly up-and-down lines, and then we have the basic shapes of our mountain landscape complete.

Begin Drawing Extra Mountain Details

We are still going to be working on the outline portion of our mountain drawing, but now we’re going to add some extra details. If you are not ready to add as much detail as you see me do here, you can leave some of this detail out and end up with a more suggestive type of a drawing, but I’m sure it will still look nice.

Let’s begin by sketching some lines to give this left side a more rock-like texture.


Continue to work your way up the left peak in a similar manner. At the summit, sketch several short vertical lines. Leave a little area here open for some snow. Although this is not going to be a very snowy mountain scene, there are small traces of snow in spots that hasn’t yet melted.


Continue to sketch the rocky surfaces of this left mountain. Make a few short, horizontal lines close together for a shelf here and there. Also, like I said before, look for easily-recognizable basic shapes. You might see some rectangle shapes or more triangle shapes. Sketch up to the left edge of the snowy slope.


Keep at it with the next peak. I like to sketch these jagged edges along the slope near the very top, as well as other parts of the mountain. It does a lot to create a rugged, rocky appearance that is so necessary for the way I draw mountains such as these.

How to Draw the Mountains with Preliminary Shading

Okay, before I get ahead of myself here, I think it’s important for us to establish the placement of some shadows, even though I still consider this the line portion of the drawing. Sunlight will be coming from the upper left corner, so that means shadows will be to the right of our peaks and any other tall rocky formations. Here, we need to sketch a shadow that the left peak is casting onto this peak.


You can also look for edges in rock formations and shade the surface that is farthest away from the sunlight. As I go back to shade this left mountain, I don’t want to shade the entire right side. Rather, I want to be selective and shade portions of individual rock formations that make up the mountain. This is because a mountain is not made of flat surfaces. It has many rocky parts that stick out beyond other parts and are in the sunlight. On the other hand, I do want to put all of this left side in shadow, since it represents the back side of another mountain peak that is not visible on our paper.


Next, continue adding details and shadows to the rest of the mountain. The slope from this peak here really sticks out, so we should have a shadow on the surface next to it. For the parts of the mountains under these next two middle peaks, I am just sketching a combination of extra line details and some shadows.


We’ll do the same thing for the peaks on the right. There is a huge shadow that this peak here is casting onto the surface next to it. Also, I have been keeping the direction of my pencil strokes very basic and consistent as I shade. All of this shading we have been doing up to this point is preliminary shading. It will help us see where our darkest areas need to be when we do heavier shading later on.

How to Draw the Base of the Mountains

Now, let’s do a little more work to the base of the mountains and the trees. There will be a thin section of trees at this area around the base. Let’s put some shading here under where we shaded earlier. All of this shoreline area should be in the shadow of the tall mountain peaks of the left.


Begin sketching some very simple representations of the tops of the evergreen trees under the right peaks. It would be helpful to erase the top guideline from earlier first. Then begin sketching the sides of the trees in front, as well as the tops of some of the front trees that are shorter than the ones in back.


Just a little more shadow areas are needed near the base, and I think that’ll do it for now.

Complete the Shading of the Mountain Drawing

Now that we have completed the line drawing of the mountains, the next thing to do is add some shading.

This is the same process that I used to draw the sky and lake in this boat drawing.

And that is how you draw mountains!