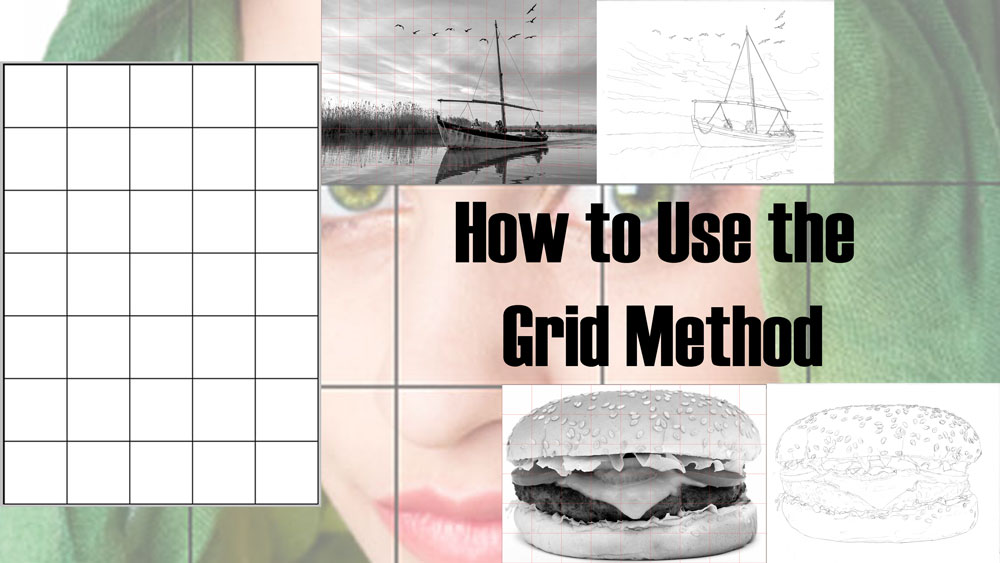
How the Grid Drawing Method Will Make You Have Improved Art
Though often considered a beginner’s tool, make no mistake about the grid. Both new and experienced artists utilize the grid drawing method!
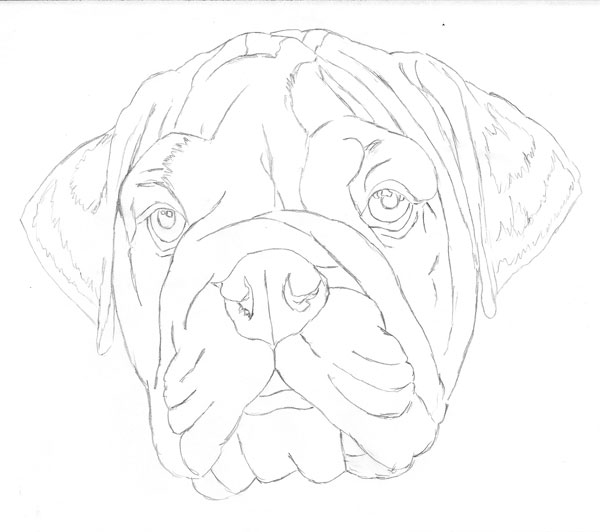
Drawing faces and other complex forms with correct proportions is one of the most difficult tasks for an artist.
Now, “complex” is relative and depends on the artist’s skill level. A simple bowl of fruit might be no problem for an experienced artist to sketch out by freehand. However, that same bowl of fruit will present much complexity to a beginner attempting to draw it.
Still, there might be valid reasons for that same experienced artist to want to use a grid to draw that same bowl of fruit. It depends on the goals an artist has for a particular drawing even more than the artist’s skill level.
The act of drawing takes practice and dedication, as well as an arsenal of tools and methods to help the artist complete a drawing more effectively and accurately. One of those tried-and-true methods that artists use time and time again is the grid method.
Table of Contents
What is the Grid Drawing Method?
The grid method is a method of defining proportion as you create your art. By drawing on a grid, the artist maintains correct proportions of a chosen subject.
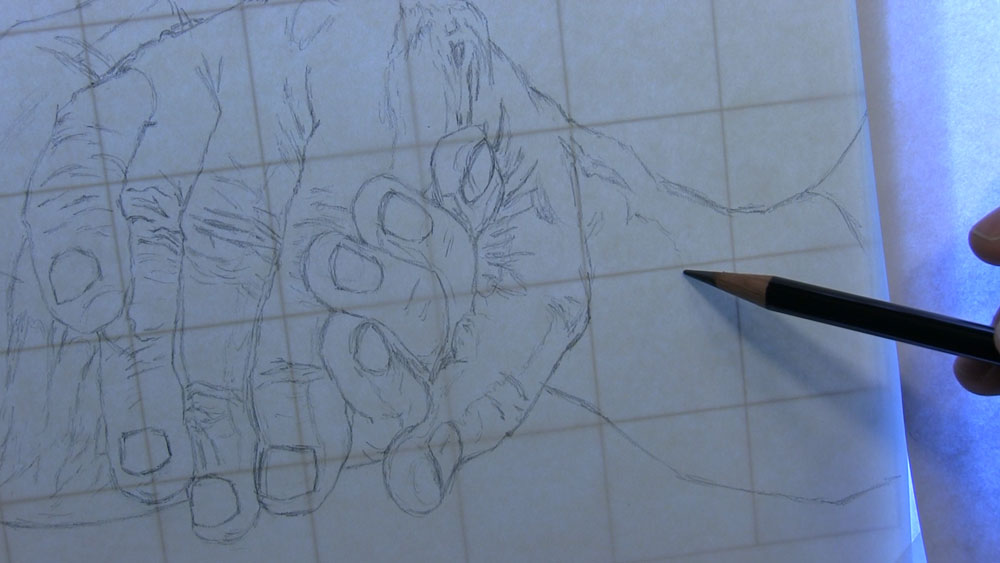
In a nutshell, the grid method involves placing a grid of squares over a reference photo and placing an identical grid of squares on your drawing paper. You then draw your subject by focusing on one square at a time and replicating what you see in each square.
By using the grid method correctly, every part of the subject will be properly sized and positioned on the paper.
If you are drawing with a grid and trusting the process of the grid method along the way, then you are removing the concern of having things look “off” in your drawing. The grid method allows you to get your outline onto your paper without constantly worrying whether you are maintaining proper proportions.
Preparation Steps for Using the Grid Drawing Method
If you’d like to try grid drawing out for yourself, there is a little bit of preparation involved. First, you will need to place a grid over your reference photo. Second, you will need a grid for your drawing paper.
Put a Grid on the Reference Photo
First, use a ruler and pencil to create a grid over the original image. Perhaps it is a photograph or a picture in a magazine. Make your grid in a comfortable measurement, like a half an inch or one-inch squares. If you don’t want to or are unable to draw a grid directly on the photograph, you can make a transparent overlay.
Better yet, make a grid on the computer over a digital image with a tool like Photoshop. If you prefer drawing from a phone or tablet, there are numerous drawing apps that allow you to place grids over photos.
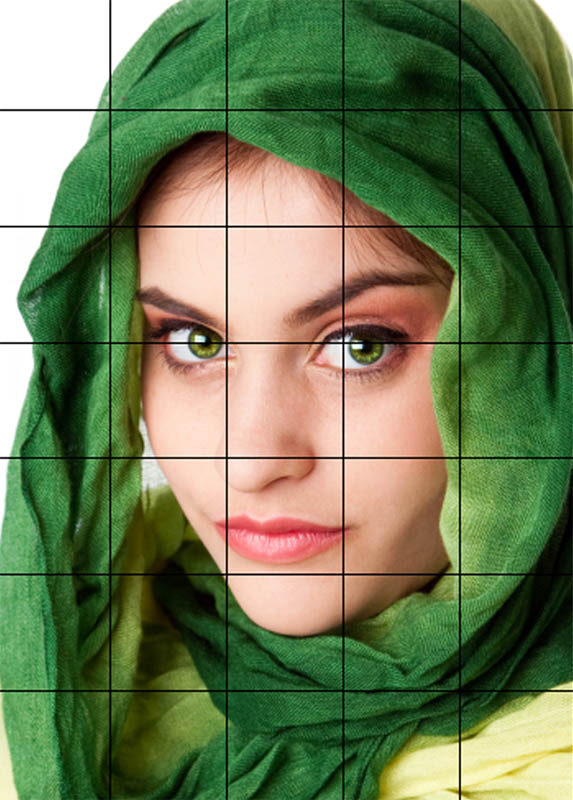
As for how many grid squares to create or how large or small the grid squares should be, it often depends on the subject matter and how much support you need with it. For simple subjects, you can create fewer squares, resulting in your squares being large. On the other hand, complex subjects might require smaller squares of a larger quantity.
Sometimes, you can do both. For instance, if you don’t have much trouble drawing a face but you struggle with drawing teeth, you can create a grid of large squares over the face and then divide the grid squares around the teeth into smaller squares.
Disclosure: The link below is an affiliate link. At no additional cost to you, I may receive a small commission if a purchase is made through this link. Learn more here.
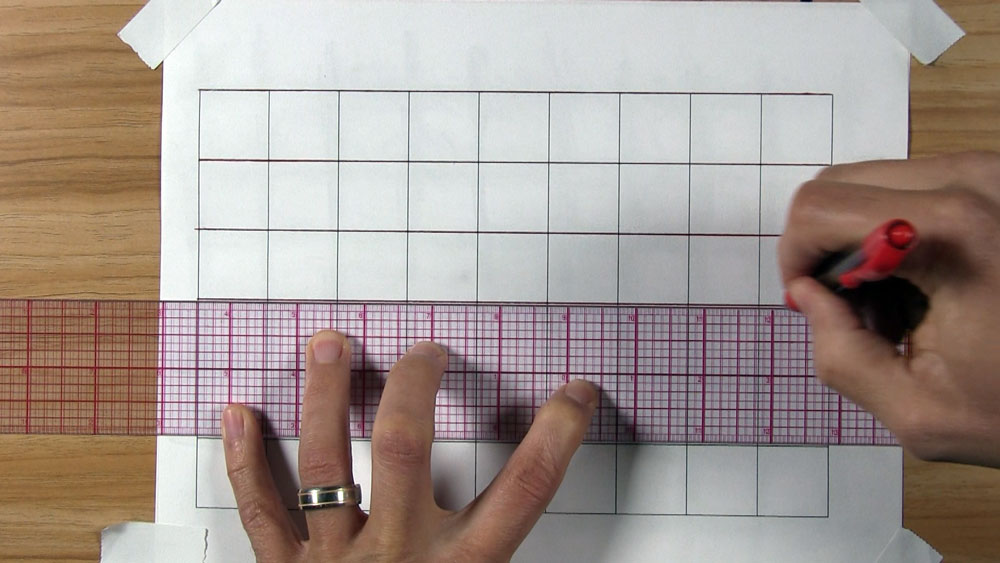
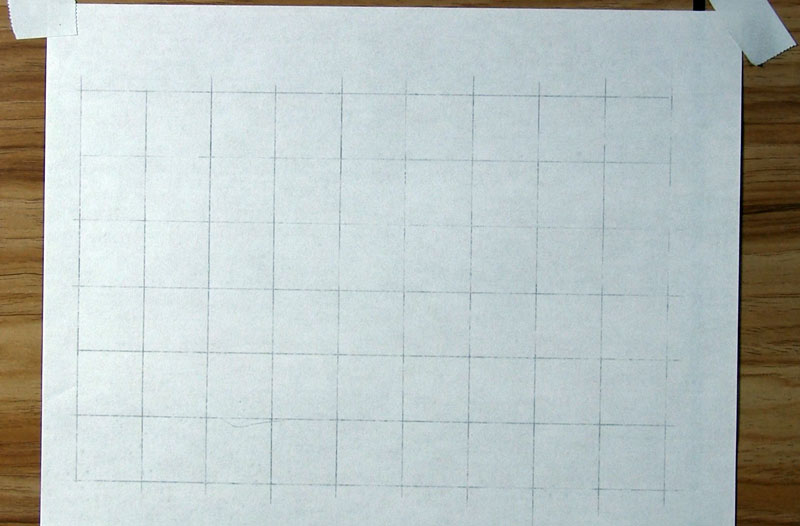
Put a Grid on the Drawing Paper
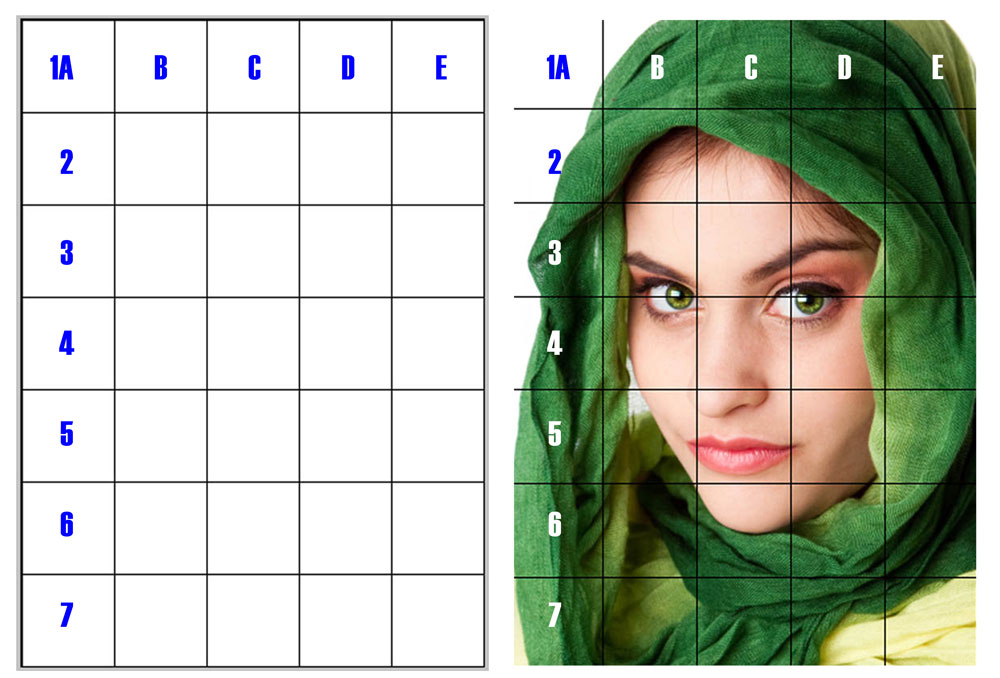
On your drawing paper, create a grid identical to the one on the reference photograph.
To keep your drawing the same scale as the reference, the ratio must absolutely be 1:1. That means if you used one inch for each grid square on your photograph, then you should use one inch for each grid square on the drawing paper.
Additionally, if your photo grid consists of 7 rows and 5 columns, then your drawing paper should have 7 rows and 5 columns too. Draw the lines in pencil. Use a very light hand while drawing the lines so they can be erased easily at a later time.

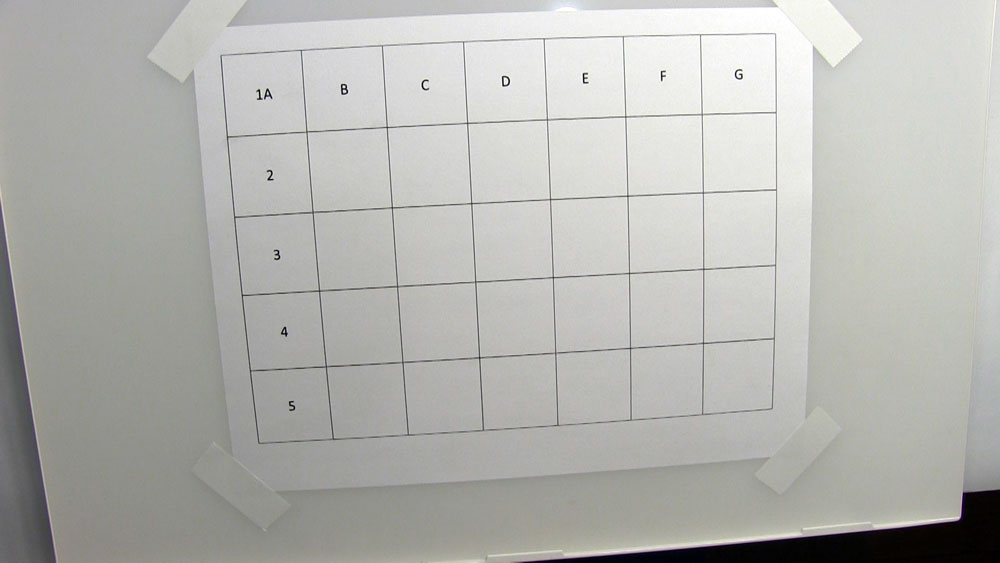
As an optional step, many beginners of the grid method find it helpful to label their grid with letters and numbers. They might pencil in letters along the grid squares on the top and numbers along the grid squares on the left side. Of course, if you do this to your drawing paper, it’s helpful to label your reference photo in the same manner.
Use the Grid Method to Guide Your Drawing
Now the drawing can begin!
A huge reason the grid method is so effective is because it trains you to draw only what you see, not what your brain thinks it sees.
Often times, when we draw something without the use of a grid, our brain plays tricks on us and we “see” something in our reference photo as being larger, smaller, longer, shorter, thicker, thinner, or whatever, than it really is.
The key to success with the grid method is to be objective and to draw what you see in a particular grid square as closely and as accurately as possible.
How to Draw What You See in One Grid Square
It is helpful to break a grid square into smaller, imaginary grid squares, and to use the edges and corners of a square as references to decide the best way to draw what is inside.
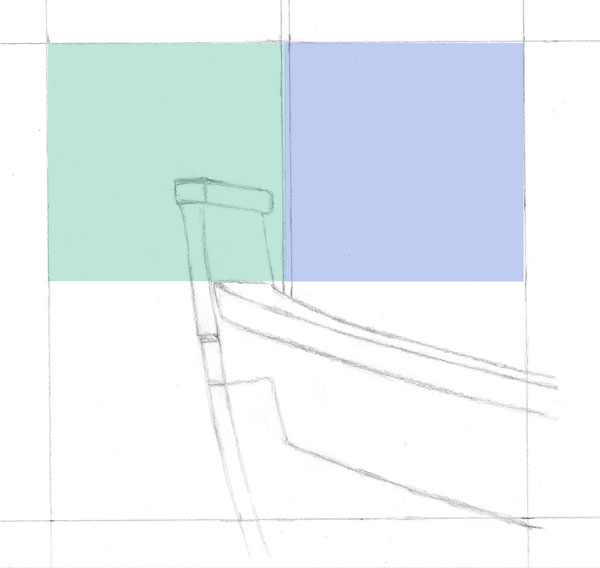
For example, let’s say you are trying to draw the bow of a boat as seen in this center grid square.
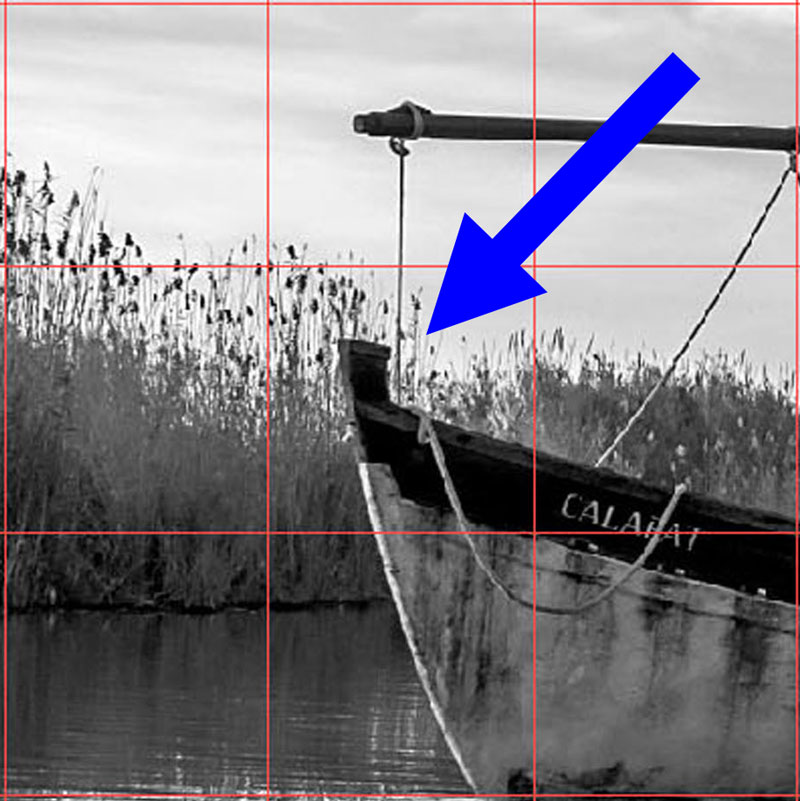
You might break the grid square into 4 imaginary smaller grid squares, as seen here:
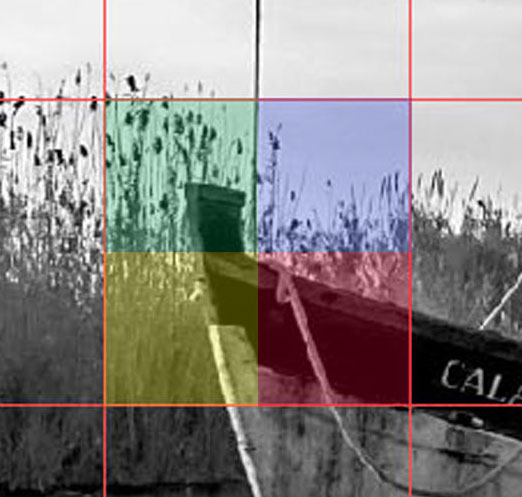
Then you might say, “I’m going to draw the front of the boat coming from the lower edge of the grid square, just a little left of the center.”
Afterwards, you might decide, “I’m going to bring this line up to this area of the smaller green grid square, close to its center.”
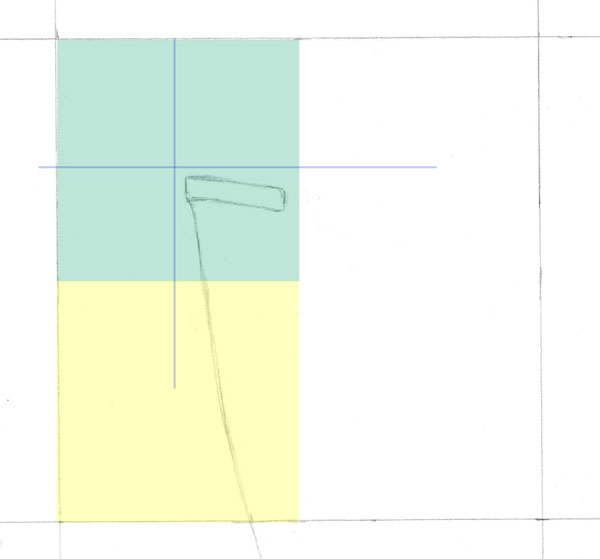
You would then continue to look for relationships between the grid squares and the lines you are drawing.
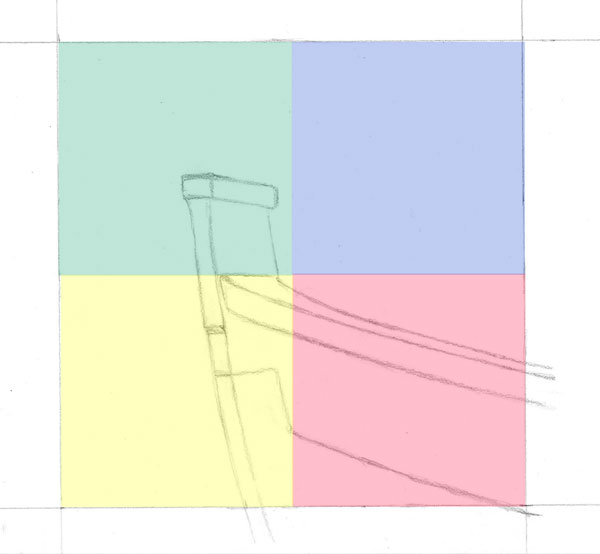
One clear example would be the vertical rope at the top of the grid square that clearly comes directly down the middle.
Another way to think of it is drawing “lines” in each grid square instead of drawing “objects”. That might help you to think more objectively.
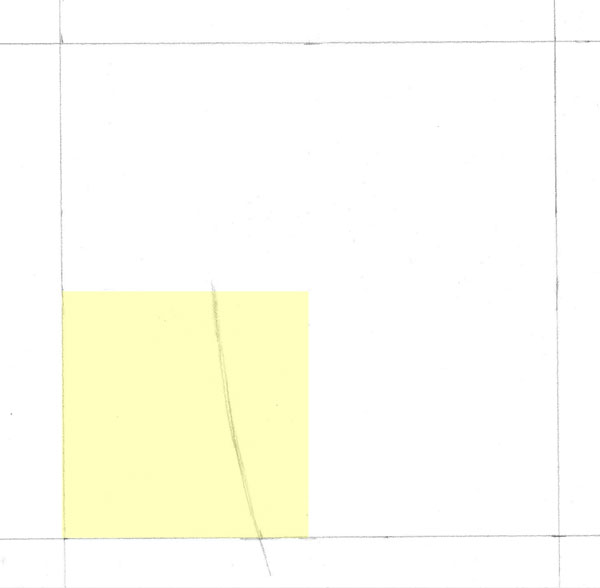
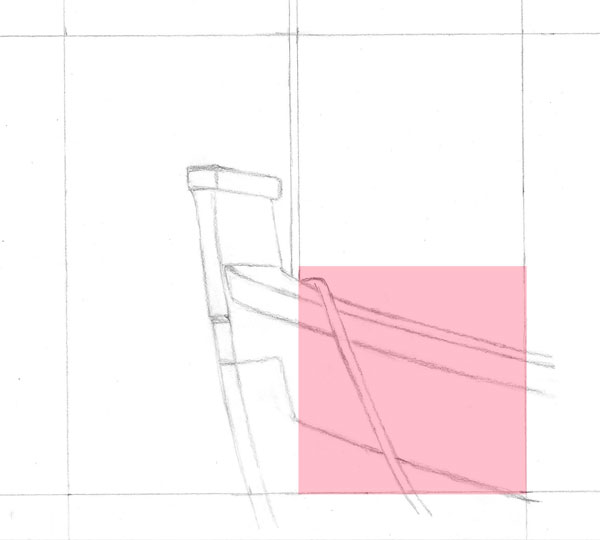
Here’s another example for drawing the rope hanging over the hull: “I’m going to draw these two lines very close together, starting from around the center of the grid square and exiting out of the lower edge between the halfway point and the lower right corner.”
There are a couple of ways to approach moving from one grid square to the next, and I think it’s a matter of preference as to which method you use.
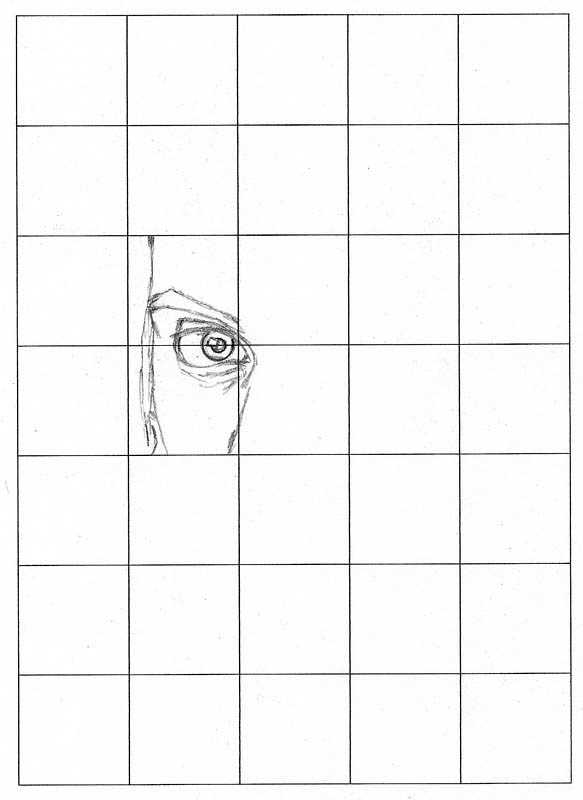
Method #1: Draw Your Subject One Square at a Time
Square by square, begin copying the master image to your drawing paper. This smaller area of focus keeps the process from being overwhelming. After all, you are not copying the whole reference photo. You are merely copying one square inch of it. It’s like the old adage “How do you eat an elephant? One bite at a time!”
Returning to our original reference photo, here’s how that process might look.
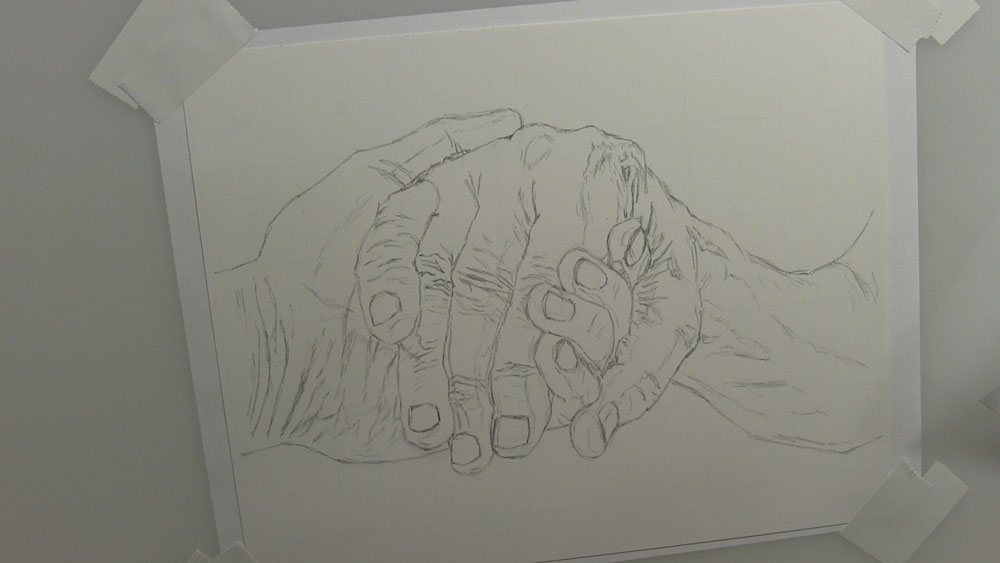
After working your way square by square, congratulations – you have a completed image!
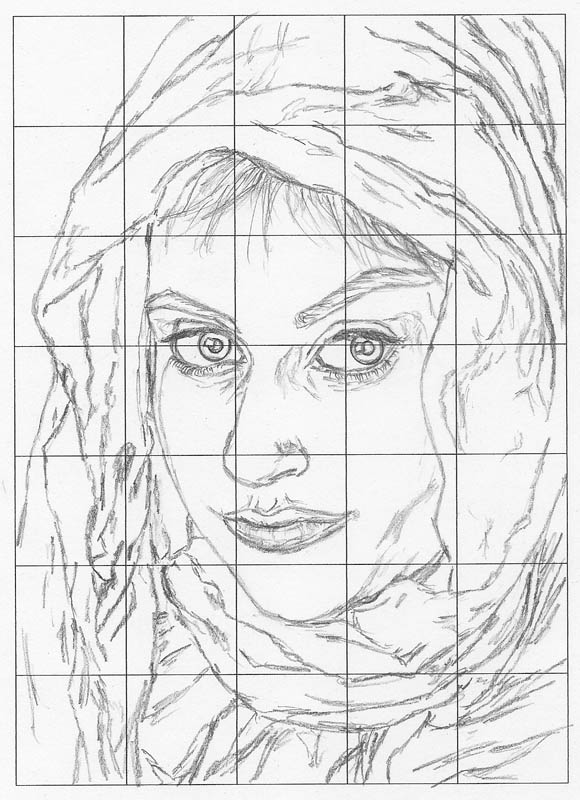
At this point, you will need to carefully erase your lightly-drawn grid lines. If you like, you may try your hand at shading or enhancing; that is, once you are comfortable with the act of copying.
Sometimes, you can erase as you shade. More on that a little later in this post.
Method #2: Draw Your Subject in Progressive Stages with the Grid as Support
Another approach to drawing a subject with a grid is to draw the same way you would probably draw the subject without one. You would just use the grid to support you as you go along.
Let’s say you want to draw this hamburger.
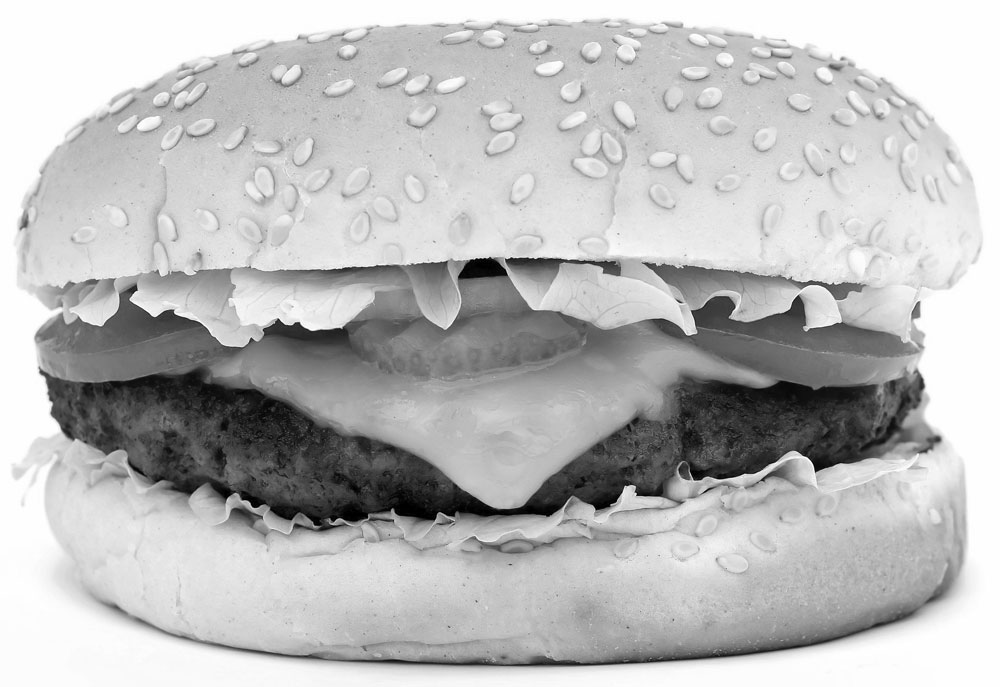
Most people would look at the hamburger and break it into smaller pieces. They would determine what the main components are (or ingredients or toppings 😊), and then they would draw the outline of one component before moving in a logical progression to the others.
You might begin by drawing the bun. Then you might draw the lettuce, the other toppings, and of course the burger patty.
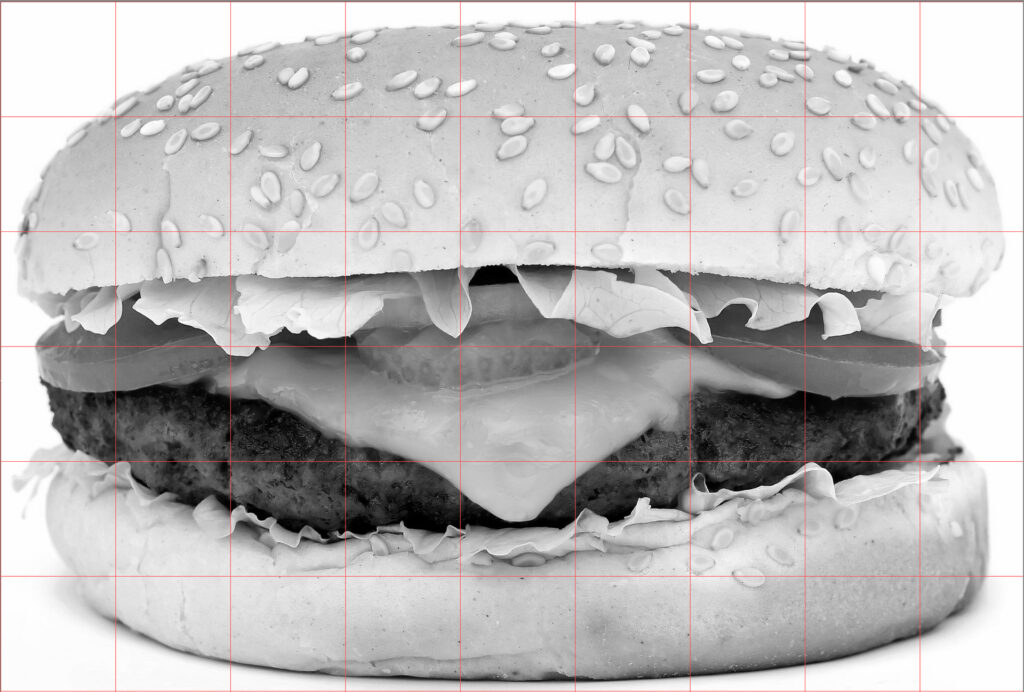
You can do the same thing with a grid. Only, rather than drawing everything in one grid square before moving on to the next square, you would draw one major part of the hamburger (like the bun), and you would use all of the necessary grid squares needed to draw that before moving on to the lettuce.

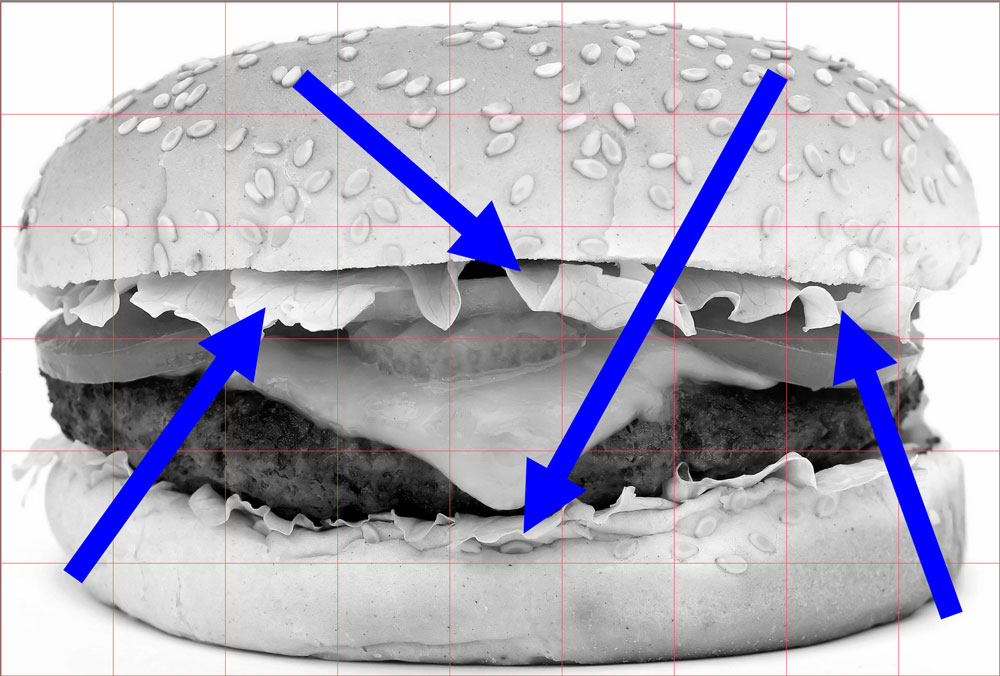
As a side note, when I drew this hamburger originally, I used a different method. Had I used the grid method, I would have had a much easier time plotting all of those sesame seeds!
Now in many instances, you will revisit grid squares you already worked in if they contain multiple parts of a subject.
For instance, some of these grid squares have the bun and the lettuce within them.
Disadvantages to Using a Grid on Your Drawing Paper (and How to Overcome Them)
The above methods require you to draw a grid onto your drawing paper. I used this method for many years with terrific results (and I still do occasionally), but it does have some distinct disadvantages.
First of all, you have to take extreme care to measure precisely when drawing your grid lines. They also need to be perfectly straight, parallel, and perpendicular to each other. If your lines are off, your drawing will be off too.
Secondly, once you take all that time to draw your subject just the way you want it, you have to go back and erase the grid lines. Even if you drew your grid lines lightly, there’s a chance that some of the grid lines will still be seen after you erase. What’s worse is you can accidentally erase small lines and details that are important parts of your final drawing.
Keep reading to discover some ways to overcome these drawbacks.
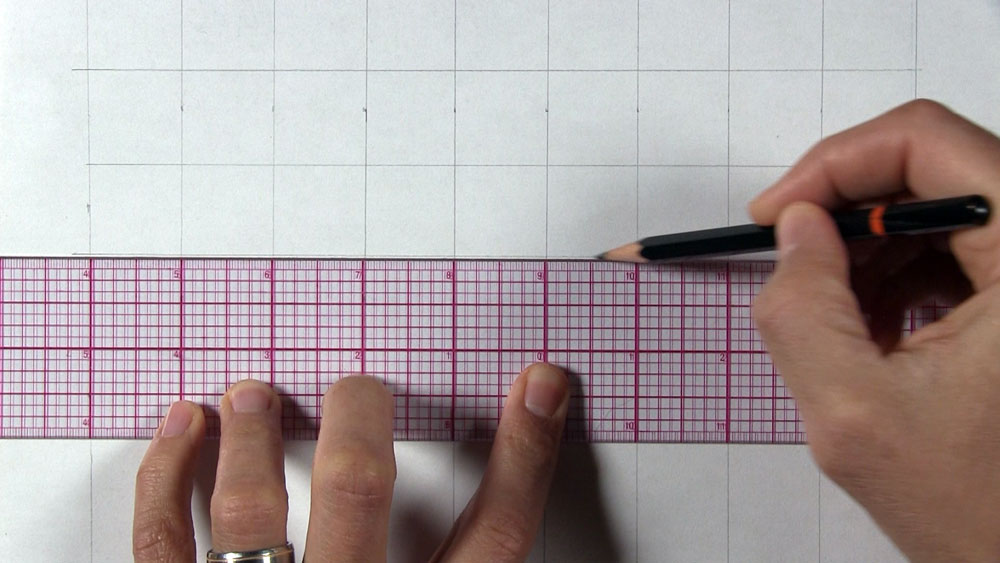
Use a Gridded Ruler
Affiliate Disclaimer: The link in this section is an affiliate link. I will receive a small commission if a purchase is made through this link. Learn more here.
When drawing the grid lines on your drawing paper, I recommend using a clear, gridded ruler, such as the one below.
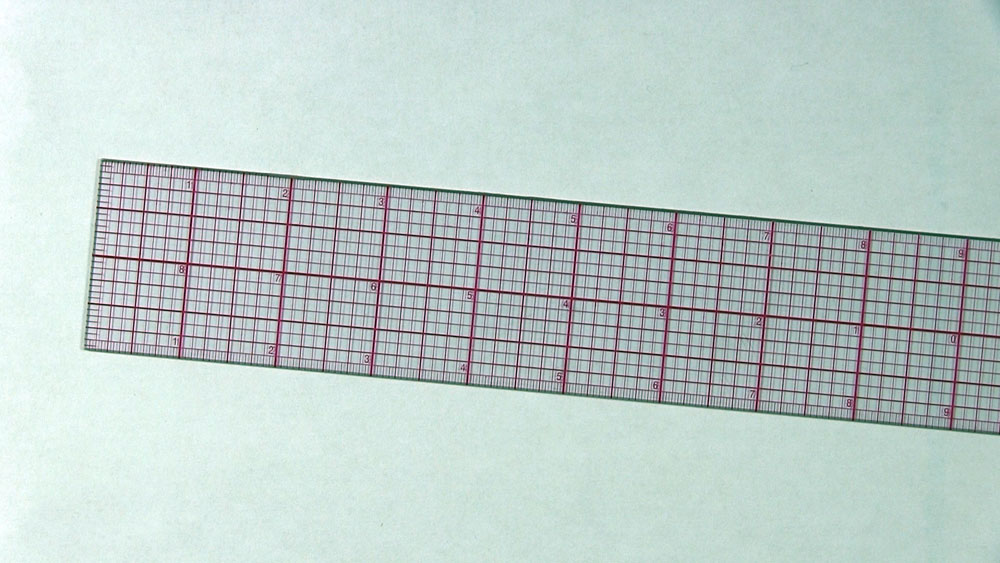
This ruler makes it much easier to draw an accurate grid on your drawing paper. You can see through the ruler to the drawing paper underneath and use the grid lines on the ruler’s surface to ensure you are placing parallel grid lines on your paper.
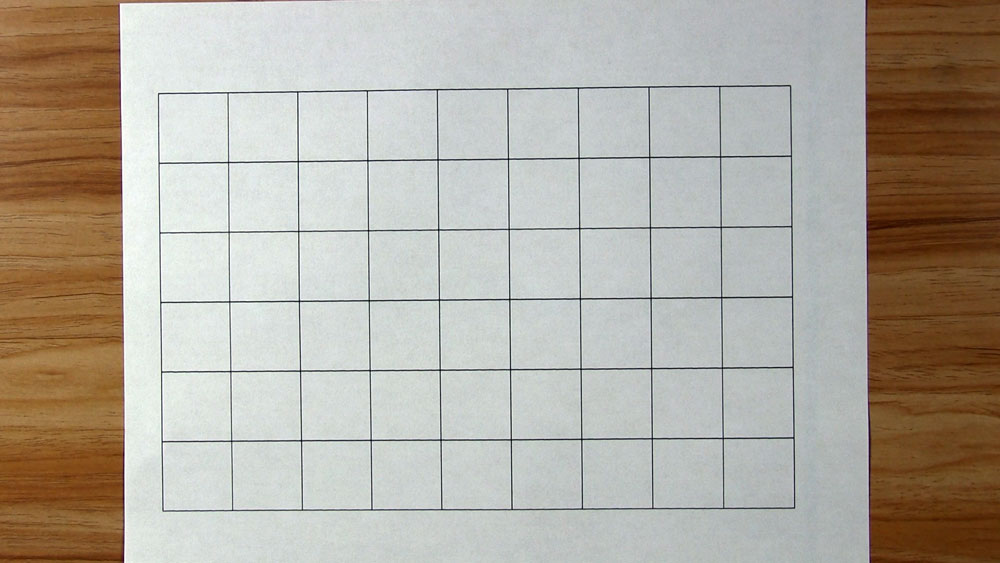
Use the Transfer Method and a Premade Grid
Assuming you have the means to make a blank grid on the computer, the means to print it out, and you want to make a drawing of the same size, you can move the printed grid onto your drawing paper with the transfer method.
First, create a custom grid with the proper measurements for your project on your computer. You can easily accomplish this with the table function on Microsoft Word, for example. Then print it out.
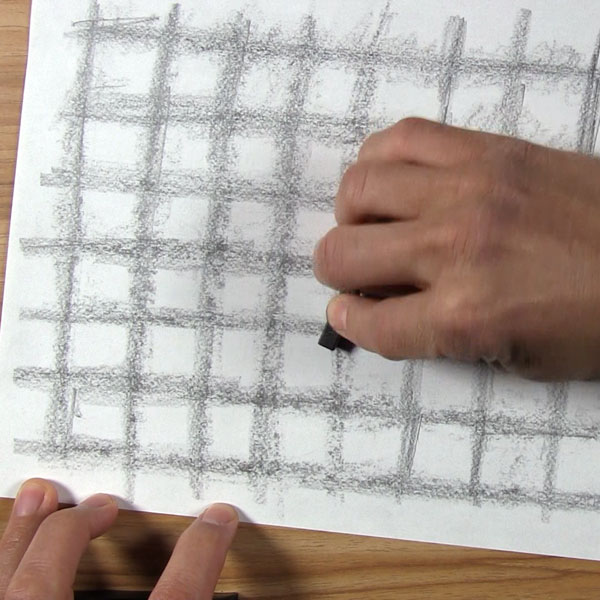
Next, flip the paper over and use a 2B graphite pencil or graphite block to shade the entire back surface. A better alternative might be to shade only along where the grid lines are, like this:
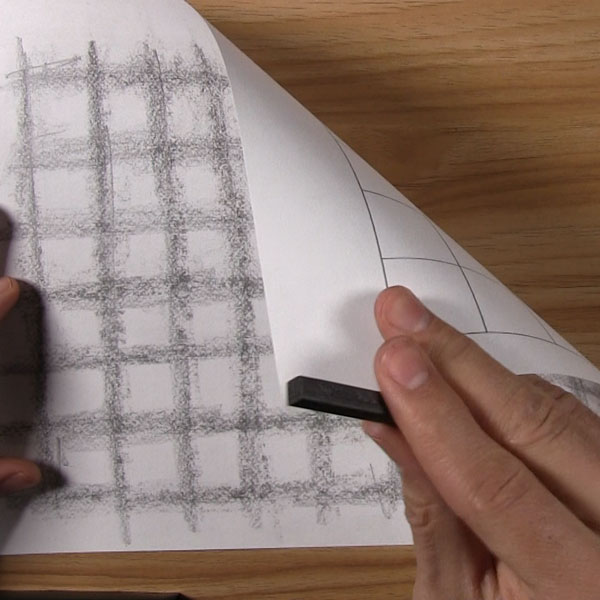
Then, place this paper on your drawing paper, secure it with artist tape, and use a ballpoint pen and a ruler to trace over the lines.
The graphite from the back of the paper will transfer onto the front of your drawing paper, like so.

Erase as You Go
Earlier, I mentioned that you can erase while you are shading your drawing. This is an excellent alternative to trying to erase all of your grid lines after you finish the line drawing and before you attempt any shading.
This is a similar approach to drawing everything you see in a grid square before moving to the next one. Rather than drawing the outlines, you will be shading.
After you have used a grid to complete your line drawing, choose one grid square. If you are right-handed, it’s often wise to start with the grid square at the upper left-hand corner of your drawing paper. If this grid square is blank (i.e., your drawing has a blank background), then begin with the first upper-left grid square containing a piece of your subject.
After you have chosen your grid square, erase any grid lines creating the border for that square. Then apply all of the shadows, midtones, and highlights that you can find within that grid square from your gridded reference photo.
Try to ensure that you have shaded the grid square as completely as possible before moving to the next one and repeating the process.
Use a Light Box
There is a method of grid drawing that is much easier than placing a grid directly onto your drawing paper. Here it goes…
First, create and print a custom grid from your computer as outlined earlier. Then tape this grid onto a light box.
Tape your drawing paper on top of the grid paper.
Turn your light box on. You will be able to easily see the grid squares showing through the drawing paper.
Draw your picture, one grid square at a time. When you are finished, simply turn the light box off. Presto! You have a perfect line drawing and no grid lines to erase!
Change the Scale of Your Drawing
Often times, you will want to draw something on paper that is a different size than your reference photo. Of course, you will want to keep the same ratio.
Let’s say your original photograph is 5″ x 7″, and you want to create a 10″ x 14″ drawing. Just use the same aspect ratio. Create a grid on your original of so many squares, each of, say, one inch. Then on your larger drawing paper, use an equal number of squares, measuring double the size – 2 inches.
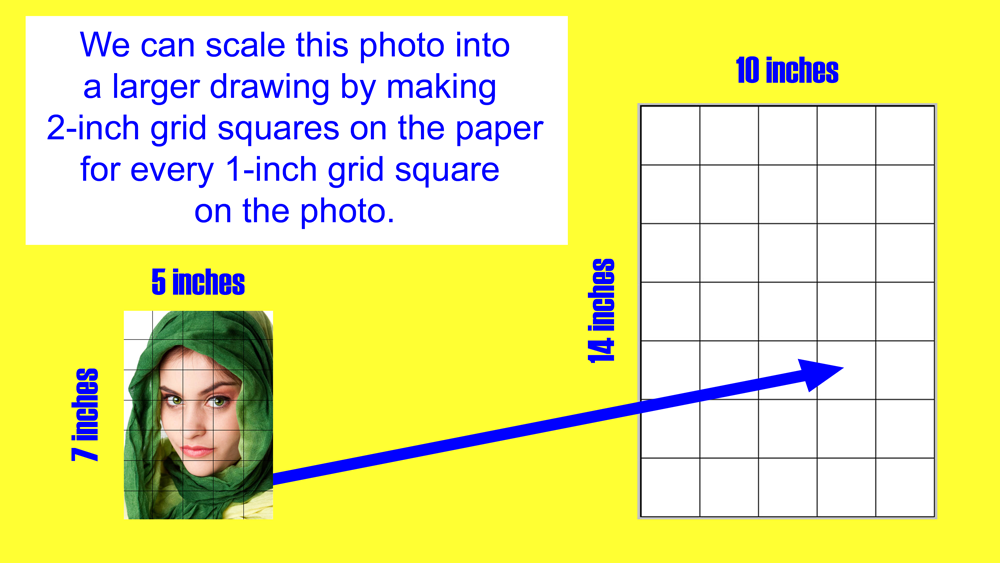
By keeping the ratio consistent, the drawing remains the same, only the size changes. Math and art – what a combination!
Use the Grid Method to Draw Better Freehand
I drew by freehand for nearly 20 years before I even heard about the concept of grid drawing. Aside from tracing, I thought freehand drawing was the only way to draw.
However, once I discovered what I could achieve by using the grid method, it was a huge “a-ha” moment for me!
Before using the grid method, that 20 years of experience did help me to create some decent drawings. Still, the grid method allowed me to take my drawings to another level, and it does the same today by ensuring a more accurately proportioned outline.
Even better, when I began drawing with a grid, I felt it helped me to better develop the way I perceive things spatially during those times I drew without a grid.
The grid method opened my eyes by getting me in the habit of looking for relationships in how different parts of my subject align with each other, either vertically or horizontally.
Now, whenever I draw by freehand, it comes easier to me because I look for those invisible gridlines whenever I can. I look for opportunities to align something, for example, on the left side of a photo with something on the right.
I still draw freehand very often, and I think every artist should do so in order to grow.
Allow the occasional use of the grid method to help you grow and develop your skills and your hand-eye coordination so you can draw without one with less effort. As wonderful as the grid method is, don’t allow it to become a crutch.
You Are in Good Company
Grid drawing is a very old, very powerful tool for accurate drawing, employed by the likes of Leonardo da Vinci and Johannes Vermeer. Da Vinci’s Vitruvian Man is a classic example of using a mathematical formula to draw the human form with great accuracy.
So don’t feel that it’s an amateur’s cop-out or cheating, just because it seems so simple. Sometimes it’s the simplest methods that produce the greatest results. Get started with the grid drawing method today and create your own art masterpiece!