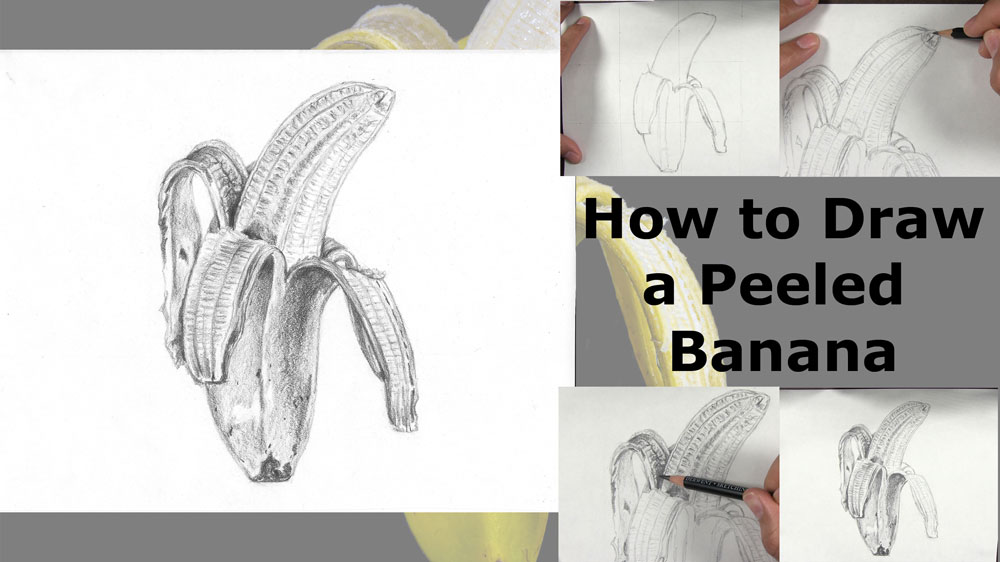
How to Draw a Peeled Banana
A banana is a fairly simple fruit and is not too difficult to draw; that is, if you are drawing a banana with an unopened peel. But how do you draw a banana that has been partially peeled?
Although there are more steps involved, you should not have much more difficulty drawing a peeled banana than an untouched one. Of course to make your banana (or any other drawing) look realistic, you should add extra details and shading, which require additional steps too, but nothing an aspiring artist such as yourself cannot handle!
Keep reading to learn how to draw a peeled banana!
Table of Contents
Use a Reference Photo of a Peeled Banana
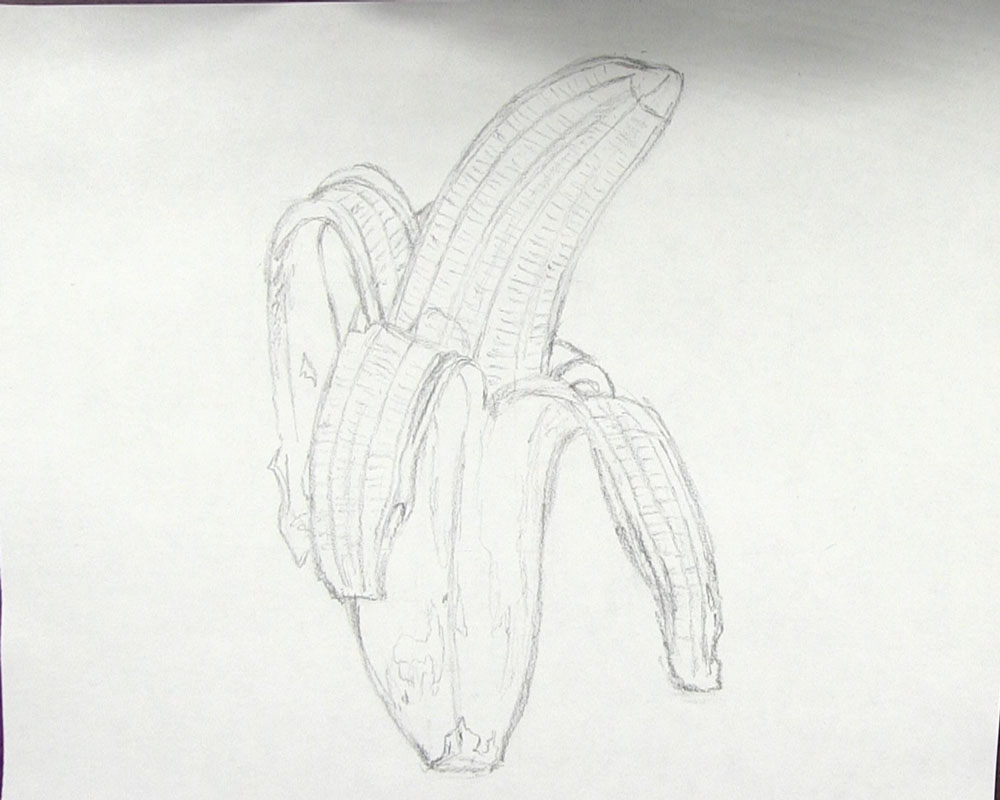
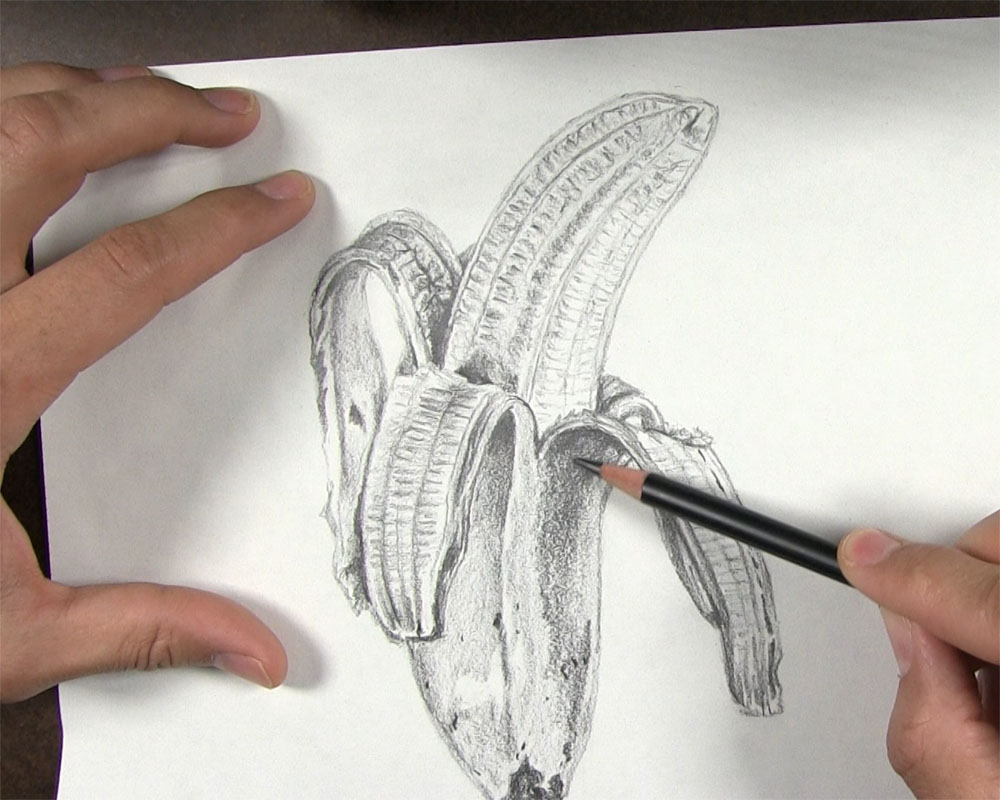
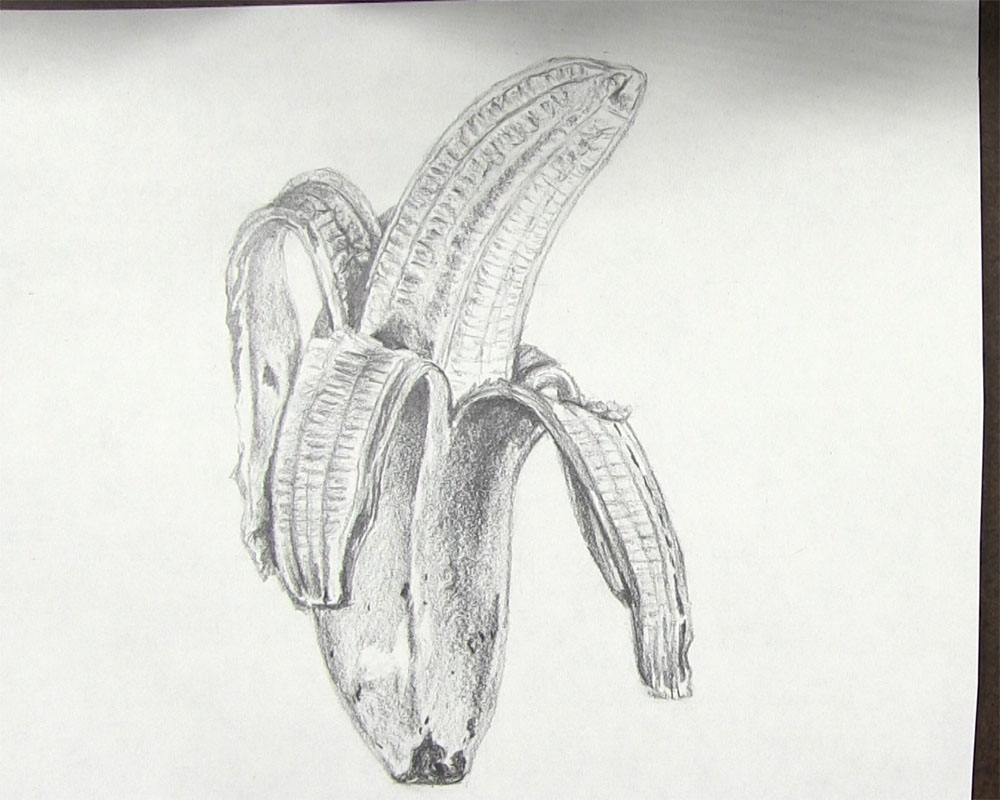
The reference photo I used for this tutorial is this banana that is halfway peeled.
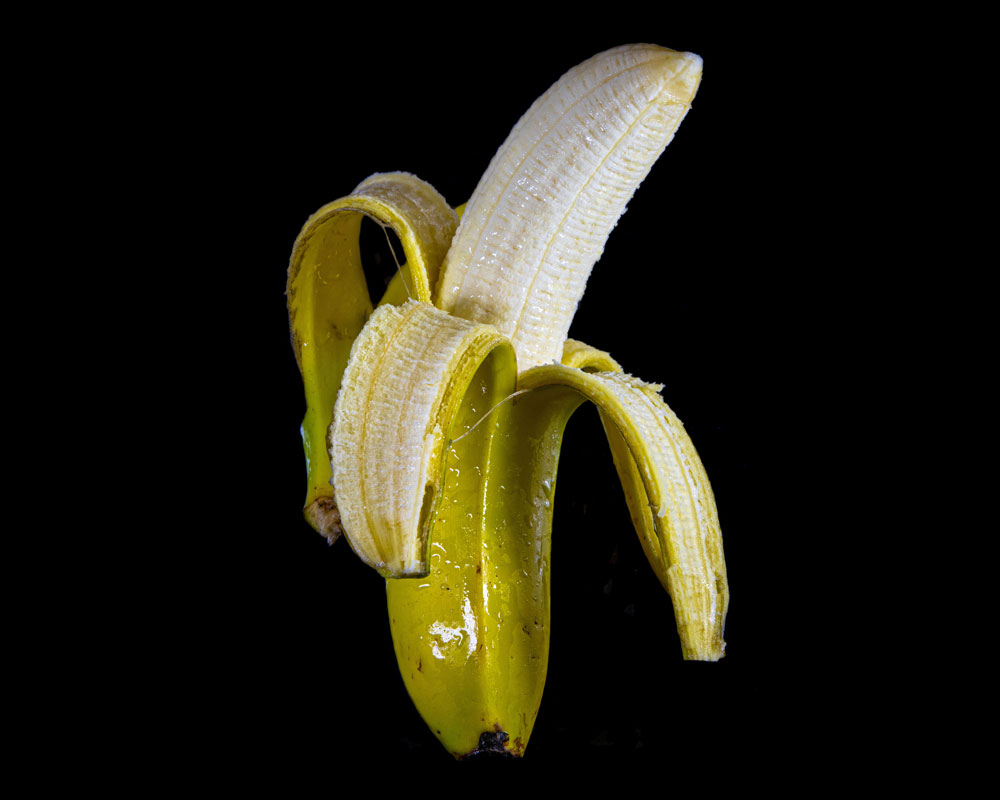
I feel like this subject strikes a nice balance between being simple enough yet a little challenging too. After you complete this tutorial, you can use a different photo or even a peeled banana from your kitchen and apply the same methods to make another banana pencil drawing.
Materials Used for This Drawing
Here is a list of the materials I am using for this drawing.
If you don’t have some of these materials, that’s okay. You can still make do with a regular pencil and eraser, as long as you just get started!
If you wish to purchase any of these materials, they can be found at your local art store, or you can buy them using the links below.
Affiliate Disclaimer: The links on this page are affiliate links. I will receive a small commission if a purchase is made through one of these links. Learn more here.
- HB, 2B, and 4B graphite pencils
- 8” by 10” drawing paper
- Ruler
- Plastic eraser
- Kneaded eraser
How to Draw a Peeled Banana Video Tutorial
You can watch the time-lapse video version of this tutorial below. Watch it once all the way through to get a sense of the overall process. Then watch a second time and draw along with me, pausing as needed.
Set Up a Grid on the Drawing Paper
Since we are using a grid for this drawing, the first step in drawing our peeled banana is to place a grid on the drawing paper. The grid consists of 3 x 3 squares. Therefore, we need to place a square grid on the paper. Since my drawing paper is 8 inches by 10 inches, I am going to draw a vertical line on the right side of the paper that is two inches away from the edge. The resulting square on the left will be the border for the grid.
If we wanted to be very general about our banana and make a basic sketch, there wouldn’t be a need for precision in our measurements. You could make approximations with your grid lines and the resulting banana outline would most likely still be sufficient. Nevertheless, let’s still use a ruler for a better outcome. Make two horizontal lines spaced 2 and 2/3 inches apart. By the way, two-thirds of an inch is roughly equivalent to 11/16ths of an inch.
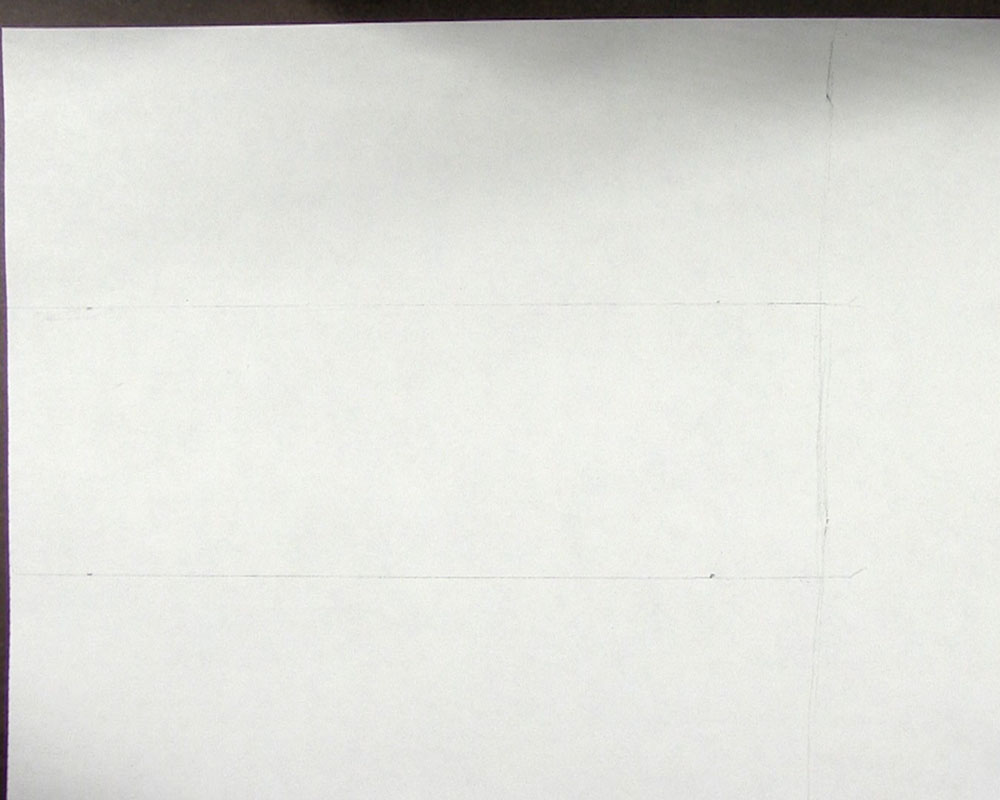
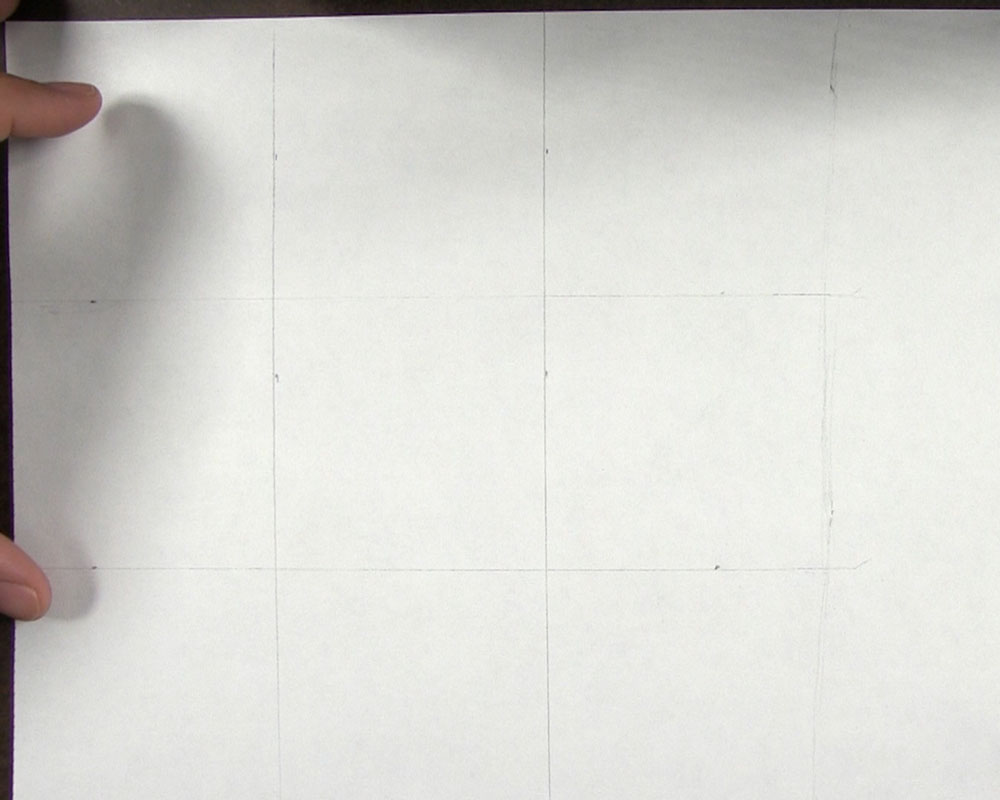
After that, make two vertical lines that are also spaced 2 and 2/3 inches apart. This will give you a simple grid of three squares by three squares.
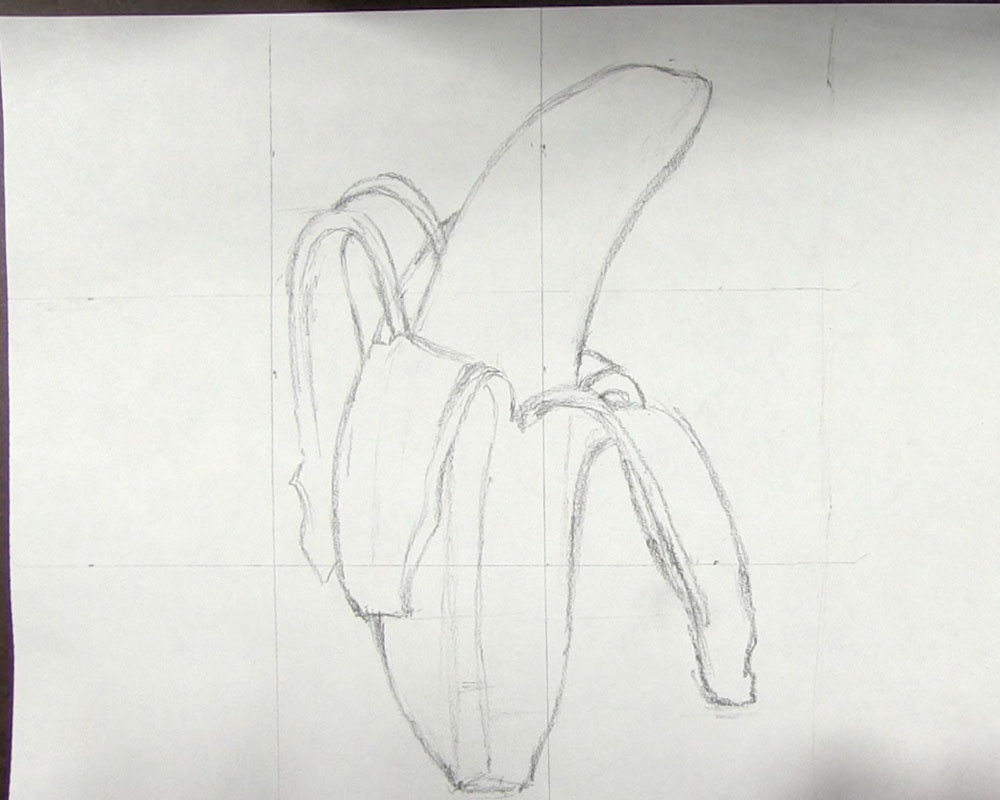
Draw the Top of the Banana and the Center Peel
Begin by drawing the outline for the fleshy part of the banana. I started by making a V shape near the top of the center grid square. This V shape represents where the left peel meets the left edge of the fleshy part. Then extend the banana shape into the grid squares above. For this step and the remaining steps of this tutorial, use your grid squares as a guide to help you decide the proper placement of the lines within each square. Finish the outline of the exposed banana by rounding out the tip and bringing the right edge down with a curvature similar to that of the left edge.
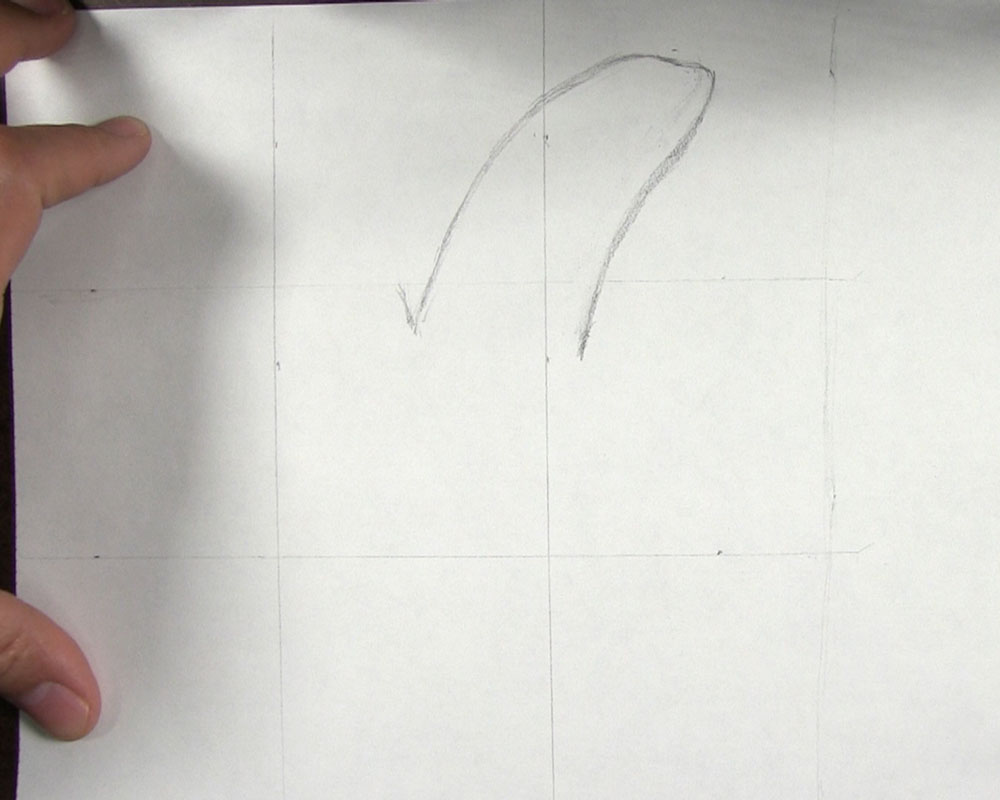
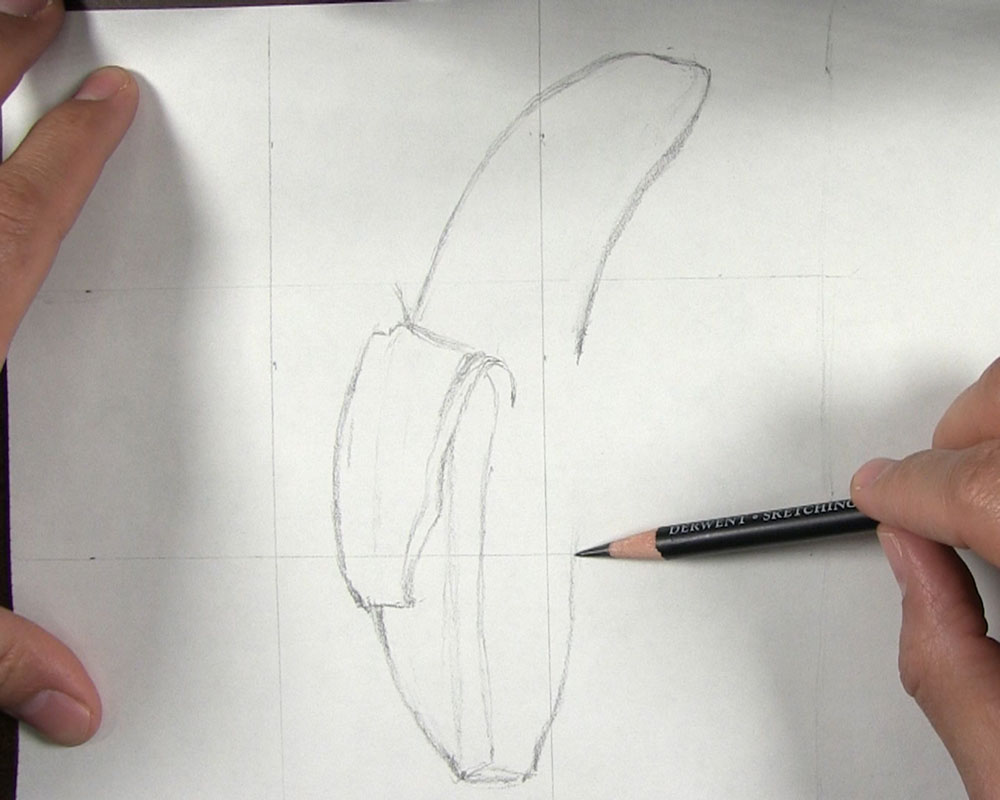
For the sake of simplicity, I will refer to the folded-over peels as the left peel, center peel, right peel, and rear peel for the remainder of the tutorial. Let’s draw the outline of the center peel of the banana first. Sketch the top edge with a short line that is almost horizontal but has a slight downward slope. From this line, sketch a line going downward for the right edge of the center peel. Bring this line down to just below the bottom edge of the center grid square. Then draw a line for the bottom edge. This line should be shorter than the top edge. Finish the outline with a curved line for the left edge. Additionally, sketch a line on the peel close to the right edge. This line shows where some of the flesh is still attached to the inside of the peel.

Draw the Bottom of the Banana and the Right Peel
Draw a vertical line with a slight curve from where the center peel is hanging to where the bottom of the banana will be. This line represents the crease where the edges of the center peel and the right peel meet. Next, sketch a very short triangle for the bottom of the banana. After that, begin to form the right edge of the banana. Make sure the edge is mostly aligned with the edge from the top of the banana but ever so slightly to the right of it. Draw another vertical line to the left of the crease for a shadow. Finally, draw the left edge with a curved line from the bottom of the banana to the bottom of the center peel. Again, make this one slightly left to the edge of the banana flesh.
Bring up the line for the right edge of the banana. Then draw lines curving downward to form the left edge of the right peel. Take one line all the way beyond the lower edge of the center peel. Round out the bottom and begin forming the right edge of the right peel. Along the left side of the peel, draw a line to show where flesh is attached to the peel’s inside. We can also draw the visible portion of the rear peel while we are here. Finish the right peel by completing the right edge and drawing a curve on the underside. Sketch a light line from the banana flesh downward to make sure the hidden edible part is properly tucked behind the peel. As a side note, I will occasionally refer to the fleshy part of the banana as the edible part, since that is what most people eat, even though people sometimes eat the peel too.
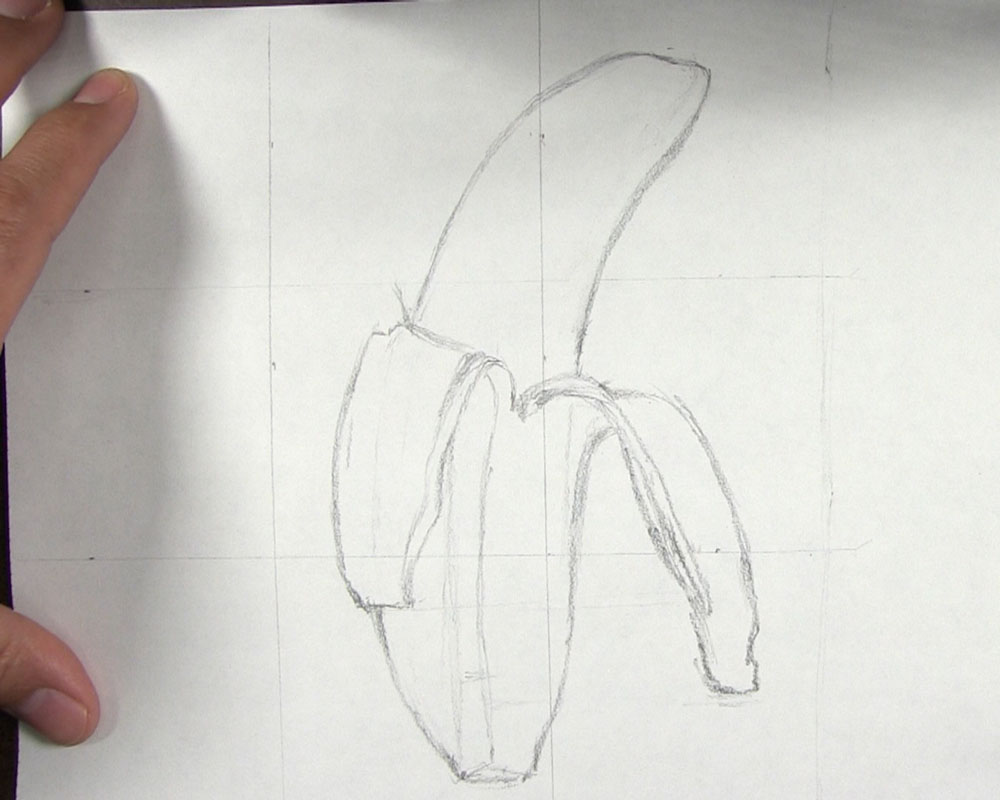
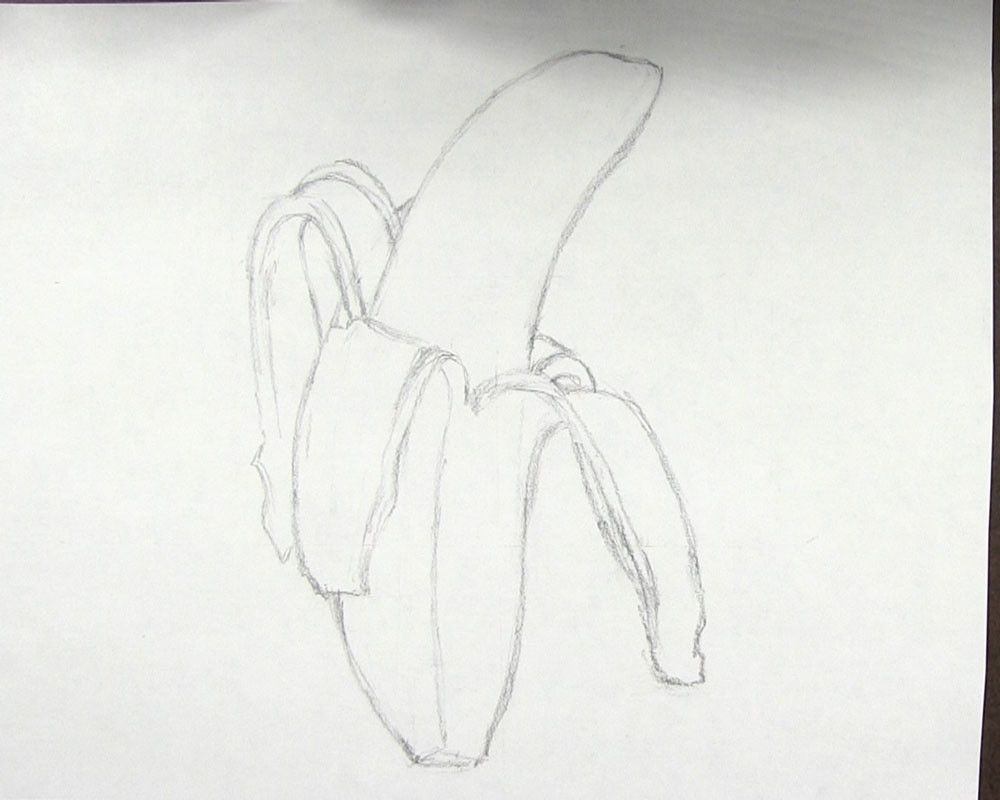
Finish Drawing the Basic Outline of the Peeled Banana
For the rear peel, there’s not too much we can see. We already drew some of the edge in the previous step. For the top, draw two curved lines just above the right peel. Then draw a line from the top of the curve to the banana flesh.
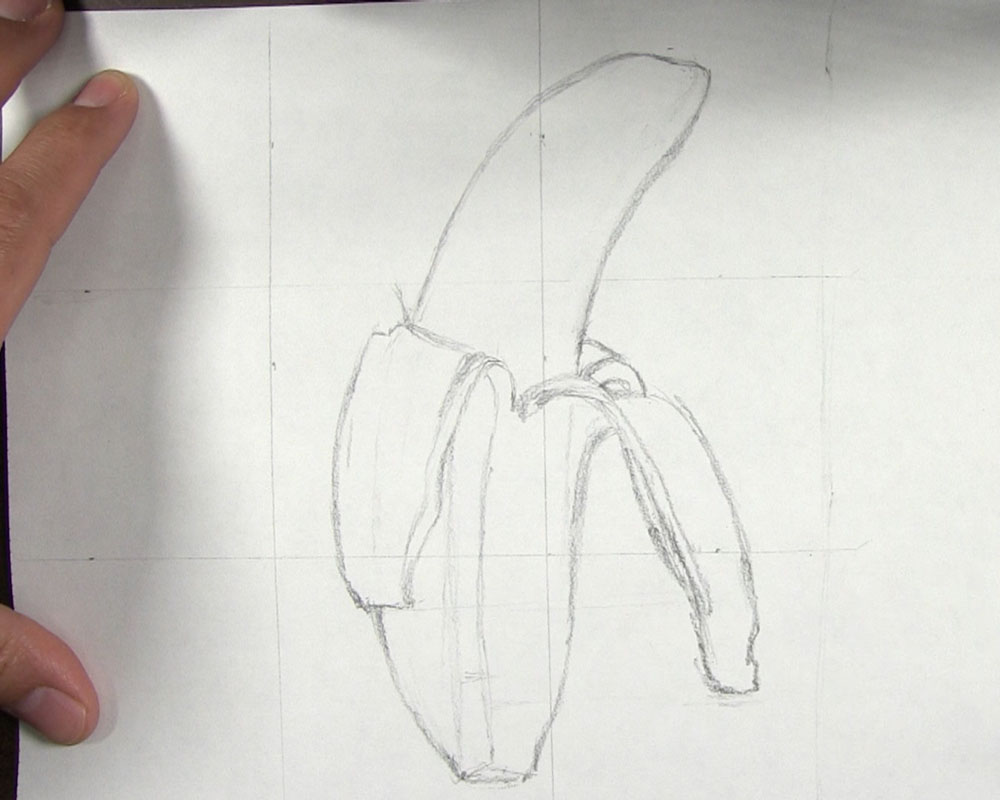
Now, draw the left peel by using steps similar to those we used to draw the center and right peels. Use curved parallel lines along both edges of the peel to show the flesh attached to the peel’s inside. Bring the bottom of the peel down to just above where the bottom of the center peel is found.
Now that we have a basic sketch of our banana drawing on the paper, we can erase all of the grid lines. Be careful to keep the outline of the peeled banana intact. You can use a plastic or standard eraser for the open areas and a kneaded eraser to get the tighter areas.
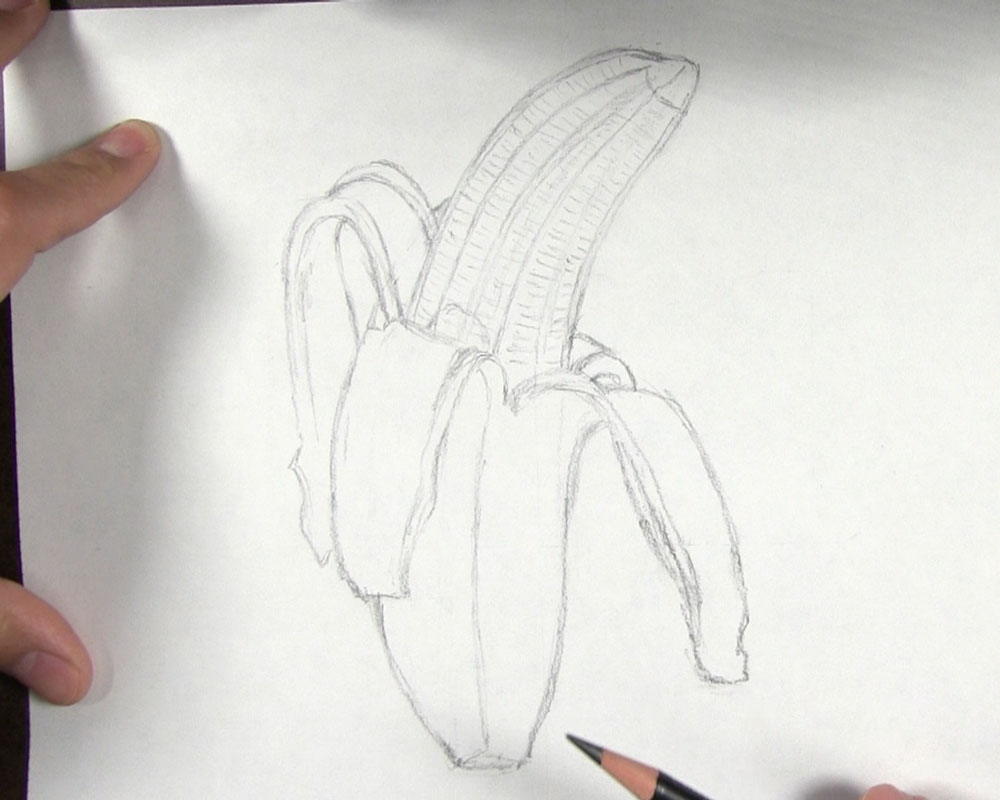
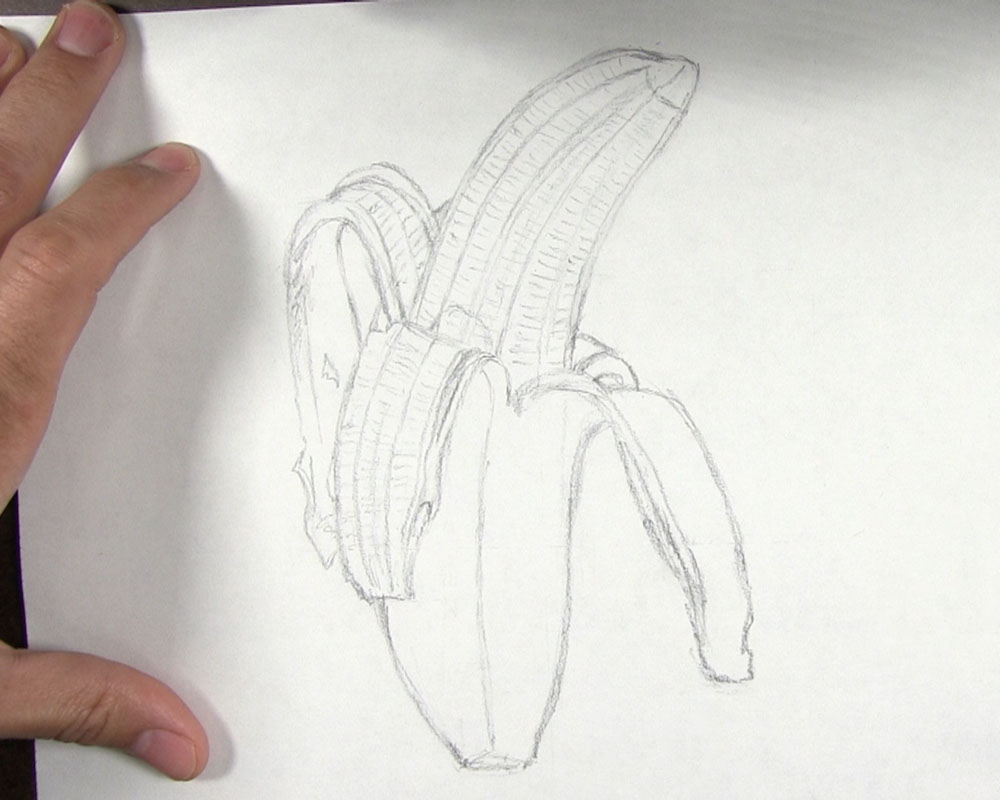
Draw Extra Details on the Top of the Banana and the Peeled Left Side
Now let’s draw some additional details to our basic banana outline. Start with a curved line around the tip. Then make a vertical line from the tip to the base of the flesh. This vertical line should follow the curvature of the banana. Draw two more curved vertical lines very close to each edge. Then draw a few more in between. After that, draw short lines that make the horizontal ridges on the surface of the banana’s flesh. Finish up with an outline of a shadow just above the center peel.
On the left peel, draw a line curving along the center of the inside. Then draw the short horizontal ridge lines on each side of the center line. On the outer surface of the peel, draw the outline of tiny brown spots along the left edge and a few larger spots near the bottom and center.
Create Extra Details on the Rest of the Banana Line Drawing
Now let’s look at the center peel. Sketch an outline of some spots along the right and lower edges. Then draw two vertical lines on the inner surface of the peel, which happens to be facing us. These vertical lines should curve along with the shape of the peel. Draw a third line down the center, but make this line much lighter than the first two. Add the short horizontal lines between the vertical lines to finish the center peel.
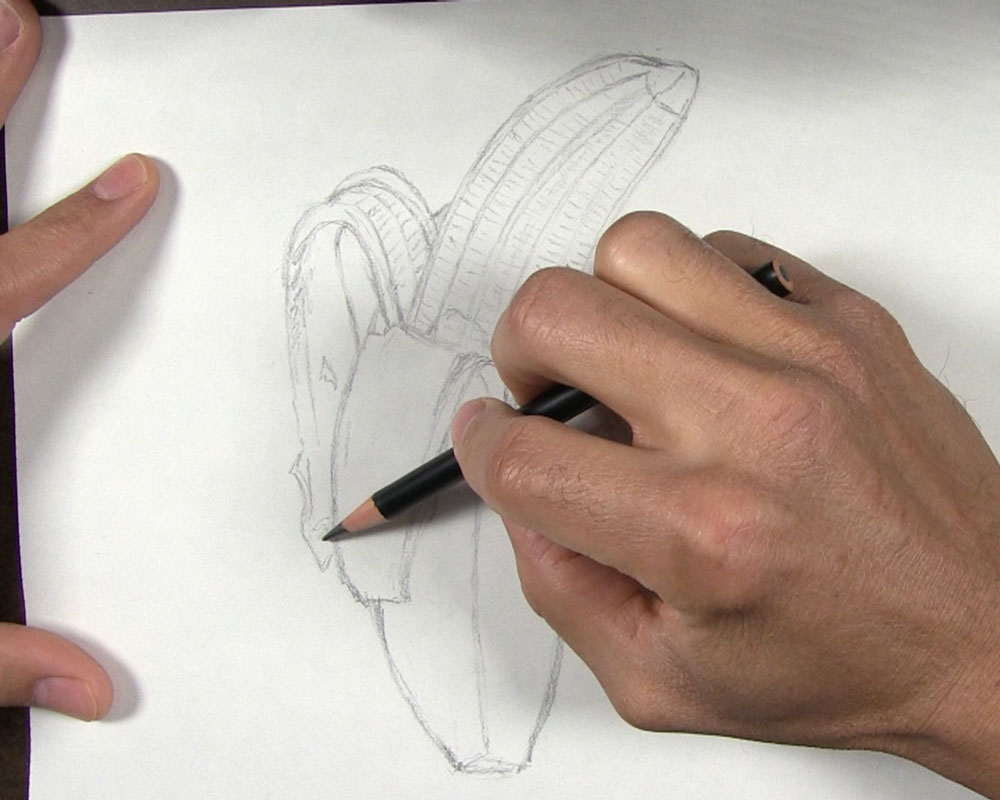
Just as we did for the other peels, draw two vertical lines curving down the inner surface of the right peel. Then draw the short horizontal ridge lines between the longer vertical lines. You may want to add spots, tiny tears, or other embellishments along the edges of this peel too.
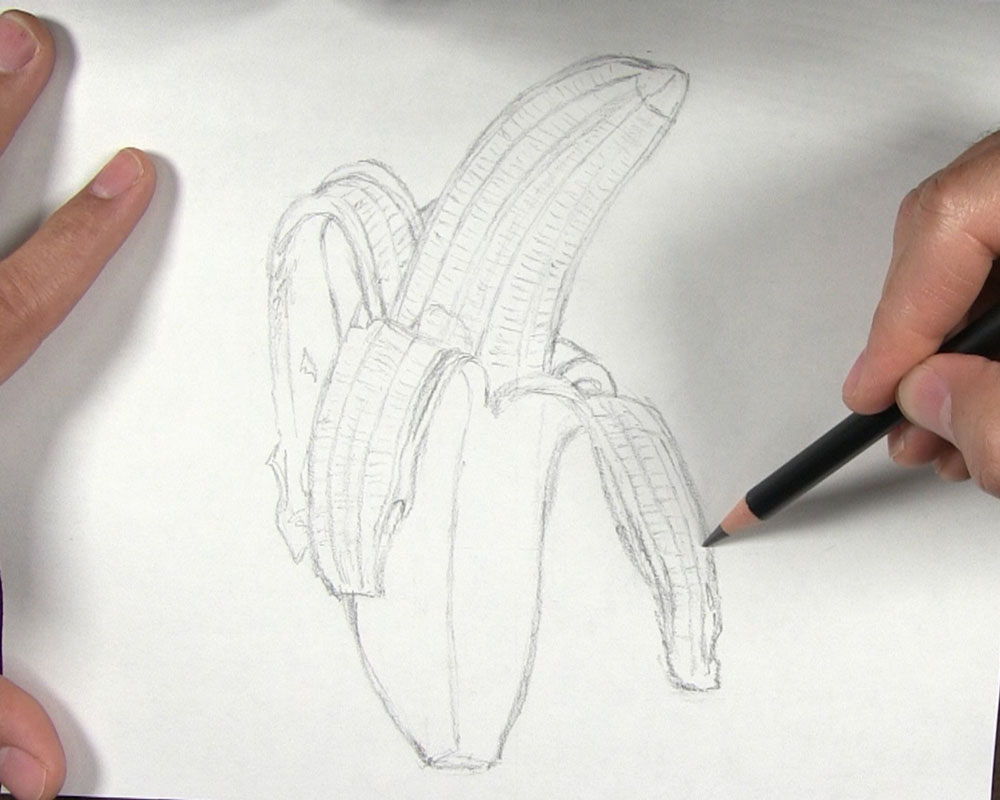
Next, we have the outer surface of the center and right banana peels. Begin by sketching the irregular shape of the brown spot at the bottom of the banana. Draw a few dots for the tinier spots found above the bottom. The reference photo shows some water droplets on this banana peel, but I’m not including the droplets in this tutorial. Instead, draw the shape of the highlight near the bottom and the shadows on each side. Now we are left with a detailed line drawing of our peeled banana!
Shade the Flesh of the Banana
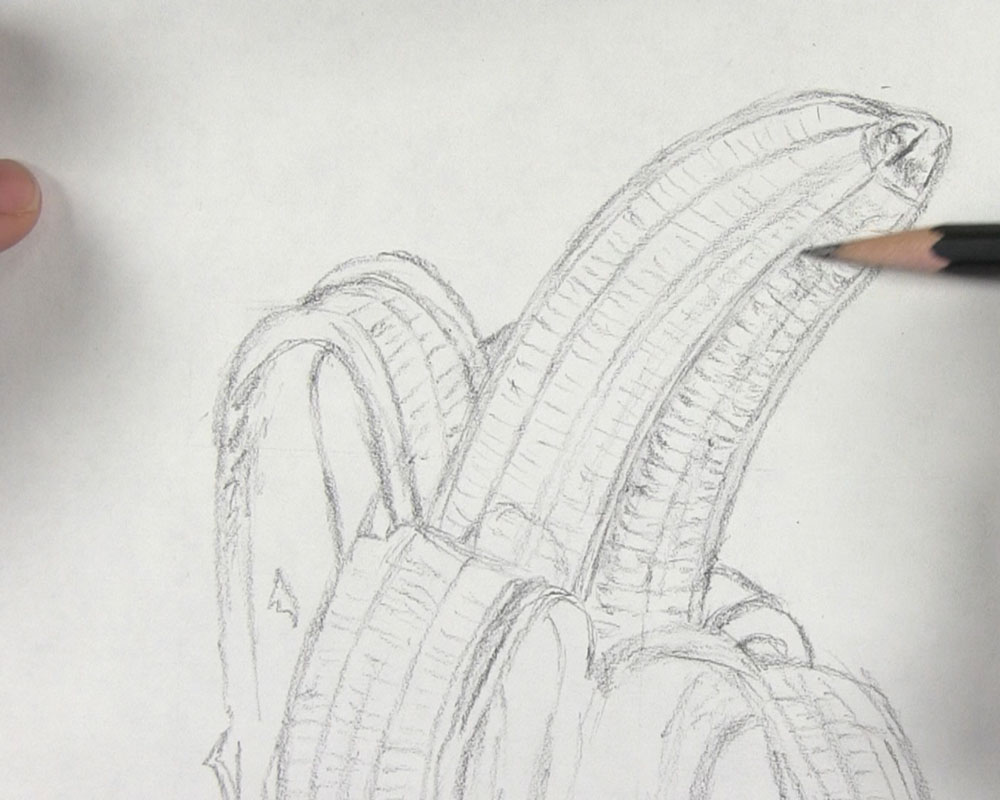
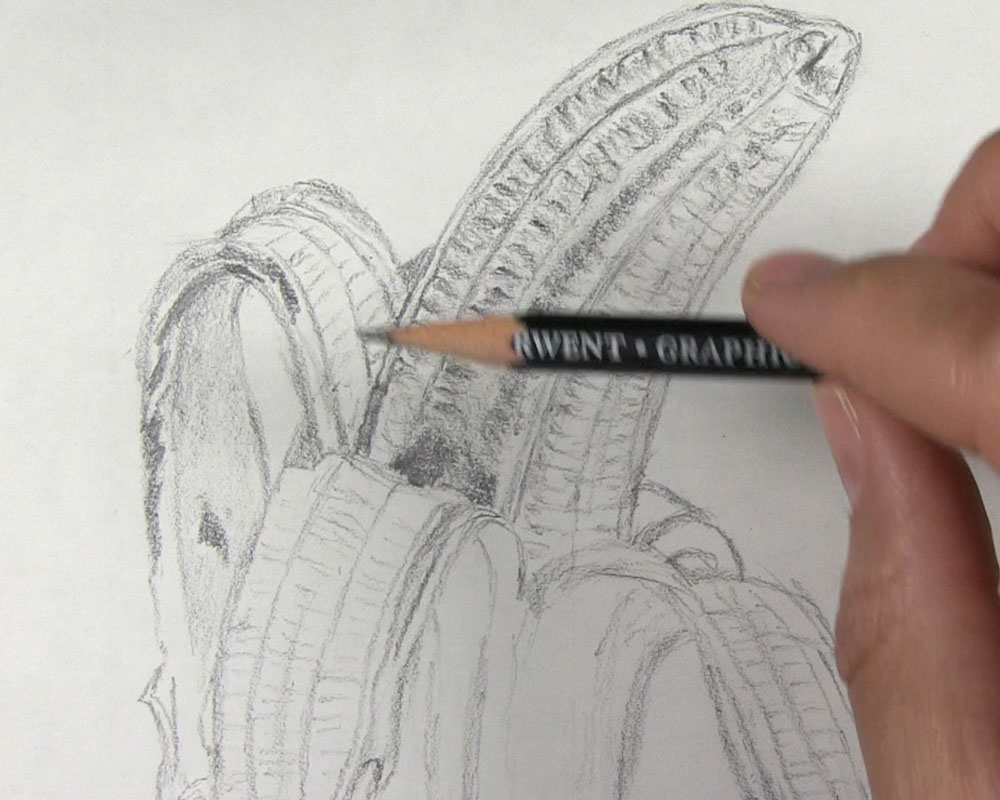
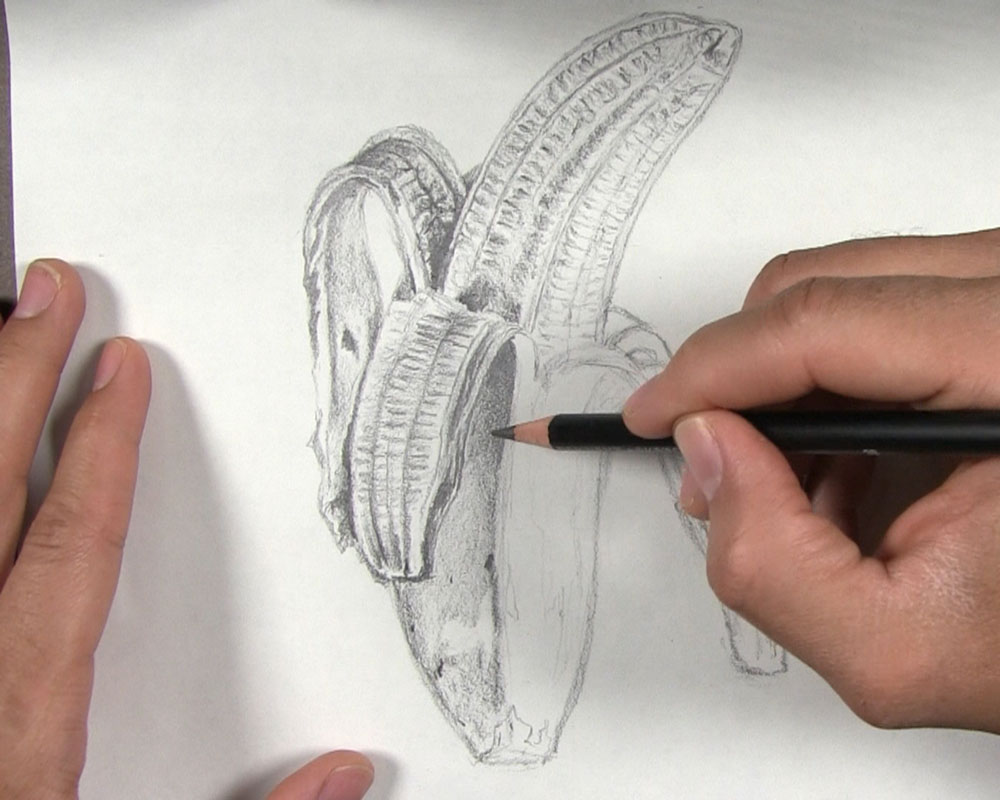
In order to make a realistic banana drawing, of course we need to apply some shading. Let’s first shade the edible part of the banana. Put a little shading around the curved line near the tip. This shading can be seen as some minor discoloration in the reference photo.
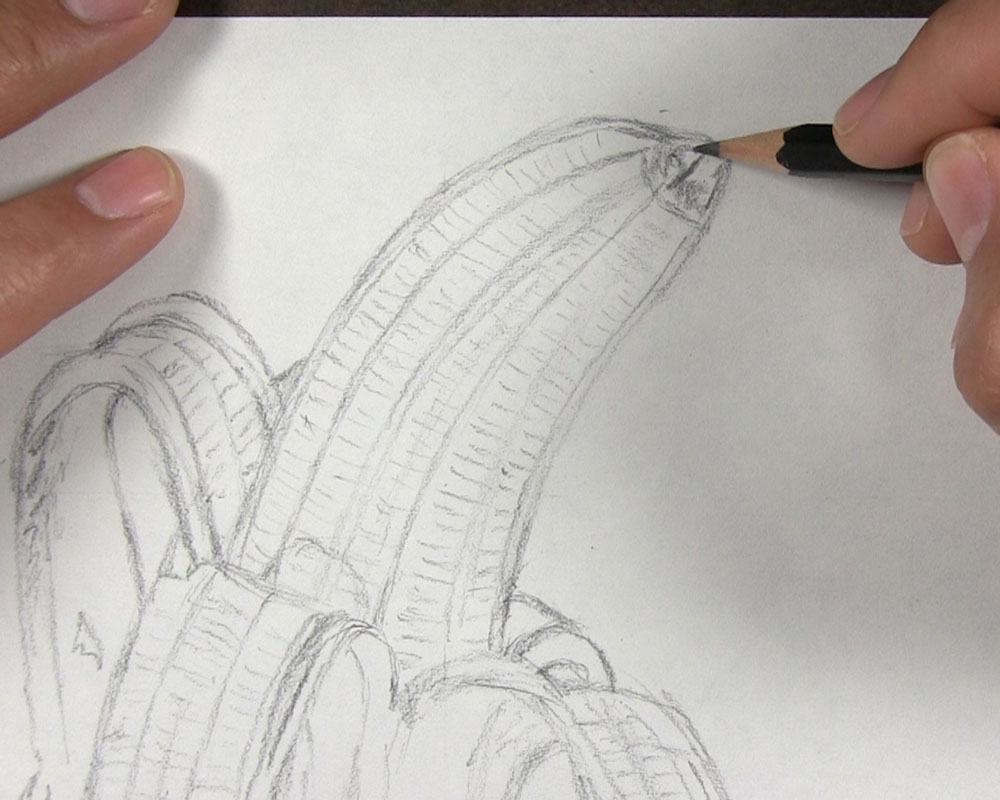
On the right side of the banana flesh, make the vertical curved lines slightly darker. As for the first two columns of horizontal ridges, shade along each one. Also, shade just above each horizontal line on the side that meets the curved vertical line.
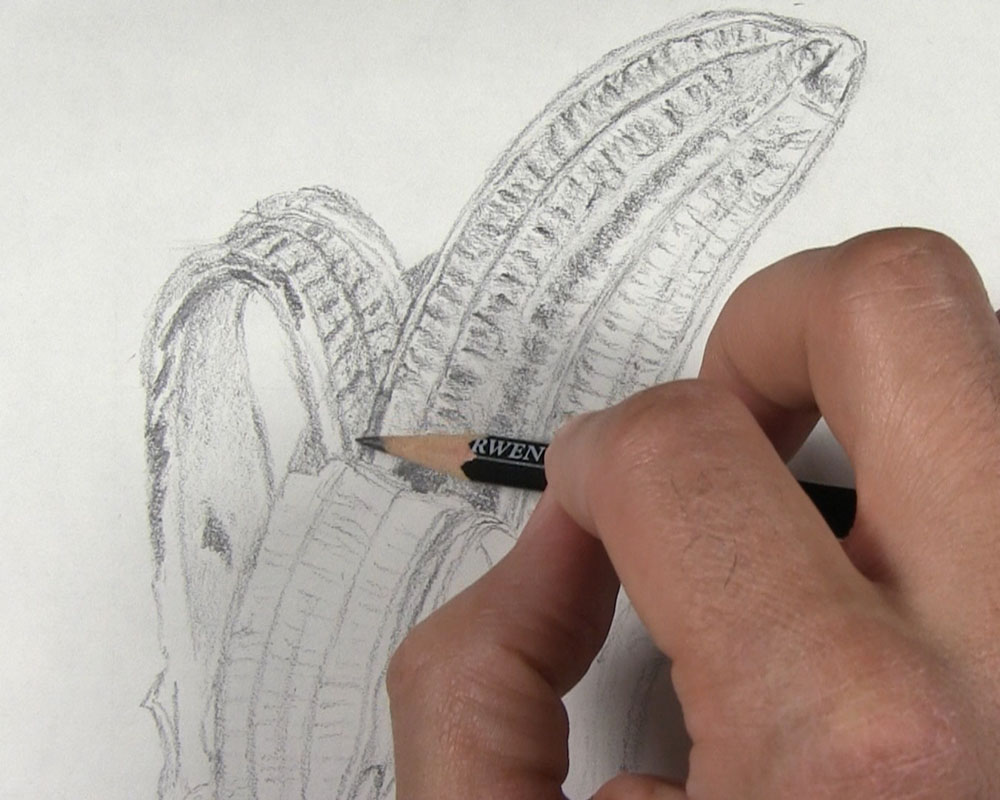
Working your way to the left side of the banana, you will notice that we have more shadow, because the light source is coming from the right side. For the center column of ridges, shade along them just as before, but place more shading above each ridge.
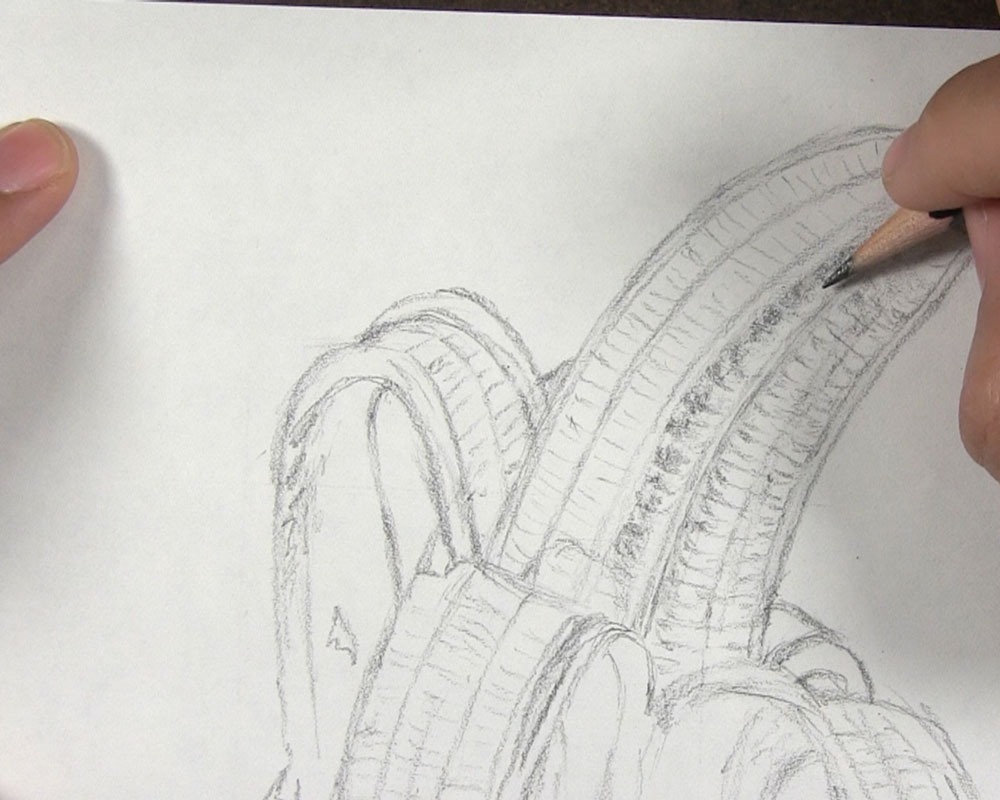
Repeat this same process for the two columns on the left side. Again, place slightly greater emphasis on your shading. After shading each individual ridge, you can place a light blanket layer of shading over the entire left side. At the lower left corner where the flesh meets the left peel, draw a thin shadow on the surface of the banana flesh.
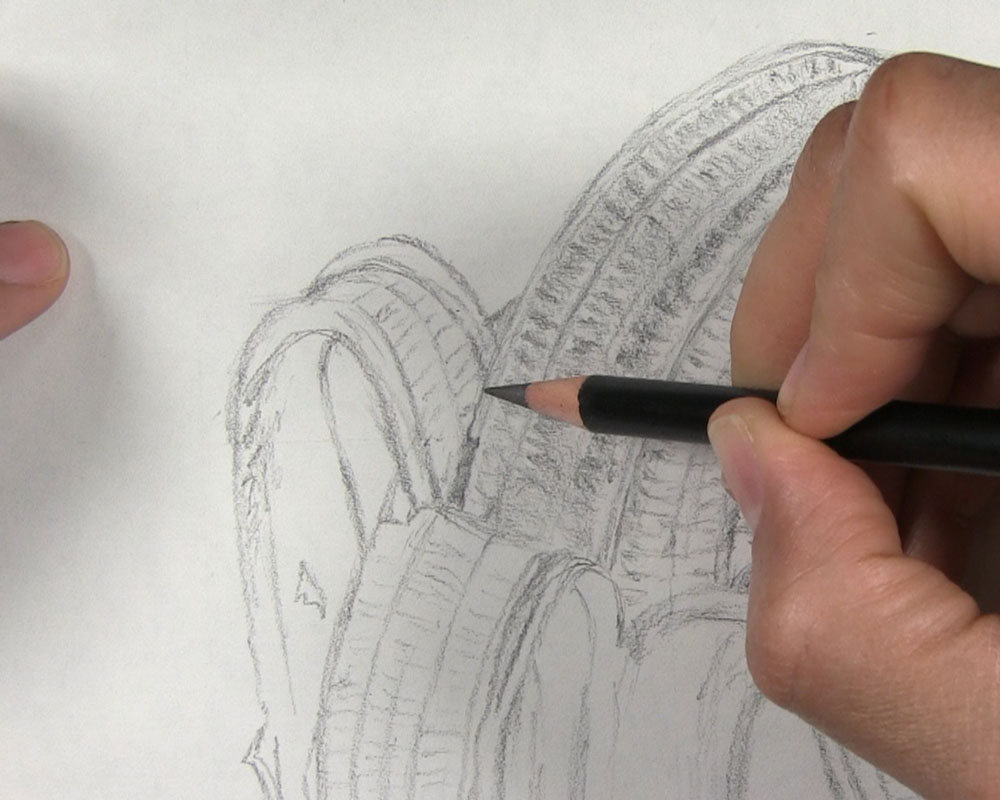
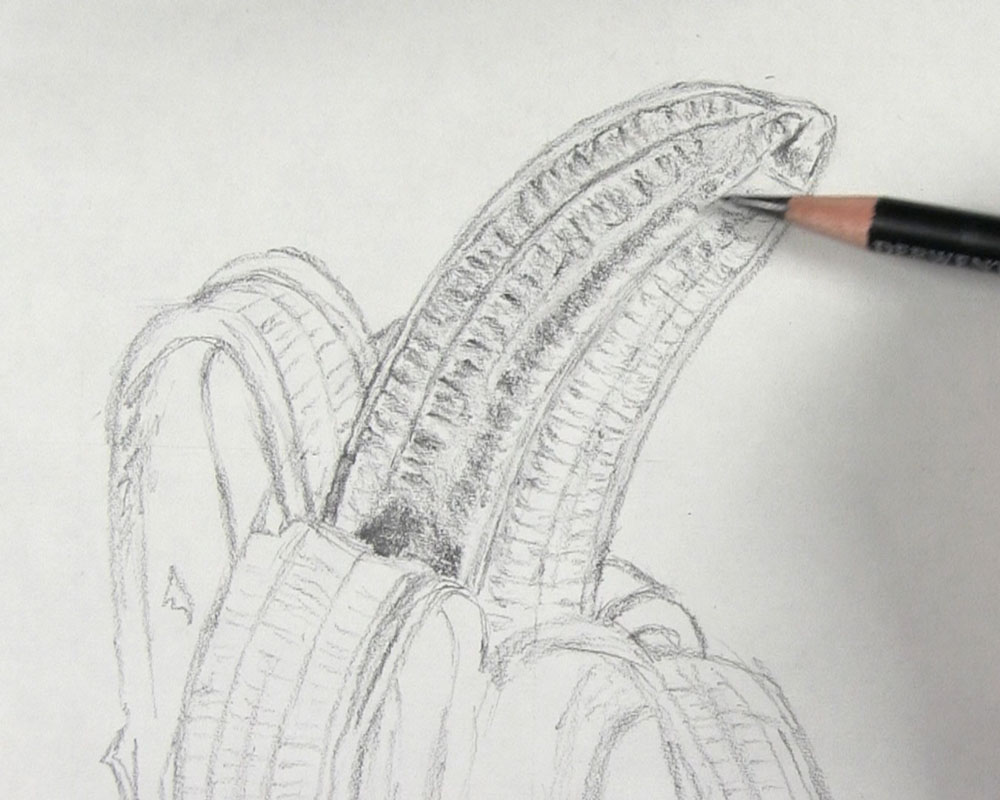
Put another cast shadow near the bottom of the flesh just above the center peel. Darken some of the lines in the shaded portion of the banana’s flesh, especially the curved vertical lines. Leave the right side a lighter value than the left since the right is receiving more light.
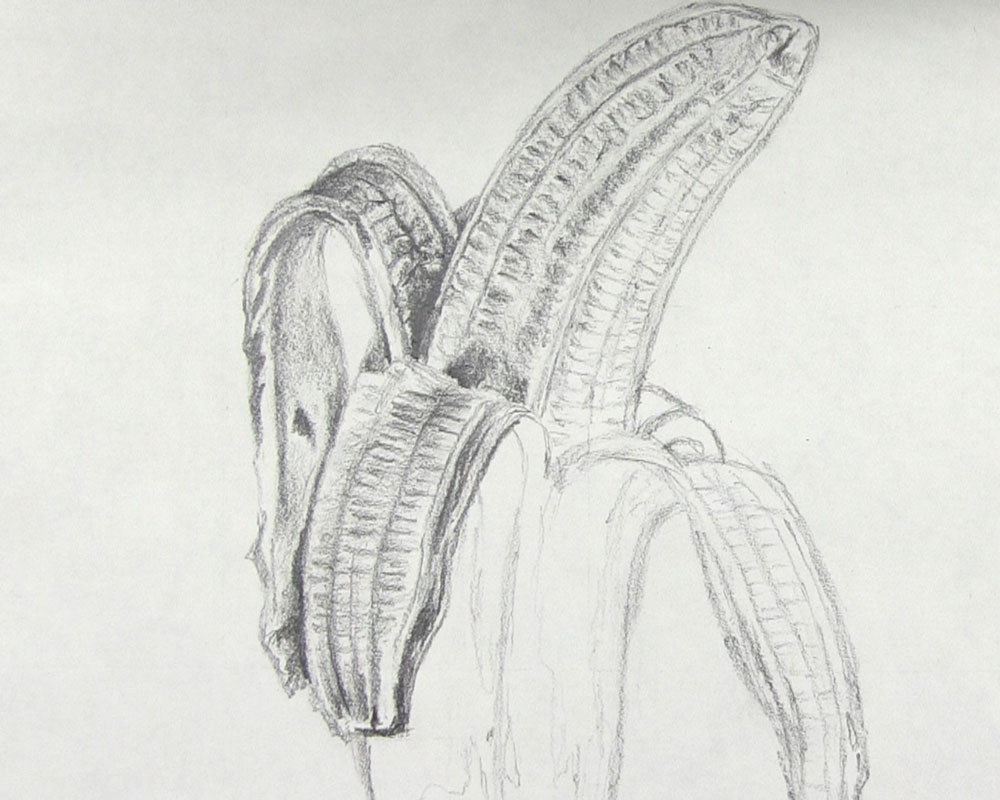
Shade the Left Peel
Now we can start giving some attention to the peels. Let’s begin with the left peel. First, put some light shading along each edge of the peel and the outer surface of the peel. Make sure to shade the brown spots on the outer surface and along the edges.
Next, shade the inner surface of the peel. Begin with a light base layer. Then darken the line that curves up the center. After that, darken the short horizontal ridges on each side of the center line.
Darken the brown spots found near the bottom tip of the left peel.
The inner surface of the left peel is receiving some of the shadow from the edible part of the banana to the right. Place some dark tones near the top of the inner peel. There is also a little bit of reflected light in between the grooves. Darken the lines making all of the grooves, but leave some patches in between the lines lighter in value. Then at the bottom, where the peel is prying away from the banana, place your darkest tones to represent the heaviest shadows.
Finish up the left peel by putting another layer of shading on the outer surface. Don’t make this an even layer. Leave some areas lighter to represent the green and yellow color variations. Make sure to shade along the left edge of the outer surface, leaving the surface just to the left of it lighter. This contrast is what creates the appearance of a sharp edge running down the peel.
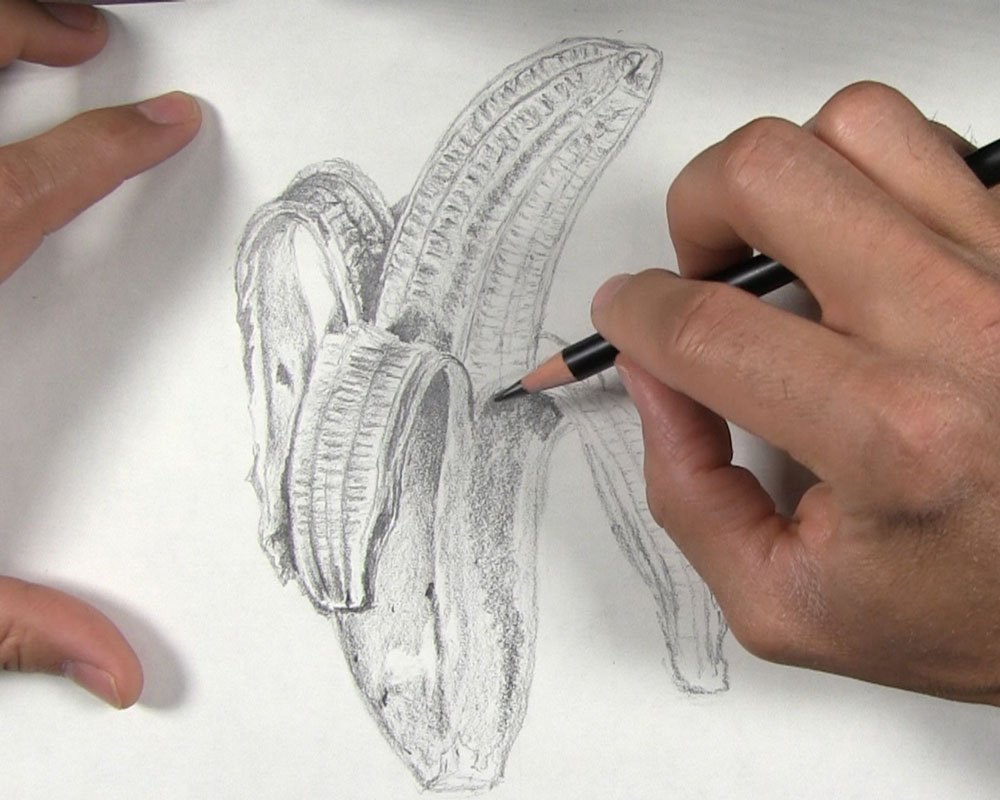
Shade the Peel in the Front
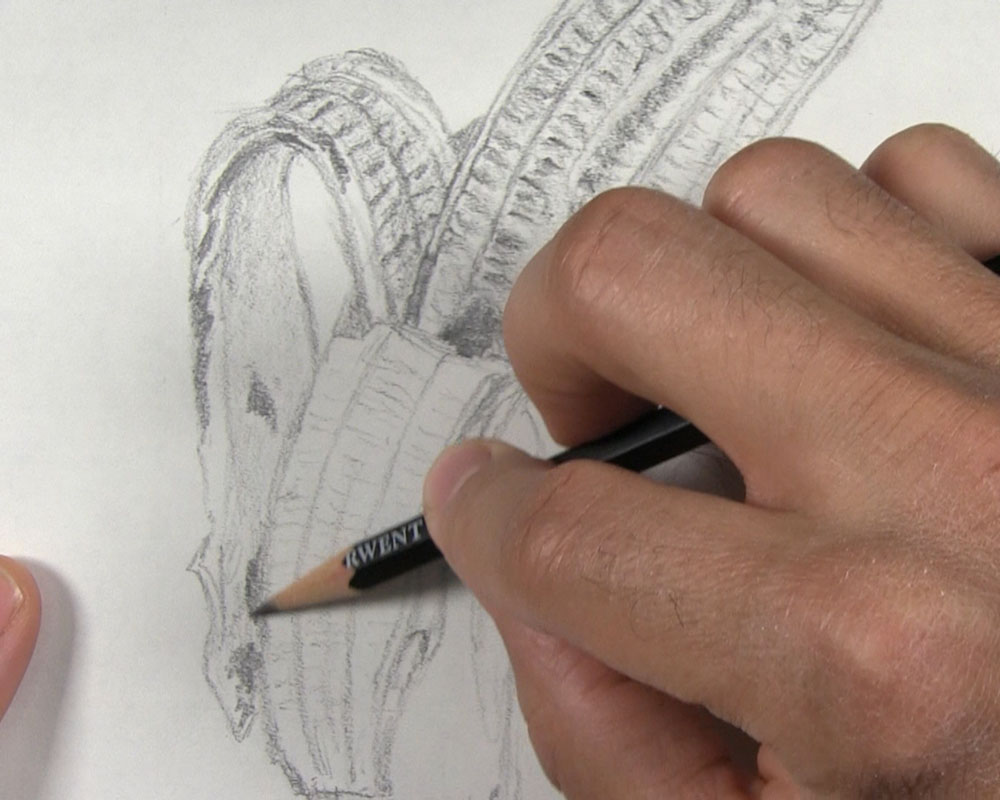
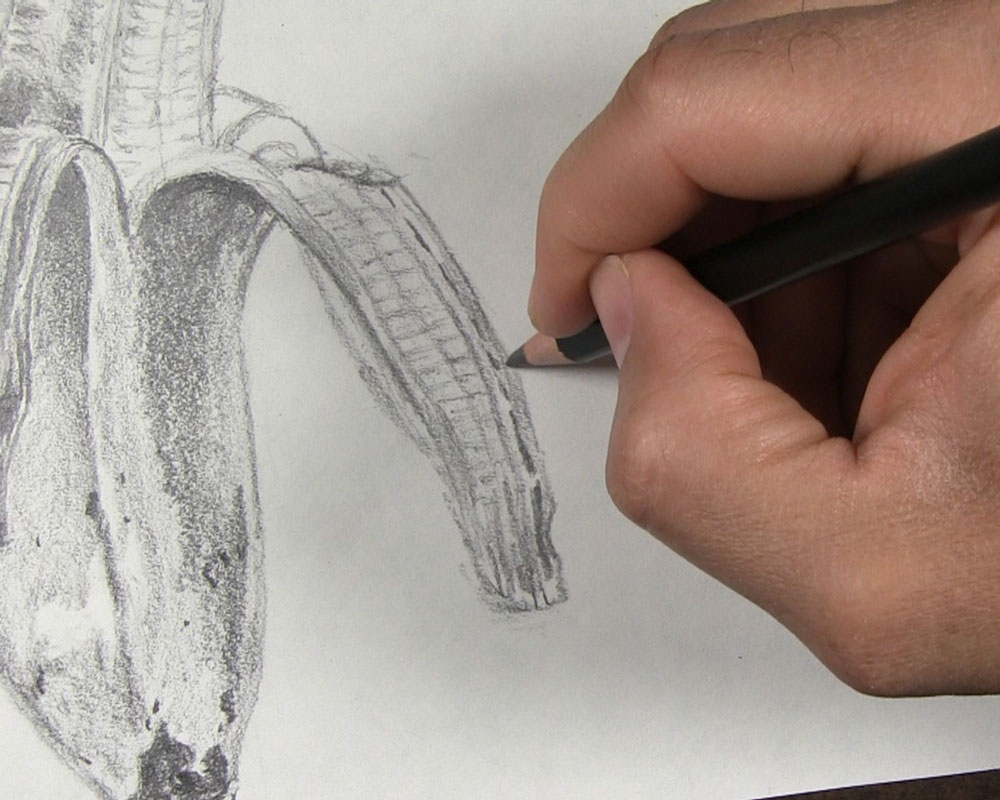
For the front peel, prepare to shade it by first tracing darker lines along the edge where some of the banana flesh is stuck to the inner surface. While you’re at it, go ahead and trace the two main curved vertical lines running down the peel.
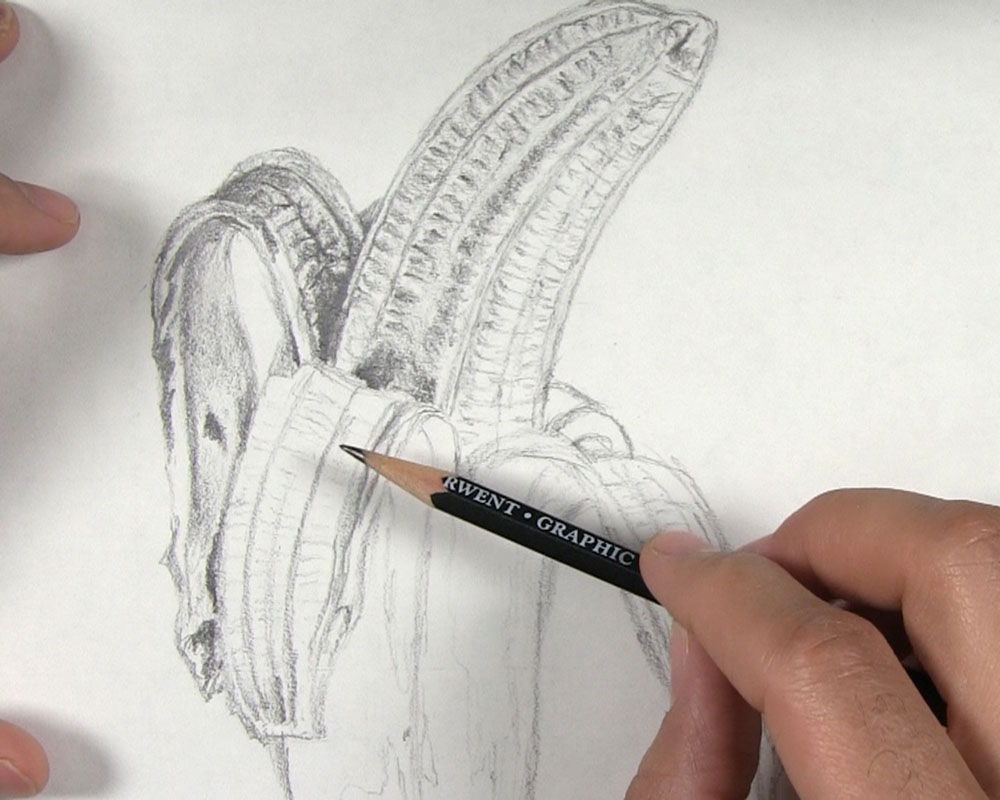
Put a light base layer of shading over the peel’s surface. Since this peel is receiving more light than the left peel, we don’t want quite as much shadow on this one. Sketch the indications of some of the horizontal ridges we placed earlier. This is so our original lines don’t get lost in all of the base shading. There is a slight shadow at the upper right corner of this center peel that you can place as well.
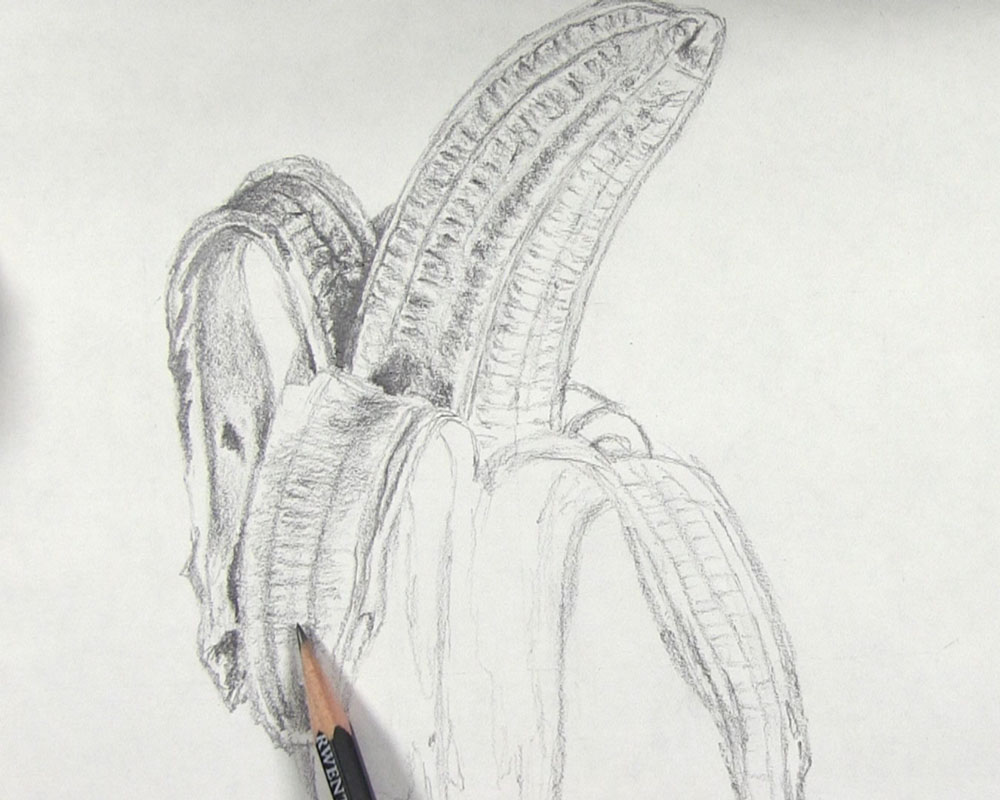
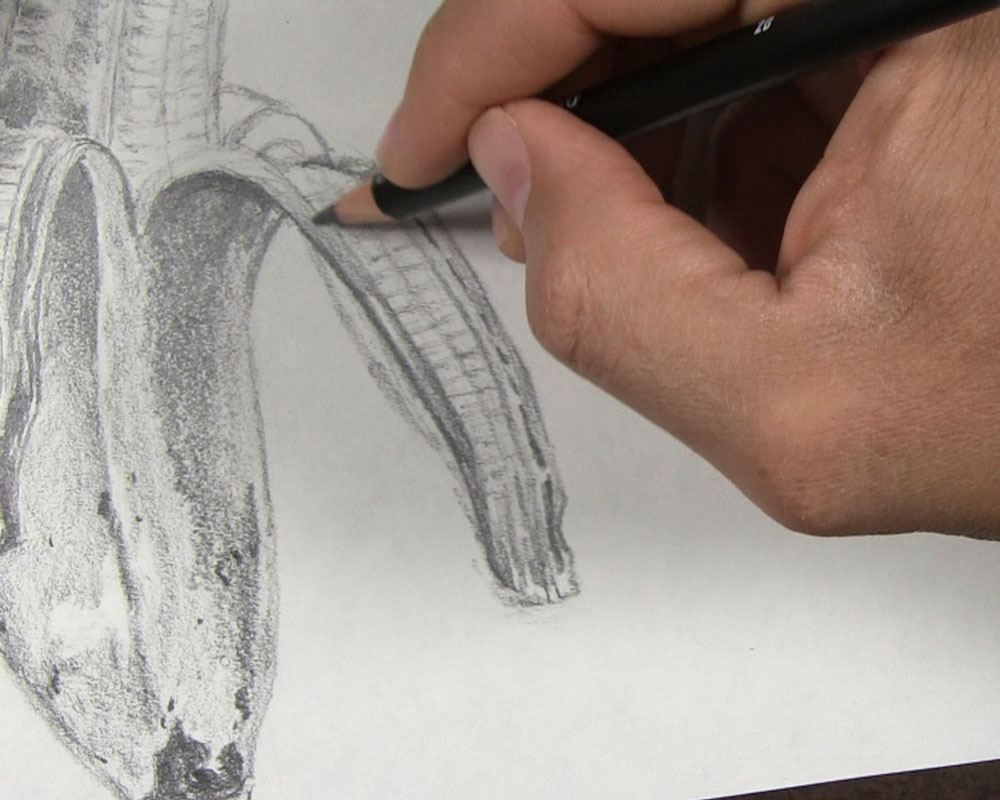
Now continue to draw slightly darker indications of the horizontal grooves. Then from the bottom of the peel, draw over the previous guidelines going in a vertical direction toward the top. Draw some heavier tones along where the flesh attaches itself to the right side of the peel. Draw the darkest tones near the bottom to show where the center peel of the banana has brown spots.
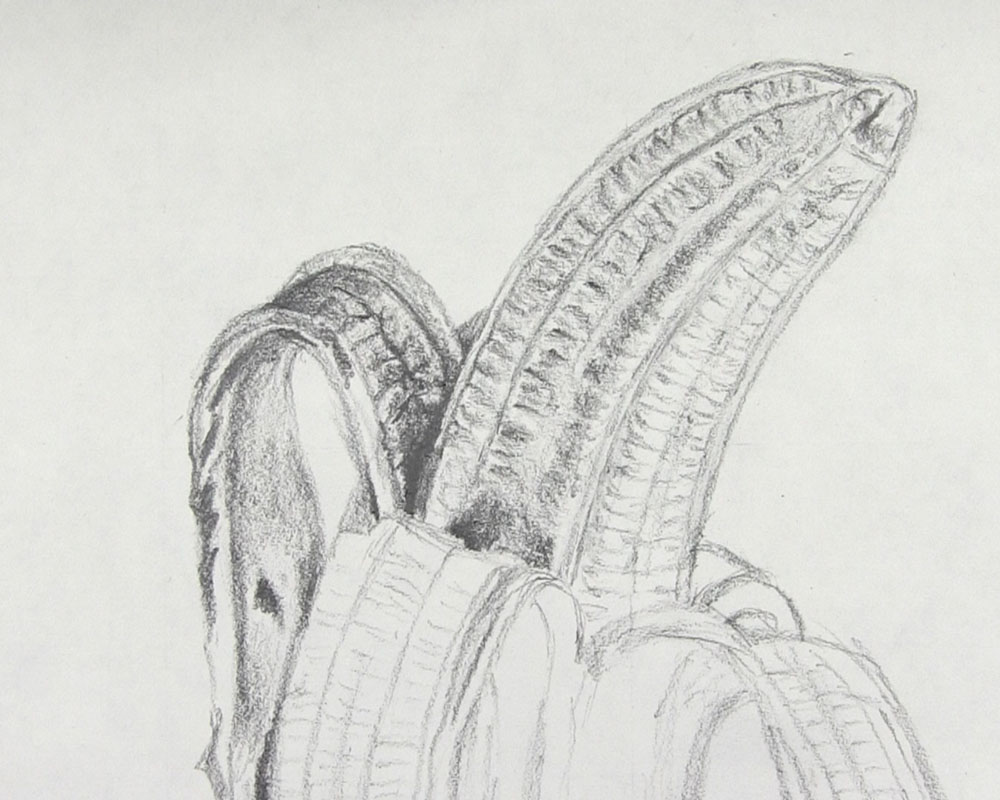
Shade the Outer Surface of the Banana’s Peel
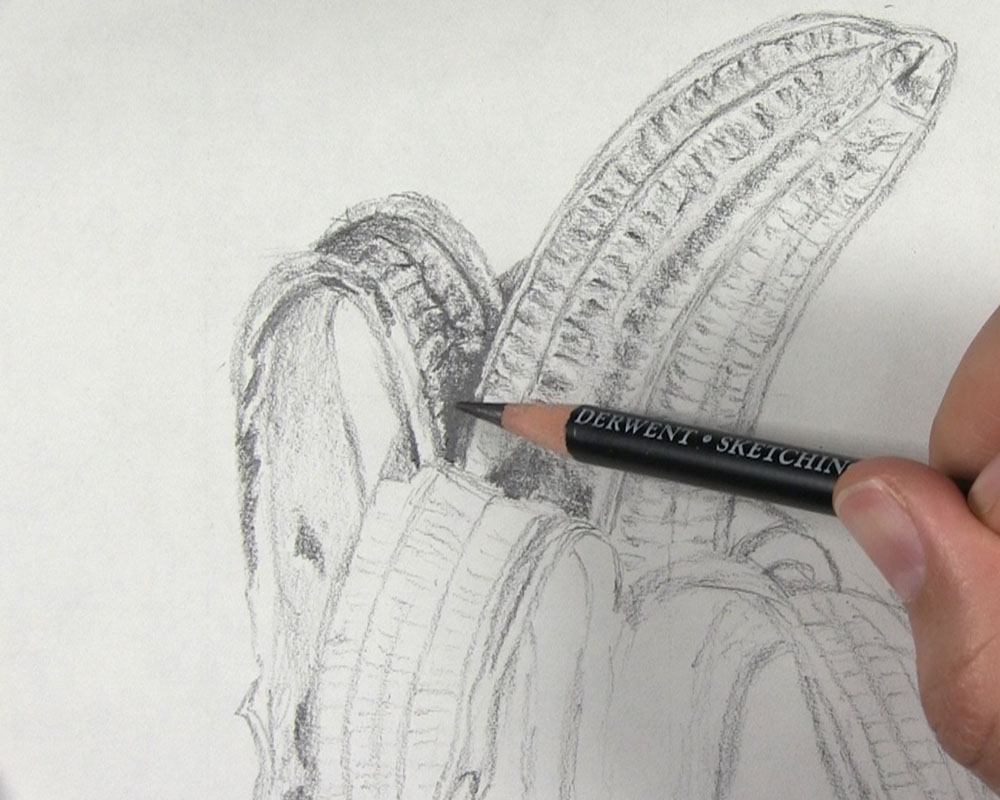
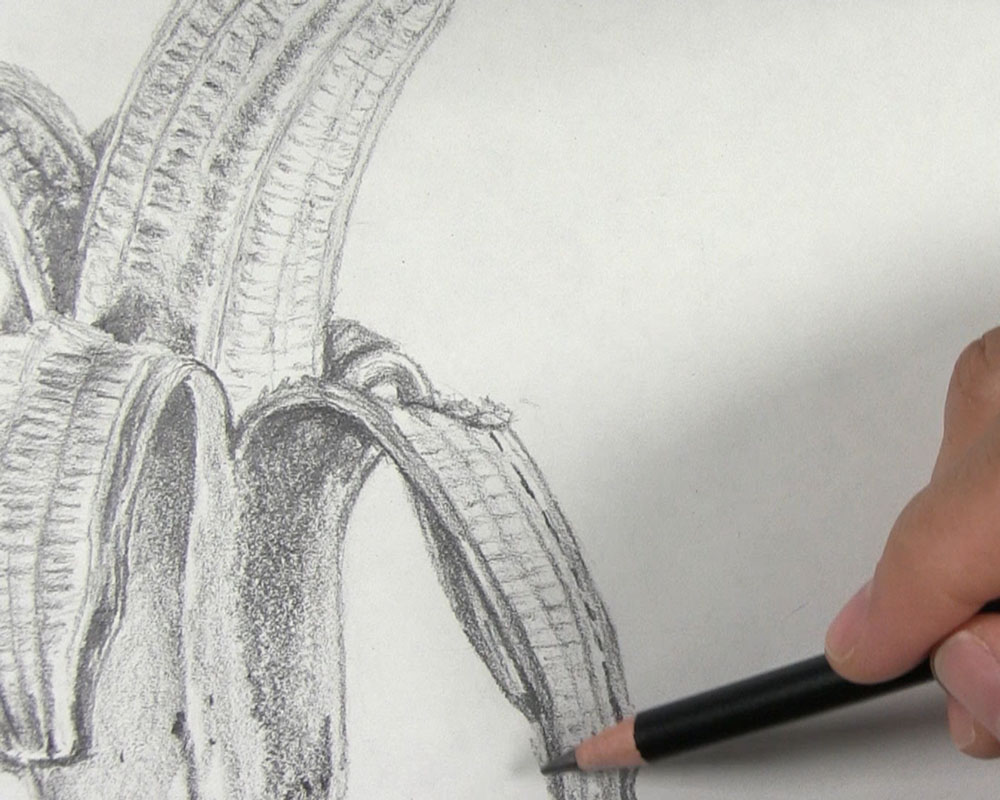
The bottom half of the banana is covered with the center peel (which is on our left) and the right peel. Let’s start by shading the center peel on the left side. Put a base layer of shading over most of the surface. Make sure to shade around the highlighted area near the bottom. Draw darker values near the top just behind where the peel flips over. Additionally, draw darker tones along both edges. Finish up by drawing some small dark spots near the bottom.
Repeat similar steps for the right side. Start with a base layer. Shade another layer of darker tones over the first layer down the middle. This darker layer is how we draw the shadow coming from the folded-over portion of the right peel. Put the darkest tones near the curved top where the peel is flipped.
Put a little more shadow near the bottom of the right peel. Then draw a few more small dark spots.
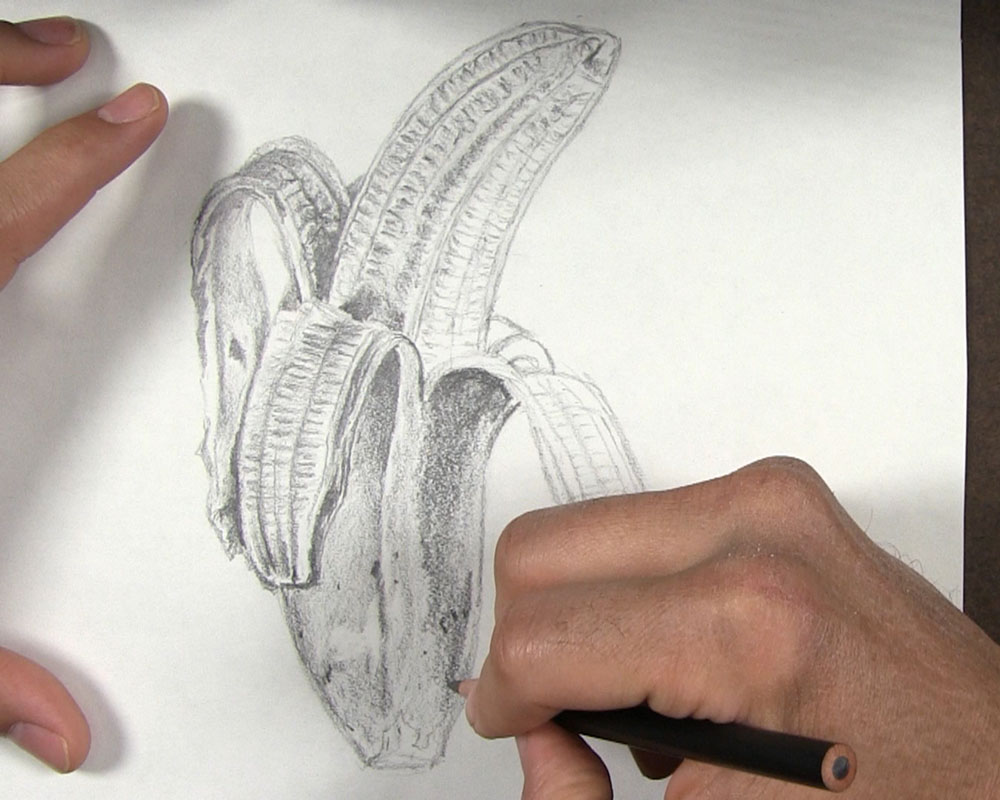
Use very dark tones to shade in the irregular shape at the very bottom of the banana. These should be some of the darkest values of the entire drawing.

Shade the Peels on the Right
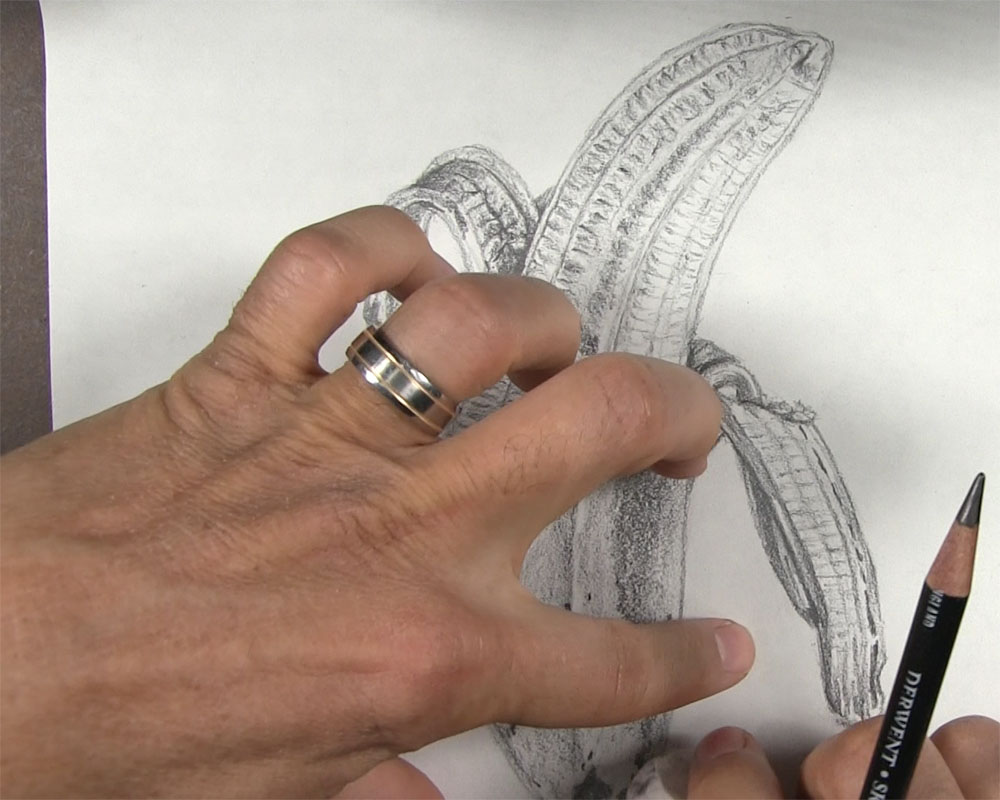
We are approaching the end of our drawing! Now there are two peels we still need to shade. Those would be the right peel and the peel in the rear that we can barely see. Starting with the right peel, shade a light base layer. Just as we did previously, trace over the groove lines so they are slightly darker than the base layer.
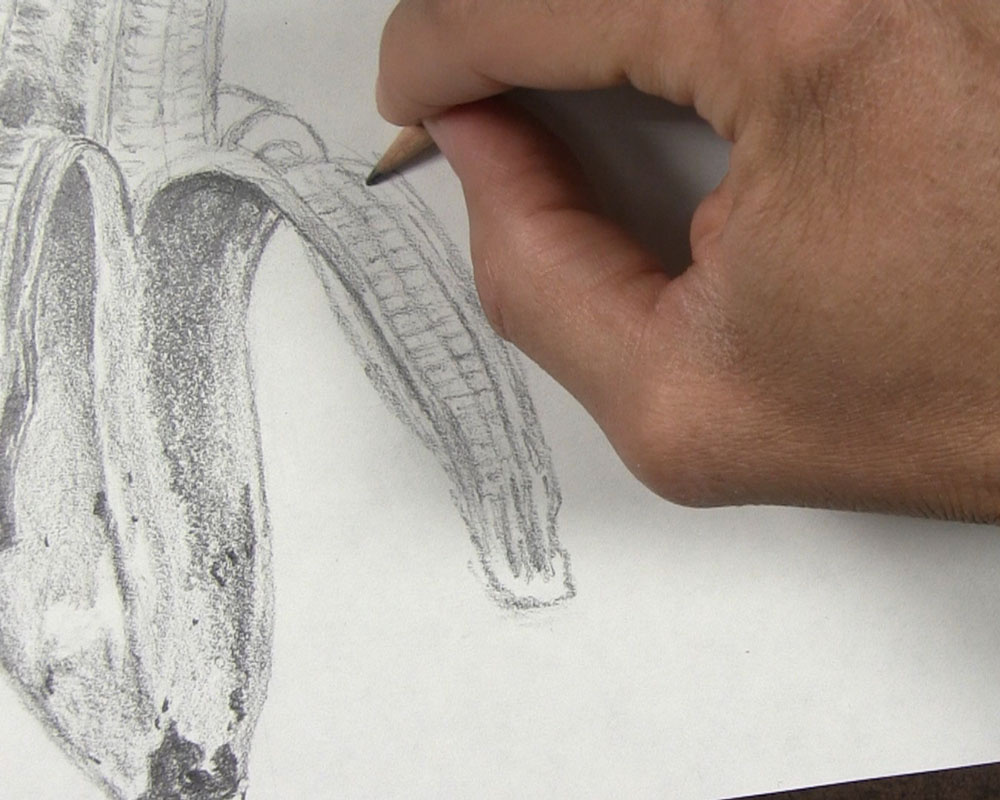
Using darker pencil tones, draw some long lines along the inside edge of the right side. Put a little bit of space between these lines. Draw these lines to help make it look like there are some ragged tears along the seam of our banana peel.
Still working on the right peel, let’s shade its left edge now. Make the outermost edge the darkest. Then shade along where the flesh meets the peel. This should leave a thin strip of highlight running down the middle.
Now that the right peel is complete, it’s time to do something with the rear peel. Put some shading where the peel touches the banana flesh. Put a bit more on the lower side edge that is above the right peel. As for the visible portion of the rear peel that we see to the left of the right peel, place darker tones on the left side that are on the opposite side of the light source.
Draw Finishing Touches on the Peeled Banana
Use an eraser to go around the banana one last time. Erase any smudges or stray markings that were accidentally left on the paper during the drawing process.
If necessary, use a softer pencil to put another layer of shading over the darkest parts of the drawing. Areas where you might consider doing this include the bottom of the banana, some of the brown spots, the shadows where all of the peels meet the fleshy part of the banana, and the shadows on the lower half of the banana. Use your reference photo to make the best decision about which areas need to be darker in your drawing.
And that is how to draw a peeled banana!
Tutorial Recap
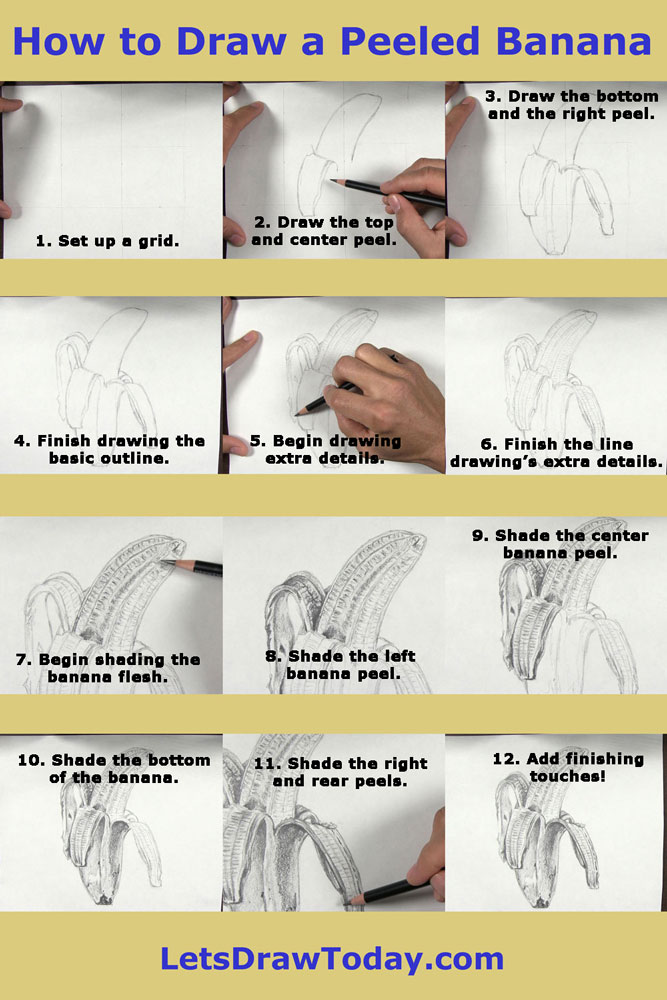
For a quick visual recap of this tutorial, take a look at the image below. It shows you a progression of the main steps for how to draw the peeled banana.
Conclusion
I hope you have learned something from this drawing tutorial!
For the best results, don’t stop here. Draw another peeled banana on your own, without the help of a tutorial. Try a banana at a different angle or maybe with the peels overlapping. You can even try drawing a banana bunch!
You will soon see that bananas and even other types of food become easier to draw.
All you need is practice and persistence. Most importantly, have fun every time you draw a banana, fruit, or anything else!