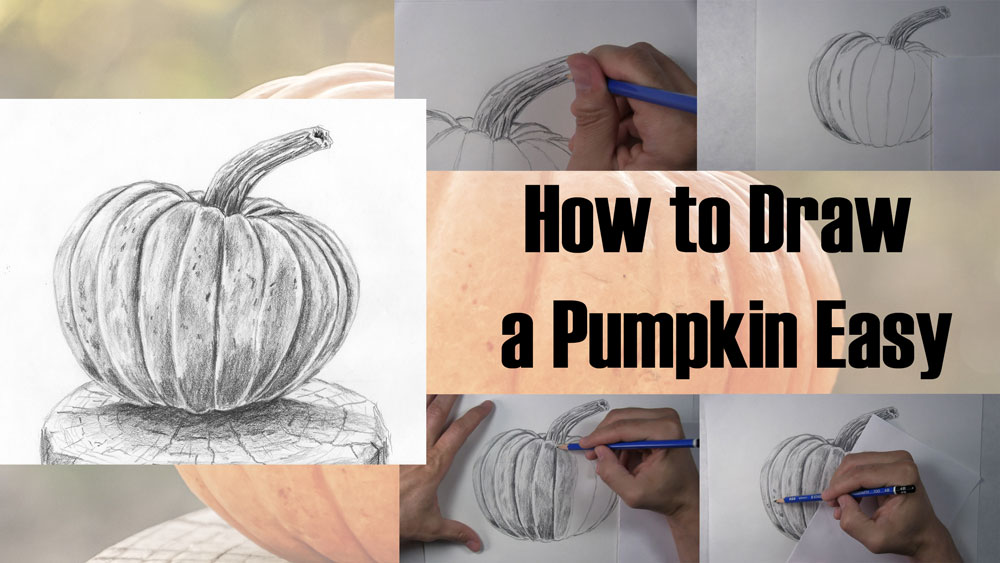
How to Draw a Pumpkin Realistically with Easy Steps
A pumpkin is a fairly simple-looking fruit. At first thought, one might think that drawing a pumpkin is a simple process as well.
However, there are many people who might not find drawing a pumpkin to be so easy.
If you are one of them, then that’s okay.
If you are looking for something to draw that is easy, a pumpkin is a perfect choice for a drawing subject. Although you can draw a pumpkin any time of year, it’s especially fun to draw a pumpkin in the fall!
What’s more, it doesn’t take much to take a simple pumpkin drawing and turn it into realistic pencil art.
In this tutorial, I will show you how to draw a pumpkin by following some easy steps. The final result will be a basic pumpkin drawing that still looks realistic.
Table of Contents
Use a Reference Photo of a Pumpkin
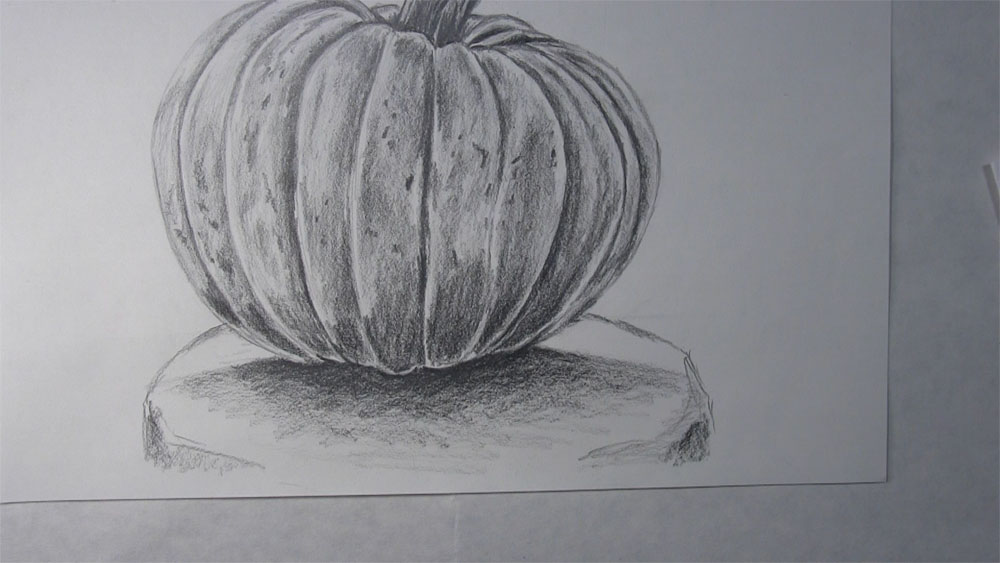
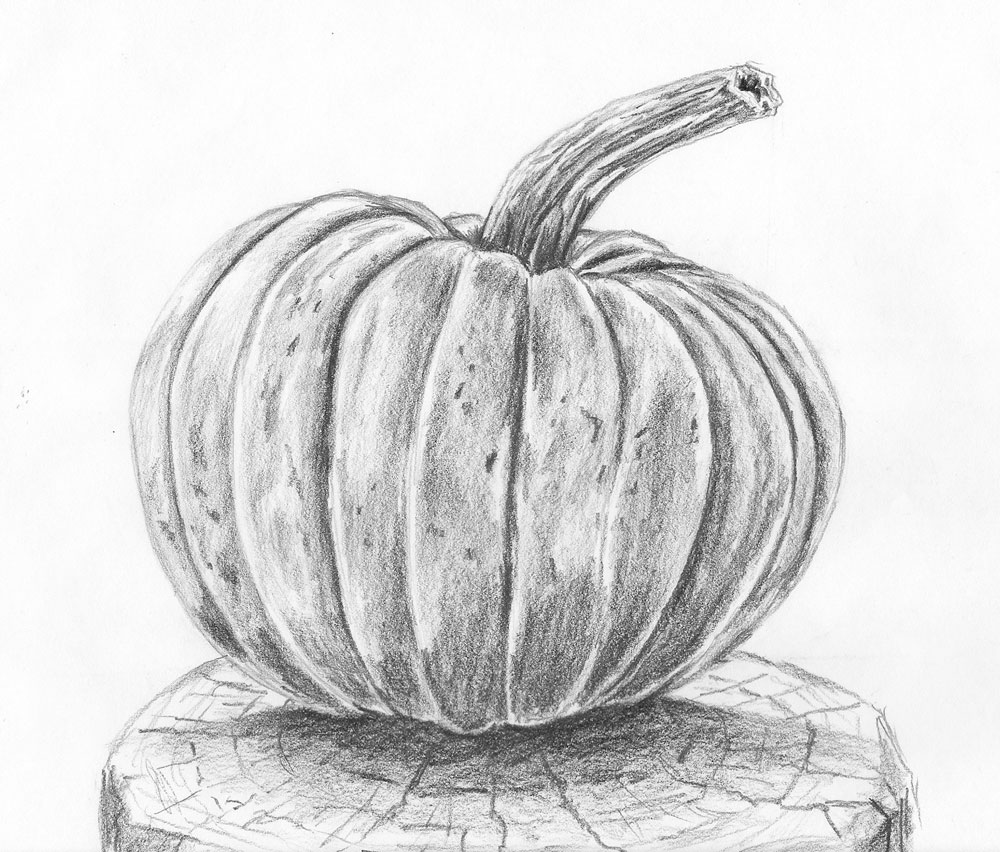
Here is the reference photo for this tutorial. Feel free to refer to this photo in addition to the step-by-step images. It is nothing more than a simple pumpkin on a wooden stump. We will draw both the pumpkin and the stump.
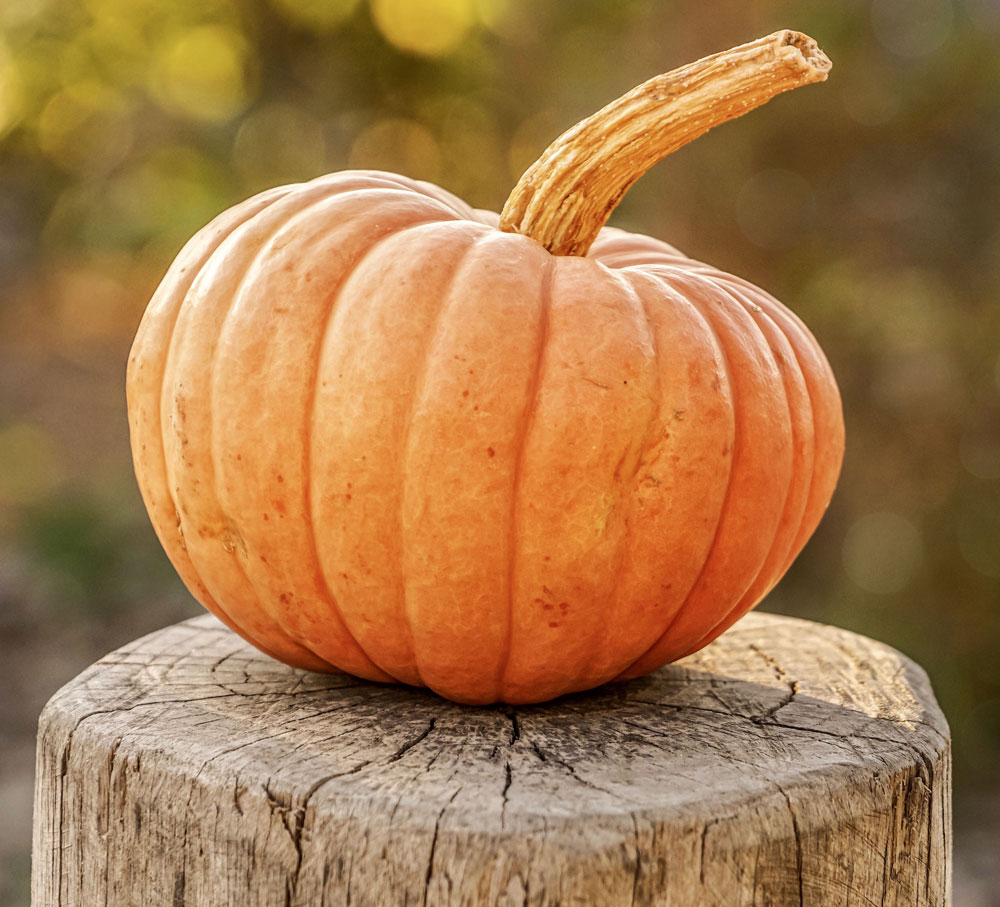
You can use the same concepts you learn from this tutorial and apply them to drawing other pumpkins. Even though pumpkins look very similar, a reference photo will be useful in drawing this picture. It will be helpful in capturing some unique traits, like the length and texture of the stem and the spots on the shell.
Materials Used for This Drawing
Here is a list of the materials I am using for this drawing.
If you don’t have some of these materials, that’s okay. You can still make do with what you have or try to improvise if necessary, as long as you just get started!
If you wish to purchase any of these materials, they can be found at your local art store, or you can buy them using the links below.
Affiliate Disclaimer: The links on this page are affiliate links. I will receive a small commission if a purchase is made through one of these links. Learn more here.
- Sheet of drawing paper
- Sheet of folded paper to prevent smudging
- HB and 4B graphite pencils
- Kneaded eraser
- Plastic eraser
- Dusting brush
How to Draw a Pumpkin Video Tutorial
You can watch the time-lapse video version of this tutorial below. Watch it once all the way through to get a sense of the overall process. Then watch a second time and draw along with me, pausing as needed.
As an alternative, when you sign up for the Let’s Draw Today Newsletter, I will give you the extended video course version of this tutorial and 9 others (10 in all) as a free gift!
Free Bonus: Click here to get access to 10 free drawing video tutorial courses. Draw along with me in the full-length version of this tutorial and 9 others as I show you one step at a time my entire process for drawing each subject from start to finish.
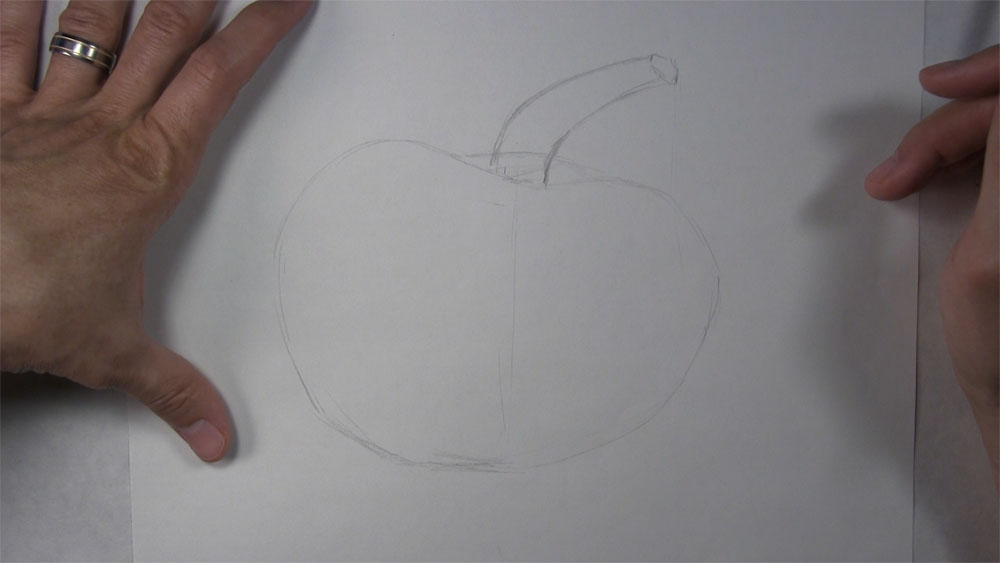
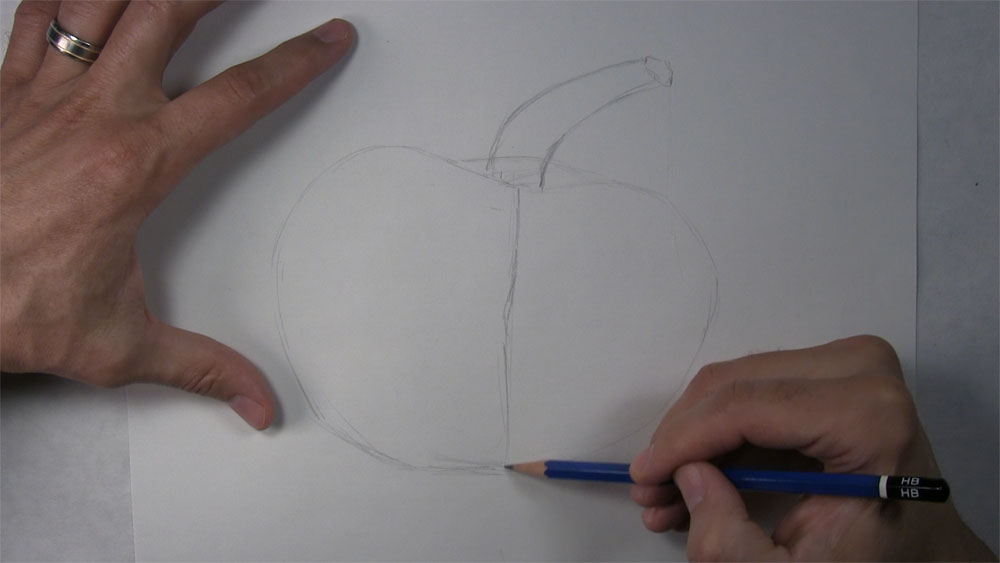
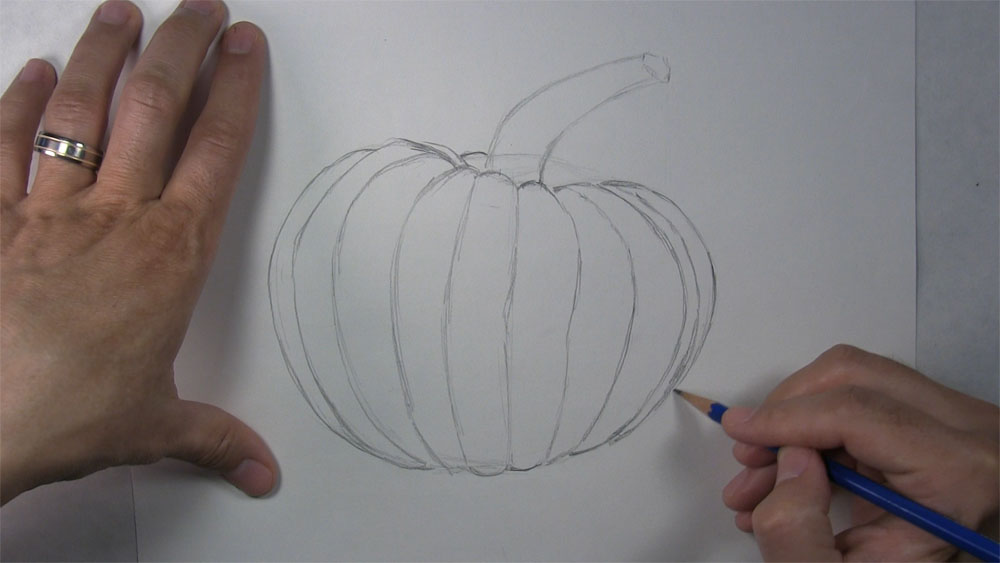
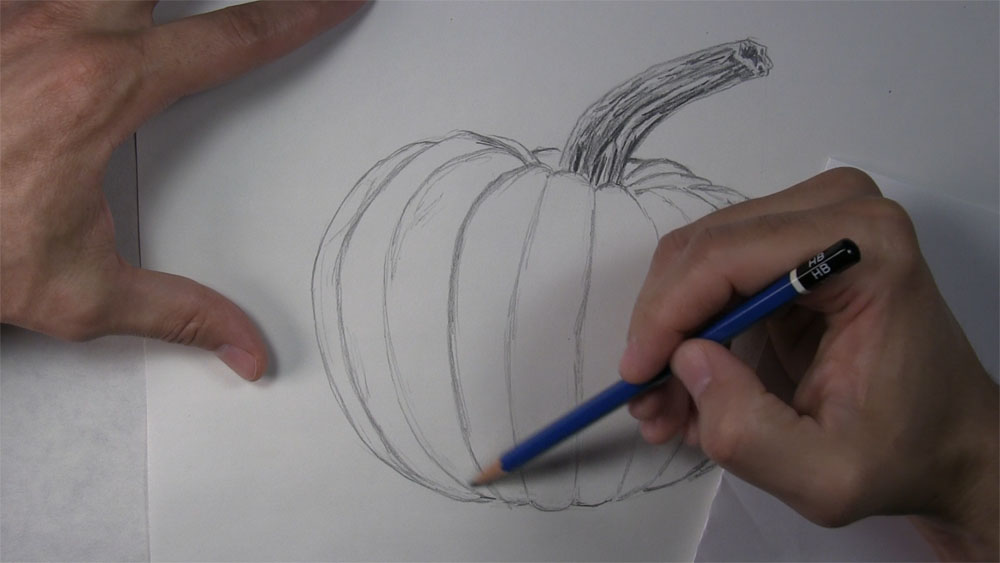
Draw the Outline of the Pumpkin’s Left Side
The first step in drawing a pumpkin is drawing its basic shapes. I began by sketching a shape for the right side with an HB pencil. Then I drew the outline of the left side a bit larger than the right. After that, I drew the outline of the stem.
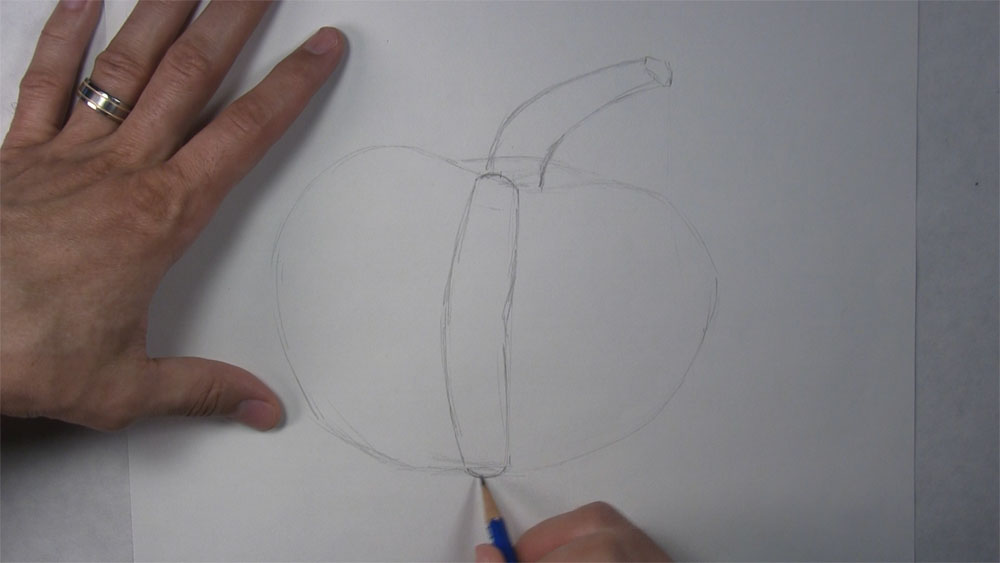
The next step is to begin drawing the many ribs of the pumpkin. Draw the first rib line by tracing the guideline from the previous step. It should be directly under the stem. Don’t make it perfectly straight. Instead, draw it with a slight bend.
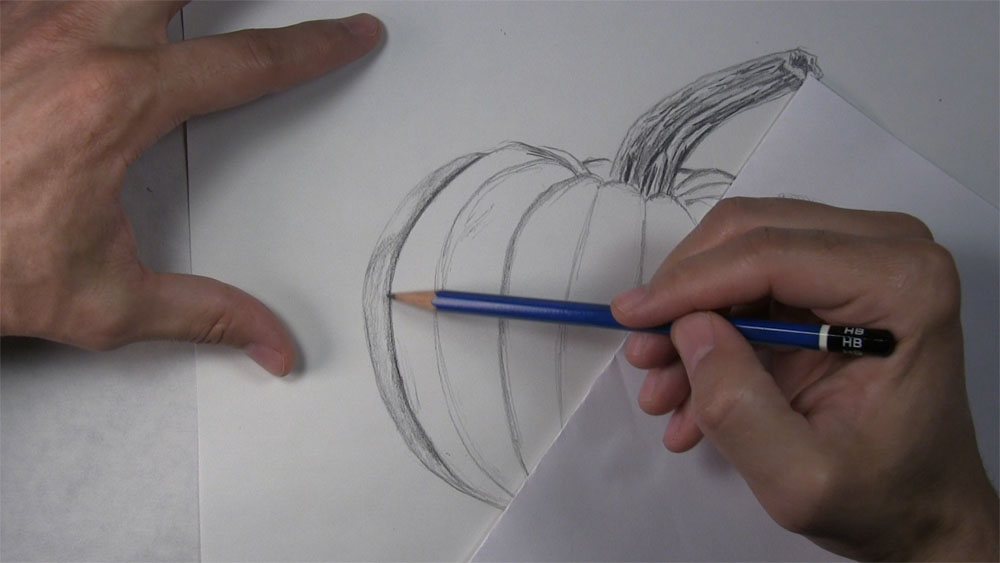
To draw the first section, draw a curved line bulging upward from the first rib. Bring this line down and run a second rib almost parallel to and following the same curvature of the first rib. Then connect the two ribs at the bottom.
Now let’s draw another rib. This section can be just about as wide as the first one. As we draw the ribs of the pumpkin, we will need to pay attention to the curvature of the pumpkin’s outer edge as well as the curvature of the previous rib we drew.
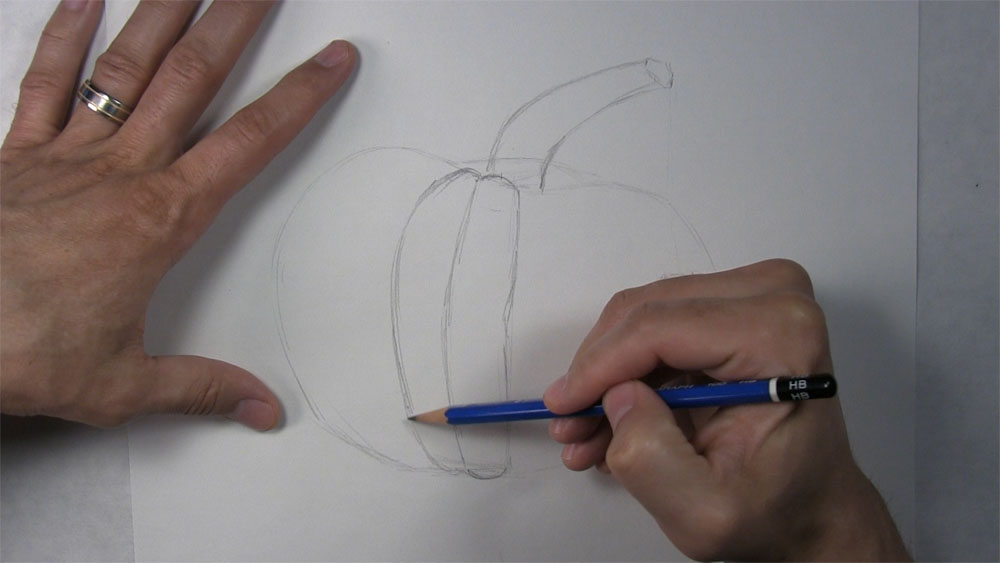
Now that we’re getting the hang of it, we’re going to draw three more ribs. It’s okay to vary the positioning of each end of a rib.

There’s a deep dip at the top of this pumpkin where the base of the stem sits. All of the ribs take a downward dip just before reaching the stem. Draw the top of another rib or two taking this dip on the other side of the pumpkin.
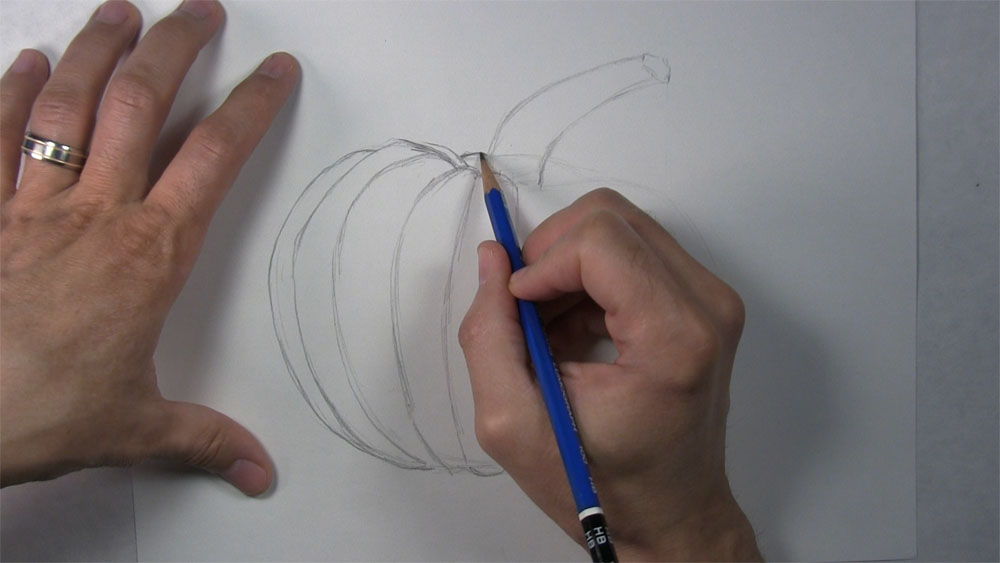
Draw the Outline of the Pumpkin’s Right Side
On the right side of the pumpkin, we’re going to repeat the same process that we did on the left by drawing five more ribs. Another thing about pumpkin ribs is that some of them are deep and some are shallow.
Just like we did earlier at the dip near the stem, let’s draw a couple more ribs on the other side. Draw lines coming from the base of the stem and curving up and over the dip. This completes the outline of our pumpkin’s shell. We’ll do some work to the stem next.
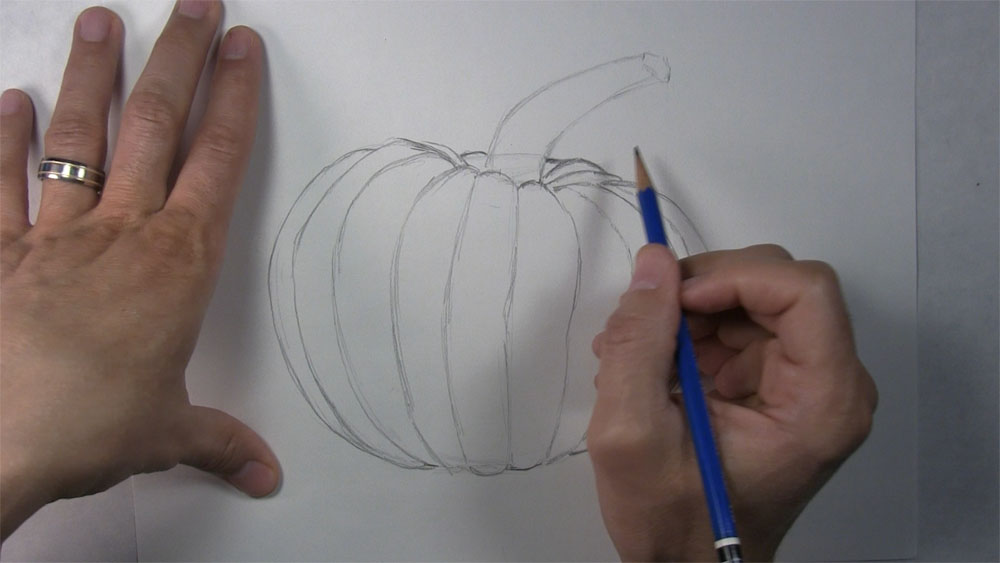
Now focusing on the stem itself, begin by erasing any guidelines from the beginning of the drawing. Then, we’ll just sharpen up the outline of the stem. We can also begin to establish some of the shape at the end of the stem.
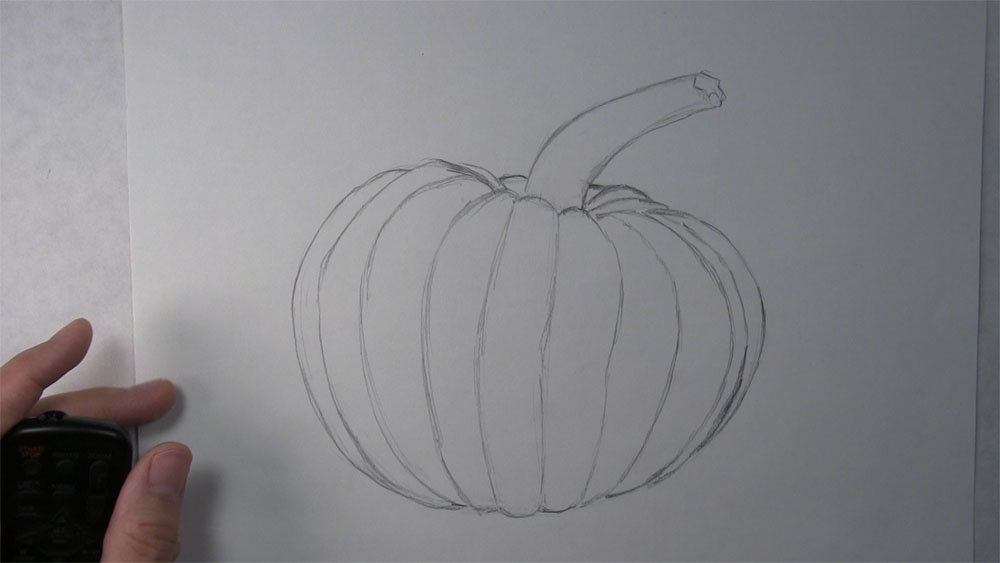
Draw the Pumpkin’s Stem
Next, begin to draw lines on the stem of the pumpkin. Draw lines close together that follow the curvature of the stem. There is this little depression at the tip of the stem, so we need to draw some bumpy lines to indicate that.
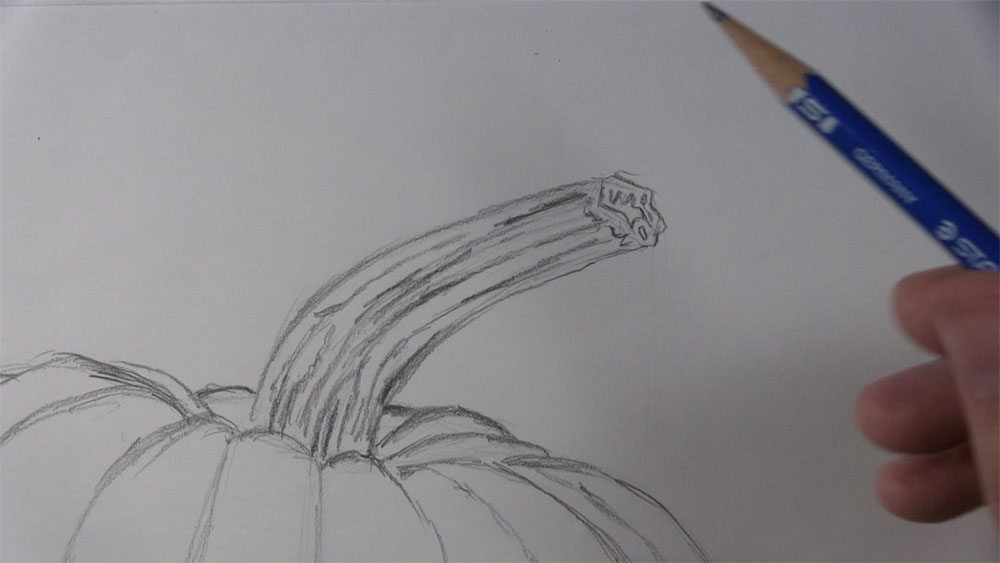
Use an HB and 4B pencil to shade the stem. The strongest light source is coming from the upper left. Therefore, we should leave more highlights along the left side and place darker shadow tones on the right and underside. Add some darker shading to the hole at the tip of the stem.
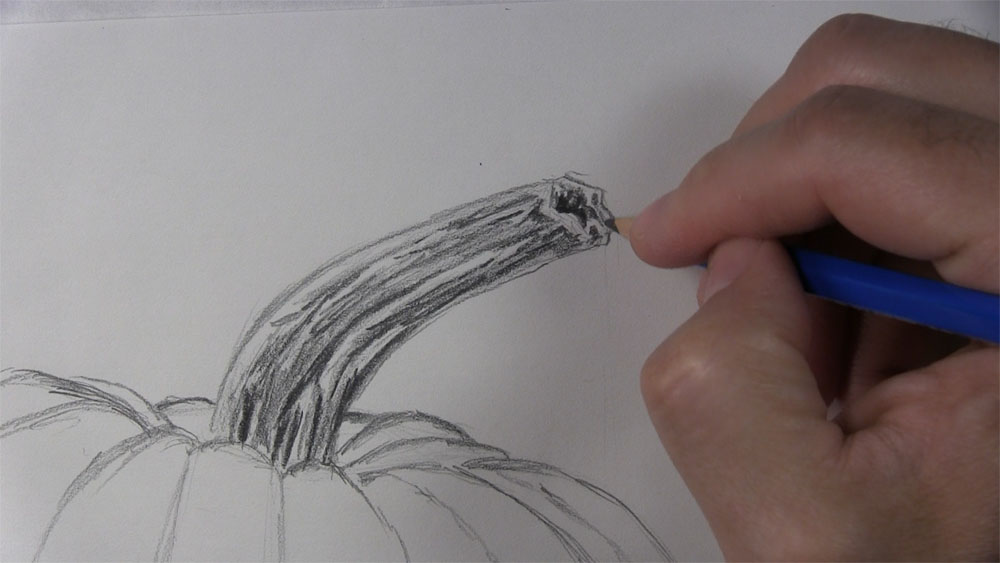
Now we are going to make the outer edge of the stem look a little bumpier to match the texture of the surface. Use a kneaded eraser to erase the outline of the edge. Then lightly redraw this line with a few bumps.
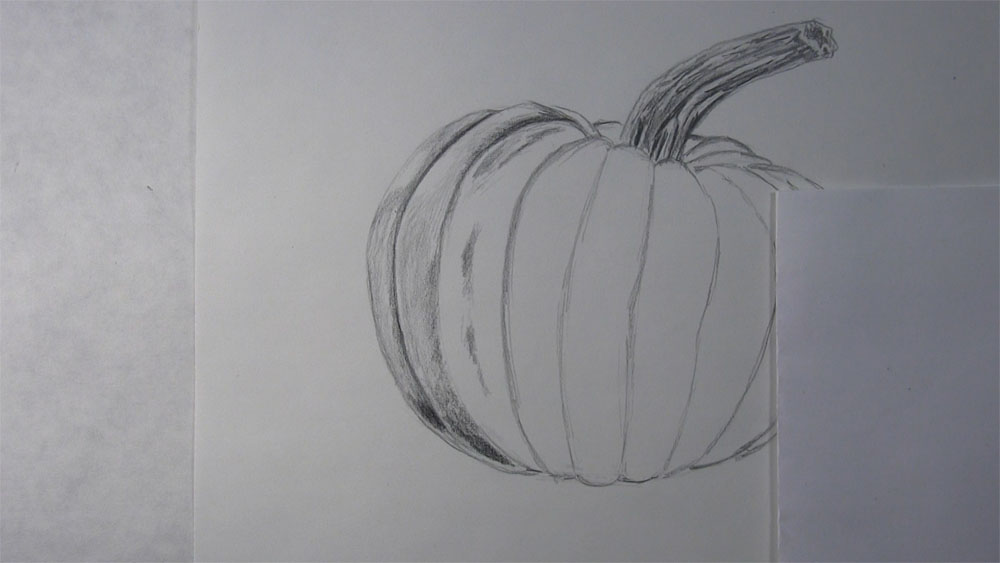
Shade the First Two Sections of the Pumpkin
Next, let’s start to shade the skin of the pumpkin. Remember that the strongest light source is coming from the upper left. Lightly sketch the outline of some highlights on the upper part of the left side of the pumpkin. Then sketch the outline of shadows along the ribs.
With an HB pencil, lightly shade some midtone values in this first section of the pumpkin’s skin. Shade around the white area in the upper left that was identified as a highlight.

Use a 4B pencil to shade along the rib. Using the guidelines for value changes will help to make sure you don’t put too much shadow in the midtone or highlighted areas.
Use an HB pencil to shade the second section. Leave a thin strip of reflected light along the edge of the rib to make it look like there is an actual dip in the surface of the shell along the rib.
Sticking with the same section, use a 4B pencil to shade along the rib. Make sharper marks with your pencil along portions of the rib and gradually lessen the pressure as you blend into the midtones.
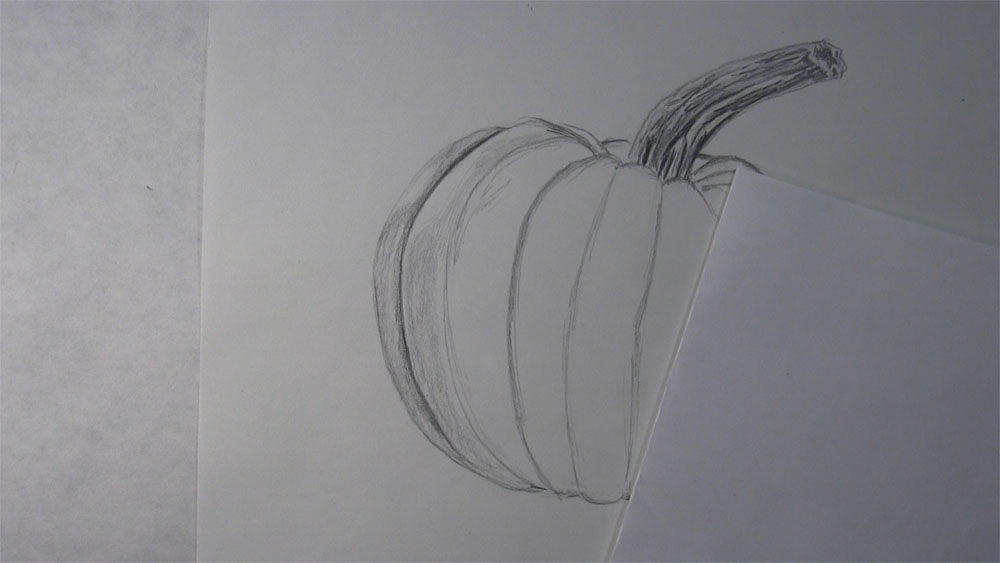
Use a 4B pencil to put some shadow tones near the bottom of the first two sections. Since the pumpkin has a round shape, shading it is similar to how we would shade a sphere. Leave a thin strip of reflected light between the dark tones and the edge of the rib.
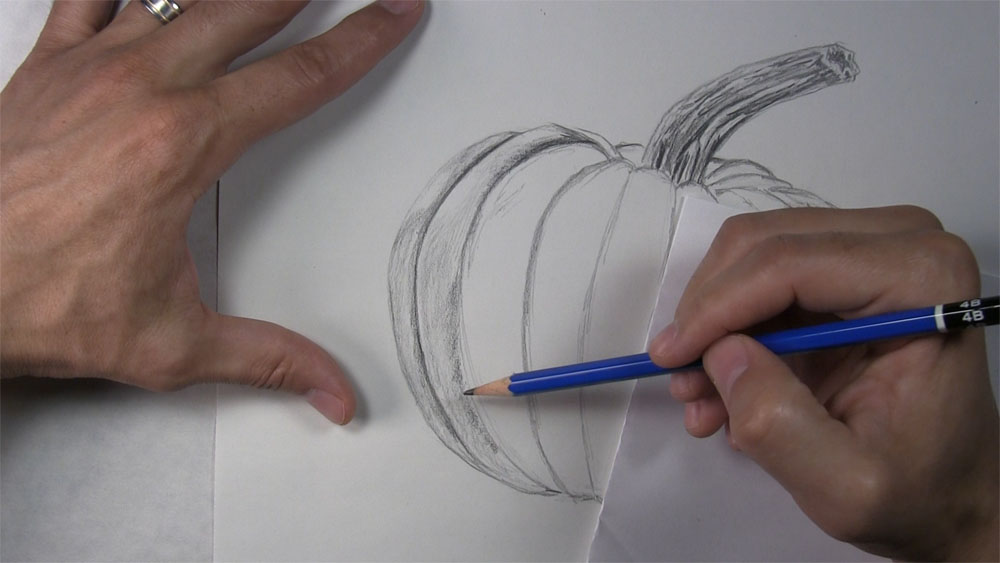
Shade the Next Section
Now we can move on to the next section. There are some minor impressions in the skin’s surface near the top here. I’m going to use an HB to put a few tones near the highlight here before shading any more of this section.
There are also a couple more impressions running down the length of this section between these two ribs. Sketch these impressions centered between the ribs, but don’t sketch a solid line all the way down like we have with the other ribs.
Keep using the HB pencil to lightly shade the section. Just as we did with the other two sections, make your pencil strokes follow the direction and curvature of the pumpkin’s shell.
Use a 4B pencil to outline the rib. Blend the graphite into the lighter tones as you shade away from the rib. Shade the bottom of the section at the base of the pumpkin. Leave some reflected light along the left edge.
Further develop the depth of this deep rib by using the 4B pencil to shade along the rib, immediately to the left of it. Then use the HB pencil to bridge a gradual transition from the dark shadow of the rib to the lighter midtone values of the pumpkin’s shell.

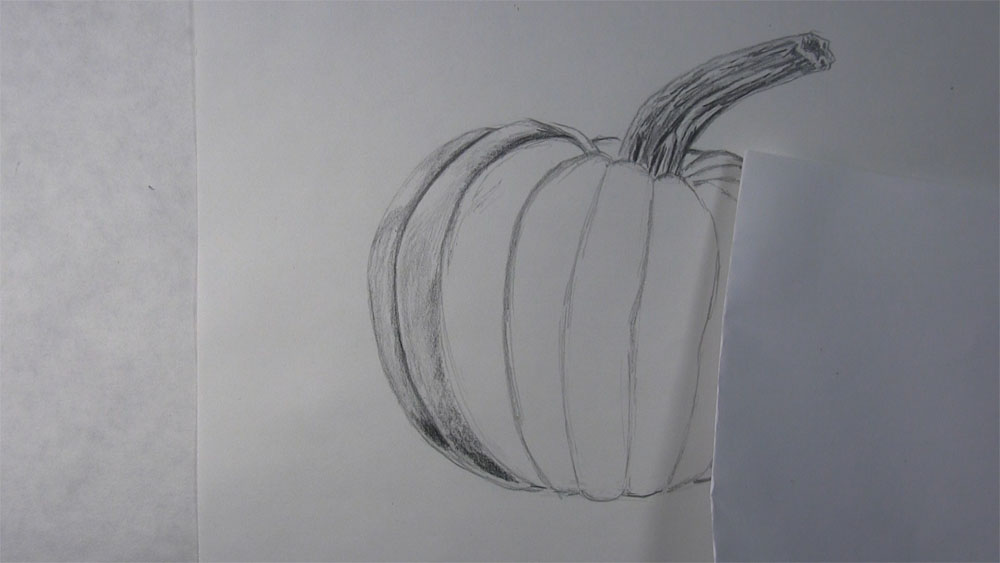
Shade the Middle of the Pumpkin
Use an HB to start lightly shading a base layer for the fourth section. Shade a slightly darker layer of tones over the base layer. Go back to the 4B to overlay even darker tones. Repeat these steps again for the fifth section.
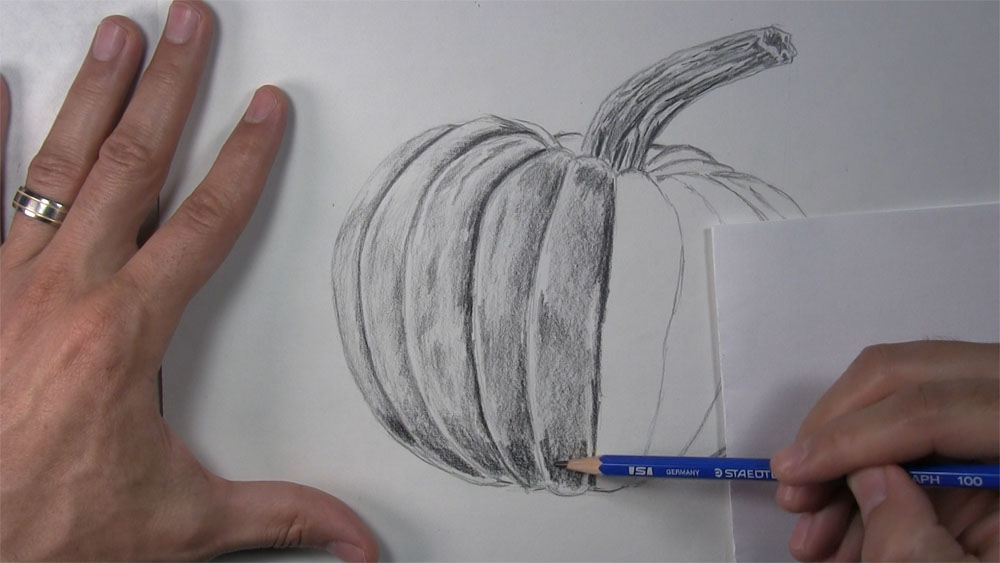
We can now go ahead and finish up this section at the top. I’ll just use an HB to add a little bit of shading, including some along the border and some slightly darker shading at the base near the stem. That leaves us with this little band of highlight.
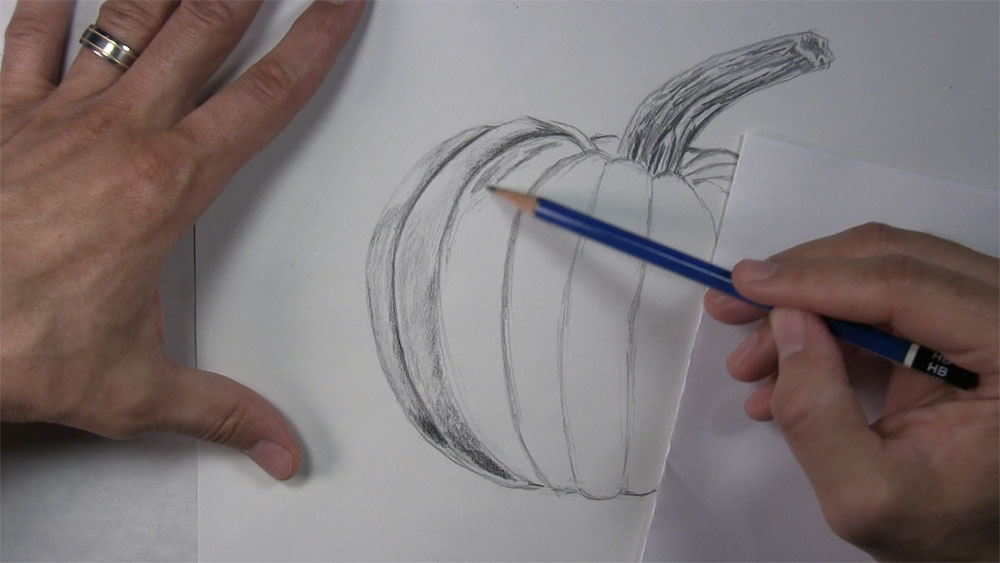
Now, we’ll keep shading the next two sections of the pumpkin’s shell. Use the HB to shade a base layer of light tones. Add a second layer of darker tones. Use a 4B to go over darker areas of the section. Then use your HB and 4B to shade the next section. This side of the pumpkin is on the opposite side of the direct sunlight, so it will have a little more shadow than the left side.
Add Shading to the Stem and Another Section
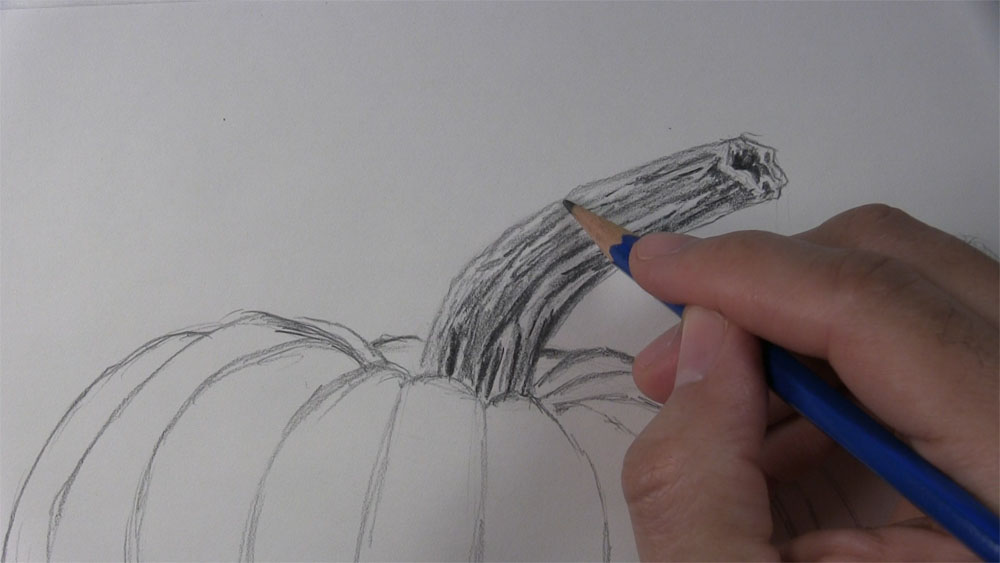
Add a bit more detail to the stem. Use the 4B to enhance the texture and appearance of the stem by adding more shadow near the base. Add a few more shadows to the ridges on the upper portion of the stem.
Okay, pick up the HB pencil again for the next section. Before adding the first layer of shading, go down the middle of the section to lightly sketch an impression down the middle. Then shade the rest of the section.
Start outlining the rib to the left with a 4B. Then put shading at the bottom of the section. Keep remembering to preserve some reflected light along the edges, even in all of the shadow areas.
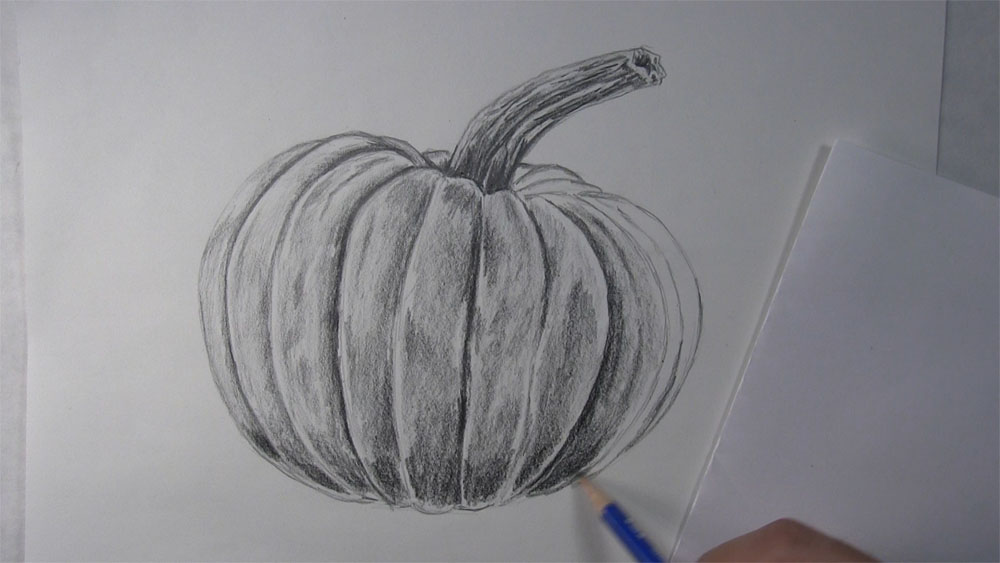
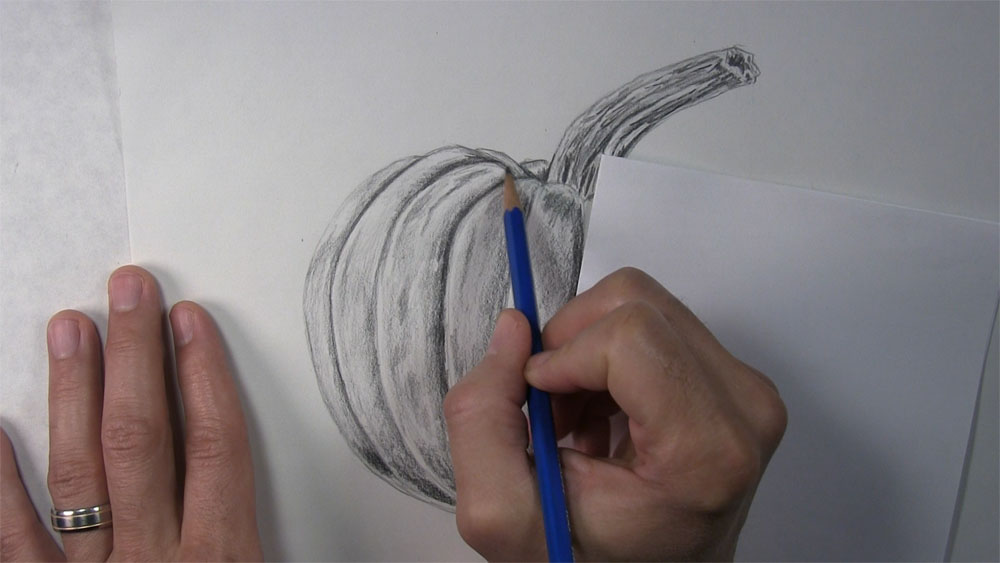
Finish Shading the Pumpkin
With your HB, start tracing over the next rib and the final sections of the pumpkin. Make the next rib a bit darker, and keep the rib to the right of it lighter. Start putting some light tones near the top.
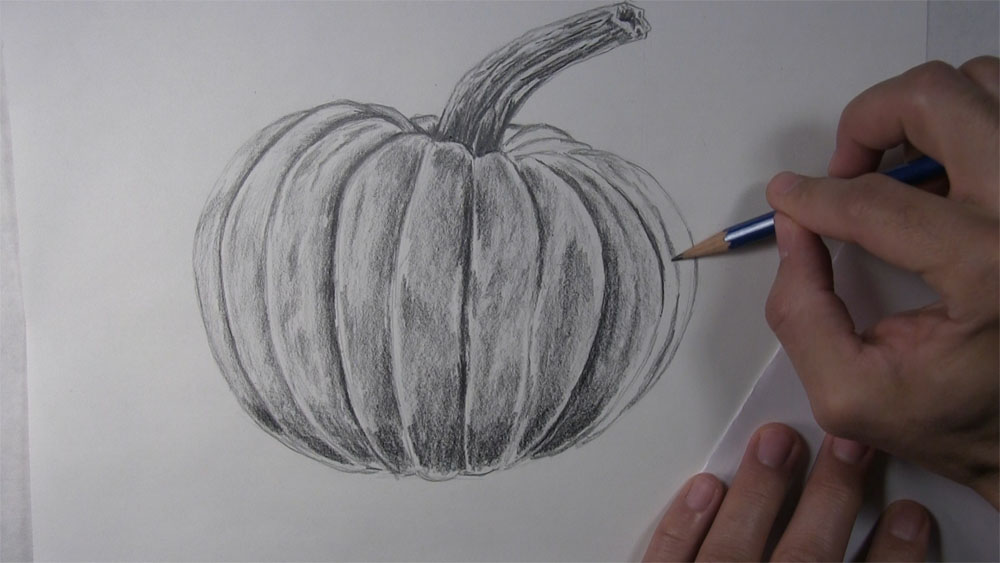
Lightly shade down the right side of the pumpkin. Then add some darker tones. Switch back and forth between the HB and 4B as you add layers of shading and additional details.
Look at your overall drawing so far and make sure that the lighter areas are at the upper left with a few highlights at the upper right side. Make sure the base of the pumpkin has the most shading.
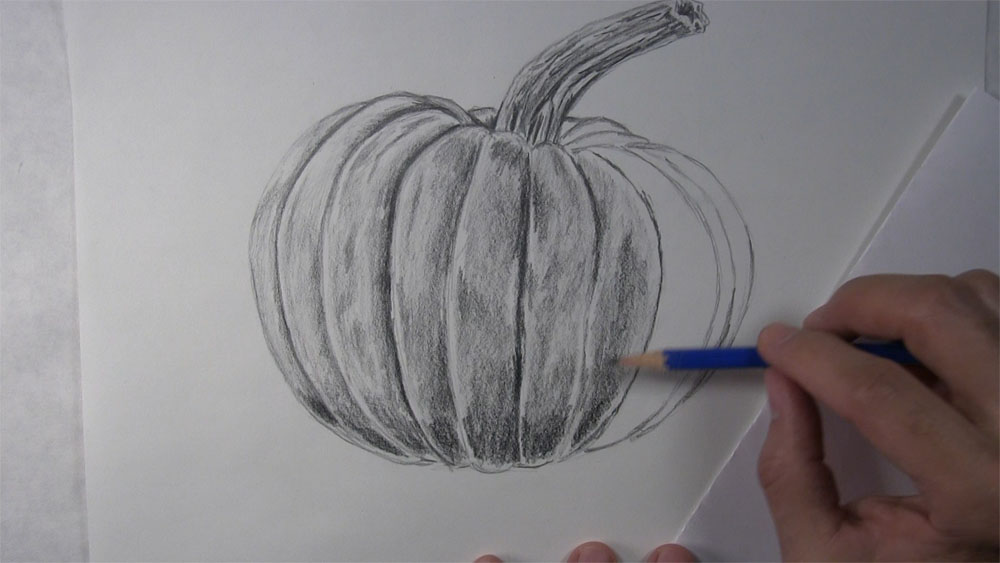
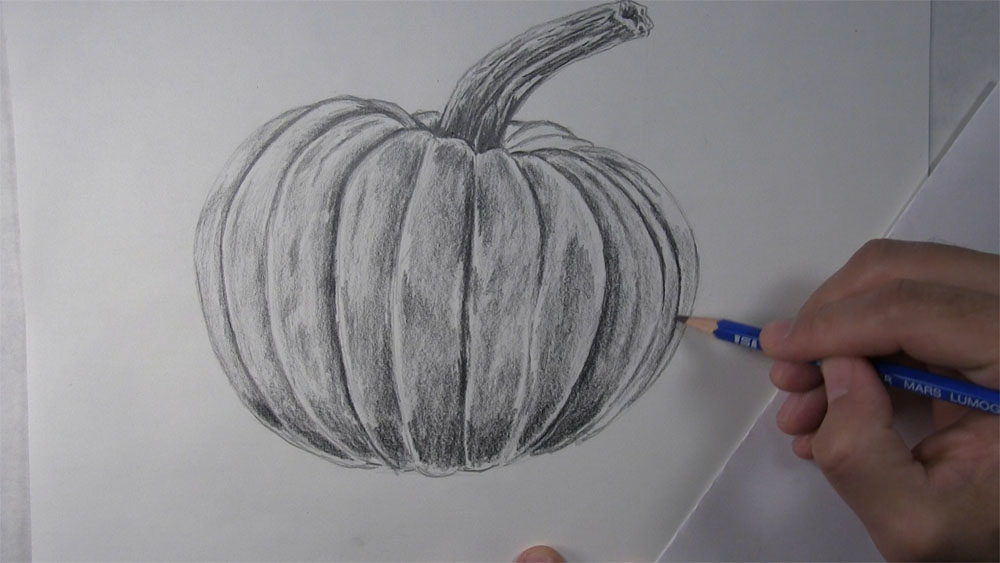
Use an HB pencil to lightly shade the final sections at the top of the pumpkin. Use the 4B to go over the ribs. Like we did with the top on the other side of the stem, there isn’t too much detail needed here since there isn’t too much we can see.
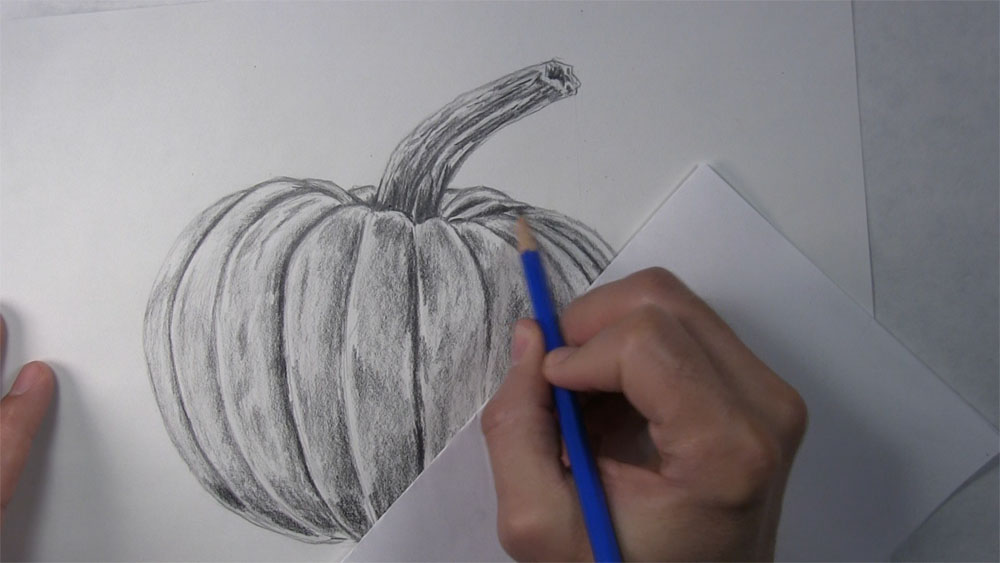
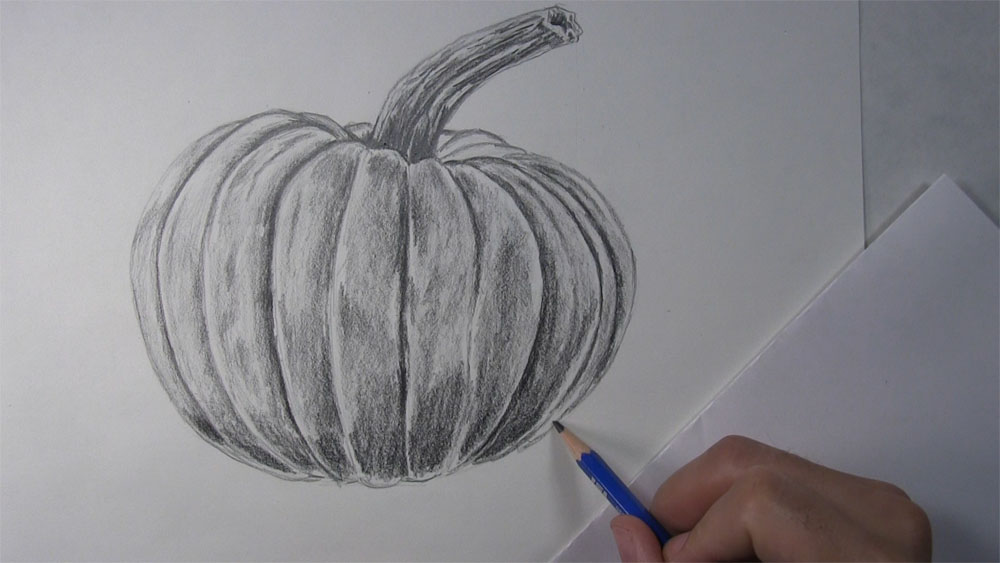
Use the 4B pencil to draw spots on the pumpkin’s skin. You can use the reference photo for guidance. You can also create some markings of your own that are not apparent in the reference, if you wish.
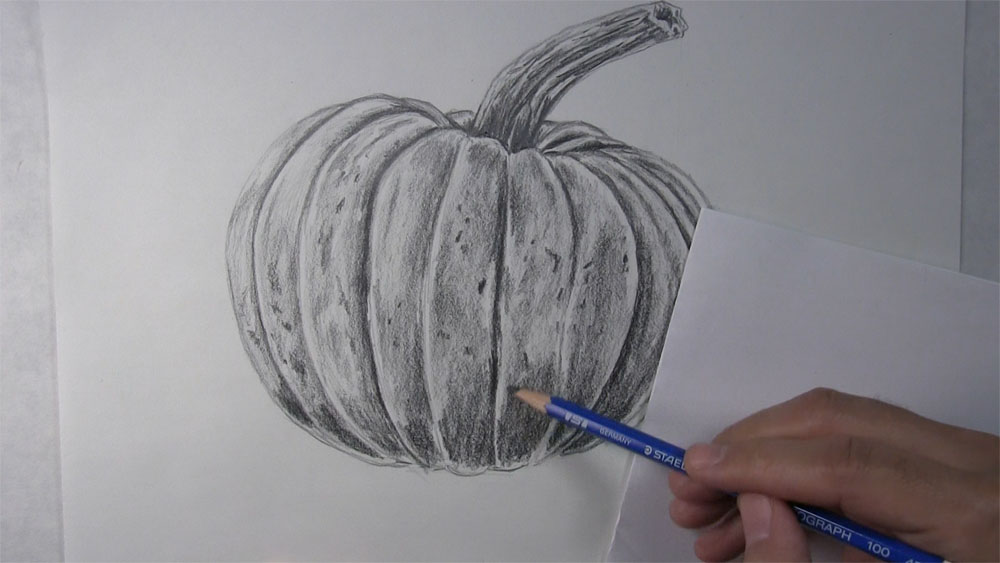
Draw the Cast Shadow and the Stump
Outline the bottom edge of the pumpkin with a 4B pencil. This is where we draw a cast shadow. Start shading under the pumpkin with a sideways motion. Next, create a crosshatch pattern by repeating this with another layer. Directly under the pumpkin, put another layer of shading. This cast shadow where the pumpkin meets the table should be where you place your darkest tones.
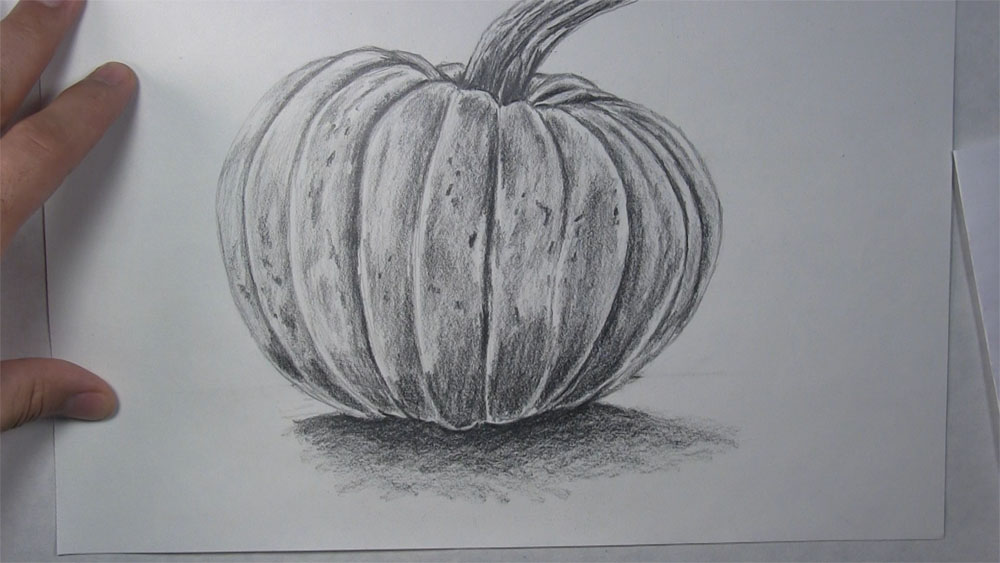
To draw the stump, begin by sketching a curved line on the left side. Then draw a line for the right side of the stump. Curve this line downward. Allow enough room for your shadow to be on the top of the stump.
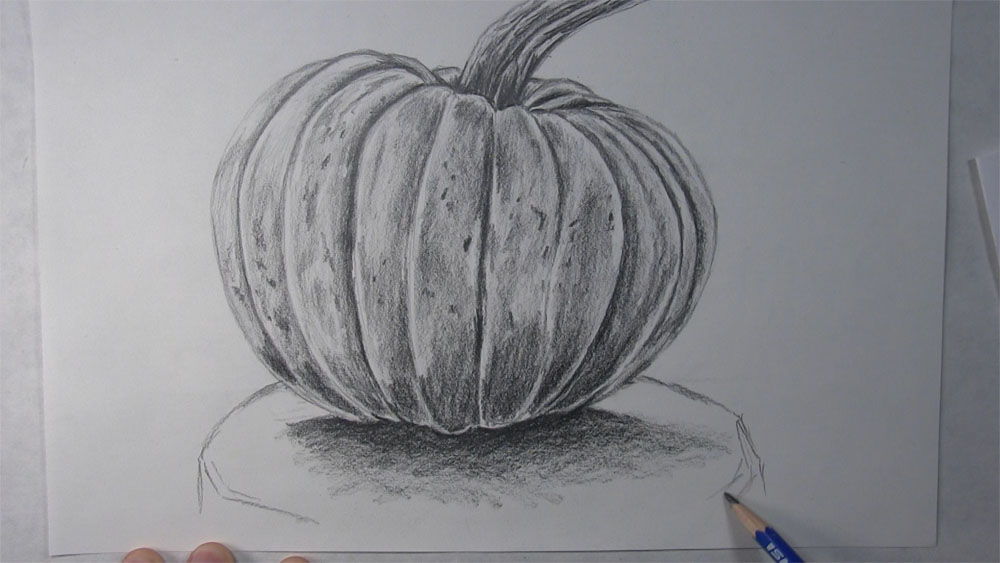
Bring some of the pumpkin’s shadow out a little more toward the edges of the stump. As for the sides of the stump, there’s not a whole lot we can see. Just shade the small part that is visible. Then shade the slanted bridge between the vertical side and the flat top.
Add Details to the Stump
Begin drawing cracks in the surface of the woody stump. Use a series of lines that are mostly straight but still wiggly and imperfect. Have the cracks branch apart in some places. Draw some cracks with light, dotted lines and thicker cracks with heavier lines. Keep drawing lines that radiate generally toward the center of the stump under the pumpkin.
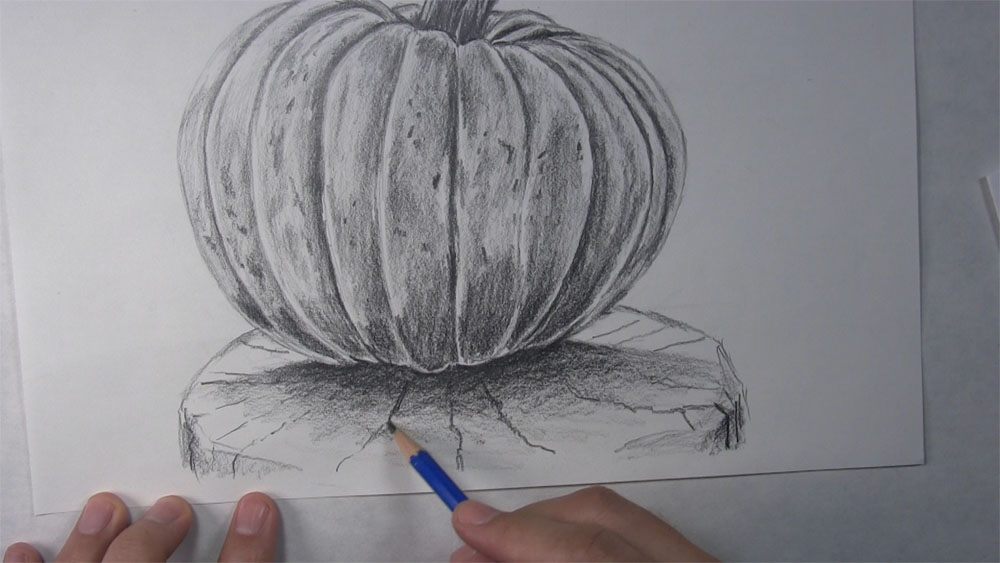
Start sketching circular rings around the top surface of the stump. Draw them in a way similar to how you drew the straight cracks. Use a loose touch with your pencil and follow the general curvature of the stump’s edges.
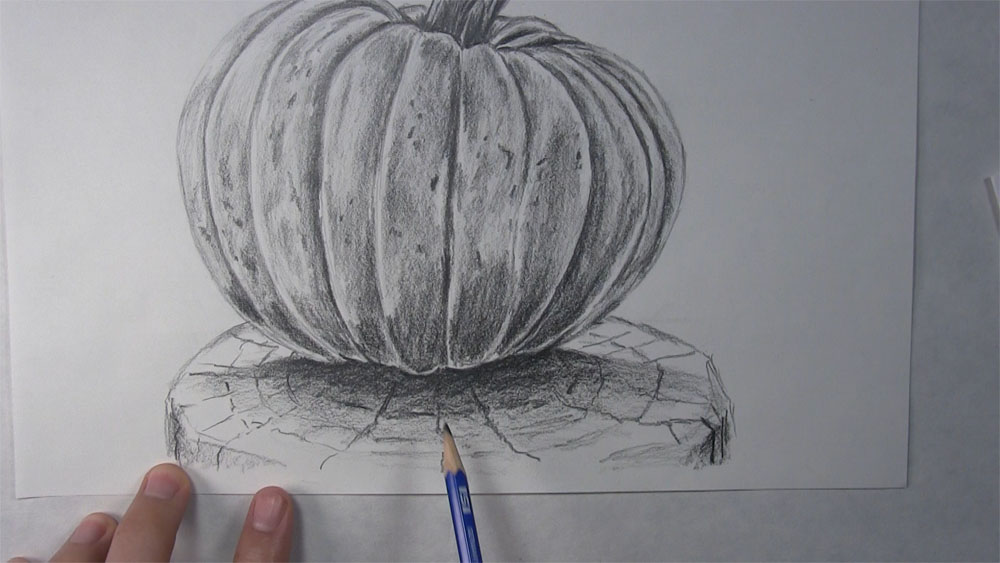
To finish up, sketch a few more straight lines pointing toward the center. Loosely and lightly sketch a few more circular rings as well. Put a little more shading on each side of the stump. Make final value adjustments and finishing touches. Erase any stray marks.
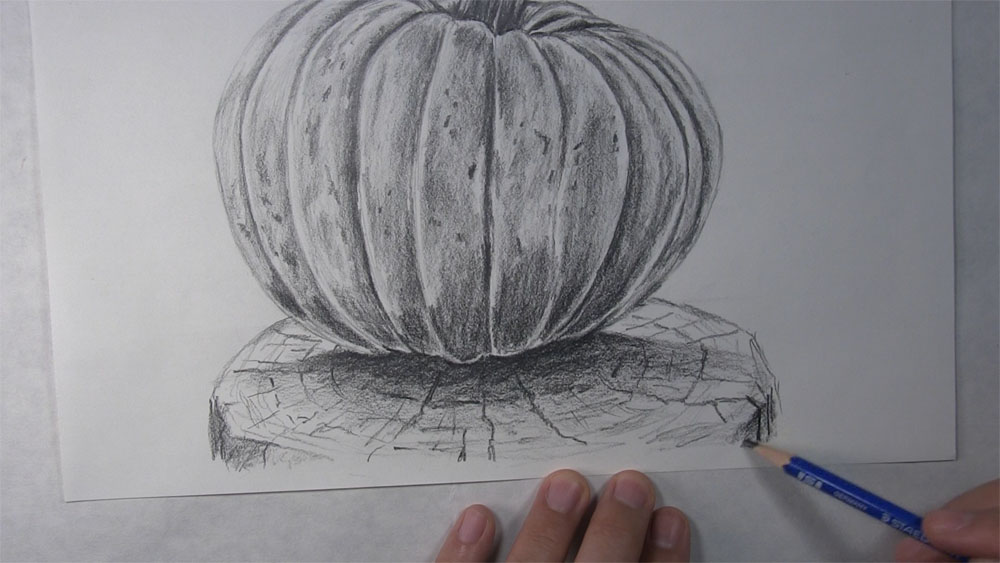
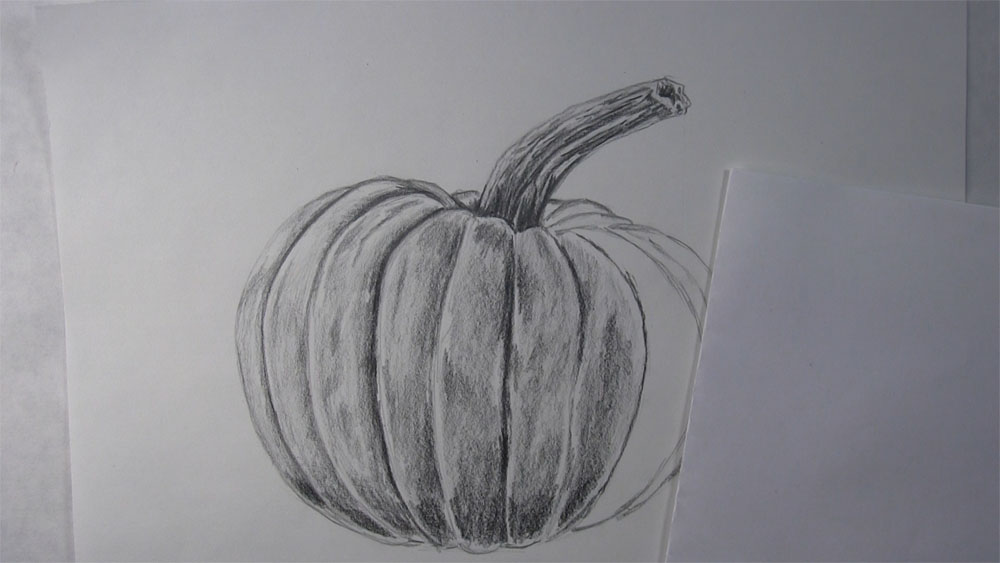
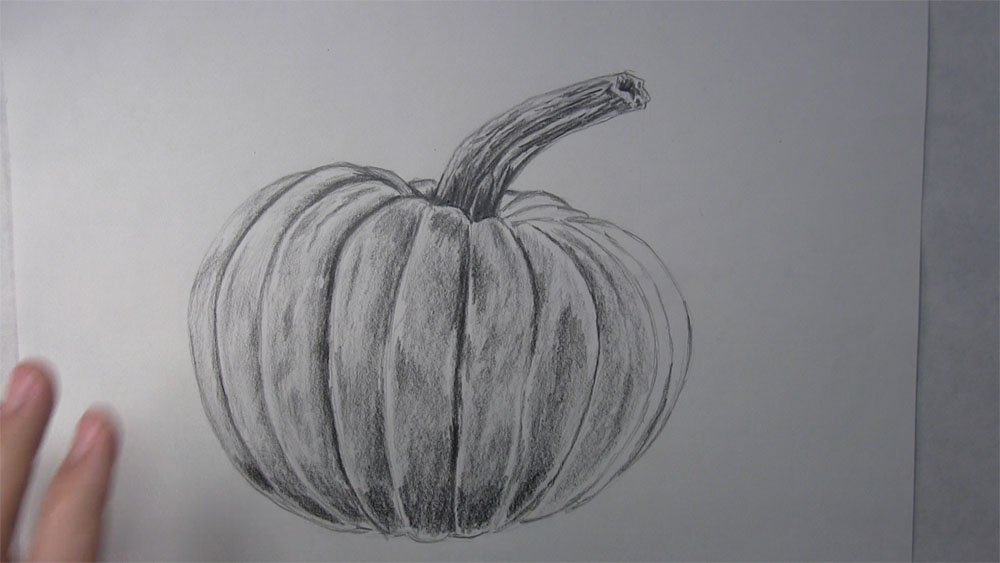
And that is an easy way to draw a realistic pumpkin!
Tutorial Recap
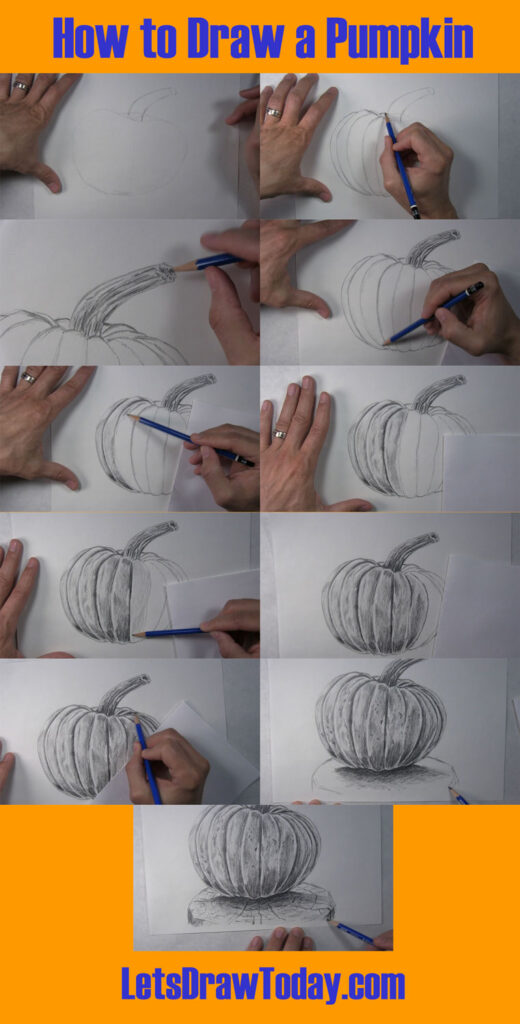
For a quick visual recap of this tutorial, take a look at the image below. It shows you a progression of the main steps for how to draw a pumpkin.
Tips to Remember the Next Time You Draw a Pumpkin
Here are a few tips to remember the next time you want to draw a simple pumpkin.
- Work from a reference photo so you can make a more realistic representation of your pumpkin.
- As you draw the ribs of the pumpkin, remember that some are very deep and some are more shallow. Vary the pressure of your pencil to convey the various depths of the ribs.
- Consider using both a color and a black-and-white version of your reference. You can use both photos together to give you information about light and dark values as well as subtle changes in color, like the subtle color variations on the pumpkin’s skin.
- Try drawing a variety of pumpkins and other squash. Although pumpkins are universally round, they still come in a variety of shapes and sizes. Some are long and tall while others are short and wide. The same can be said about pumpkin stems!
If you enjoyed drawing this pumpkin step by step, maybe you will like drawing other foods. Maybe you’ll even get the urge to draw some pumpkin pie!
I hope you now realize just how easy it is to draw a pumpkin! Why not make it a personal goal to draw a pumpkin every fall? Keep picture records of your drawings or the originals themselves to track your progress. You will be amazed at how easily pumpkin drawing comes to you!