How to Draw a Kitten Face Step by Step
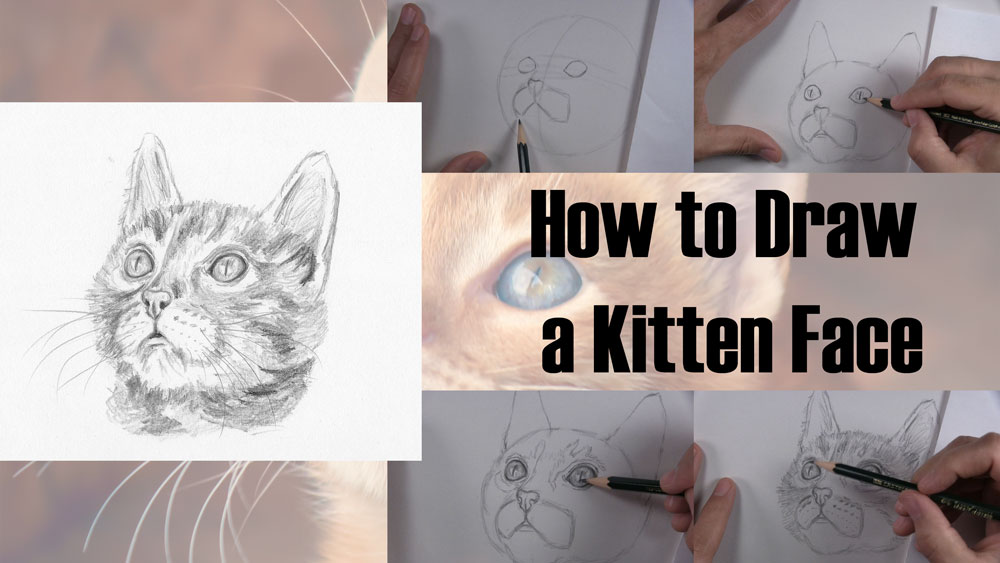
If you are a person who is fond of cats and cat faces in particular, then it’s probably safe to say that you find kitten faces irresistible. Not only are kitten faces cute, but they are also a fun subject to draw. You may even be looking for a step-by-step way to draw a cute kitten face.
If so, then look no further! In this tutorial, I will show you how to draw a kitten face step by step.
Table of Contents
Use a Reference Photo of a Kitten Face
Here is the reference photo for this tutorial…a cute domestic kitten with her head looking up. We can see a little bit of the kitten’s body, but our focus for this tutorial will just be the head.
Also, I will make broad, loose strokes when adding the fur and some other features. In many ways, the end result will be more of a freehand sketch than a polished drawing. Anyway, feel free to refer to this photo in addition to the step-by-step images.
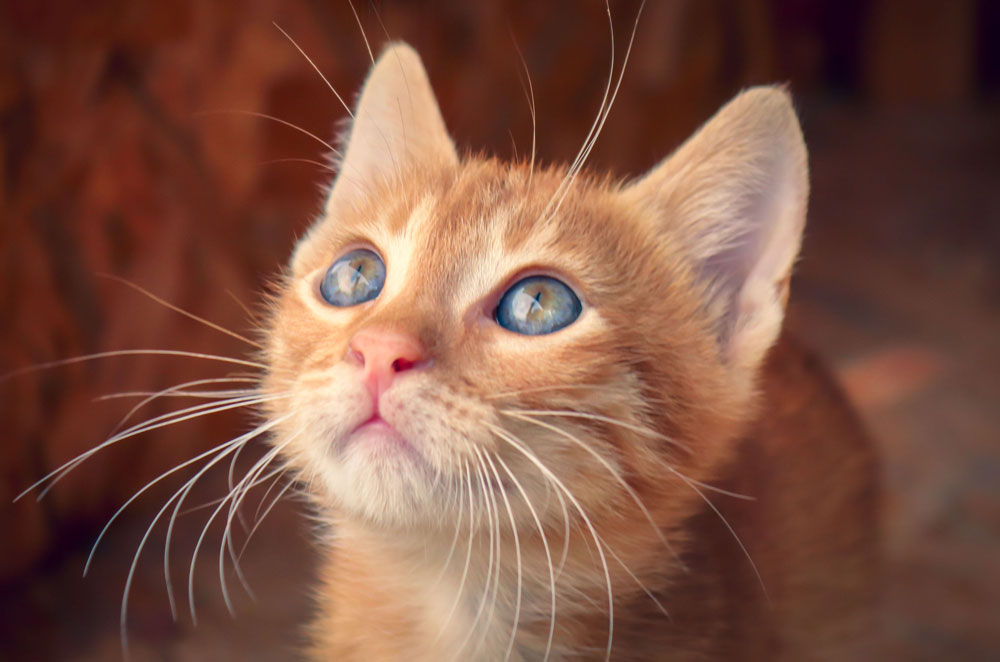
You can use the same concepts you learn from this tutorial and apply them to drawing other kitten faces. Kittens have many common traits. However, there can be significant differences from one kitten to the next. So, having a reference photo of the kitten face you are trying to draw is not a bad idea.
Materials Used for This Drawing
Here is a list of the materials I am using for this drawing.
If you don’t have some of these materials, that’s okay. You can still make do with a regular pencil and eraser, as long as you just get started!
If you wish to purchase any of these materials, they can be found at your local art store, or you can buy them using the links below.
Affiliate Disclaimer: The links on this page are affiliate links. I will receive a small commission if a purchase is made through one of these links. Learn more here.
- Sheet of drawing paper
- Sheet of folded paper to prevent smudging
- 2B and 6B graphite pencils
- Kneaded eraser
- Plastic eraser
- Dusting brush
How to Draw a Kitten Face Video Tutorial
You can watch the time-lapse video version of this tutorial below. Watch it once all the way through to get a sense of the overall process. Then watch a second time and draw along with me, pausing as needed.
As an alternative, when you sign up for the Let’s Draw Today Newsletter, I will give you the extended video course version of this tutorial and 9 others (10 in all) as a free gift!
Free Bonus: Click here to get access to 10 free drawing video tutorial courses. Draw along with me in the full-length version of this tutorial and 9 others as I show you one step at a time my entire process for drawing each subject from start to finish.
Draw Basic Guidelines for the Kitten Face
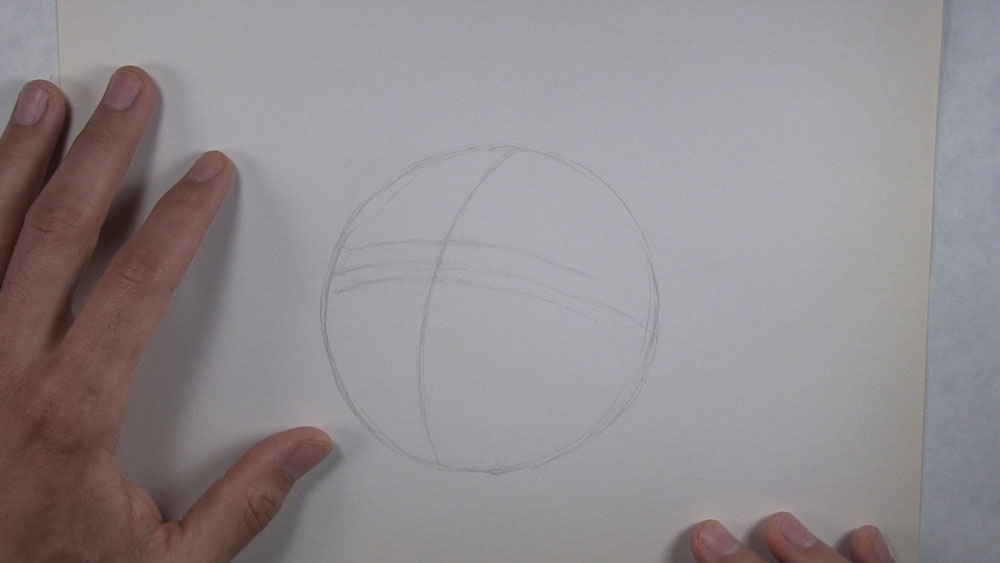
To begin drawing a kitten face, lightly sketch a circle for the head. I’m using a 2B pencil. Then draw a horizontal guideline with a slight curve to reflect an upward tilt of the head. After that, sketch a curved vertical line. Remember, the kitten’s head is facing to our left. Next, sketch two more curved lines parallel to the first horizonal guideline.
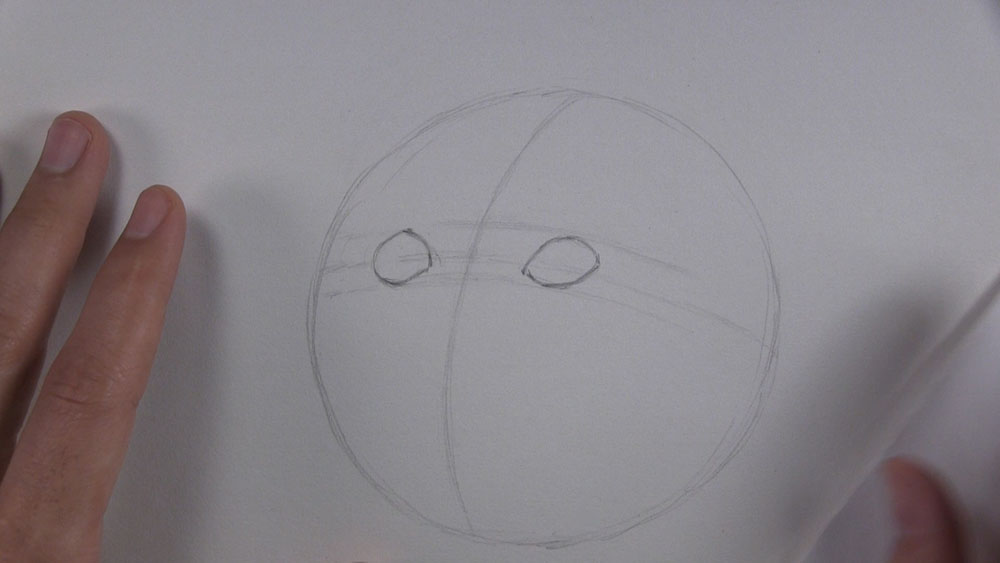
Let’s draw the outline of the kitten’s eyes. The last two horizontal guidelines I sketched during the last step are meant to help locate the top and bottom of the eyes. The tricky thing about cat eyes is they have a sharp diagonal angle from the inner to the outer corner. The inner corners of each eye should be aligned with one another between the center and lower horizontal guidelines.
We can start drawing the nose next. If necessary, adjust the levels of the eyes so the right eye is slightly lower than the left, as in the reference photo. This way, the bottom of the right eye can be aligned with the top of the kitten’s nose. Sketch a pointy bottom to the nose.
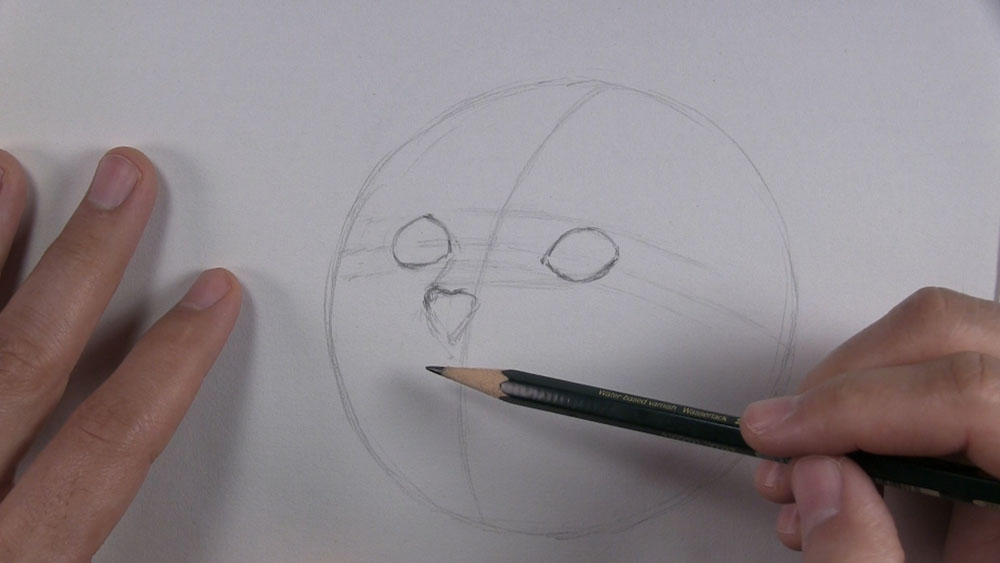
Below the nose, draw shapes that form the mouth area. Sketch a line from each side of the nose that curves downward. Sketch a vertical line down the center of the nose and beyond the lower tip. Use diagonal lines to connect this middle line to each lower end of the mouth area.
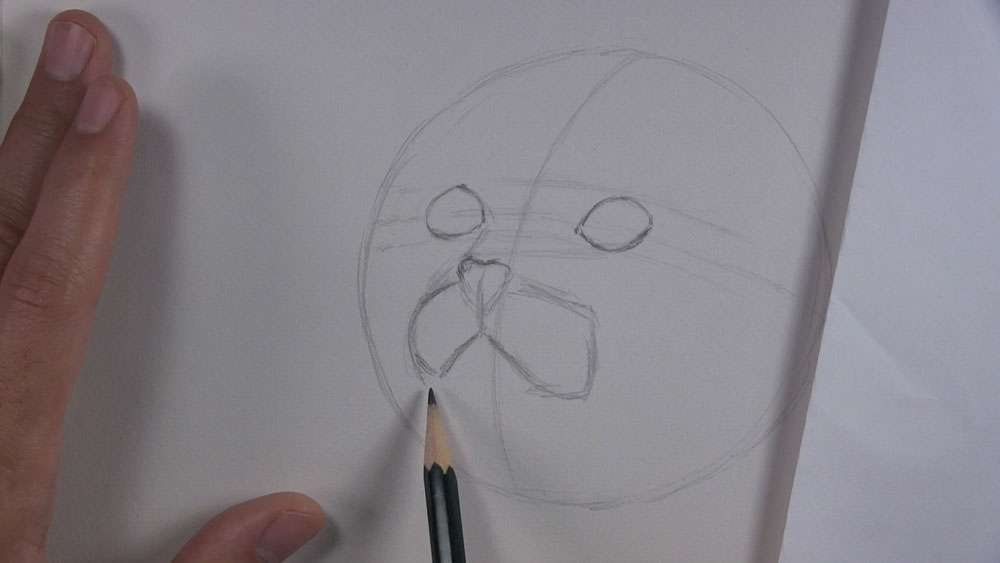
We can draw the mouth next. I will draw a mouth that is more visibly open than the reference. Draw a line for the opening just under the nose. Sketch another short line just under that. Then we can begin drawing the kitten’s jaw.
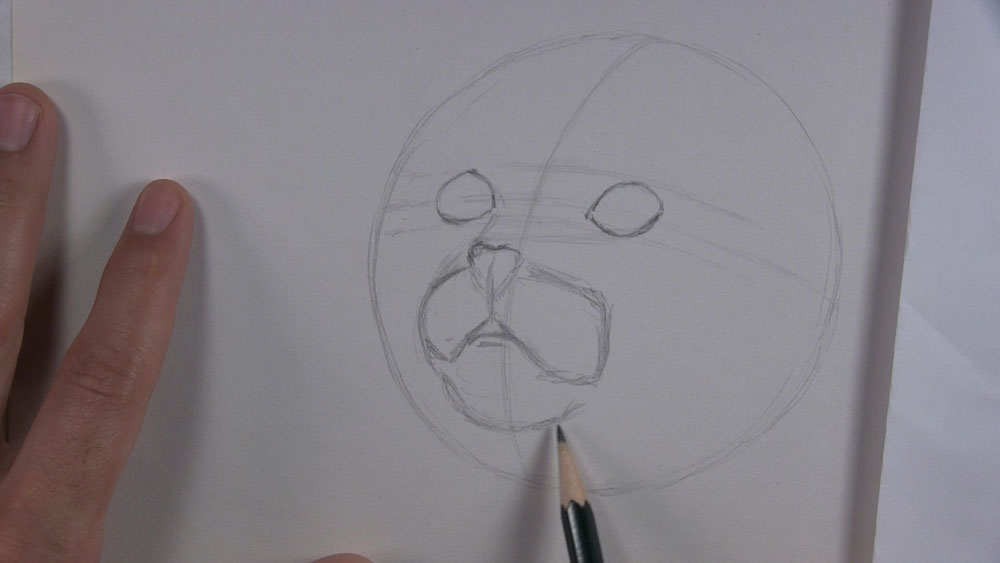
Complete the Outline of the Head
Let’s continue to shape the outline of the kitten’s head. Extend the jawline from under the mouth area. Next, start shaping the side of the kitten’s face. I am not drawing precisely on top of my circle guideline from the first step. Instead, I am drawing alongside it, because our little kitten’s head is much smaller than our circle guideline would suggest.
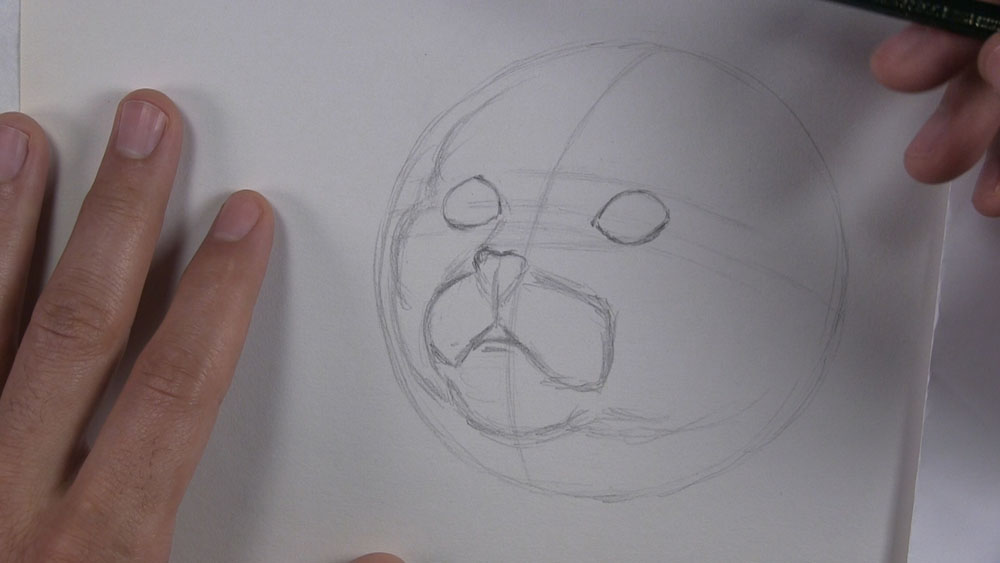
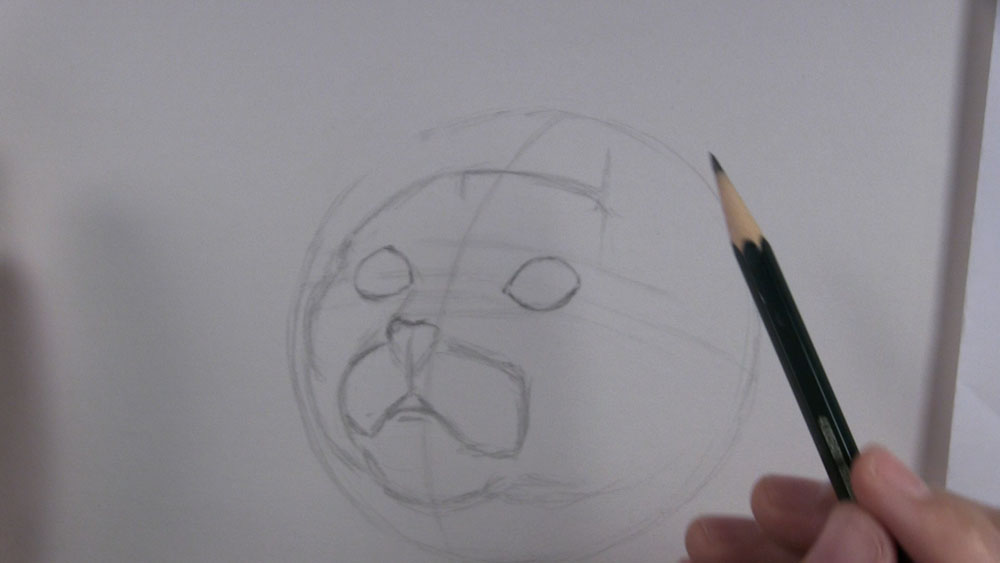
Next, identify the top of the kitten’s head. First, locate where the ears should be. The ear on the right is aligned a little to the right of the eye. Note the amount of space between the eye and the top of the head. It reveals the top of the head should be lower. The other ear is aligned to the right of the nose.
Complete the Outline of the Ears
To draw the outline of the first ear, we already marked where along the head one edge begins. For the other edge of the ear, put a mark where the outer edge of the eye is located. For the tip, mark above the area of the inner corner of the eye. Now we can complete the ear outline by connecting the marks.
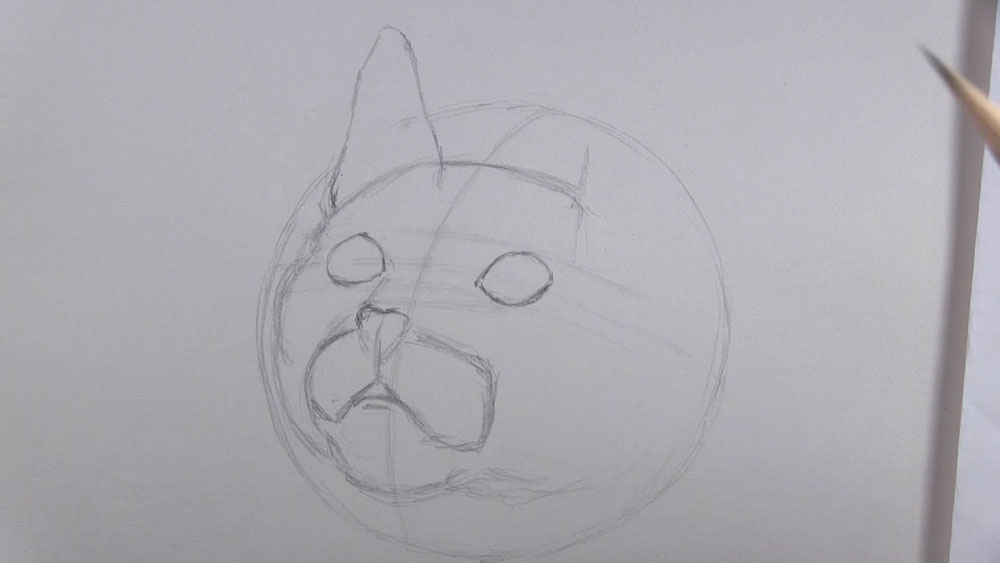
Next, we need to find where the other side of the ear connects. The reference photograph reveals that the edge of the head is about two eye-widths away from the corner of the eye. The ear itself connects below the eye level. The top tip of this ear is slightly lower than the first one. Connect the ear at the base and finish the side of the head.
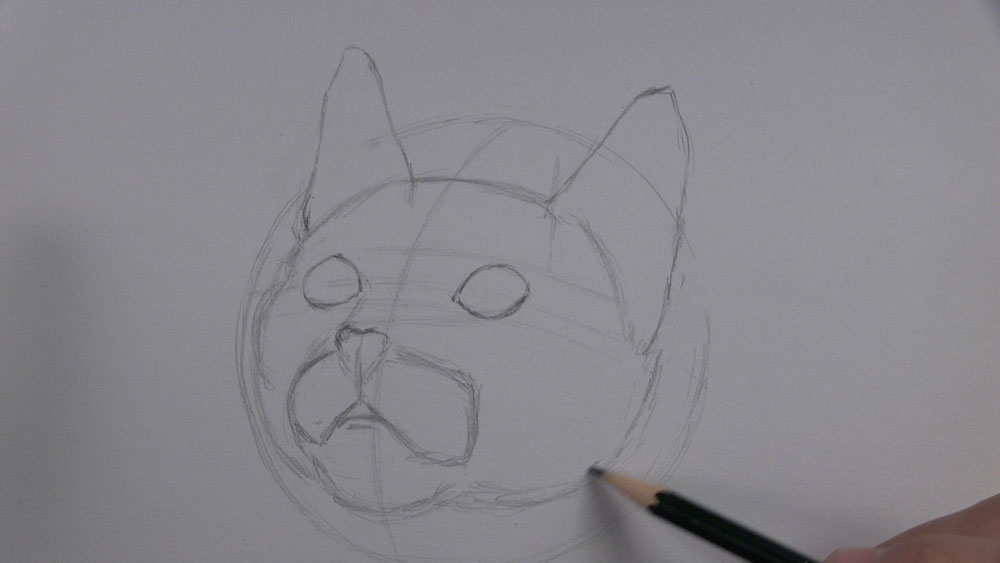
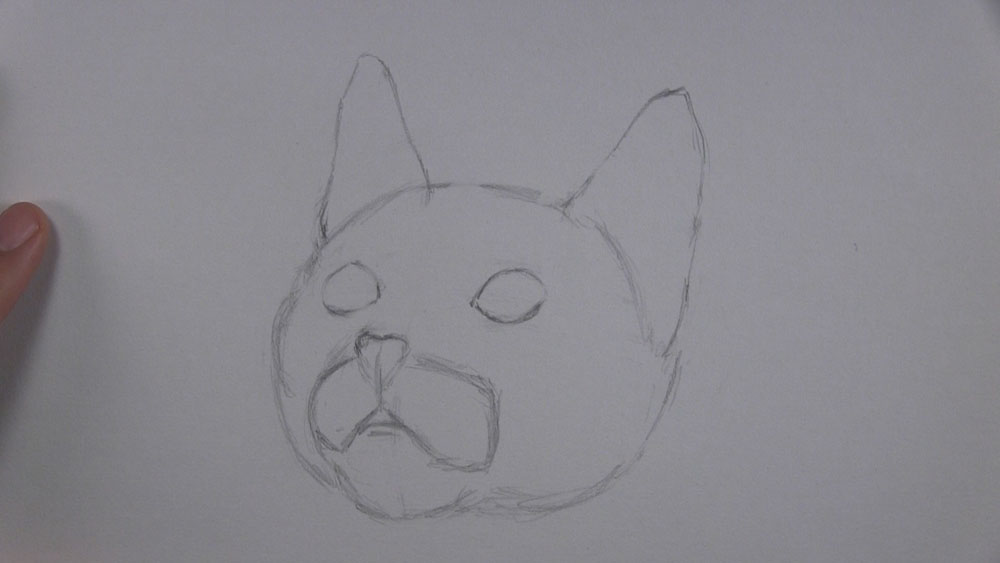
We no longer need most of these guidelines, so we can start erasing them now. As you erase, take care to maintain the contours of the kitten’s face. Very carefully erase the remaining guidelines inside the outline of the kitten’s face. Try your best to not erase the outline of the facial features you drew up to this point.
Add Details to the Kitten’s Eyes
Next, we can begin working on the eyes. A kitten has a very different pupil from a human. Draw a vertical slit slightly left of center that still curves on the kitten’s eyeball. Do the same for the other eye.
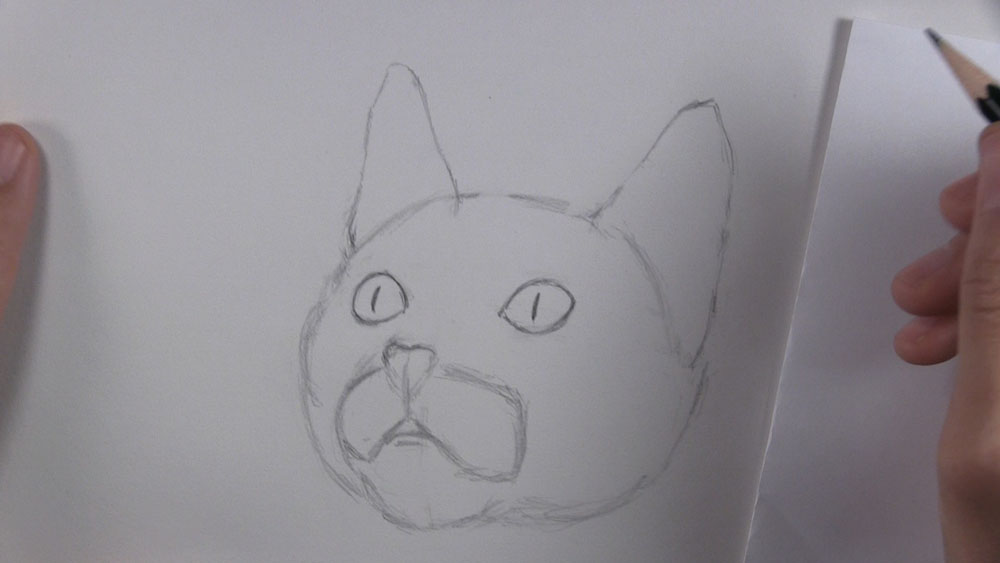
After that, very lightly draw the outline of the highlights in each eye. There is one major highlight in each eye. Both have an irregular shape. The first one intersects the pupil about halfway and covers its lower half. The second one is similar but is shaped slightly different.
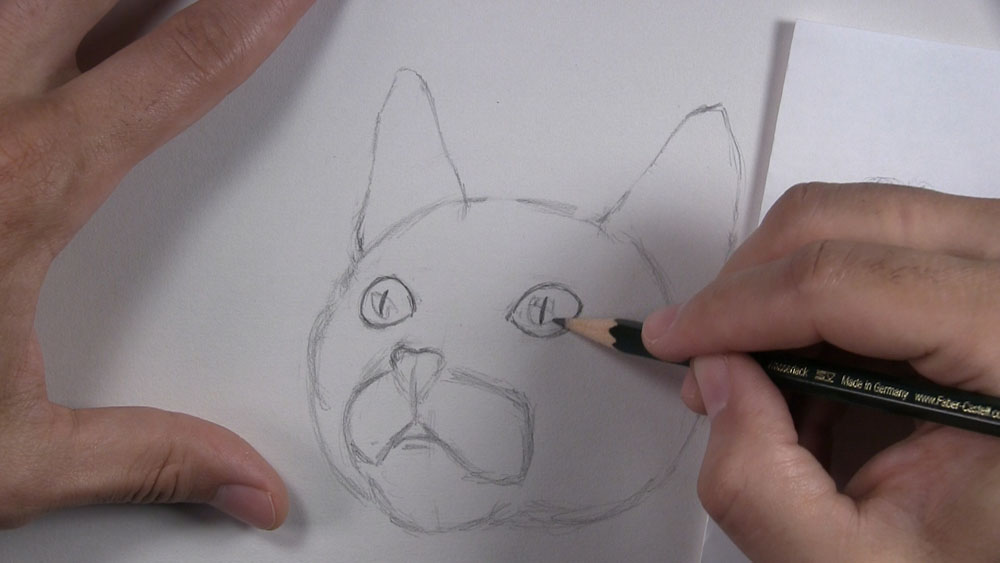
Outline along the inside edge of each eye. Put a round edge against the corners to give more shape to the eyeball. Lightly shade the eyes. Shade around the highlights to leave them free of any pencil marks. Then put another layer of light shading in the eyes. Make this layer slightly darker.
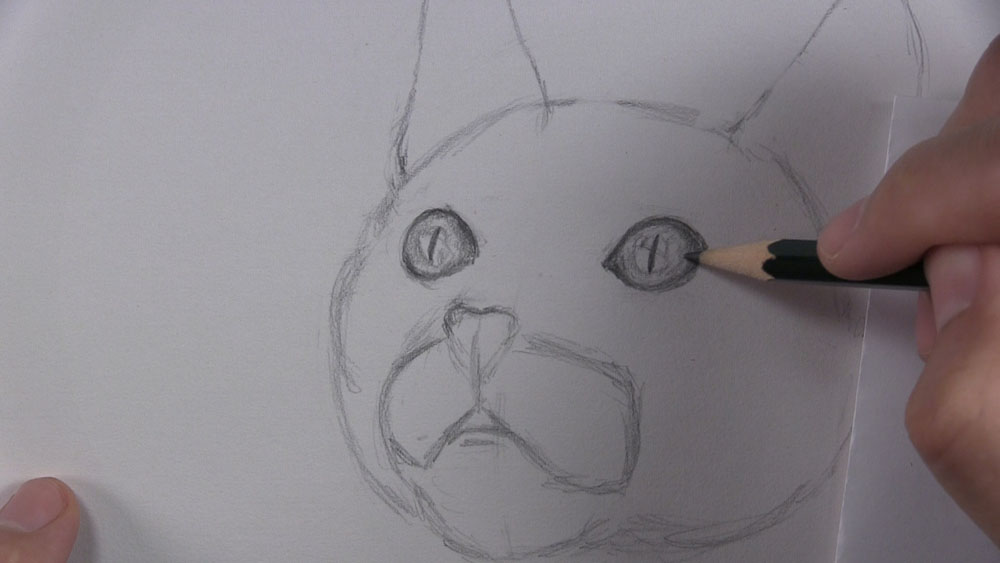
Shape the Nose and Furry Patterns
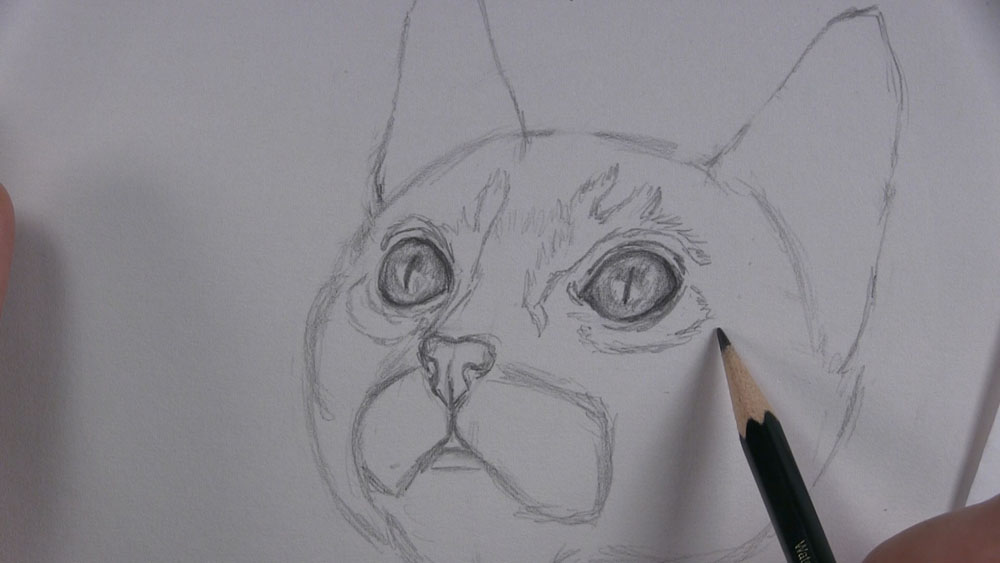
Next, start shaping up the nose. Define the upper edge. Then outline the lower part of the line in the middle as well as the lower tip. From the lower portion of the nose, start drawing lines inward to shape the nostrils. Curve these lines toward the outer edges and back up toward the top. Then draw curved lines toward the inner part of the nostrils.
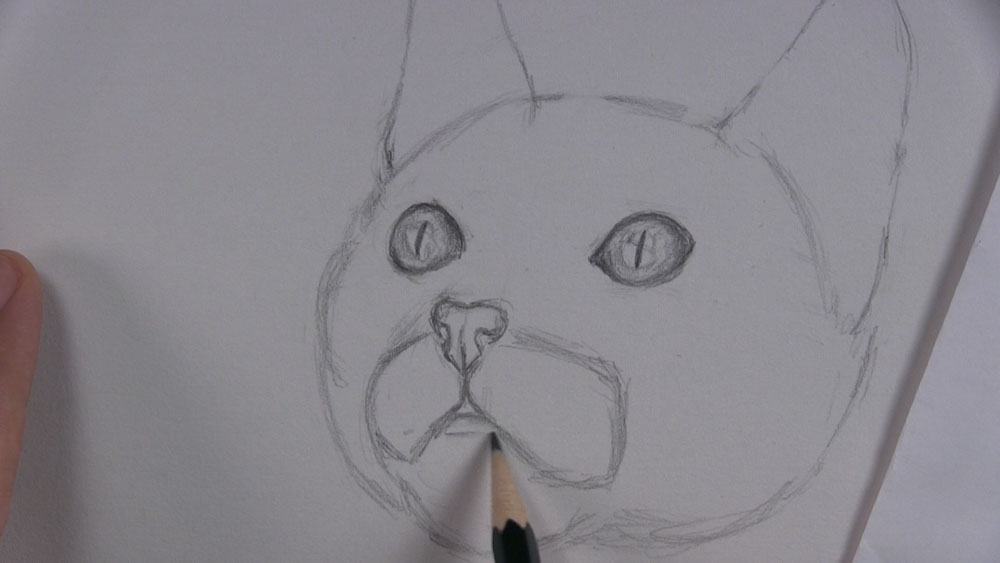
Now we can begin drawing some of the furry pattern around the kitten’s eyes. Start by drawing curved, zigzag lines above each eye. Sketch a basic outline of the light-colored furry pattern that is around the kitten’s eyes and on the forehead. Draw it branching out in a couple of different directions. Put another layer of shading over the eyes too, but still shade around the highlights.
Add Minor Details to the Ears and Mouth
Take some preliminary steps to shape the ears. Sketch a diagonal line running parallel to the edge of the ear to our right. Then start shaping the lower end. Draw a similar diagonal line on the other ear.
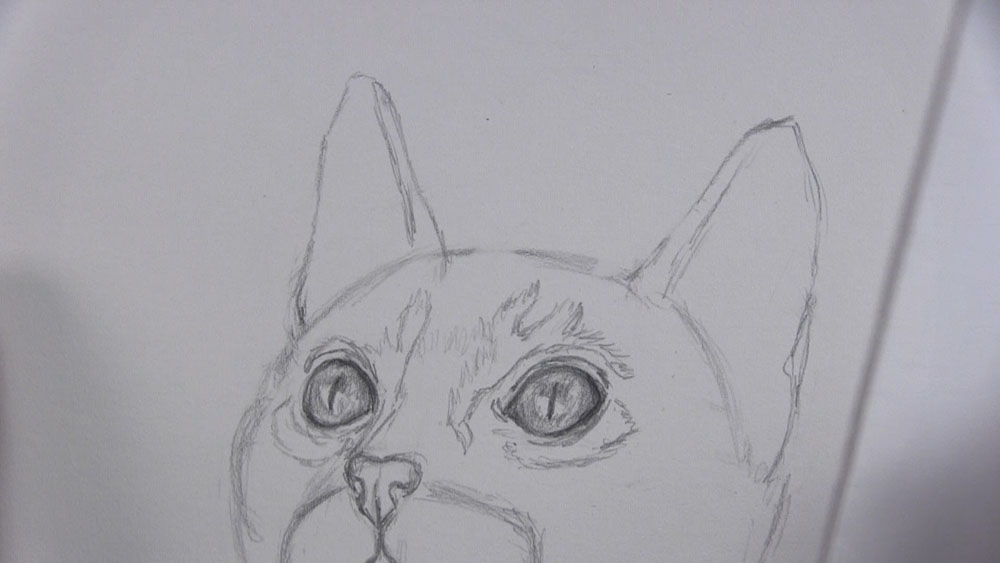
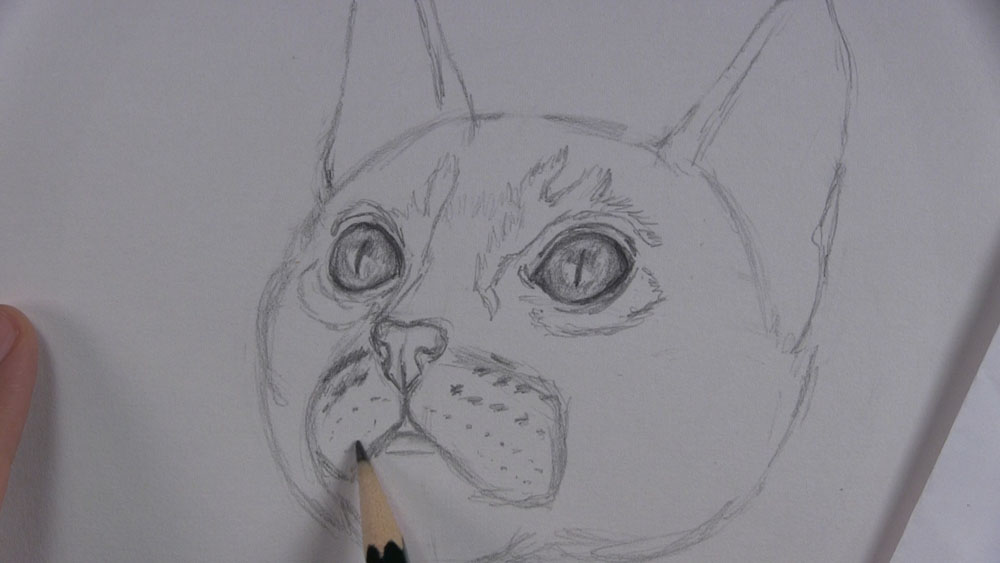
Focusing on the mouth area now, start sketching some marks, spots, and other tiny dots. This area is where most of the whiskers will originate. We will save drawing the whiskers as one of the final steps of the tutorial. For now, draw these dots in diagonal rows sloping downward from the nose. Make the top rows out of thicker spots. Make tinier dots for the lower rows.
Draw Fur on the Ears and Forehead
Back up to the first ear, draw some hairs pointing up along the edge. Draw a few sprigs of hair down the other edge too. Sketch a line along the inside edge to complete the flap. Erase the outline of the head immediately in front of the ear. Then draw thicker fur in front of the ear.
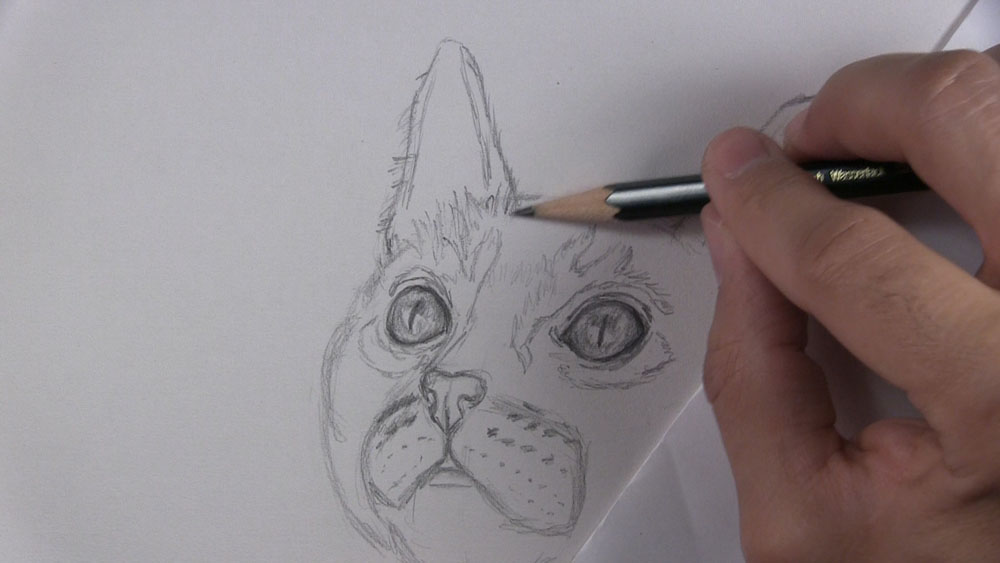
Continue to add fur to the kitten’s forehead. Erase the outline of the head between the ears. Then in its place, sketch the furry outline of the top of the head. Use longer vertical strokes to represent more fur on the forehead.
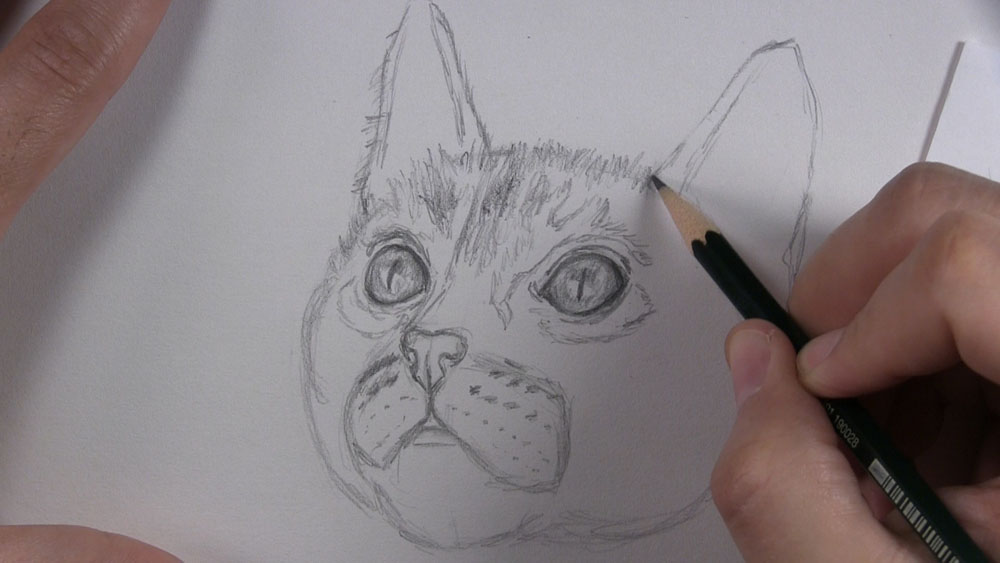
Sketch along the edges of the second ear with short strokes to give it a slightly hairy appearance. Return to the first ear to draw some long hairs along the inner edge. Then do the same with the other ear. Additionally, sketch some fur along the lower edge of the ear. Put some shading and a rim along the ear flap’s outer edge.
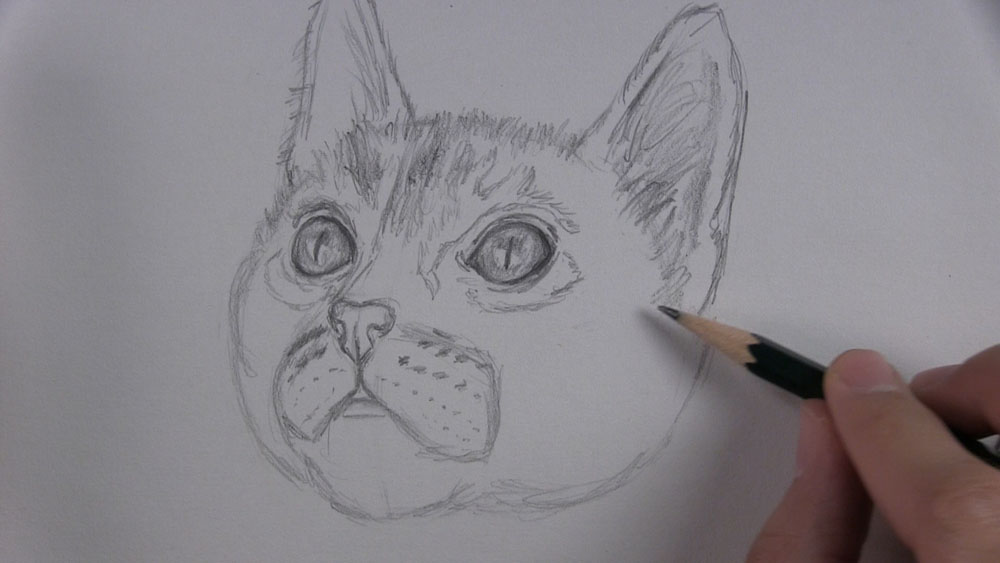
Continue adding fur to the top of the kitten’s head. Shade around the lighter fur patches identified earlier. Bring the fur down to the area under the ear. Use a swooping motion to curve the hairs upward. Keep checking the reference photo to look for the direction of hair growth.
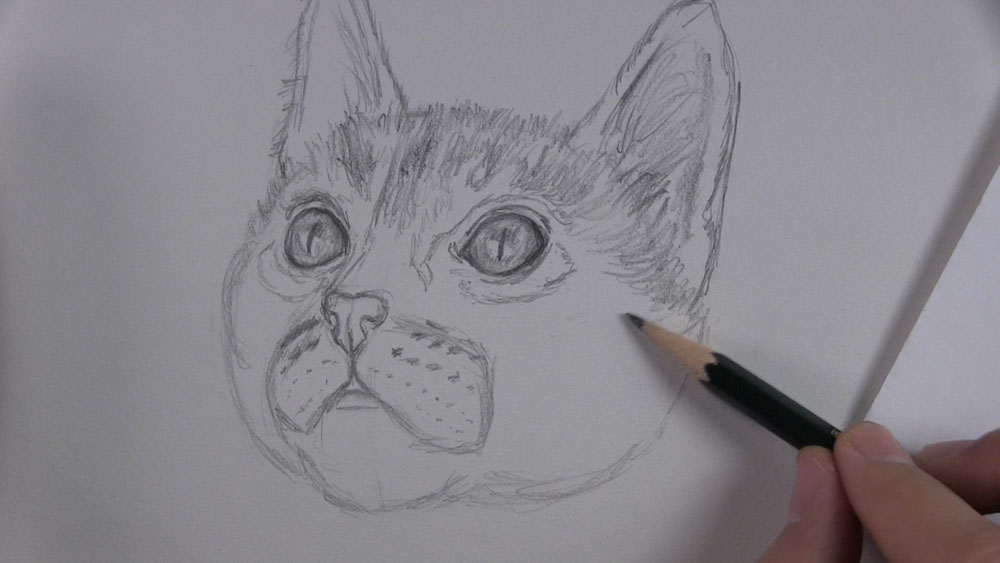
Draw Fur on the Kitten’s Face and Neck
Put some dark shading around the kitten’s eye. Extend the tones beyond the outer corner. Shade around the section of light fur that is under the eye. Then add more fur along the side of the face under the ear. Sketch fur on the other side of the kitten face and between the eye and the mouth area too.
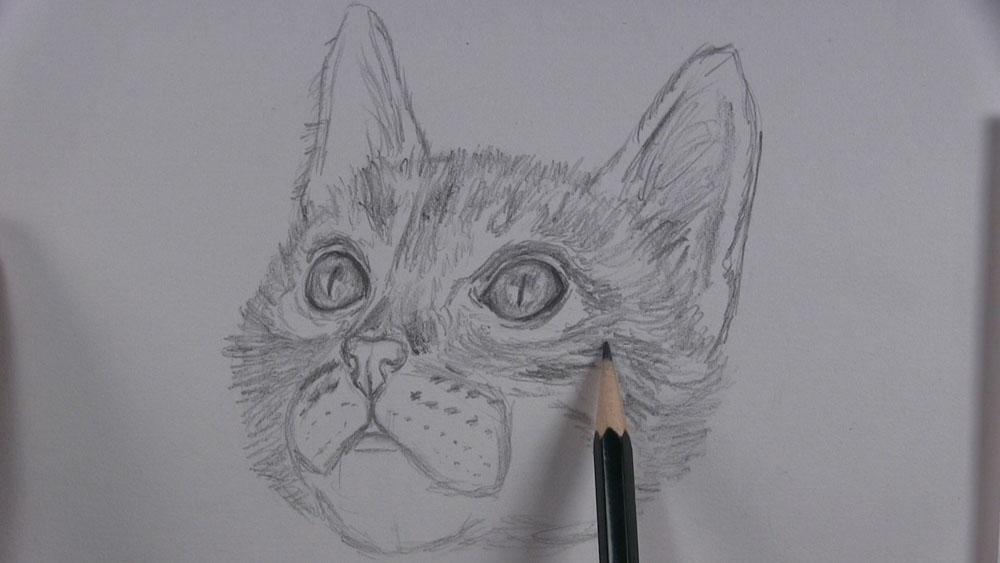
Shade the nostrils. Trace over the outline of the nose. Add some darker shading around the mouth area and to the inside of the mouth itself. Sketch some fur under the mouth. Erase the outline before drawing the hairs along the outermost edge.
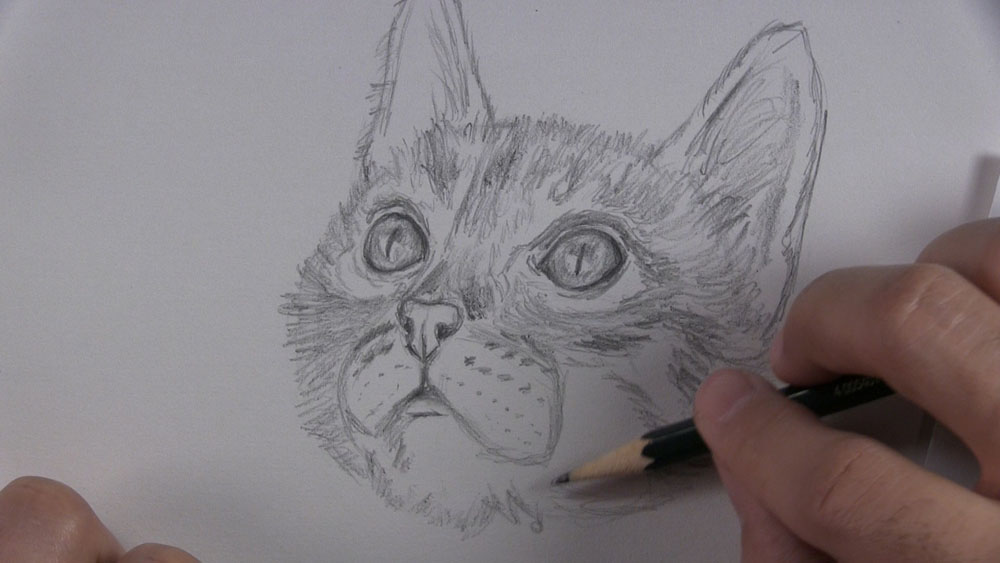
With your kneaded eraser, get rid of the outline shaping the area of the mouth that will contain the whiskers. Replace the outline with a furrier edge. Repeat this on the other side of the mouth. Apply some tones to fill in the open area on the side of the face.
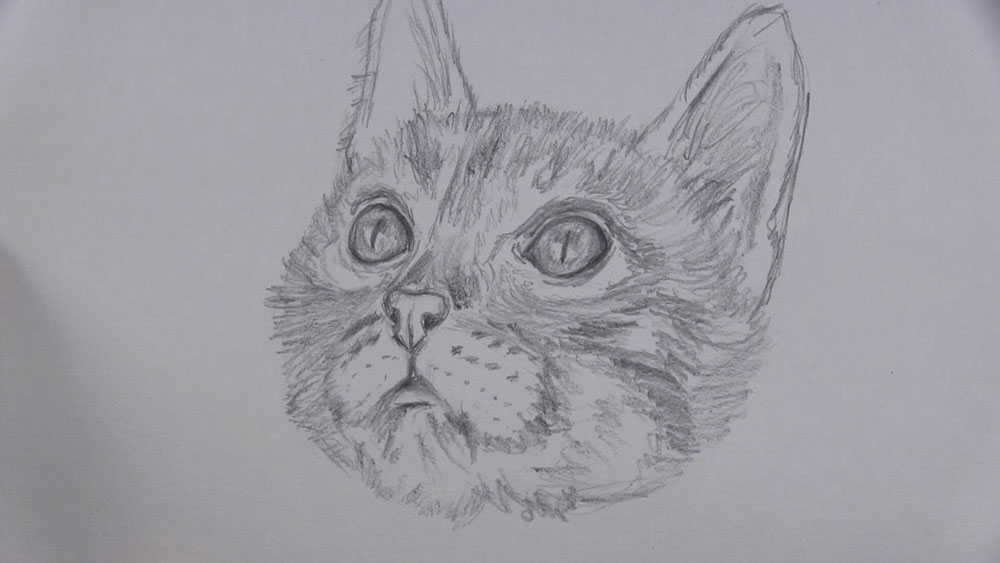
Begin loosely sketching some fur to signify the neck of the kitten. The fur on the sides of the neck go in the same direction as the fur on the sides of the face. Make the fur directly under the mouth area slightly darker, as well as the fur on the right side.
Add Depth to the Fur and Final Details
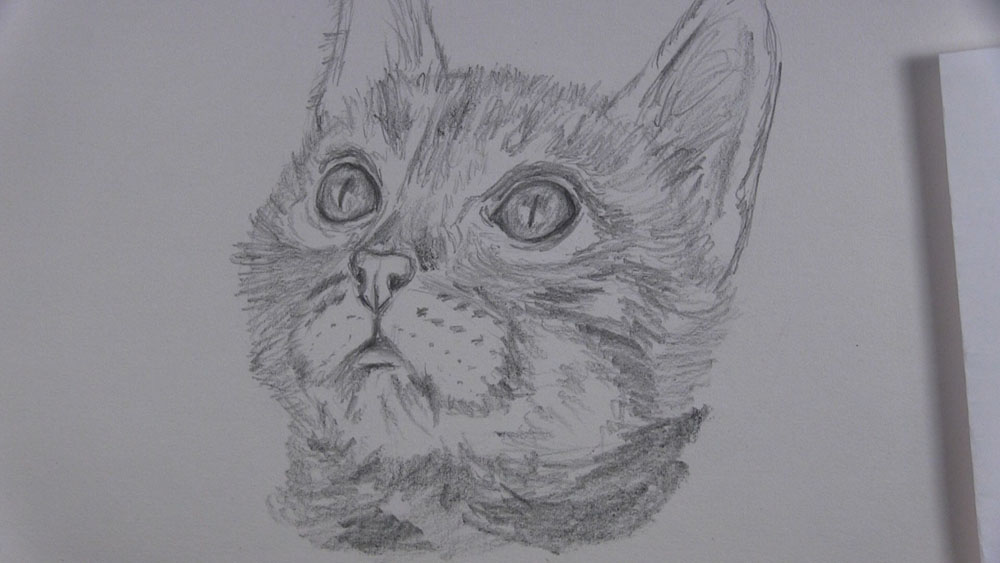
Darken the outline of the nose. Put some light shading on the nose as well. Look for opportunities to create contrast by putting darker tones next to lighter tones. Add darker values along the bridge between the eyes and on the forehead over the eyes. Remember to shade with the hair growth.
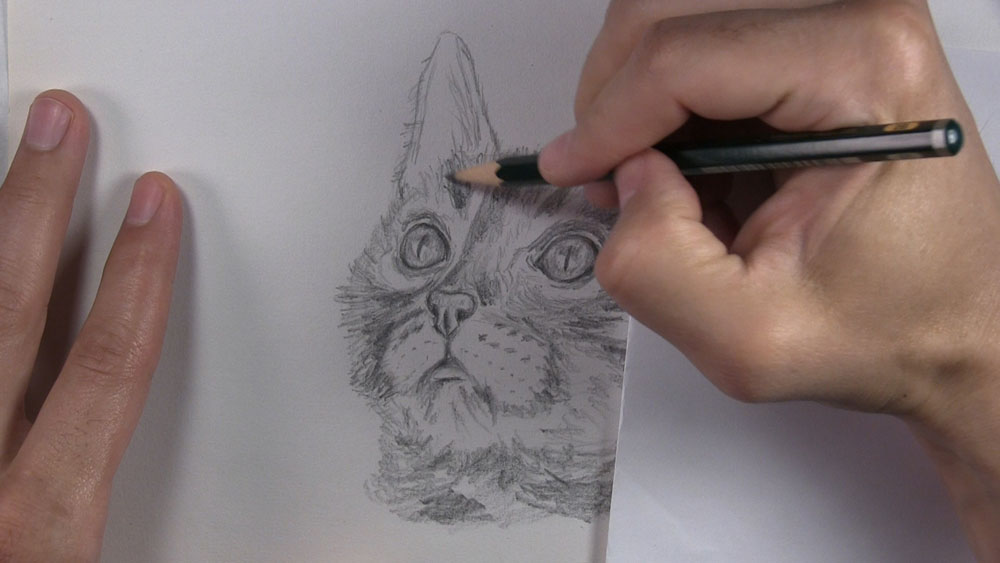
Put some darker tones at the base of the ear to make the lighter-value fur stand out. Put some more dark shading on the neck under the mouth area. Switch to a 6B pencil to trace over the darkest areas, like the outline of each eye, pupils, nostrils, mouth, and shadows in the fur.
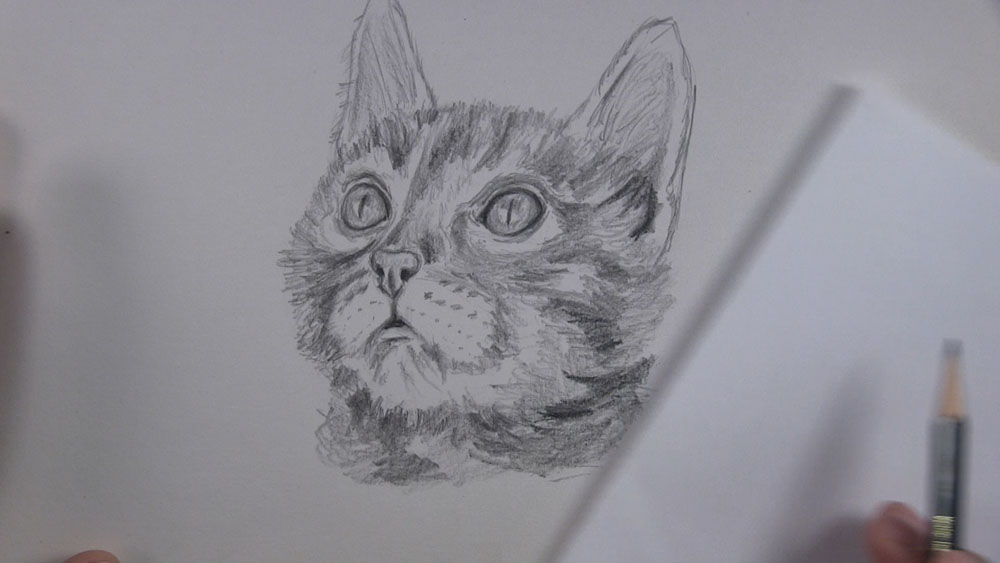
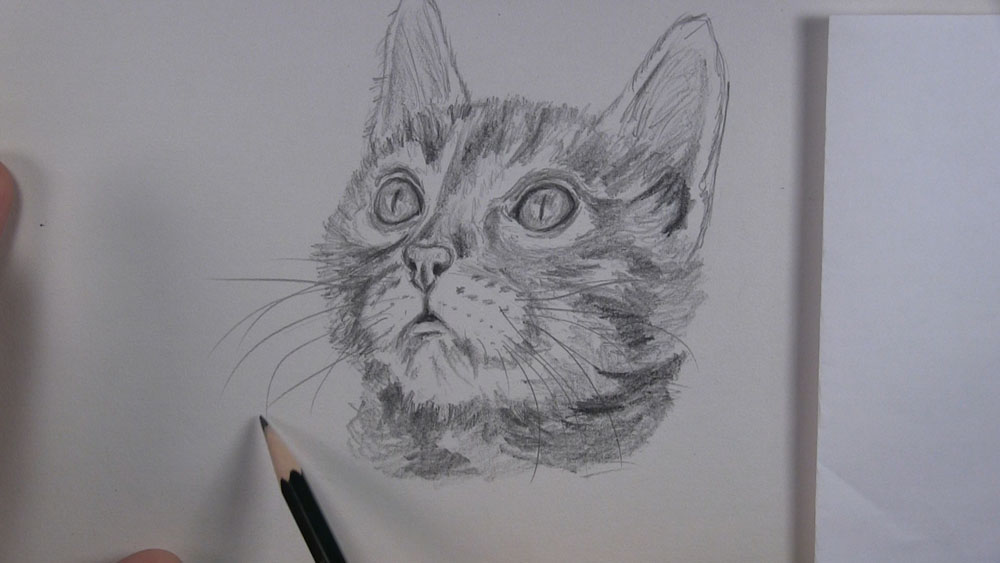
Use a sharp 2B pencil to draw whiskers on the face of the kitten. As you draw each whisker, start at the base and gradually lighten the pressure on your pencil until you gently lift it off the paper to leave a tapered end. If you want to draw more or fewer whiskers than what’s on the reference, that’s fine too!
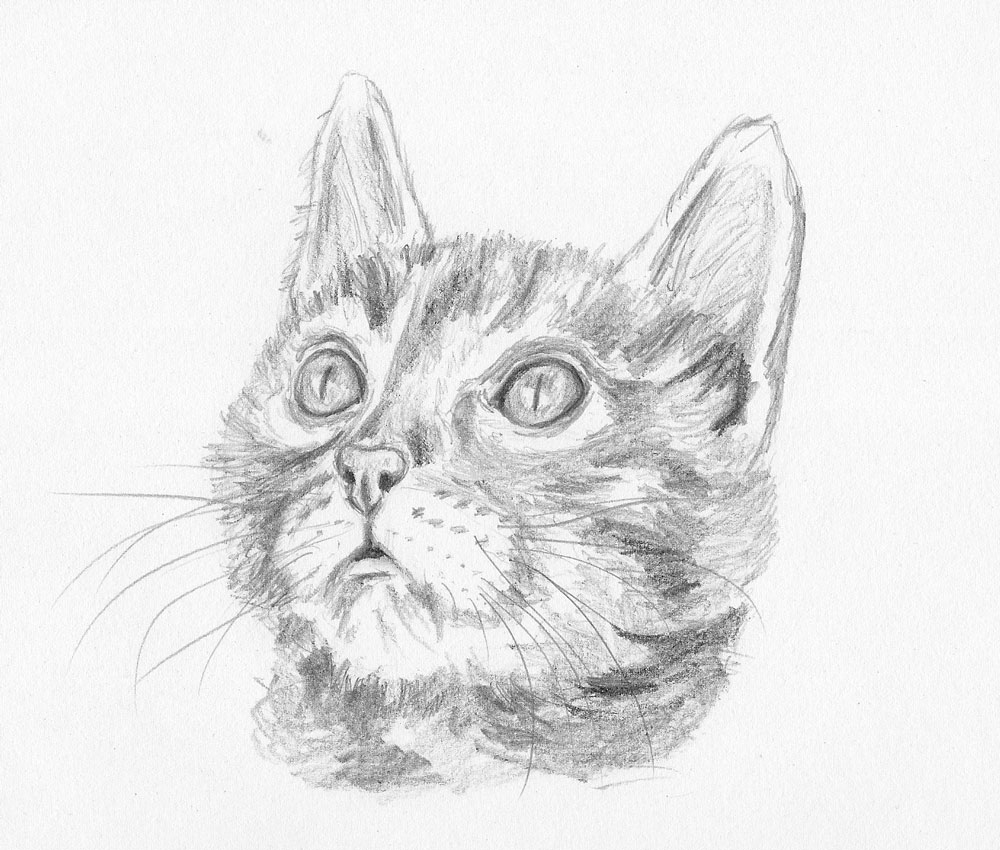
And that is how to draw a kitten face!
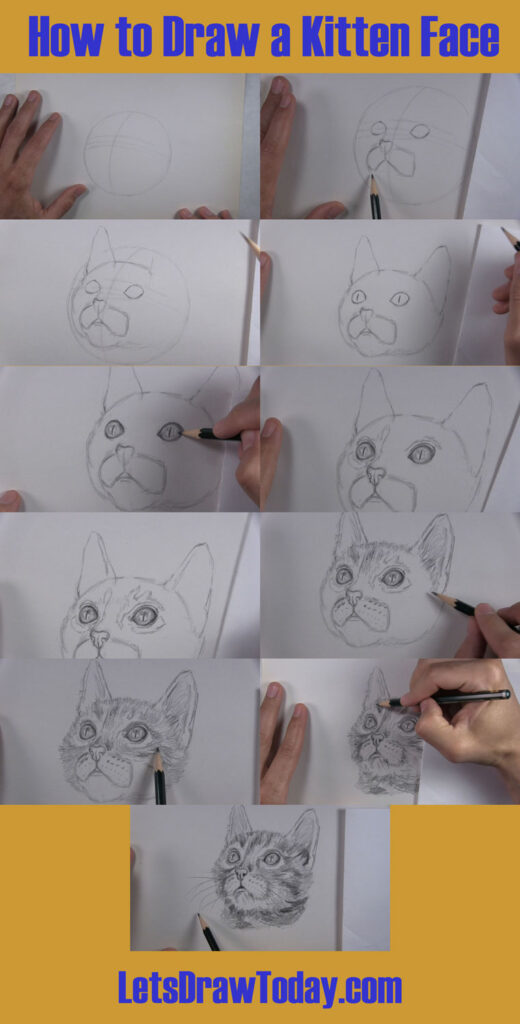
Tutorial Recap
For a quick visual recap of this tutorial, take a look at the image below. It shows you a progression of the main steps for how to draw a kitten face.
Tips to Remember the Next Time You Draw a Kitten Face
Here are a few tips to remember the next time you want to draw a kitten face.
- Even if you’d rather make more of a sketch of a kitten, you should still work from a reference photo so you can make a more realistic representation of your kitten face within your sketch.
- Pay attention to the unique traits of the kitten’s face and how they differ from human characteristics. Pay attention especially to the slant of the kitten’s eyes as well as the kitten’s vertical pupils.
- Consider using both a color and a black-and-white version of your reference. You can use both photos together to give you information about light and dark values as well as subtle changes in color, such as the slight variations between the lighter and darker patches of the kitten’s fur.
- Try drawing a variety of kitten faces. Although kitten faces have a lot of traits in common, there are many cat breeds that have differences in fur length, color patterns, facial shape and structure, and other traits you would encounter as you draw kitten faces.
If you enjoyed drawing this kitten face, maybe you will also enjoy drawing a dog face or drawing other animals.
So now that you know how to draw a kitten face step by step, you have nothing holding you back from filling up a sketchbook with as many cute kitten faces as possible! You might even consider snapping some pictures of your own kitty or the kittens of your family members and friends for practice. If people really like your work, you can give your kitten drawings away as a gift or even sell them!


