What You Should Know About Drawing Food as a Beginner

drawing food

When people think about food, they usually think about eating it rather than drawing it.

However, food can be the subject of some very interesting drawings.

Have you ever heard of the phrase, “Do what you love?”

Well, I love to draw, and I love to eat! Who doesn’t love to eat, right?

If you are anything like me, you can agree that there is some fun to be had by choosing to draw food.

If you are a beginner, please don’t think that you are only capable of simplified line drawings of food. Even if just starting out, you can create a certain level of realism with food drawings without as much effort as you think.

Read on to find out more about how to draw food!

Pros and Cons to Drawing Food

There are a lot of good reasons for you to add food to your bucket of drawing ideas. There are also a few downsides to it. Let’s talk about some pros and cons.

Pros

  • Food is a staple of still life drawing, allowing you to create interesting compositions.
  • If you are drawing food from life, it will stay perfectly in place for you!
  • You have plenty of choices for drawing subjects. Venture no farther than your kitchen, garden, or local grocery store or farmer’s market.
  • If you’d rather draw food from reference photos, it’s easy to build up a collection using foods you already have.
  • Drawing your favorite foods can be an incentive for building a daily sketching habit. Sketch one per day, and you get to eat it as a reward for finishing!

Cons

  • Certain foods, like hot foods or juicy foods that could get soggy, are not ideal for drawing from life if you plan on eating them too.
  • Sometimes, it can be challenging to draw food in a realistic way that maintains its appeal and still looks appetizing.

Which Foods Should I Draw?

I may have eluded to an answer to this question in the previous section. A good start is to draw foods you already have in your house.

Like I mentioned earlier, drawing your favorite foods can serve as a motivator. You are likely to be more excited about a drawing subject that you really enjoy.

If you are drawing multiple foods in a still-life composition, you can choose foods that make a pleasing arrangement to the eye. Just try putting them in different positions with various lighting options. Pick the one that looks the best. By the way, these don’t all have to be foods you like.

You can also get ideas from looking at the menus from your favorite places to eat out. Scan the menus for delicious appetizers, entrees, and desserts. Read the descriptions. Menus are great at using adjectives to give tasty details about a restaurant’s food options. If the menu has no pictures, imagine you are an illustrator tasked with drawing a picture of the food that will get the customer’s mouth watering. If the menu has pictures, then great! They can serve as additional inspiration.

Ultimately, the answer to the question “Which foods should I draw?” should reflect your current goals and inspiration. Don’t be afraid to draw unfamiliar food or even food you don’t like. If your drawing is appreciated by others and you sharpen your skills in the process, then whatever you choose is well worth it.

Tips for Drawing Food

Now that you know a little bit about why you should draw food and what kind of foods to draw, let’s take a look at how to draw food. Here are a few tips for getting better at drawing food.

Start with Basic Shapes

Use basic shapes to establish the outline. Try looking at the food you are drawing as if it were composed of smaller geometric shapes.

For example, if you were drawing a pizza, you would start with a circle. If it were a pizza sliced into 8 equal pieces, you would divide the circle with a vertical line, a horizontal line, and two diagonal lines.

Now, that is only if you are looking directly down at the pizza from above. If you were looking at the pizza from an angle, there would be some foreshortening. Therefore, you would start with an oval instead of a circle. Also, the slices will not appear as equal as before. Due to foreshortening, the pieces closer to the viewer will appear slightly larger than the pieces at the farther end of the pizza.

Use a Mix of Values and Textures

After completing the outline of your food drawing, you can take it to the next level with shading. Using a mix of light and dark values will turn your food outline into a more three-dimensional form.

In addition, try to add details that replicate the texture of your chosen food. Look for carves or bumps on the surface. This will add another layer of realism.

Create a Composition of Food Arranged with Other Foods or Objects

Don’t feel like you have to stop drawing once you have your one chosen food completed on your drawing paper. What other foods or objects should be paired with your food? What combination of subjects would make a more pleasing drawing or tell a more interesting story?

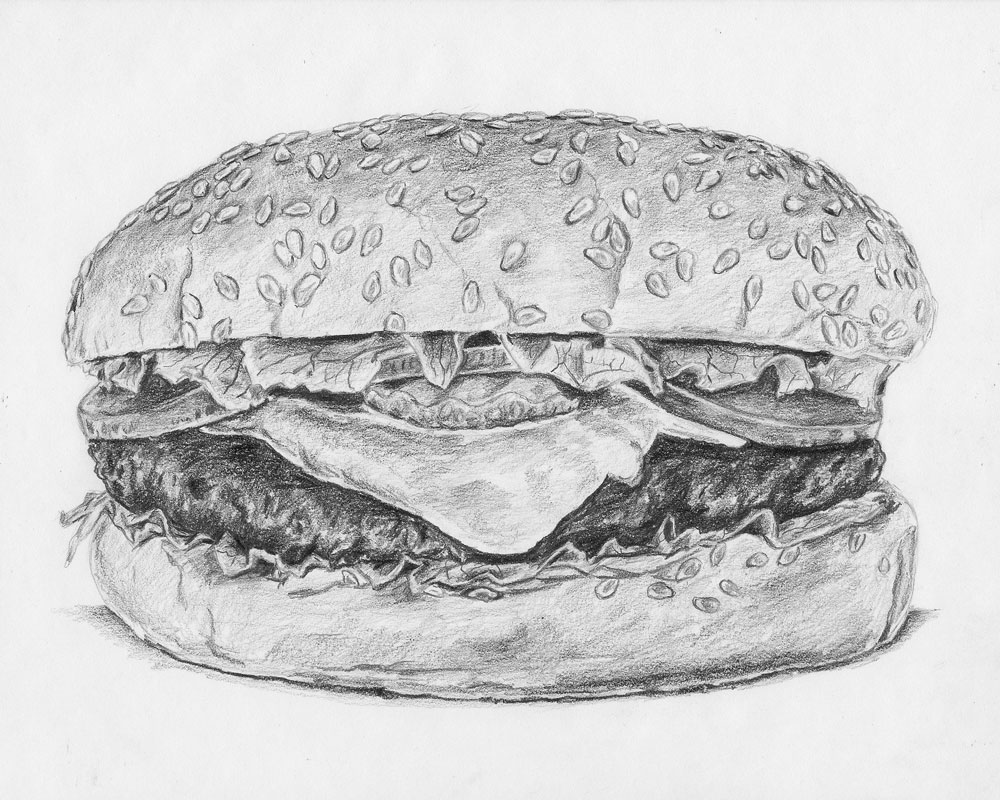
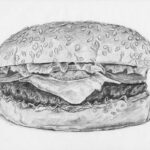
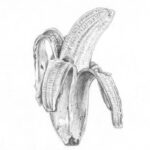
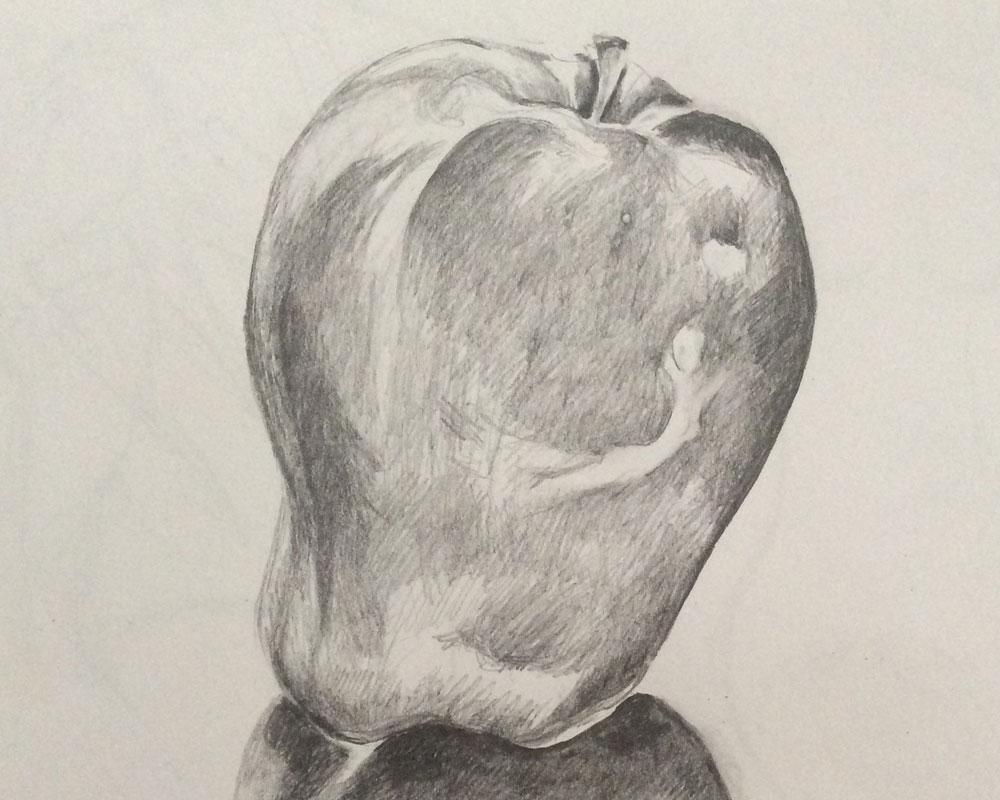
Think about foods that commonly go with your food. If you are drawing an apple, consider drawing other fruits with it, such as oranges, bananas, or grapes. If you are drawing a hamburger, maybe you can draw some fries next to it.

What other non-food items should you create in your food drawings? Think about common objects that surround the food in our everyday lives. Some examples are tables and tablecloths, plates, utensils, a vase of flowers, and even salt and pepper shakers.

Drawing Food Tutorials

Here are a few links to tutorials that will get you started with drawing food.

how to draw a peeled banana
A banana is a fairly simple fruit and is not too difficult to draw; that is, if you are drawing Read more
how to draw a hamburger
If you wish to know how to draw a hamburger, this tutorial will have you drawing a realistic burger with Read more
how to draw a pumpkin
A pumpkin is a fairly simple-looking fruit. At first thought, one might think that drawing a pumpkin is a simple Read more

[adrotate banner=”4″]

How to Draw a Peeled Banana

Home » Draw Food » What You Should Know About Drawing Food as a Beginner

how to draw a peeled banana title

A banana is a fairly simple fruit and is not too difficult to draw; that is, if you are drawing a banana with an unopened peel. But how do you draw a banana that has been partially peeled?

Although there are more steps involved, you should not have much more difficulty drawing a peeled banana than an untouched one. Of course to make your banana (or any other drawing) look realistic, you should add extra details and shading, which require additional steps too, but nothing an aspiring artist such as yourself cannot handle!

Keep reading to learn how to draw a peeled banana!

Use a Reference Photo of a Peeled Banana

The reference photo I used for this tutorial is this banana that is halfway peeled.

how to draw a peeled banana reference
Image by Céline Martin from Pixabay

I feel like this subject strikes a nice balance between being simple enough yet a little challenging too. After you complete this tutorial, you can use a different photo or even a peeled banana from your kitchen and apply the same methods to make another banana pencil drawing.

Materials Used for This Drawing

Here is a list of the materials I am using for this drawing.

If you don’t have some of these materials, that’s okay. You can still make do with a regular pencil and eraser, as long as you just get started!

If you wish to purchase any of these materials, they can be found at your local art store, or you can buy them using the links below.

Affiliate Disclaimer: The links on this page are affiliate links. I will receive a small commission if a purchase is made through one of these links. Learn more here.

How to Draw a Peeled Banana Video Tutorial

You can watch the time-lapse video version of this tutorial below. Watch it once all the way through to get a sense of the overall process. Then watch a second time and draw along with me, pausing as needed.

Set Up a Grid on the Drawing Paper

Since we are using a grid for this drawing, the first step in drawing our peeled banana is to place a grid on the drawing paper. The grid consists of 3 x 3 squares. Therefore, we need to place a square grid on the paper. Since my drawing paper is 8 inches by 10 inches, I am going to draw a vertical line on the right side of the paper that is two inches away from the edge. The resulting square on the left will be the border for the grid.

make grid to draw peeled banana

If we wanted to be very general about our banana and make a basic sketch, there wouldn’t be a need for precision in our measurements. You could make approximations with your grid lines and the resulting banana outline would most likely still be sufficient. Nevertheless, let’s still use a ruler for a better outcome. Make two horizontal lines spaced 2 and 2/3 inches apart. By the way, two-thirds of an inch is roughly equivalent to 11/16ths of an inch.

draw horizontal lines

After that, make two vertical lines that are also spaced 2 and 2/3 inches apart. This will give you a simple grid of three squares by three squares.

draw vertical lines

Draw the Top of the Banana and the Center Peel

Begin by drawing the outline for the fleshy part of the banana. I started by making a V shape near the top of the center grid square. This V shape represents where the left peel meets the left edge of the fleshy part. Then extend the banana shape into the grid squares above. For this step and the remaining steps of this tutorial, use your grid squares as a guide to help you decide the proper placement of the lines within each square. Finish the outline of the exposed banana by rounding out the tip and bringing the right edge down with a curvature similar to that of the left edge.

draw the flesh outline of the peeled banana

For the sake of simplicity, I will refer to the folded-over peels as the left peel, center peel, right peel, and rear peel for the remainder of the tutorial. Let’s draw the outline of the center peel of the banana first. Sketch the top edge with a short line that is almost horizontal but has a slight downward slope. From this line, sketch a line going downward for the right edge of the center peel. Bring this line down to just below the bottom edge of the center grid square. Then draw a line for the bottom edge. This line should be shorter than the top edge. Finish the outline with a curved line for the left edge. Additionally, sketch a line on the peel close to the right edge. This line shows where some of the flesh is still attached to the inside of the peel.

draw the center peel

Draw the Bottom of the Banana and the Right Peel

Draw a vertical line with a slight curve from where the center peel is hanging to where the bottom of the banana will be. This line represents the crease where the edges of the center peel and the right peel meet. Next, sketch a very short triangle for the bottom of the banana. After that, begin to form the right edge of the banana. Make sure the edge is mostly aligned with the edge from the top of the banana but ever so slightly to the right of it. Draw another vertical line to the left of the crease for a shadow. Finally, draw the left edge with a curved line from the bottom of the banana to the bottom of the center peel. Again, make this one slightly left to the edge of the banana flesh.

draw the bottom of the peeled banana

Bring up the line for the right edge of the banana. Then draw lines curving downward to form the left edge of the right peel. Take one line all the way beyond the lower edge of the center peel. Round out the bottom and begin forming the right edge of the right peel. Along the left side of the peel, draw a line to show where flesh is attached to the peel’s inside. We can also draw the visible portion of the rear peel while we are here. Finish the right peel by completing the right edge and drawing a curve on the underside. Sketch a light line from the banana flesh downward to make sure the hidden edible part is properly tucked behind the peel. As a side note, I will occasionally refer to the fleshy part of the banana as the edible part, since that is what most people eat, even though people sometimes eat the peel too.

draw the right peel of the banana

Finish Drawing the Basic Outline of the Peeled Banana

For the rear peel, there’s not too much we can see. We already drew some of the edge in the previous step. For the top, draw two curved lines just above the right peel. Then draw a line from the top of the curve to the banana flesh.

draw the rear peel of the banana

Now, draw the left peel by using steps similar to those we used to draw the center and right peels. Use curved parallel lines along both edges of the peel to show the flesh attached to the peel’s inside. Bring the bottom of the peel down to just above where the bottom of the center peel is found.

draw the left peel

Now that we have a basic sketch of our banana drawing on the paper, we can erase all of the grid lines. Be careful to keep the outline of the peeled banana intact. You can use a plastic or standard eraser for the open areas and a kneaded eraser to get the tighter areas.

erase the grid

Draw Extra Details on the Top of the Banana and the Peeled Left Side

Now let’s draw some additional details to our basic banana outline. Start with a curved line around the tip. Then make a vertical line from the tip to the base of the flesh. This vertical line should follow the curvature of the banana. Draw two more curved vertical lines very close to each edge. Then draw a few more in between. After that, draw short lines that make the horizontal ridges on the surface of the banana’s flesh. Finish up with an outline of a shadow just above the center peel.

draw lines on the flesh

On the left peel, draw a line curving along the center of the inside. Then draw the short horizontal ridge lines on each side of the center line. On the outer surface of the peel, draw the outline of tiny brown spots along the left edge and a few larger spots near the bottom and center.

draw spots on the left side of the peeled banana

Create Extra Details on the Rest of the Banana Line Drawing

Now let’s look at the center peel. Sketch an outline of some spots along the right and lower edges. Then draw two vertical lines on the inner surface of the peel, which happens to be facing us. These vertical lines should curve along with the shape of the peel. Draw a third line down the center, but make this line much lighter than the first two. Add the short horizontal lines between the vertical lines to finish the center peel.

draw lines on the center of the peeled banana

Just as we did for the other peels, draw two vertical lines curving down the inner surface of the right peel. Then draw the short horizontal ridge lines between the longer vertical lines. You may want to add spots, tiny tears, or other embellishments along the edges of this peel too.

draw lines on the right of the peeled banana

Next, we have the outer surface of the center and right banana peels. Begin by sketching the irregular shape of the brown spot at the bottom of the banana. Draw a few dots for the tinier spots found above the bottom. The reference photo shows some water droplets on this banana peel, but I’m not including the droplets in this tutorial. Instead, draw the shape of the highlight near the bottom and the shadows on each side. Now we are left with a detailed line drawing of our peeled banana!

draw details on the bottom of the peeled banana

[adrotate banner=”3″]

Shade the Flesh of the Banana

In order to make a realistic banana drawing, of course we need to apply some shading. Let’s first shade the edible part of the banana. Put a little shading around the curved line near the tip. This shading can be seen as some minor discoloration in the reference photo.

draw shading at the tip

On the right side of the banana flesh, make the vertical curved lines slightly darker. As for the first two columns of horizontal ridges, shade along each one. Also, shade just above each horizontal line on the side that meets the curved vertical line.

put shading on the right side

Working your way to the left side of the banana, you will notice that we have more shadow, because the light source is coming from the right side. For the center column of ridges, shade along them just as before, but place more shading above each ridge.

put shading down the middle

Repeat this same process for the two columns on the left side. Again, place slightly greater emphasis on your shading. After shading each individual ridge, you can place a light blanket layer of shading over the entire left side. At the lower left corner where the flesh meets the left peel, draw a thin shadow on the surface of the banana flesh.

put shading on the left side

Put another cast shadow near the bottom of the flesh just above the center peel. Darken some of the lines in the shaded portion of the banana’s flesh, especially the curved vertical lines. Leave the right side a lighter value than the left since the right is receiving more light.

put shading where the flesh meets the banana peel

Shade the Left Peel

Now we can start giving some attention to the peels. Let’s begin with the left peel. First, put some light shading along each edge of the peel and the outer surface of the peel. Make sure to shade the brown spots on the outer surface and along the edges.

shade spots on the left peel

Next, shade the inner surface of the peel. Begin with a light base layer. Then darken the line that curves up the center. After that, darken the short horizontal ridges on each side of the center line.

put shading on the inner left peel

Darken the brown spots found near the bottom tip of the left peel.

draw spots on the left of the peeled banana

The inner surface of the left peel is receiving some of the shadow from the edible part of the banana to the right. Place some dark tones near the top of the inner peel. There is also a little bit of reflected light in between the grooves. Darken the lines making all of the grooves, but leave some patches in between the lines lighter in value. Then at the bottom, where the peel is prying away from the banana, place your darkest tones to represent the heaviest shadows.

draw more shading on the peeled banana left side

Finish up the left peel by putting another layer of shading on the outer surface. Don’t make this an even layer. Leave some areas lighter to represent the green and yellow color variations. Make sure to shade along the left edge of the outer surface, leaving the surface just to the left of it lighter. This contrast is what creates the appearance of a sharp edge running down the peel.

finish shading the left peel of the banana

Shade the Peel in the Front

For the front peel, prepare to shade it by first tracing darker lines along the edge where some of the banana flesh is stuck to the inner surface. While you’re at it, go ahead and trace the two main curved vertical lines running down the peel.

draw darker lines on the center peel

Put a light base layer of shading over the peel’s surface. Since this peel is receiving more light than the left peel, we don’t want quite as much shadow on this one. Sketch the indications of some of the horizontal ridges we placed earlier. This is so our original lines don’t get lost in all of the base shading. There is a slight shadow at the upper right corner of this center peel that you can place as well.

draw more shading on the center of the peeled banana

Now continue to draw slightly darker indications of the horizontal grooves. Then from the bottom of the peel, draw over the previous guidelines going in a vertical direction toward the top. Draw some heavier tones along where the flesh attaches itself to the right side of the peel. Draw the darkest tones near the bottom to show where the center peel of the banana has brown spots.

draw more shading on the peeled banana center

Shade the Outer Surface of the Banana’s Peel

The bottom half of the banana is covered with the center peel (which is on our left) and the right peel. Let’s start by shading the center peel on the left side. Put a base layer of shading over most of the surface. Make sure to shade around the highlighted area near the bottom. Draw darker values near the top just behind where the peel flips over. Additionally, draw darker tones along both edges. Finish up by drawing some small dark spots near the bottom.

shade the bottom center of the banana

Repeat similar steps for the right side. Start with a base layer. Shade another layer of darker tones over the first layer down the middle. This darker layer is how we draw the shadow coming from the folded-over portion of the right peel. Put the darkest tones near the curved top where the peel is flipped.

shade the bottom right of the banana

Put a little more shadow near the bottom of the right peel. Then draw a few more small dark spots.

draw spots on the bottom of the peeled banana

Use very dark tones to shade in the irregular shape at the very bottom of the banana. These should be some of the darkest values of the entire drawing.

draw the black bottom of the peeled banana

Shade the Peels on the Right

We are approaching the end of our drawing! Now there are two peels we still need to shade. Those would be the right peel and the peel in the rear that we can barely see. Starting with the right peel, shade a light base layer. Just as we did previously, trace over the groove lines so they are slightly darker than the base layer.

trace the lines on the right peel

Using darker pencil tones, draw some long lines along the inside edge of the right side. Put a little bit of space between these lines. Draw these lines to help make it look like there are some ragged tears along the seam of our banana peel.

draw extra details on the right peel

Still working on the right peel, let’s shade its left edge now. Make the outermost edge the darkest. Then shade along where the flesh meets the peel. This should leave a thin strip of highlight running down the middle.

shade the left edge of the right peel

Now that the right peel is complete, it’s time to do something with the rear peel. Put some shading where the peel touches the banana flesh. Put a bit more on the lower side edge that is above the right peel. As for the visible portion of the rear peel that we see to the left of the right peel, place darker tones on the left side that are on the opposite side of the light source.

shade the rear peel

Draw Finishing Touches on the Peeled Banana

Use an eraser to go around the banana one last time. Erase any smudges or stray markings that were accidentally left on the paper during the drawing process.

erase smudges from the drawing

If necessary, use a softer pencil to put another layer of shading over the darkest parts of the drawing. Areas where you might consider doing this include the bottom of the banana, some of the brown spots, the shadows where all of the peels meet the fleshy part of the banana, and the shadows on the lower half of the banana. Use your reference photo to make the best decision about which areas need to be darker in your drawing.

draw finishing touches on the peeled banana

And that is how to draw a peeled banana!

how to draw a peeled banana final result

Tutorial Recap

For a quick visual recap of this tutorial, take a look at the image below. It shows you a progression of the main steps for how to draw the peeled banana.

how to draw a peeled banana recap

Conclusion

I hope you have learned something from this drawing tutorial!

For the best results, don’t stop here. Draw another peeled banana on your own, without the help of a tutorial. Try a banana at a different angle or maybe with the peels overlapping. You can even try drawing a banana bunch!

You will soon see that bananas and even other types of food become easier to draw.

All you need is practice and persistence. Most importantly, have fun every time you draw a banana, fruit, or anything else!

[adrotate banner=”4″]

How to Draw a Hamburger with a Tempting Look

how to draw a hamburger title

For anyone interested in learning how to draw a hamburger, you have as many choices as there are types of hamburgers.

A hamburger can be as simple as a small patty in a bun. It can also be a much more elaborate and tempting main course with an enticing mix of condiments and toppings.

I think it’s safe to say that most people would rather eat the latter!

Whether you like them or not, you cannot disagree with the notion that the hamburger is a true American icon. It only makes sense that a hamburger would be a popular idea for something to draw, too.

When it comes to drawing topics, people often draw what they know or what they like most. Therefore, it’s also probably safe to say that people would rather create a hamburger drawing with a variety of toppings over a drawing of a plain burger.

Would you like to know how to draw a hamburger or cheeseburger?

If so, then you are in the right place. In this tutorial, I will show you how to draw a hamburger step by step with a slice of cheese and other yummy toppings.

Keep reading to draw your very own juicy, delicious, and realistic burger!

Use a Reference Photo of a Hamburger

Here is the reference photo for this tutorial. It’s a tasty-looking hamburger with cheese, lettuce, tomatoes, onions, and pickles on a sesame seed bun.

how to draw a hamburger color reference
Image by Shutterbug75 from Pixabay

I will teach you how to draw this hamburger by freehand methods, although I did use some plot points to guide me during the drawing. If you wish to use the same plot-point resources I used for greater accuracy, you can access them in the full extended tutorial course.

You can use the same concepts you learn from this tutorial and apply them to drawing other hamburgers. The next hamburger you draw might have a different collection of toppings and other characteristics. I can tell you that I used this reference photo extensively to achieve the level of detail I was hoping for, so I definitely recommend a good reference photo to guide you in whatever hamburger drawing you attempt!

Materials Used for This Drawing

Here is a list of the materials I am using for this drawing.

If you don’t have some of these materials, that’s okay. You can still make do with a regular pencil and eraser, as long as you just get started!

If you wish to purchase any of these materials, they can be found at your local art store, or you can buy them using the links below.

Affiliate Disclaimer: The links on this page are affiliate links. I will receive a small commission if a purchase is made through one of these links. Learn more here.

How to Draw a Hamburger Video Tutorial

You can watch the time-lapse video version of this tutorial below. Watch it once all the way through to get a sense of the overall process. Then watch a second time and draw along with me, pausing as needed.

As an alternative, when you sign up for the Let’s Draw Today Newsletter, I will give you the extended video course version of this tutorial and 9 others (10 in all) as a free gift!

Free Bonus: Click here to get access to 10 free drawing video tutorial courses. Draw along with me in the full-length version of this tutorial and 9 others as I show you one step at a time my entire process for drawing each subject from start to finish.

Draw the Outline of the Hamburger Bun

Start drawing the outline of the hamburger with the top of the bun. I will use a 2H pencil to draw the initial outline. Draw a round top and a flat bottom. Look at the reference photo to help you shape the line.

top bun outline

For the bottom bun, draw a curved side downward. Then draw the bottom edge of the bun. When you get to the right side, you may notice that this edge of the bun has a sharper corner than the left side. That’s okay, though. It’s perfectly normal for hamburger buns to lack perfect symmetry. Sketch the top edge of the bottom bun by using a curved line.

lower bun outline

Draw the Outline of the Toppings

Now let’s sketch the outline of the first half of the lettuce on top of the burger patty. Look at the reference and make careful observations as you shape each lettuce leaf. Draw the tip of the second leaf a little lower than the tip of the first group of leaves. Draw a larger third leaf and a pointy fourth leaf just before the midpoint of the bun.

begin the lettuce outline

Sketch the outline of the second half of the top lettuce. For the first leaf, start with a triangle shape. Then draw a line from the lower tip of the triangle and back up towards the bun as you shape the leaf. As for the second leaf, it has two curves along its edge along with a flap at the end. For the third leaf, sketch a line going downward and then back up toward the right edge of the bun.

finish the lettuce outline

Next, we can draw the tomato and onion toppings. Draw a disc shape, something like a hidden oval with a thick side, for the first tomato slice. Draw the other tomato in a similar way. Then, draw a line connecting the two center lettuce leaves for the bottom of the onion. Continue the line between these two leaves. Finish the onion slice by drawing a short line for the top.

outline the onion slice

The next topping we are going to draw is the pickle. Sketch a curved line for the outer edge of the pickle. Next, draw the wavy top with a series of rounded peaks and valleys. Then sketch a few short, diagonal lines coming from the peaks to indicate the raised top surface of the pickle.

draw the pickle

Draw the Outline of the Cheese, Burger, and Bottom Lettuce

For the cheese slice, draw a line with a slight bend or two from the first tomato to the center of the top edge of the lower bun. Make the corner into a slightly wedged or rounded shape. From the corner, begin sketching a line going toward the other tomato. Draw a little bulge on the side of the cheese where it is beginning to melt on the hot burger. Finish the outline of the cheese slice by bringing the line over toward the other tomato.

draw the cheese slice

Now let’s draw the outline of the burger itself! Draw the first side as a bumpy line from the tomato to the bottom bun. Draw the other side of the burger meat in a similar way. Trail the line along just above the bun. This allows for some of the bun’s top edge to be visible. Draw a short line to finish up the corner of the bun. Continue sketching the bottom of the burger all the way across.

draw the hamburger patty

Let’s outline the bottom lettuce leaves now. Sketch a little piece or two hanging from under the patty on the outer edge. Continue to draw a wiggly line for the thin layer of lettuce between the burger and the lower bun. Draw another line above this one and overlapping the lower part of the meat. Finish sketching the lettuce outline nearly to the edge of the bun.

draw the lower lettuce

Draw Texture and Seeds on the Hamburger Bun

Next, let’s add some texture to the bun. Draw some subtle cracks or little indentations just above some of the lettuce leaves and along the edge of the bun. Draw a few of them taller but keep most of them short. Use light pressure with your pencil. We don’t want these to look like deep cracks.

draw cracks on the top hamburger bun

Now it’s time to add sesame seeds. Draw tiny seeds overlapping the outer lower edge of the bun. Draw a few more seeds close by the edge. Continue to draw more sesame seeds on this upper left area of the bun. Remember to maintain a shape and size similar to the surrounding seeds. Draw a short line in some of the seeds to represent the tiny dent found on a sesame seed’s surface.

begin drawing seeds

Let’s keep going by adding more sesame seeds to the top of the bun. Draw some seeds in close clusters and other seeds by themselves. Draw seeds arranged at different angles. Use very narrow shapes to draw only the sides of the seeds along the bun’s top edge. For the others, you can sketch a circle or oval shape and then sketch the tip at one end. Keep going until you have most of the surface area covered with seeds. If you’d rather draw fewer seeds, there’s nothing wrong with that either!

finish drawing seeds

Add Details to the Top Lettuce and Onion Slice

Begin to define the outline of the first group of lettuce leaves. In addition to the occasional tears along the edge of the leaves, put little wiggles along the edge to help shape the outline. Sketch a few lines running from the edge up toward the top bun to indicate separate leaves as well as ruffles and folds in the lettuce.

begin adding details to the lettuce

Use the reference to help you shape the wiggly edge of the next leaf. Then sketch some short lines on the leaf itself. Keep checking the reference photo to make adjustments in the shape until you have a close resemblance. Repeat this with the next leaf. The fourth leave has a smoother edge. Draw a line on the leaf close to the edge that curves over the onion and rides along the side. As you can see, it’s really not that difficult to draw a lettuce leaf!

draw lettuce folds

As for the onion slice, there’s not much to do right now. Sketch a few light horizontal lines. Just do so between each lettuce leaf.

draw lines on the onion

Let’s start outlining the outer edge of the next leaf. There are some interesting folds happening with this particular lettuce leaf. Now move on to the leaves after that. Outline and define the shape along the edge of the leaves. All it takes is a few simple but deliberate short markings to make these folds in the lettuce look realistic and believable.

finish lettuce details

Draw Details for the Other Toppings and the Hamburger Patty

On the pickle, use light markings to indicate value changes, like under the leaf, under the onion, and under the onion and leaf on the other side. On the side of the pickle, the reference photo shows us that there are these numerous circular spots. Very lightly sketch the indication of these spots with various circles on the side.

draw details on the pickle

Next, add more detail to the tomato slices. There are subtle waves and dents on the surface of the slices. Lightly sketch a few loose marks along the bottom edge. Then put a few marks on the top. On the other tomato, we’ll do the same thing.

draw details on the tomato

In these next steps, sketch some lines that differentiate between the light and dark areas on the cheese slice. Sketch a glossy reflection under the pickle. There’s some shadow to the right and the left of the pickle. Now sketch a wiggly line going down the left side of the slice of cheese, a shiny highlight in the middle, and a wiggly line along the other side.

draw value changes on the cheese

Now let’s focus our attention on the burger itself. Start with a light line to separate the top surface of the patty from the patty’s side. Then, loosely sketch the bumps and dents in the meat that give it its texture. Most of these wavy shapes I am sketching are dark, shadow areas on the meat.

draw details on the hamburger patty

Add Details to the Bottom Lettuce

The next step is to add details to the second and much thinner layer of lettuce. I’ll begin over here on the left side by outlining this strip and sketching another arm extending farther down. Sketch some lines in the middle. Trace over the outline of the next leaf. Draw two little humps to show where this lettuce leaf is folding up and towards us. Trace along the burger and draw some curved lines to show where the lettuce overlaps the lower edge of the meat.

draw details on the lower lettuce

At this point, all we need to do is simply continue doing what we just did with the previous lettuce leaves. We already have the basic shapes established from the initial sketch. Look for little details from the reference that you can replicate, simple things like where the lettuce overlaps the lower part of the burger meat. To help you with drawing all of the ruffles and twists and folds in the individual lettuce leaves, the best thing to do is slow down and take it one small section of leaf at a time. Continue outlining the lettuce all the way to the end.

finish lower lettuce details

Add Details and Seeds to the Bottom of the Bun

Now we’ll move on to the lower bun. Add a little bit of texture and darken the outline. Put some very light marks to indicate soft bumps and breaks in the surface. Starting at the lower right corner, draw vertical marks that curve upward from the edge. While adding the texture marks, use a very light touch that barely grazes the surface of the drawing paper.

draw details on the lower bun

Draw some sesame seeds on the lower bun. Don’t draw nearly as many seeds as you did for the top. Draw some of the seeds tucked away under the lettuce and tucked into the bread. Draw a small cluster of seeds on the right side.

add seeds to the lower bun

[adrotate banner=”3″]

Begin Shading the Bun on Top

Now that the outline is complete, let’s begin the shading process. We’ll use an HB pencil to shade a base layer of light tones on the top left area of the bun. Lightly shade over the sesame seeds too. Darken along the edge of cracks you see in the surface just enough so they don’t get lost in the base shading.

shade the top bun

We can use a 2B pencil for some midtones and shadows in some of the lighter areas. Shade along the edges of the seeds. Put some shading along some of the shallow cracks in the bun too.

shade the side of the seeds

Looking at the reference photo, you can see that the top of the bun and especially this left side is like a golden-brown color. The lower part of the bun around the edge is much lighter. Use your HB pencil to shade another layer of tones over the base layer. This time, shade mostly around the seeds rather than over them. Put some additional shading along the tall crack.

shade along the crack

Draw Details on the Seeds of the Hamburger Bun

Begin tracing around some of the seeds. In addition, put some light shading adjacent to the seeds where they are affixed to the bun. Go back to the 2B pencil to touch up next to the seeds. Put a layer of shading with the 2B pencil along the very top edge of the bun. Work around the seeds. Bring this graphite down a little but not too much. Make sure to maintain the light values of each seed so it can stand out against the darker bun.

You can use the tip of a kneaded eraser to lift graphite away from any seeds or other areas that are darker than desired.

add more shading to the top bun

If you do lift any graphite from the seeds with a kneaded eraser, it may be necessary to go back over some of the seeds to replace any details that were mistakenly erased, such as the curved lines inside.

add more shading to the top bun

Keep working to outline the seeds on the upper left part of the bun. Also, keep shading around the seeds so the bun has a darker shade and the seeds have a lighter shade. The outlines of the seeds should be a little darker than the surrounding tones, but not too much, and ideally only darker where the shadow areas are located around each seed. Remember to occasionally add light shading on top of some of the seeds.

add more shading to the top bun

Bring some of the tones down from the top of the bun. Try to maintain a gradual transition from dark to light. Keep working your way across the bun. Add shading in a similar way. Once you know what to do, and you realize the repetition involved in a drawing like this, there’s not much required of you besides persistence and patience.

finish shading the left side of the bun

Shade the Rest of the Bun on Top

We’re pretty much done with the left side of the bun. Now we’ll focus on the center. Similar to what we did with the left side, here we’re going to put a light base layer of tones over the drawing surface. Next, develop the details in the seeds. Then shade the bun area around the seeds. Make sure to add some shading along the cracks in the bun.

shade the middle of the bun

Okay, for the remainder of the bun, we’ll start with a base layer of shading, just as we did previously. Add details to the seeds by tracing around the outline and putting shadows next to and inside some of them. Put another layer of shading near the top of the bun. Shade around all of the sesame seeds. Remember to gradually lighten your touch as you get farther down until the top bun is essentially complete!

draw the final details of the hamburger bun

Begin Shading the Top Lettuce

Now we can work our way down to the toppings. We’ll focus on the lettuce first with some preliminary shading of a base layer on the first leaves. Use an HB pencil to very lightly shade the first leaf bunch. Then move on to the second lettuce leaf. Finish up with the third lettuce leaf in the same manner.

lightly shade the lettuce

Next, we can apply some darker shadows to the individual lettuce leaves. Switch to a 2B graphite pencil. Put some shading on the very first leaf on the left. Now put some shading on the leaf next to it. Avoid shading over the entire surface of the leaf. Leave some spots open so you can see the lighter base layer showing through. Then move beyond the first pair of leaves to the much larger second leaf.

add darker shading to the lettuce

Now let’s use a 4B pencil for some of the heavier tones. Apply a darker layer of shading on the first pair of leaves just under the bun and on the right side of the first group of lettuce leaves. Similarly, put the some dark shading just under the bun and on the right side of the second leaf. Gradually lighten your tones as you get farther away from the edges.

shade the lettuce under the bun

Add Fine Details to the Lettuce

Switch to an HB pencil. Add some fine details to some of the folds on these lettuce leaves. Use the reference photo to help you better define and sharpen the individual folds that you see along the leaves’ edges. A kneaded eraser can help you to lift a few highlights.

add darker shadows on the lettuce

Use your pencil to draw thin veins on the surface of the lettuce. Draw a couple more lines on the second piece of lettuce. Have these veins run from the outer edge of the leaf to underneath the top bun. Draw some secondary lines going at a slight angle toward the main veins. Rather than drawing random lines, pay attention to the contour of the lettuce and draw lines that curve along with the surface.

draw veins on the lettuce

Shade the Next Lettuce Leaf

Moving on to the third lettuce leaf now, begin shading the area underneath the bun with a 2B pencil. We’re laying the foundation now for the shadow that the top bun is casting onto the lettuce. We will develop this shadow so it is nice and dark, just like the shadows on the previous leaves we shaded.

shade the next lettuce leaf

Now, we’ll use a 4B pencil to apply the heavier tones of the cast shadow. Begin by outlining directly below and along the lower edge of the bun. Then shade the area immediately below the edge of the bun. Bring the graphite down but not as far down as the midtones that are already in place. Then switch back to a 2B pencil to blend the darker tones above into the midtones below it.

put more shadow on the leaf

Now go to the HB pencil. Overlay a little more shading on the lower portion of the lettuce leaf. Draw some veins and place some dark outlines along these veins on the right side of the leaf. Try lifting a highlight or two directly alongside the dark outlines with a kneaded eraser. Make a little shadow that this third lettuce leaf is leaving on the leaf next to it. Draw some additional veins, including thinner veins that branch away from the primary veins.

draw additional lettuce veins

Shade the Rest of the Top Lettuce

So now that we’ve got the hang of it, let’s focus our attention on the remaining lettuce leaves. Use the HB pencil to lightly shade the fourth and fifth leaves, followed up by some midtones with a 2B. Use a 4B for some darker shadows, and add some veins too. Do the same for the remaining leaves. Start with a light base layer of shading followed by some shadow tones. Shade a deep shadow along the edge of the bun. Draw veins from the dark shadow underneath the bun to the lower edges of the leaves.

draw the final details on the hamburger lettuce

Shade the Tomato Slices

The next topping we are going to shade is the slice of tomato on the left side. Start with an HB pencil. Lightly shade the narrow edge of the tomato slice. With a 2B, sketch some ridges on the lower edge. Then shade the area just above these ridges. Then put some shadow on the top of the slice and a little more on the side next to the second lettuce leaf.

shade the first tomato slice

Switch to a 4B pencil. Place some marks to indicate the impressions on the side of the tomato slice. Put some shading on the side of the tomato next to the leaf. Next, put some additional shading on the top surface of the tomato slice. The darkest tones should be closest to the lettuce leaves, since this is the area where the lettuce casts a shadow on the tomato slice.

put darker shading on the tomato

Get a 4B pencil to shade the rest of the tomato slice that is visible directly under the third lettuce leaf. This portion of the tomato is tucked away under the lettuce, so its surface consists entirely of shadow.

shade the hidden tomato part

Now, shade the other tomato slice. Lightly shade the side. Overlay some darker tones, but leave some of the lighter areas exposed to show through. Then, begin to establish some shading on the top surface of the tomato slice. Go back with a softer pencil to overlay darker tones on the side and the top. Leave a little rim of lighter value. Bridge the lighter and darker areas on the tomato slice.

draw final details on the hamburger tomato slices

Shade the Onion, Pickle, and Cheese

Lightly shade the onion slice and add some darker shadow. Sketch a few vertical ridges on the onion slice for texture. As for the pickle, shade the peaks while curving your strokes to fit the contours. Very lightly shade the side. Then, start placing some of the midtones and shadows. Outline the little circles on the side of the pickle slice. Develop midtone areas by shading away from the shadows. Shade the side with a light touch so the circles remain visible.

draw the shading on the hamburger pickle

We’ll now draw shading on the cheese of our “cheeseburger” hamburger! Use a kneaded eraser to soften the highlight and shadow guidelines. Then use soft, broad strokes to cover the surface of the cheese slice. Shade around the highlight outlines. Begin shading another relatively light layer of tones over the first layer on the cheese. Shade around the pickle and under the lettuce. Put some shading along the edges too.

draw shading on the hamburger cheese

Draw Shading on the Hamburger Patty

Now it’s time to shade the actual hamburger beef. Start with a 2B pencil. Begin with a light layer of shading and a wiggly motion in and around the little dimples sketched in the side. Shade the top of the patty with a 4B pencil. Use dark, heavy tones extending toward the edge.

lightly shade the burger patty

Sticking with the same 4B pencil, draw some of the texture across the side of the hamburger. Start making marks in the side, using the lightly sketched guidelines from the line drawing as a guide. Try to shade them the same dark value as the top of the patty. Sketch some dark curved lines that cradle the bottom edge of the patty. Trace along the tiny lettuce leaves that sit under the burger patty.

put darker shading on the patty

Finish Shading the Burger Patty

Use a 2B pencil to shade the seemingly empty space in the center of the burger. Shade from the top dark area down to the lighter areas below. Move your pencil freely around the bumpy texture of the burger’s surface. These marks should be darker than the base layer you are covering but lighter than the surrounding shadow areas.

shade the open areas of the patty

Continue to shade the spaces beyond the right side of the cheese slice. Shade in and around all of the various bumps and dents in the beef. Keep shading the beef patty until all of the area of base shading is covered with darker tones.

keep shading burger patty

Switch back to your 4B pencil. Shade along the lower edge of the burger patty. Use this opportunity to define the sharp, clear border existing between the patty and the thin layer of lettuce directly under it. By placing dark tones next to the lettuce leaves, which will be much lighter in value, it will help the lettuce to stand out much more clearly in our drawing. Continue until the entire hamburger patty is thoroughly shaded.

draw finishing details on the hamburger patty

Shade the Bottom Lettuce

Place some light base tones on the thin layer of lettuce between the burger patty and the bun. Start with some light outlining and shading of the lettuce leaves on the left. Then apply shadows in the tighter areas. Make sure to draw a few visible veins as well. Repeat this process for the middle section of leaves and the right side to complete the lettuce.

draw final shading layer on the hamburger lower lettuce

Shade the Bottom Bun

Let’s use an HB pencil to begin shading the lower bun. Lightly trace over some of the textures in the bun’s surface. Some crosshatch marks streaking across the bun can help to add some preliminary texture to our bread.

lightly shade the lower bun

Let’s use a 2B pencil for the next step. Begin shading some of the rugged lower lines along the browned bottom portion of the bun. The area of the bun around the seeds appears to be white, so lighten your touch as you shade around the seeds. Sketch some heavier tones along the lower right edge of the hamburger bun with a 4B. Gradually blend the tones into the lighter graphite above to create a smooth transition.

add darker shading to the bun

Next, we will develop a few more of the light cracks in the bun’s surface with an HB pencil. Start near the top of the bun around where the lettuce is on the left side. Lightly sketch a crack or two curving downward. Sketch another one from the bottom heading up. Sketch a couple of lines to show where the bun is bunched up along the top center edge.

add details to the bun under the lettuce

Next, we will work to develop the sesame seeds on the lower bun. Put some shadow next to the seeds tucked under the lettuce. Outline or apply light shades of value on and next to each seed. Define some of the edges and sketch the little dimple lines inside the seeds.

draw seeds on the lower bun

Add the Finishing Touches

Use a 6B pencil to touch over the darkest areas. Shade just under the bun and above the toppings. Then go back and amplify some of the shadows on the hamburger patty. Make sure the shadows under the tomato and cheese are very dark.

draw the darkest shadows on the hamburger

Go around your drawing and erase any smudges that might be on your paper. Then grab a 2B pencil for the final step. Sketch a surface for the burger to be sitting on. Extend some short, horizontal strokes from the bun’s edge so it looks like a surface. Make sure the surface is on the same level when drawn on the other side.

draw a table for the hamburger

And that is how to draw a hamburger with cheese!

how to draw a hamburger final result

Tutorial Recap

For a quick visual recap of this tutorial, take a look at the image below. It shows you a progression of the main steps for how to draw a hamburger.

how to draw a hamburger recap

Tips to Remember the Next Time You Draw a Hamburger

The next time you have a craving to draw a hamburger (or cheeseburger), here are a few tips to keep in mind:

  • As mentioned at the beginning of this post, a reference photo can go a long way to helping you create a realistic hamburger drawing. A reference will help you to properly capture important elements of art such as shape, form, space, value, and texture.
  • When using a reference photo, still remember to allow yourself some creative freedom. Drawing a hamburger is not the same as drawing a person. You don’t have to create a likeness that resembles a person’s face when you are drawing food. Feel free to make adjustments on such things as the amount of toppings or positioning of certain pieces of your hamburger. It’s just like when I said you can vary the number and location of your sesame seeds.
  • Consider using both a color and a black-and-white version of your reference. You can use both photos together to give you information about light and dark values as well as subtle changes in color, such as the slight variations between the lighter and darker shades on the hamburger bun, sesame seeds, and the beef patty.
  • Try drawing a variety of hamburgers. Draw small hamburgers and large hamburgers. You can draw hamburgers with and without cheese. Draw hamburgers with traditional toppings as well as burgers with more adventurous toppings!
  • Strive for a level of detail and realism that will make your burger drawing look appetizing enough to eat!

I hope you found this tutorial for drawing a hamburger helpful. Even if you can only draw a simplified version of a hamburger for now, keep practicing by drawing different types of hamburgers. Keep practicing your observation and shading techniques. Over time, your hamburger drawings will look more realistic and even more appetizing to people who view them!

[adrotate banner=”4″]

How to Draw a Pumpkin Realistically with Easy Steps

how to draw a pumpkin title

A pumpkin is a fairly simple-looking fruit. At first thought, one might think that drawing a pumpkin is a simple process as well.

However, there are many people who might not find drawing a pumpkin to be so easy.

If you are one of them, then that’s okay.

If you are looking for something to draw that is easy, a pumpkin is a perfect choice for a drawing subject. Although you can draw a pumpkin any time of year, it’s especially fun to draw a pumpkin in the fall!

What’s more, it doesn’t take much to take a simple pumpkin drawing and turn it into realistic pencil art.

In this tutorial, I will show you how to draw a pumpkin by following some easy steps. The final result will be a basic pumpkin drawing that still looks realistic.

Use a Reference Photo of a Pumpkin

Here is the reference photo for this tutorial. Feel free to refer to this photo in addition to the step-by-step images. It is nothing more than a simple pumpkin on a wooden stump. We will draw both the pumpkin and the stump.

how to draw a pumpkin reference
Image by Susanne Jutzeler, suju-foto from Pixabay

You can use the same concepts you learn from this tutorial and apply them to drawing other pumpkins. Even though pumpkins look very similar, a reference photo will be useful in drawing this picture. It will be helpful in capturing some unique traits, like the length and texture of the stem and the spots on the shell.

Materials Used for This Drawing

Here is a list of the materials I am using for this drawing.

If you don’t have some of these materials, that’s okay. You can still make do with what you have or try to improvise if necessary, as long as you just get started!

If you wish to purchase any of these materials, they can be found at your local art store, or you can buy them using the links below.

Affiliate Disclaimer: The links on this page are affiliate links. I will receive a small commission if a purchase is made through one of these links. Learn more here.

How to Draw a Pumpkin Video Tutorial

You can watch the time-lapse video version of this tutorial below. Watch it once all the way through to get a sense of the overall process. Then watch a second time and draw along with me, pausing as needed.


As an alternative, when you sign up for the Let’s Draw Today Newsletter, I will give you the extended video course version of this tutorial and 9 others (10 in all) as a free gift!

Free Bonus: Click here to get access to 10 free drawing video tutorial courses. Draw along with me in the full-length version of this tutorial and 9 others as I show you one step at a time my entire process for drawing each subject from start to finish.

Draw the Outline of the Pumpkin’s Left Side

The first step in drawing a pumpkin is drawing its basic shapes. I began by sketching a shape for the right side with an HB pencil. Then I drew the outline of the left side a bit larger than the right. After that, I drew the outline of the stem.

draw the outline of the pumpkin

The next step is to begin drawing the many ribs of the pumpkin. Draw the first rib line by tracing the guideline from the previous step. It should be directly under the stem. Don’t make it perfectly straight. Instead, draw it with a slight bend.

draw the first pumpkin rib

To draw the first section, draw a curved line bulging upward from the first rib. Bring this line down and run a second rib almost parallel to and following the same curvature of the first rib. Then connect the two ribs at the bottom.

draw the second rib

Now let’s draw another rib. This section can be just about as wide as the first one. As we draw the ribs of the pumpkin, we will need to pay attention to the curvature of the pumpkin’s outer edge as well as the curvature of the previous rib we drew.

draw the next section

Now that we’re getting the hang of it, we’re going to draw three more ribs. It’s okay to vary the positioning of each end of a rib.

draw the left side of the pumpkin

There’s a deep dip at the top of this pumpkin where the base of the stem sits. All of the ribs take a downward dip just before reaching the stem. Draw the top of another rib or two taking this dip on the other side of the pumpkin.

draw ribs near the top

Draw the Outline of the Pumpkin’s Right Side

On the right side of the pumpkin, we’re going to repeat the same process that we did on the left by drawing five more ribs. Another thing about pumpkin ribs is that some of them are deep and some are shallow.

draw the right side of the pumpkin

Just like we did earlier at the dip near the stem, let’s draw a couple more ribs on the other side. Draw lines coming from the base of the stem and curving up and over the dip. This completes the outline of our pumpkin’s shell. We’ll do some work to the stem next.

draw more ribs near the top

Now focusing on the stem itself, begin by erasing any guidelines from the beginning of the drawing. Then, we’ll just sharpen up the outline of the stem. We can also begin to establish some of the shape at the end of the stem.

pumpkin drawing outline

[adrotate banner=”3″]

Draw the Pumpkin’s Stem

Next, begin to draw lines on the stem of the pumpkin. Draw lines close together that follow the curvature of the stem. There is this little depression at the tip of the stem, so we need to draw some bumpy lines to indicate that.

draw ridges in the pumpkin stem

Use an HB and 4B pencil to shade the stem. The strongest light source is coming from the upper left. Therefore, we should leave more highlights along the left side and place darker shadow tones on the right and underside. Add some darker shading to the hole at the tip of the stem.

shade the stem

Now we are going to make the outer edge of the stem look a little bumpier to match the texture of the surface. Use a kneaded eraser to erase the outline of the edge. Then lightly redraw this line with a few bumps.

shade the pumpkin stem

Shade the First Two Sections of the Pumpkin

Next, let’s start to shade the skin of the pumpkin. Remember that the strongest light source is coming from the upper left. Lightly sketch the outline of some highlights on the upper part of the left side of the pumpkin. Then sketch the outline of shadows along the ribs.

draw value changes on the pumpkin outline

With an HB pencil, lightly shade some midtone values in this first section of the pumpkin’s skin. Shade around the white area in the upper left that was identified as a highlight.

start shading the first section

Use a 4B pencil to shade along the rib. Using the guidelines for value changes will help to make sure you don’t put too much shadow in the midtone or highlighted areas.

shade the first section

Use an HB pencil to shade the second section. Leave a thin strip of reflected light along the edge of the rib to make it look like there is an actual dip in the surface of the shell along the rib.

shade the second section

Sticking with the same section, use a 4B pencil to shade along the rib. Make sharper marks with your pencil along portions of the rib and gradually lessen the pressure as you blend into the midtones.

shade the second section more

Use a 4B pencil to put some shadow tones near the bottom of the first two sections. Since the pumpkin has a round shape, shading it is similar to how we would shade a sphere. Leave a thin strip of reflected light between the dark tones and the edge of the rib.

shade the bottom of the pumpkin

Shade the Next Section

Now we can move on to the next section. There are some minor impressions in the skin’s surface near the top here. I’m going to use an HB to put a few tones near the highlight here before shading any more of this section.

shade the top

There are also a couple more impressions running down the length of this section between these two ribs. Sketch these impressions centered between the ribs, but don’t sketch a solid line all the way down like we have with the other ribs.

draw impressions between the pumpkin ribs

Keep using the HB pencil to lightly shade the section. Just as we did with the other two sections, make your pencil strokes follow the direction and curvature of the pumpkin’s shell.

shade the third section

Use a 4B pencil to outline the rib. Blend the graphite into the lighter tones as you shade away from the rib. Shade the bottom of the section at the base of the pumpkin. Leave some reflected light along the left edge.

keep shading the third section

Further develop the depth of this deep rib by using the 4B pencil to shade along the rib, immediately to the left of it. Then use the HB pencil to bridge a gradual transition from the dark shadow of the rib to the lighter midtone values of the pumpkin’s shell.

shade more of the third section

Shade the Middle of the Pumpkin

Use an HB to start lightly shading a base layer for the fourth section. Shade a slightly darker layer of tones over the base layer. Go back to the 4B to overlay even darker tones. Repeat these steps again for the fifth section.

shade the fourth and fifth section

We can now go ahead and finish up this section at the top. I’ll just use an HB to add a little bit of shading, including some along the border and some slightly darker shading at the base near the stem. That leaves us with this little band of highlight.

shade the section near the top

Now, we’ll keep shading the next two sections of the pumpkin’s shell. Use the HB to shade a base layer of light tones. Add a second layer of darker tones. Use a 4B to go over darker areas of the section. Then use your HB and 4B to shade the next section. This side of the pumpkin is on the opposite side of the direct sunlight, so it will have a little more shadow than the left side.

shade the sixth and seventh sections

Add Shading to the Stem and Another Section

Add a bit more detail to the stem. Use the 4B to enhance the texture and appearance of the stem by adding more shadow near the base. Add a few more shadows to the ridges on the upper portion of the stem.

draw more shading on the pumpkin stem

Okay, pick up the HB pencil again for the next section. Before adding the first layer of shading, go down the middle of the section to lightly sketch an impression down the middle. Then shade the rest of the section.

draw more shading on the pumpkin

Start outlining the rib to the left with a 4B. Then put shading at the bottom of the section. Keep remembering to preserve some reflected light along the edges, even in all of the shadow areas.

draw shading on the pumpkin bottom

Finish Shading the Pumpkin

With your HB, start tracing over the next rib and the final sections of the pumpkin. Make the next rib a bit darker, and keep the rib to the right of it lighter. Start putting some light tones near the top.

shade the right sections of the pumpkin

Lightly shade down the right side of the pumpkin. Then add some darker tones. Switch back and forth between the HB and 4B as you add layers of shading and additional details.

keep shading the right sections

Look at your overall drawing so far and make sure that the lighter areas are at the upper left with a few highlights at the upper right side. Make sure the base of the pumpkin has the most shading.

finish shading the pumpkin shell

Use an HB pencil to lightly shade the final sections at the top of the pumpkin. Use the 4B to go over the ribs. Like we did with the top on the other side of the stem, there isn’t too much detail needed here since there isn’t too much we can see.

draw shading near the top of the pumpkin

Use the 4B pencil to draw spots on the pumpkin’s skin. You can use the reference photo for guidance. You can also create some markings of your own that are not apparent in the reference, if you wish.

draw spots on the pumpkin

Draw the Cast Shadow and the Stump

Outline the bottom edge of the pumpkin with a 4B pencil. This is where we draw a cast shadow. Start shading under the pumpkin with a sideways motion. Next, create a crosshatch pattern by repeating this with another layer. Directly under the pumpkin, put another layer of shading. This cast shadow where the pumpkin meets the table should be where you place your darkest tones.

draw a shadow under the pumpkin

To draw the stump, begin by sketching a curved line on the left side. Then draw a line for the right side of the stump. Curve this line downward. Allow enough room for your shadow to be on the top of the stump.

draw a stump under the pumpkin

Bring some of the pumpkin’s shadow out a little more toward the edges of the stump. As for the sides of the stump, there’s not a whole lot we can see. Just shade the small part that is visible. Then shade the slanted bridge between the vertical side and the flat top.

shade the sides of the stump

Add Details to the Stump

Begin drawing cracks in the surface of the woody stump. Use a series of lines that are mostly straight but still wiggly and imperfect. Have the cracks branch apart in some places. Draw some cracks with light, dotted lines and thicker cracks with heavier lines. Keep drawing lines that radiate generally toward the center of the stump under the pumpkin.

draw cracks on the stump

Start sketching circular rings around the top surface of the stump. Draw them in a way similar to how you drew the straight cracks. Use a loose touch with your pencil and follow the general curvature of the stump’s edges.

draw circular cracks

To finish up, sketch a few more straight lines pointing toward the center. Loosely and lightly sketch a few more circular rings as well. Put a little more shading on each side of the stump. Make final value adjustments and finishing touches. Erase any stray marks.

finish drawing the stump

And that is an easy way to draw a realistic pumpkin!

how to draw a pumpkin final result

Tutorial Recap

For a quick visual recap of this tutorial, take a look at the image below. It shows you a progression of the main steps for how to draw a pumpkin.

how to draw a pumpkin recap

Tips to Remember the Next Time You Draw a Pumpkin

Here are a few tips to remember the next time you want to draw a simple pumpkin.

  • Work from a reference photo so you can make a more realistic representation of your pumpkin.
  • As you draw the ribs of the pumpkin, remember that some are very deep and some are more shallow. Vary the pressure of your pencil to convey the various depths of the ribs.
  • Consider using both a color and a black-and-white version of your reference. You can use both photos together to give you information about light and dark values as well as subtle changes in color, like the subtle color variations on the pumpkin’s skin.
  • Try drawing a variety of pumpkins and other squash. Although pumpkins are universally round, they still come in a variety of shapes and sizes. Some are long and tall while others are short and wide. The same can be said about pumpkin stems!

If you enjoyed drawing this pumpkin step by step, maybe you will like drawing other foods. Maybe you’ll even get the urge to draw some pumpkin pie!

I hope you now realize just how easy it is to draw a pumpkin! Why not make it a personal goal to draw a pumpkin every fall? Keep picture records of your drawings or the originals themselves to track your progress. You will be amazed at how easily pumpkin drawing comes to you!

[adrotate banner=”4″]